
 Published on 30.11.2025
A good home server rack organizes your hardware, keeps cables under control, and improves airflow. The right components prevent overheating, power issues, and messy wiring. This guide shows you exactly what to install in your rack and how to build a clean, reliable setup at home.
1) Essential rack components every setup needs
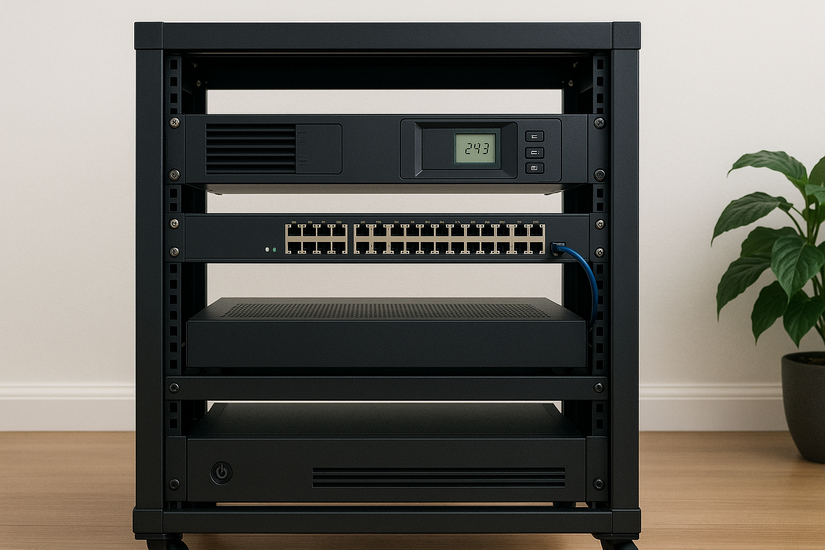
The following parts are important if you want to set up a stable home server rack. They keep your network organized, distribute power safely, and support future upgrades.
Rack cabinet or open-frame rack
Choose a rack that matches your space, noise tolerance, and equipment depth. Racks between 9U and 25U work for most home builds. Open frames cost less, while enclosed racks reduce noise.
Uninterruptible power supply (UPS)
A UPS protects your servers during power outages. It gives enough time for a safe shutdown and helps prevent data loss. Line-interactive units work well for homes.

Power distribution unit (PDU)
A PDU cleans up your power cables and makes device management easier. Metered or switched PDUs also help you track power usage.
Patch panel
A patch panel keeps Ethernet runs organized and protects switch ports from constant plugging and unplugging. It also makes future cable changes easier.
Rack-mount network switch
Your switch connects everything in the rack. A PoE switch also powers cameras and access points. Pick a switch that matches your speed needs and port count.

2) Core devices that most home labs include
These devices handle storage, compute workloads, routing, and connectivity. They support common tasks like file sharing, virtualization, and home automation.
NAS or storage server
A NAS stores your files, streams media, and manages backups. It’s the most common device people add to their home rack. {{ link_to_nas_buying_guide }}
Virtualization server
A dedicated virtualization host runs VMs and containers. It helps consolidate apps, test new tools, and reduce the number of physical devices.
Router and firewall
A router or firewall appliance manages your network security. Rack-mount options centralize your setup and reduce cable sprawl.
Modem or ONT
Your ISP modem or fiber terminal can sit in the rack for easy access. A shelf helps if it’s not rack-mountable.
3) Optional upgrades that improve performance
These upgrades improve airflow, reduce noise, and keep your rack more organized as it grows.
Cable management bars and vertical organizers
Cable managers keep everything tidy and easy to navigate. They prevent tangles and improve airflow behind the rack.
Rack shelves and sliding trays
Shelves hold devices that lack rack ears. Sliding trays help store drives, tools, or small accessories.

Cooling fans and airflow kits
Extra cooling keeps temperatures steady under load. Airflow kits help direct cold air through the front and push hot air out the back.
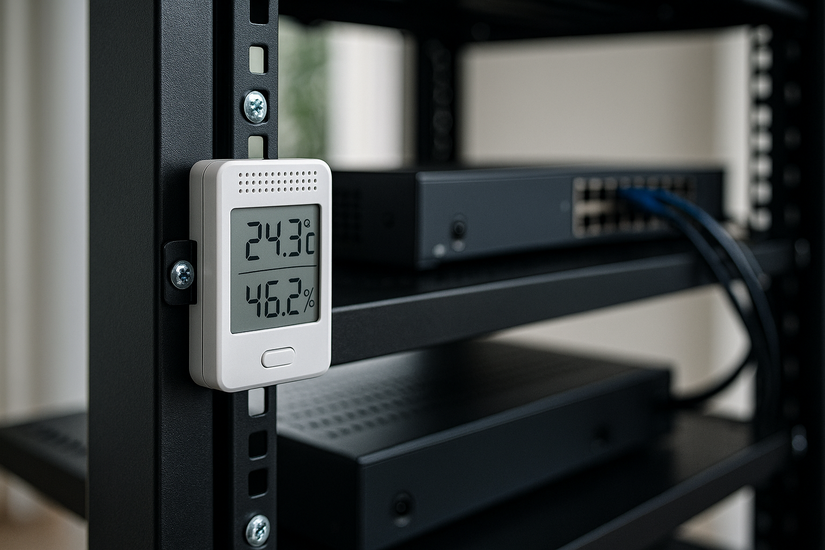
Temperature and humidity sensors
Sensors help you track environmental conditions inside the rack. Alerts let you catch heat or moisture issues early.
Noise-reduction panels
Acoustic foam and lined rack doors help reduce fan noise. These work well when your rack sits in a living space or office.
4) Planning your rack for size, power, and noise
These factors influence everyday usability. A well-planned rack runs cooler, quieter, and uses power efficiently.
Choosing the right rack height and depth
Match rack depth to your server and NAS dimensions. Leave space for cable management and cooling. Many home users choose 12U–20U.
Power budgeting for your devices
List every device and add up the maximum wattage. Leave headroom for your UPS and avoid loading circuits near their limit.
Cooling requirements
Allow airflow from front to back. Avoid stacking equipment too tightly, which traps heat and reduces fan efficiency.
Noise considerations
Home racks often sit near living areas. Slower fan profiles, quiet switches, and enclosed racks reduce noise levels.
5) Example rack layouts for different budgets
These sample builds help you visualize realistic setups. They show what to prioritize when building a rack from scratch.
Entry-level rack under $300
A small open-frame rack, a basic switch, a patch panel, a UPS, and a shelf for non-rack gear. Good for cleaning up home networking.
Mid-range rack under $1000
Adds a NAS, stronger UPS, and better cable management. Works well for backups, media streaming, and small home labs.
Enthusiast rack
Includes virtualization hosts, PoE switches, airflow kits, sensors, and noise reduction. Ideal for learning, automation, and heavier workloads.
Tips for organizing and securing your rack
- Label every cable
- Separate power and data cables
- Use Velcro instead of zip ties
FAQs
Do I need a full-size rack for a home server? Most users can work with a 9U–15U rack unless they plan to host multiple servers or large UPS units.
How much power does a home rack usually need? Typical home racks run between 100W and 600W, depending on the number of servers, switches, and storage devices.
Can I build a silent home server rack? Yes. Use quiet fans, a sound-damped rack, and low-TDP hardware to reduce noise.
Should I use a 2-post or 4-post rack? A 4-post rack supports heavier gear and offers better stability. A 2-post rack works for lighter networking setups.
Summary
- Install core rack components like a UPS, PDU, switch, and patch panel.
- Add a NAS and virtualization host for storage and compute workloads.
- Improve airflow with cooling kits and structured cable management.
- Plan your rack size, power usage, and noise levels before installing hardware.
- Use labeling, Velcro, and organized layouts to keep upkeep simple.
A well-designed home server rack increases reliability, improves airflow, and gives you a clean, centralized place to run your entire network. When you plan power, cooling, and noise ahead of time, your rack stays easier to upgrade and maintain over the long term.


Discussion (0)
Be the first to comment.