Do you have a Windows 11 laptop, tablet, or maybe even a desktop computer that’s connected to the internet, and you want to share its connection with other wireless devices like your smartphones? In other words, would you like to use your Windows 11 PC as a mobile hotspot? If you do, the good news is that you can, and this operating system makes the whole process easy. So, without further ado, here’s how to turn a Windows 11 laptop (or other devices) into a Wi-Fi hotspot:
How do I turn my Windows 11 laptop into a Wi-Fi hotspot?
If you want to make a Wi-Fi hotspot using your Windows 11 PC, your device must meet a few requirements:
- Have at least one Wi-Fi network card or Bluetooth chip
- Be connected to the internet, using Wi-Fi, Ethernet, a USB modem, a SIM card, or other means
If your Windows 11 computer, laptop, or tablet meets these requirements, open the Settings app (press the Windows + I), and select “Network & internet” on the left sidebar.
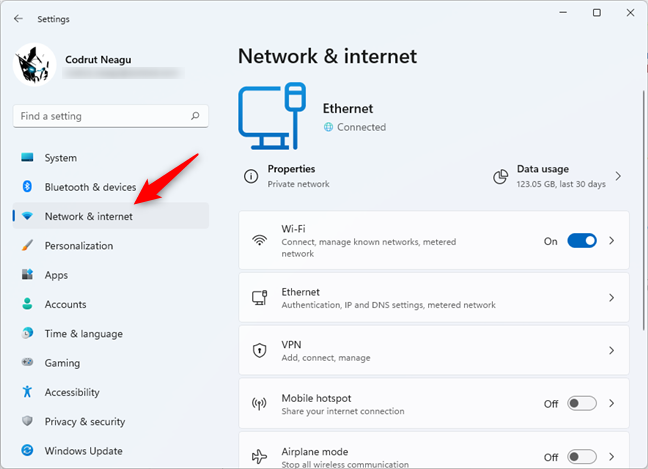
Go to Network & internet in the Windows 11 Settings app
On the right pane, locate and click or tap on the “Mobile hotspot” entry: in small letters, it tells you that its purpose is to “Share your internet connection” and, by default, its switch is Off, as you can see in the following screenshot. You may be tempted to activate the switch but don’t do that just yet. It is better to click or tap the “Mobile hotspot” entry instead so that you can see its default settings and configure how it works.
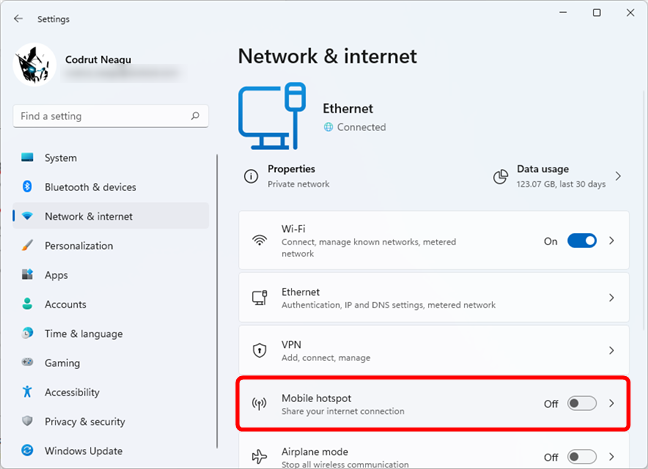
The Mobile hotspot entry from Windows 11's Settings
Now, the Settings app loads the “Mobile hotspot” page, and, at its top, there’s the same “Mobile hotspot” switch that you can use to enable or disable Windows 11’s hotspot feature. However, before turning it on, you should first check and adjust its settings: network name, password, and radio band used.
First, choose the internet connection you want to share in the “Share my internet connection from” list. For example, in the following screenshot, you can see that we chose to share the wired internet connection (Ethernet).
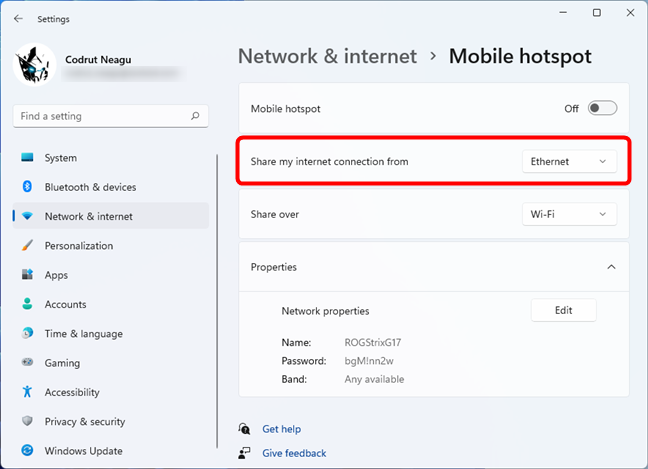
The list of available internet connections for the Windows 11 hotspot
Then, depending on your hardware and preference, choose how you want to share the internet connection: over Wi-Fi or Bluetooth. Although you can choose either one, we advise you to use Wi-Fi if you can, as it’s much faster and has much broader coverage than Bluetooth.
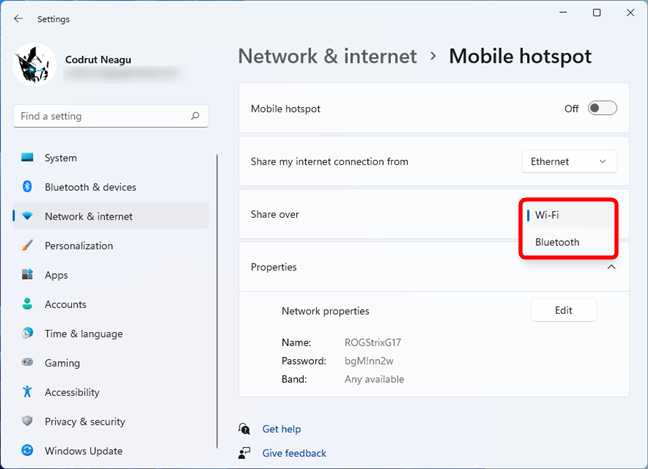
Choosing to share internet over Wi-Fi
Then, in the Properties section, you can see the default Name, Password, and Band used by your Windows 11 PC, set automatically by the operating system. If you don’t want to change them, all there’s left to do is turn the “Mobile hotspot” switch On and connect your other devices to it. Read this tutorial to learn how: How to connect to Wi-Fi in Windows 11
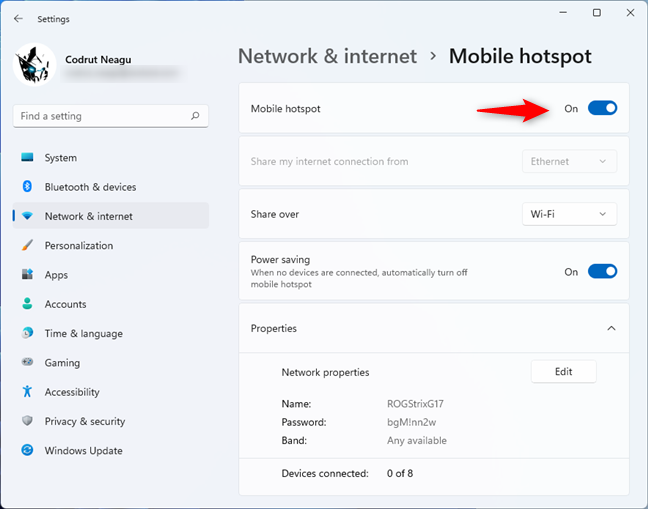
Enable the Windows 11 hotspot
When the Windows 11 mobile hotspot is turned on, under its Properties, you can see the number of “Devices connected” (the maximum number of connected devices is 8).
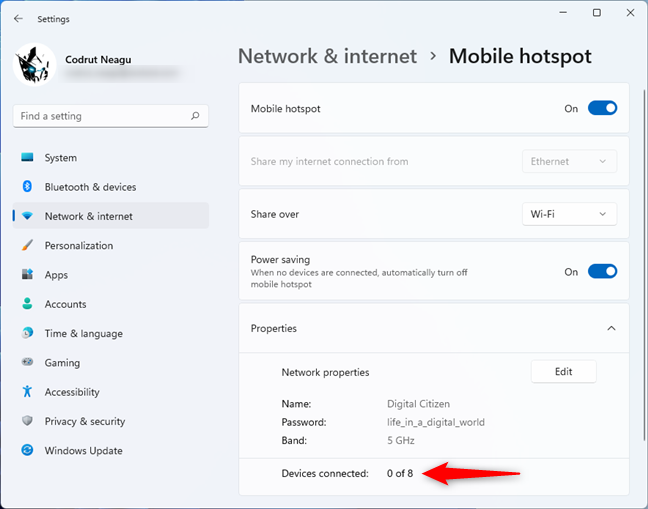
The number of Devices connected to the Windows 11 hotspot
Also, when you enable the Windows 11 hotspot, another option pops up: Power saving. On the Mobile hotspot page, Windows 11 informs you that “When no devices are connected, [it] automatically turn[s] off mobile hotspot.” This means that the operating system can shut down the hotspot feature when no devices have connected to it for a while. It’s a useful setting if you’re using a laptop as a Wi-Fi hotspot, and you want to save as much battery life as possible. But, if you need the Windows 11 hotspot to stay active permanently until you decide to turn it off manually, you can disable this switch.
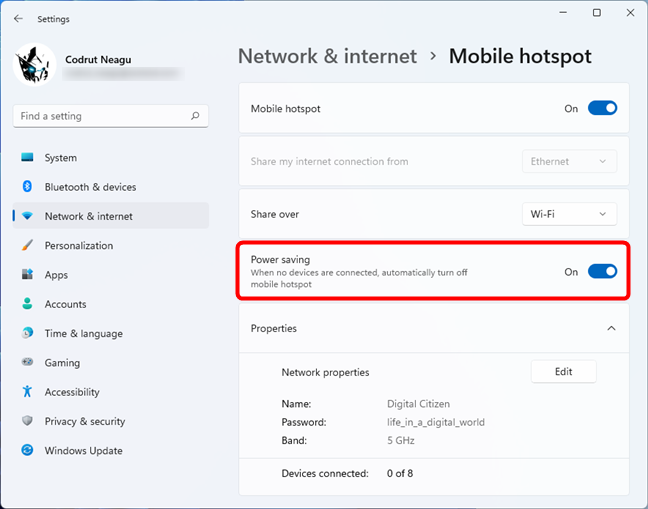
When no devices are connected, automatically turn off the mobile hotspot
Now you know how to enable a Windows 11 hotspot. However, it still uses the default settings. While you can continue using them as they are, you might want to customize some or all of the mobile hotspot connection details, like the hotspot’s Wi-Fi name or password. For that, follow the steps from the next section of this tutorial:
How to configure a Windows 11 hotspot
If you want to personalize the details of your Windows 11 hotspot, on the “Mobile hotspot” page in Settings, press the Edit button.
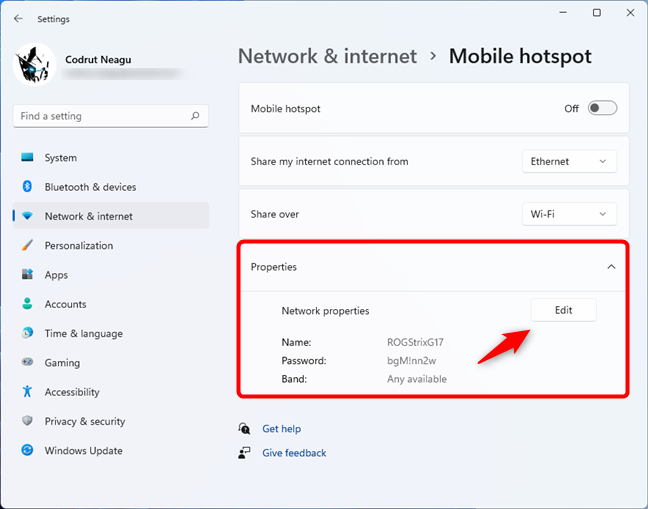
Press Edit in the Windows 11 hotspot Properties
In the corresponding fields, type the new Network name, Network password, and Network band that you want to use. Then, click or tap the Save button.
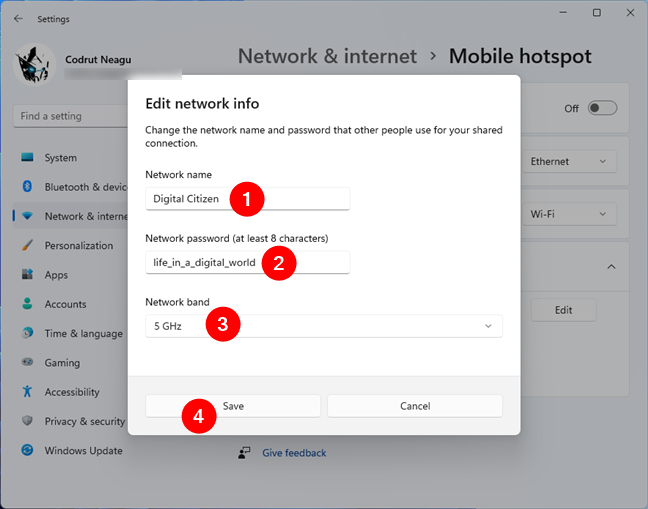
Custom settings for the Windows 11 hotspot
As soon as you press Save, the hotspot settings are changed.
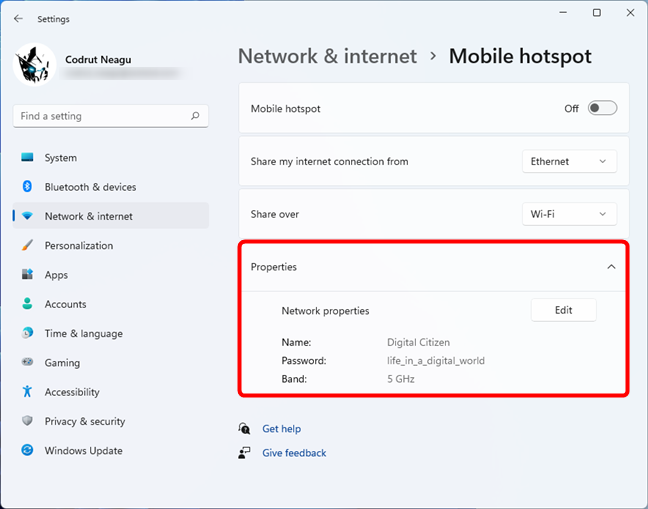
Personalized Windows 11 hotspot
Finally, you can now turn the “Mobile hotspot” switch on.
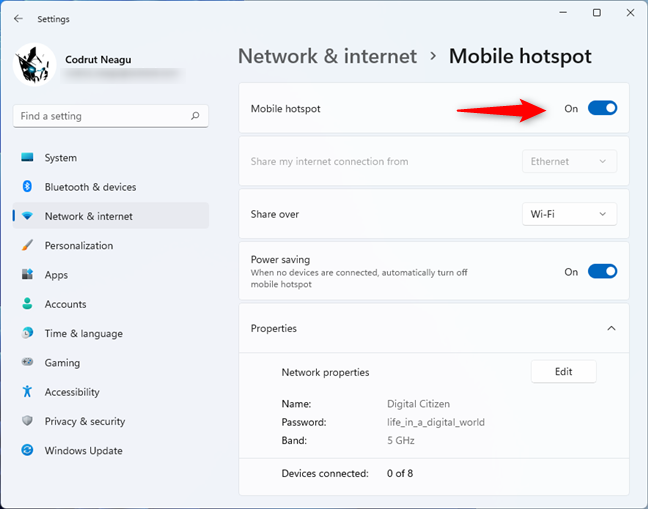
Turning on the Windows 11 hotspot
How to quickly turn on the Windows 11 hotspot
So you’ve configured the “Mobile hotspot” to work as you want, and you also know how to turn it on from the Settings app. However, there’s a much faster way to enable or disable a Windows 11 hotspot:
First, click or tap on the network icon from the system tray or press Windows + A on your keyboard. Then, in the quick settings panel, click or tap on the “Mobile hotspot” button to turn it on.
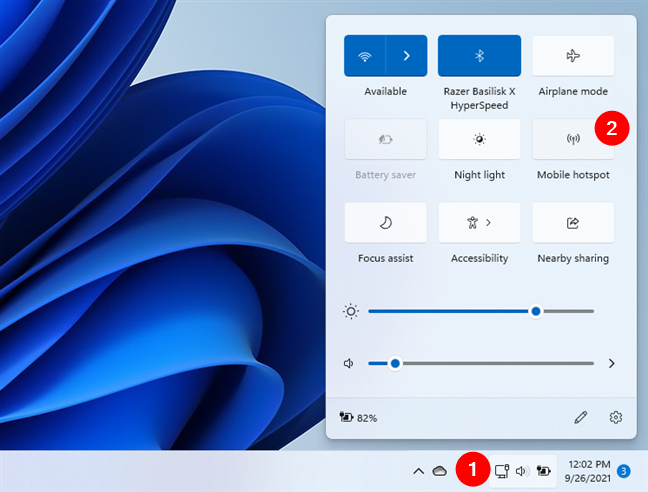
Turning on a Windows 11 hotspot from the quick settings panel
However, keep in mind this method doesn’t show you the settings used by your mobile hotspot. That means that you should already know the hotspot’s name and password.
TIP: You can also create mobile hotspots using your smartphones or tablets by following the steps in these tutorials: How to turn your Android into a Wi-Fi hotspot, How to use your iPhone as a Wi-Fi hotspot, and How to share internet from an Android smartphone to a PC via USB.
Are you using a Windows 11 hotspot?
As you’ve seen, you can make a Windows 11 hotspot easily. You only have to make a few settings, and then you can share the internet connection of your Windows 11 computer, laptop, or tablet with any other Wi-Fi devices close by. Are you using Windows 11’s mobile hotspot feature? Is everything working as it should? Let us know in the comments section.


 11.10.2021
