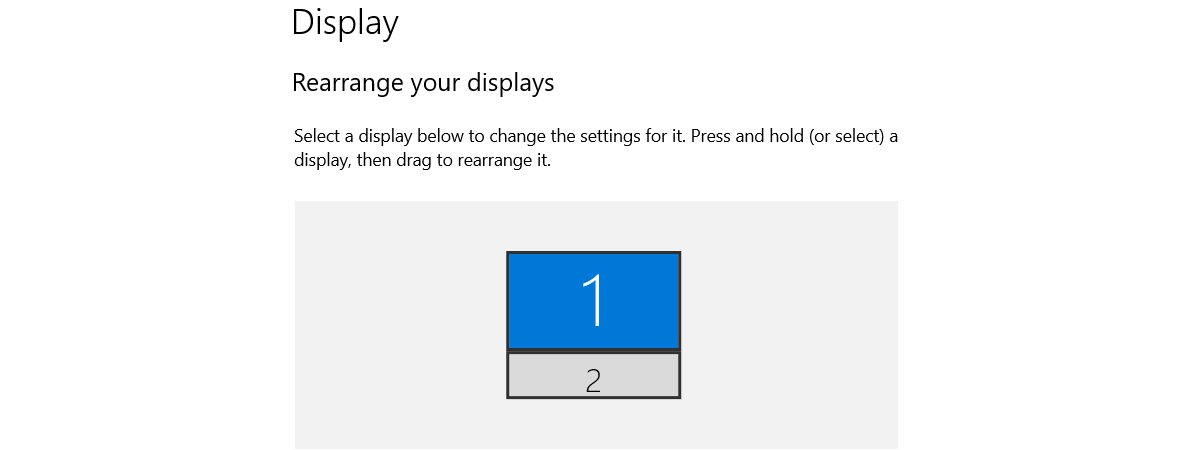
Do you need to find the screen refresh rate for your Windows 10 PC, laptop, or tablet? Do you want to lower the refresh rate to 60 Hz or less? Or maybe you have a gaming monitor, and you want to increase it to a value like 120 Hz or 144 Hz? No matter which of these things you want to do, you’re in the right place. Here’s where to find the refresh rate in Windows 10 and how to change it to a value you want:
How to find and change your refresh rate from the Settings app
In Windows 10, the best place to view and manage the refresh rate is the Settings app. Open Settings: one way to do that is to click or tap on Start and then Settings. Alternatively, press the Windows + I keys on your keyboard simultaneously. Then, open the System section.
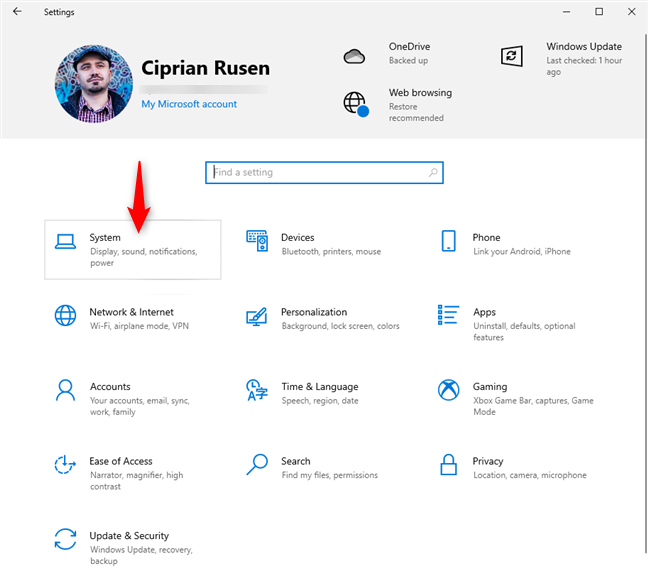
In Windows 10 Settings, go to System
In the column on the left, make sure the Display tab is selected. On the right, scroll down to the “Advanced display settings” link and click or tap on it.
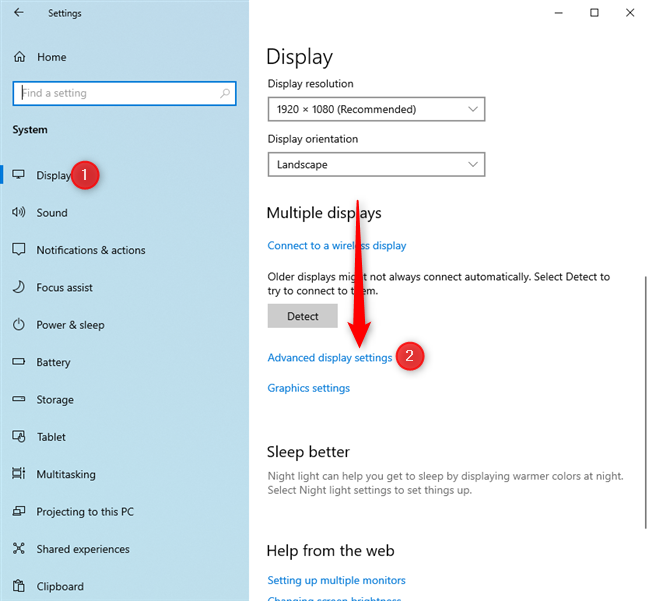
Click or tap on Advanced display settings
TIP: You may also want to know how to change the screen resolution and make text and icons bigger in Windows 10.
The Advanced display settings window is opened. If you have more than one display connected to your Windows 10 computer, select it from the “Choose display” drop-down menu. Then, in the Display information section, you see the current refresh rate in Hz, as highlighted below.
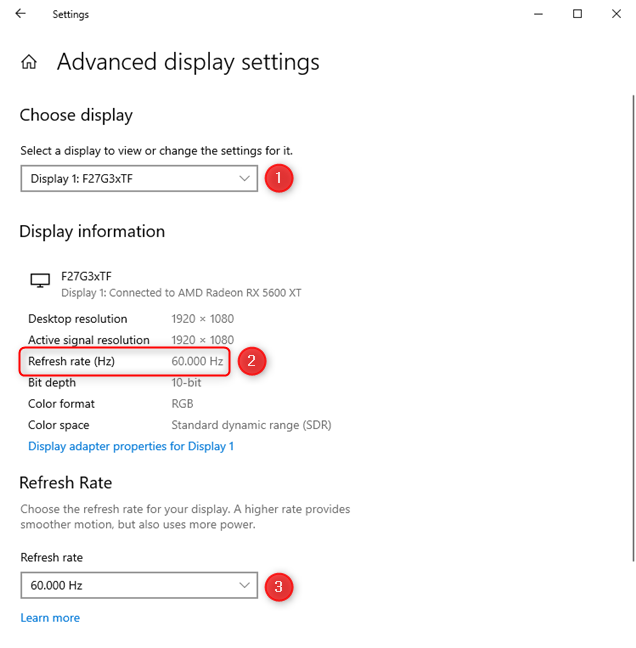
See the current refresh rate
To change the refresh rate, click or tap the Refresh rate drop-down, and select the rate you want. Depending on your display, it may be 144 Hz, 120 Hz, 60 Hz, or less. The values you see depend on the model of the display you’re using and the drivers installed in Windows 10 for the graphics card and the display.
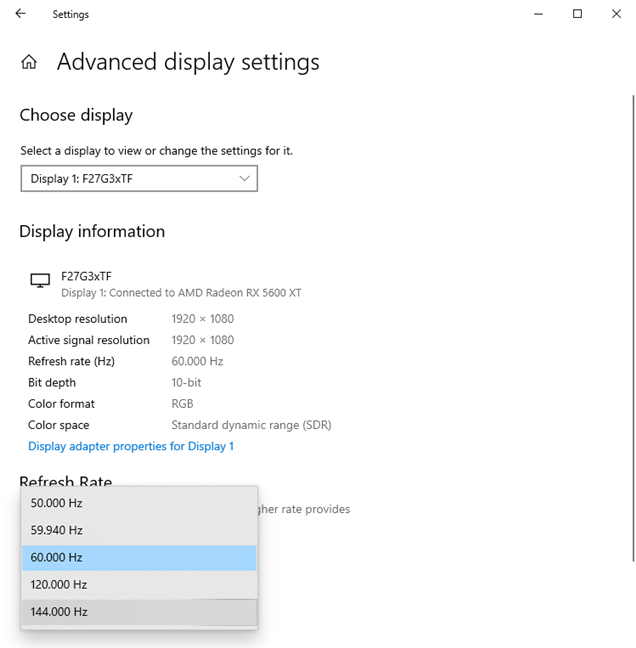
Set the Refresh rate
After selecting the new refresh rate, you are asked whether you want to keep your new display settings. To apply the new refresh rate, press Keep changes. If you press Revert or wait for the confirmation dialog to disappear, the screen automatically reverts to the previous refresh rate.
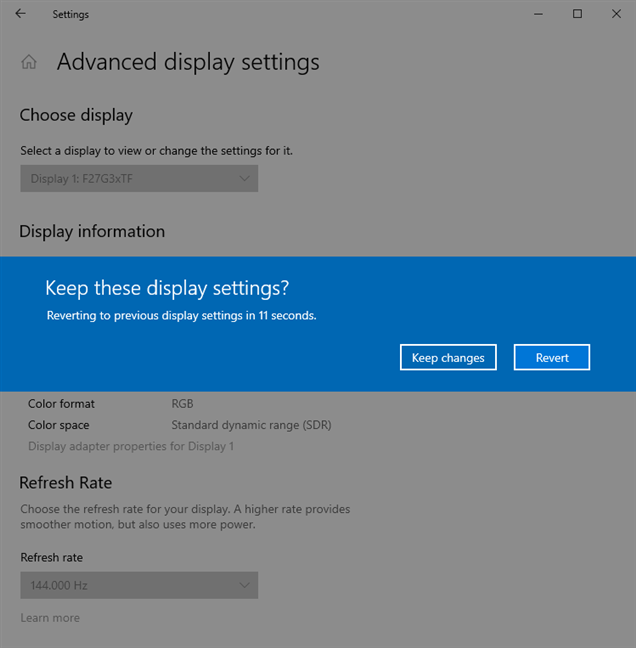
Confirm that you want to keep the new settings
How to see and change your refresh rate from the Display Adapter Properties window
This method was available in the old Control Panel from Windows 7, and it still works in Windows 10 too, even though it sometimes doesn’t allow you to change the refresh rate, only view it. First, open the Run window (Windows + R) and copy and paste the following command: rundll32.exe display.dll,ShowAdapterSettings 1. Then, click or tap OK, or press Enter on the keyboard.
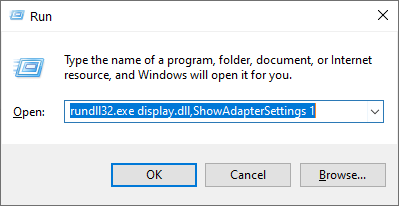
rundll32.exe display.dll,ShowAdapterSettings 1
The properties window for your video card is opened, and it should look similar to the screenshot below.
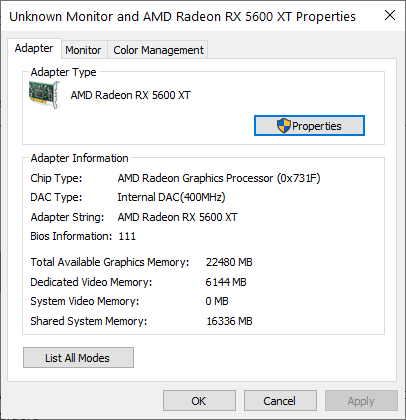
The Properties of your video card
Go to the Monitor tab, where you see the Screen refresh rate field display the current rate. To change it, click on it, and choose a new value from the drop-down list. Then, press OK to apply it.
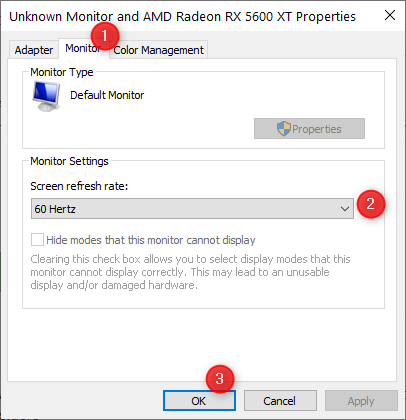
Go to Monitor and set the refresh rate
IMPORTANT: Microsoft has made a point of replacing the old Control Panel with the Settings app. We expect this method to work on fewer and fewer Windows 10 computers and devices. In the near future, it might be phased out entirely and become useless.
How to view the Windows 10 refresh rate from CMD or PowerShell
If you love commands, you can quickly see the refresh rate used by opening the Command Prompt or starting PowerShell, depending on what you prefer. Then, run the "wmic PATH Win32_videocontroller get currentrefreshrate” (without the quotes) and press Enter on your keyboard. You should see the CurrentRefreshRate value displayed like in the screenshot below.
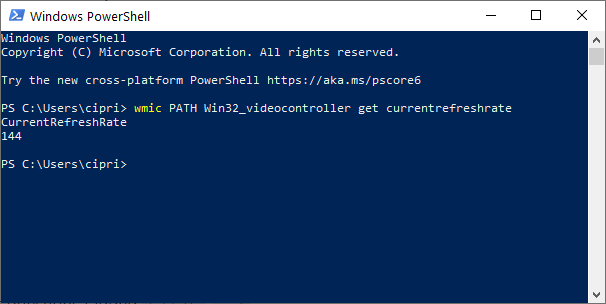
View the Refresh Rate in PowerShell
Unfortunately, Windows 10 does not have a command that you can run to set the refresh rate to a value you want.
What is your screen’s refresh rate? What rate did you set?
Before closing this tutorial, tell us what was your display’s refresh rate when you started following this guide and the value to which you have set it. Is it 60 Hz, 120 Hz, 144 Hz, or another value? Comment below, and let’s share refresh rates. 🙂


 29.06.2021