When you get your hands on a new hard disk or solid state drive, the first thing you have to do is partition it. That means that you must create one or more partitions so that you can then store data. Although you could use third-party tools for this task, the Windows operating system includes tools that can handle partitioning disks just as well. So here are two ways to create a partition on any drive (HDD, SSD, etC) in Windows, using only built-in tools:
NOTE: This procedure works the same in all modern versions of Windows: Windows 10, Windows 8.1 and Windows 7.
How to create a partition in Windows, using Disk Management
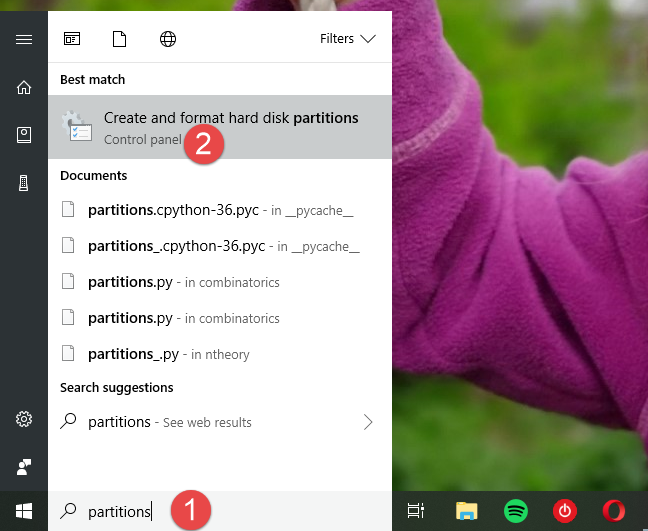
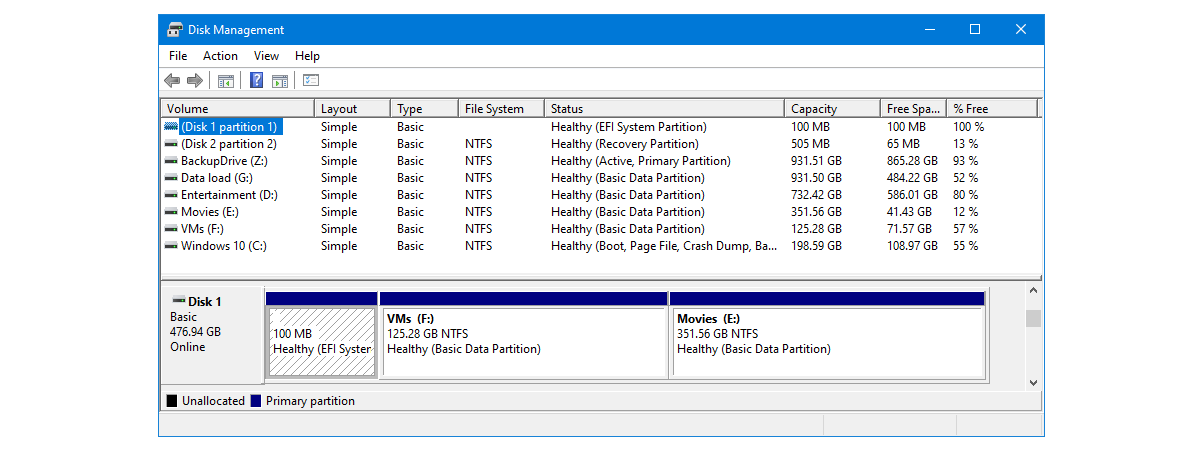
The first thing you must do is open Disk Management. A quick way to do it is to search for it. However, there are also other methods, which you can find all described in this tutorial: 9 ways to open the Disk Management tool in Windows (all versions).
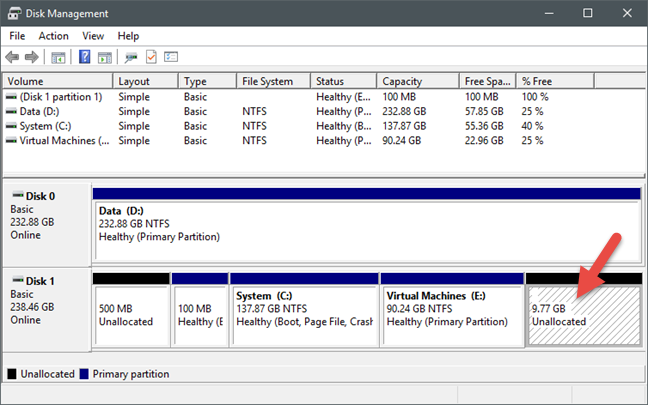
If you have free space on your hard drive, you can use it to create new partitions. You should see the unpartitioned space highlighted and labeled as Unallocated or "Free space."
NOTE: If there is no free space on your drives, but you are not satisfied with the partitions set on the, you could delete the existing partition to free all the space they occupy and then create new partitions as you see fit. However, note that deleting partitions means losing all the data on them. If you want to read more about this subject, see this guide: Two ways of deleting a partition, in Windows, without third-party apps.
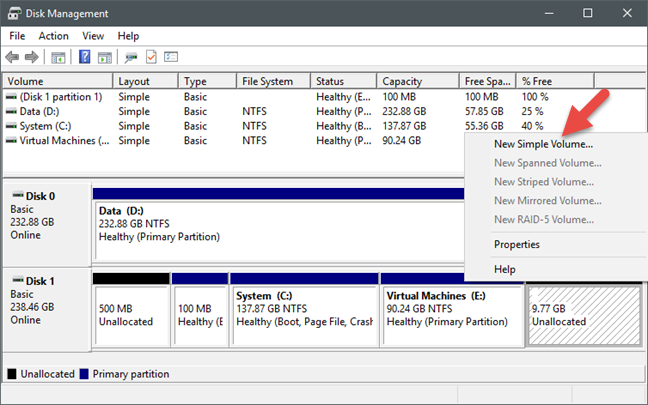
To create a partition in the unallocated (free) space, right-click or tap and hold on that space and then click or tap on "New Simple Volume."
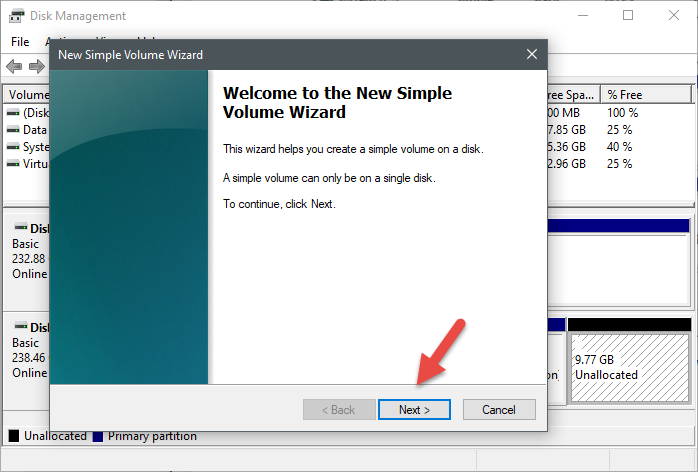
This action should launch the "New Simple Volume Wizard." In it, click or tap Next.
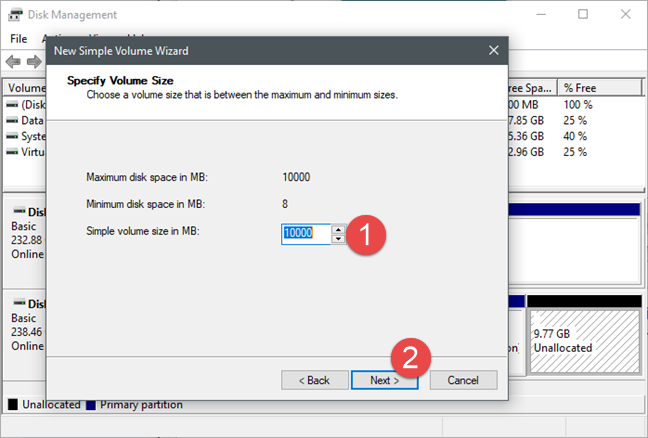
The wizard asks what size the partition should be. Enter the value that you want, in megabytes, and then press Next. Note that you can use all or just part of the total available free space.
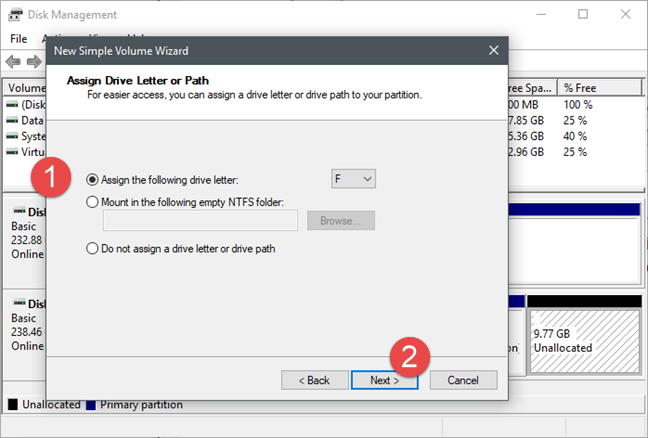
Then, you can choose to "Assign a drive letter," "Mount in an empty NTFS folder" or "Do not assign any drive letter or drive path" for the new partition. You should probably choose to assign a letter to the new partition so that you can see it in File Explorer and Windows Explorer as a separate drive. However, for special circumstances, you can also choose one of the other options. After you have made your mind, click or tap Next.
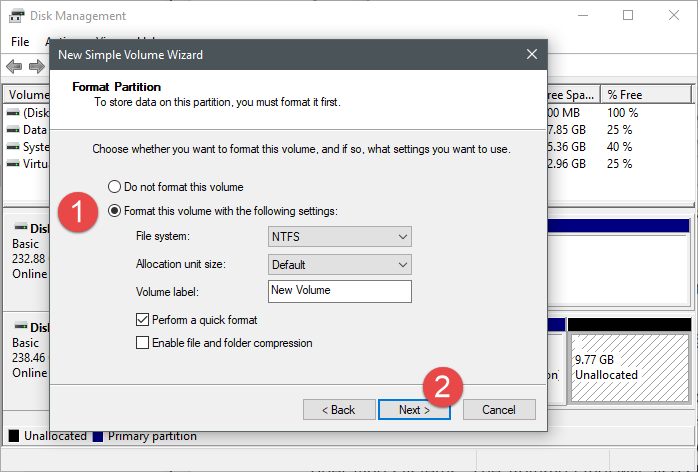
You are then going to be asked for some information regarding how the partition should be formatted. Keep in mind that, if you wish to use this partition, it needs to be formatted. In most cases, you should choose to use NTFS. This is the default and preferred file system in modern versions of Windows, providing increased performance, security and fault tolerance when compared to FAT32. For more information, read this article: FAT32, exFAT or NTFS? How to format SD cards, memory sticks, and hard drives.
If you do not want to format the partition, select "Do not format this volume" and click or tap Next. If you do want to format the partition, select the second option, using NTFS as the file system and keeping the default Allocation unit size. It is also a good idea to label the volume, not only to recognize it more easily, but also because it is a required step if you plan on sharing this partition with other devices running on different operating systems. The Volume label always shows up next to the drive letter in File Explorer and Windows Explorer. Once you have made all your choices, click or tap Next.
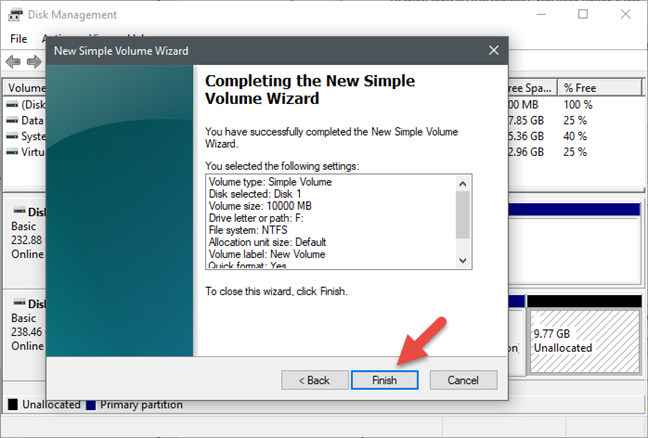
The wizard displays a summary of the settings you chose for the new partition. You can click or tap on Finish to close the wizard.
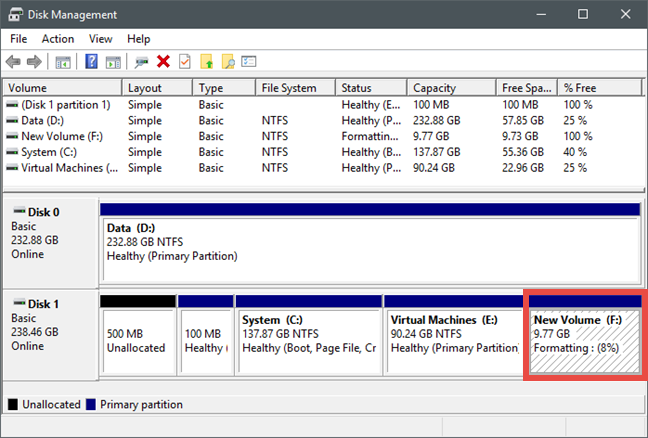
When the wizard is finished, you are brought back to the Disk Management window, where you see the new partition as it is being formatted. This process should take only a few seconds, but it depends on the size of the partition and the speed of your hard disk or solid state drive.
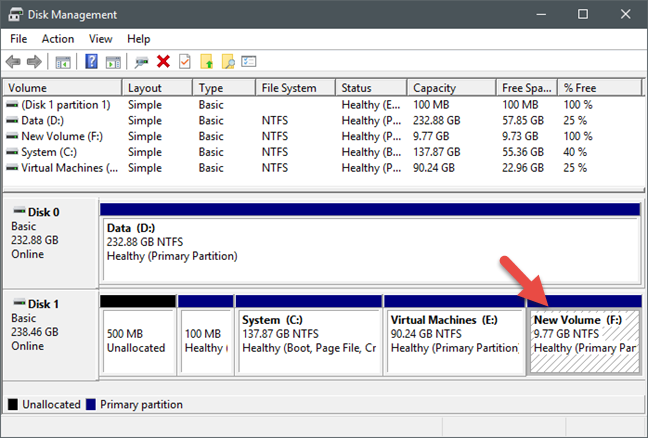
After the partition is formatted, it is listed among the others found on your drive.
Now you can close the Disk Management tool and start using the new partition to store data on it.
How to create a partition in Windows, using PowerShell or Command Prompt, and the diskpart tool
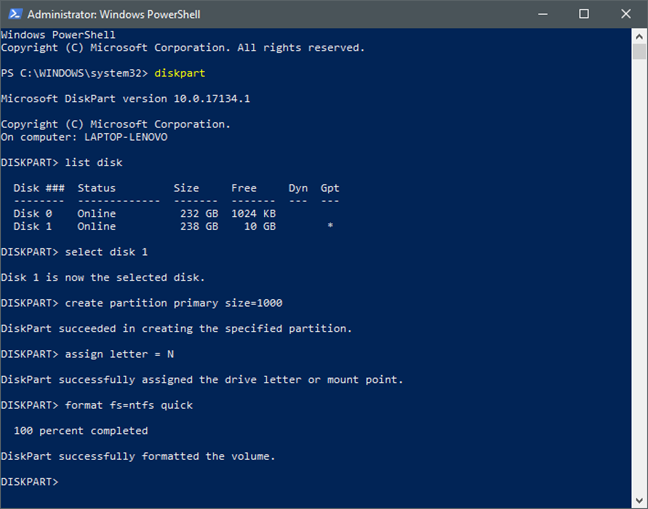
If you prefer the command line instead of a graphical interface, you can use the diskpart command in Powershell or Command Prompt. Start the one you prefer, as an administrator, and then run the following commands, each followed by Enter (on your keyboard):
- diskpart - starts the diskpart tool.
- list disk - lists all the disks installed on your system. Write down the number of the disk on which you want to create a partition.
- select disk X - select the disk on which you want to create the new partition. X should be the number of the disk that you want to use.
- create partition primary size=XXXXX - creates a partition using the free space on the disk, with a size equal to the one you specify (in megabytes). Replace XXXXX with the size that you want.
- assign letter = X - use this command to assign a letter to the new partition that you just created. X should be the drive letter that you want to use.
- format fs=ntfs quick - to be able to use the partition, you must format it. We recommend using the NTFS file system and do a quick format.
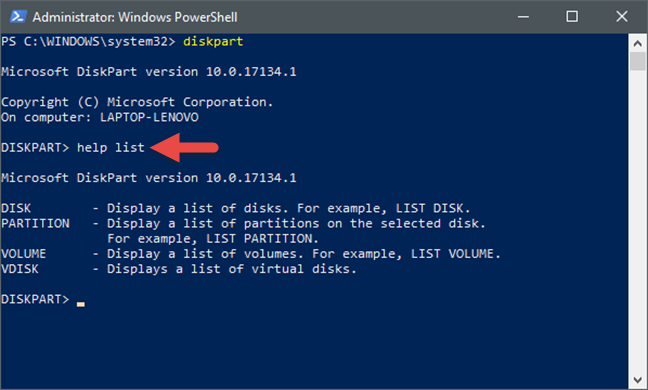
Now you can close PowerShell or Command Prompt and start using your new partition. You should also note that all the commands above have many other parameters that you can use. To see what they are and how you can customize each command, you can type help followed by that command.
If you want to know more about the diskpart command tool, and how to use it to manage partitions and disks, read this tutorial: Command Prompt - 6 disk management commands you should know.
Conclusion
As you have seen from our guide, creating partitions is easy in Windows. You can use the graphical and user-friendly Disk Management tool, but you can also use the DiskPart command-line tool, if you prefer. There is no need for any third-party apps because Windows has everything you need. Let us know how well they worked for you, in a comment below.


 27.04.2018