Windows 11 has a built-in VPN feature that allows you to add as many VPNs as you wish and connect to them. In this guide, you’ll learn what you need in order to add a VPN connection to Windows 11, how to create a VPN connection, use it, change its settings, and delete it when you no longer want to use it. There’s plenty of information to cover, so let’s get started:
What you need to create a VPN connection in Windows 11
To use the built-in VPN feature from Windows 11 and add a VPN connection, you need the following:
- The IP address or domain name of the VPN server to which you are going to connect
- The VPN protocol used by the server
- The login details and any other custom configuration that may be required to establish a secure connection to that VPN server
- A working internet connection
Once you managed to gather all the credentials and configuration details, go ahead and create the VPN connection in Windows 11:
How to add a VPN connection in Windows 11
First, open the Settings app (press Windows + I on your keyboard). Then, on the left, go to Network & internet, and on the right, click or tap VPN.
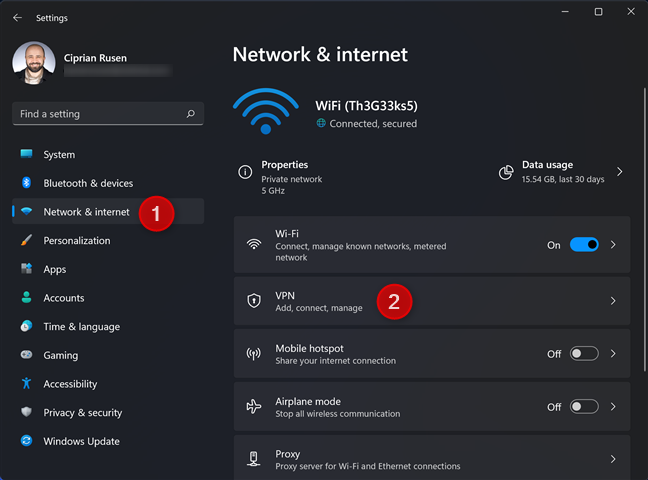
In Windows 11 Settings, go to Network & internet -> VPN
Here, you can add VPN connections to Windows 11, configure existing connections, and set advanced settings for all VPN connections. To add a VPN connection, click or tap Add VPN.
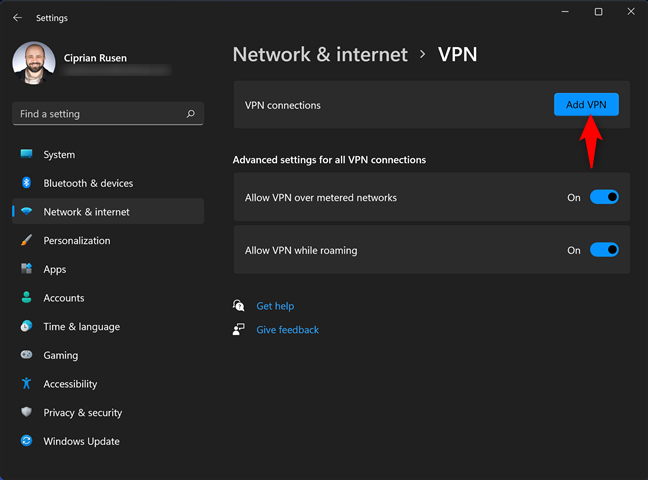
Click or tap Add VPN
You see the “Add a VPN connection” window, in which you must enter all the VPN connection details. First, select the VPN Provider, which should be “Windows (built-in),” and type a suggestive connection name. Then, type the IP address or the domain name of the VPN server you want to use.
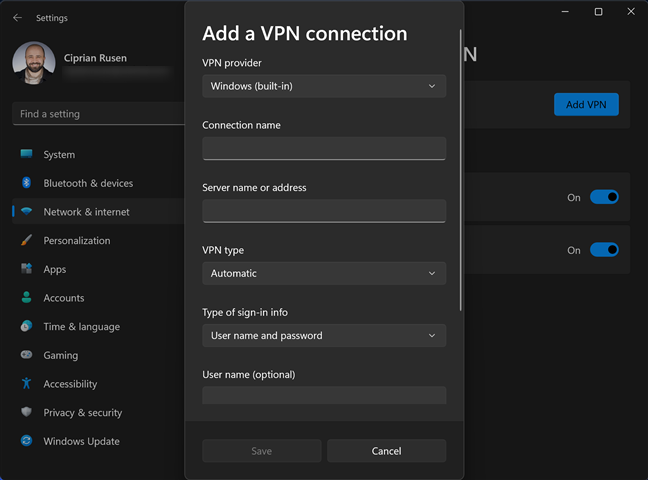
Enter the VPN connection details
Click or tap the VPN type drop-down list and select the protocol used by your VPN server. Windows 11 can work with the following VPN protocols: IKEv2, SSTP, L2TP, and PPTP. If you don’t know which type of VPN protocol you should select, choose Automatic and let Windows 11 figure it out for you.
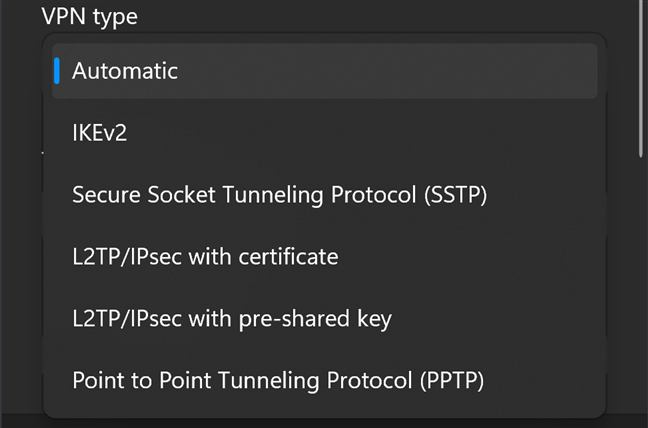
Windows 11 works with these VPN protocols
Then, enter the login details. Depending on your specific VPN server and its protocol, you may need to type a username and password or provide a certificate or pre-shared key. Finally, check the box for “Remember my sign-in info” and press Save.
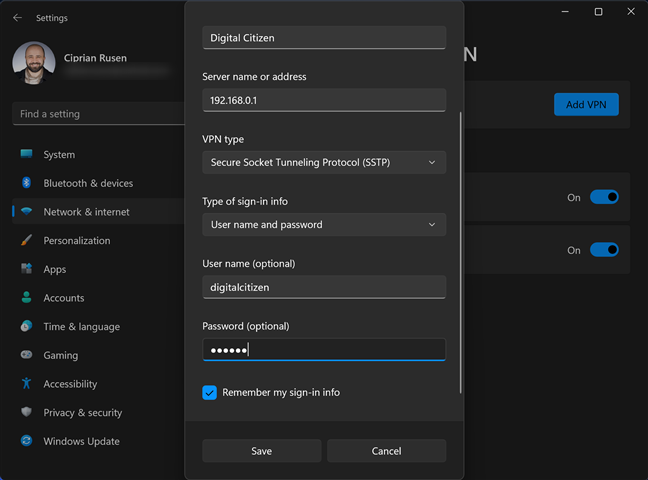
Enter the sign in information, and press Save
NOTE: Remember that the user name and password fields are optional, meaning that if you leave these fields blank, you will be prompted to enter them each time you connect to the VPN service.
The VPN connection is now created and saved, and you are brought back to the Settings app.
How to connect to a VPN in Windows 11
After the VPN connection is added to Windows 11, you can connect to the VPN server directly from the Settings app, from its “Network & internet -> VPN” section. Then, simply click or tap the Connect button next to the VPN connection you want to use.
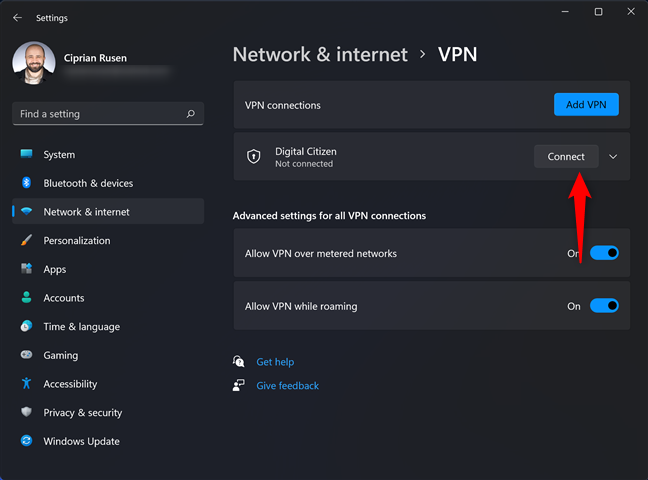
Click or tap the Connect button
Wait for Windows 11 to connect (and provide the login credentials, if asked). Next, you see the status of the connection process beneath the VPN connection name.
Another method is to use Quick Settings to connect to VPN. First, press Windows + A on your keyboard to open Quick Settings or click or tap the network, volume, or battery icons in the system tray. Then, in the Quick Settings, click or tap the VPN button.
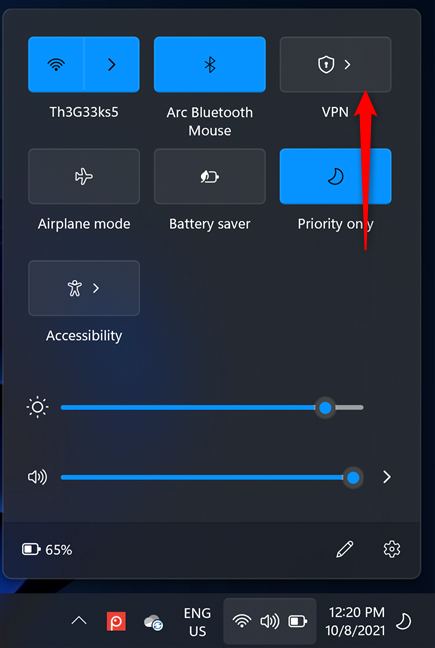
Click or tap VPN in Quick Settings
You see the list of all the VPNs added to Windows 11. Click or tap on the name of the VPN you want to use, and press Connect.
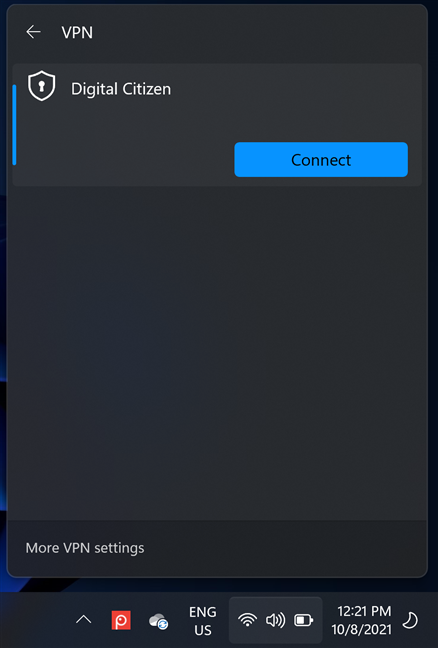
Press Connect
If you’re prompted for the sign-in details, enter them, and then wait for the connection to be established.
How to disconnect from a VPN in Windows 11
There are two ways to disconnect from a VPN in Windows 11. One is from the Settings app: in the “Network & internet -> VPN” section, click or tap the Disconnect button next to your VPN connection.
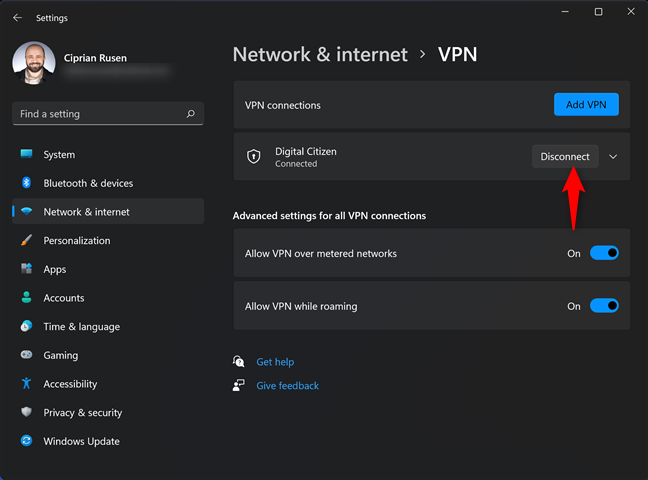
Press Disconnect
In a couple of seconds, you are disconnected from the VPN server.
Another method is to use Quick Settings to disconnect from the VPN. First, press Windows + A on your keyboard to open Quick Settings or click or tap the network, volume, or battery icons in the system tray. Then, in the Quick Settings, click or tap the lit VPN button named after the VPN connection, as shown below.
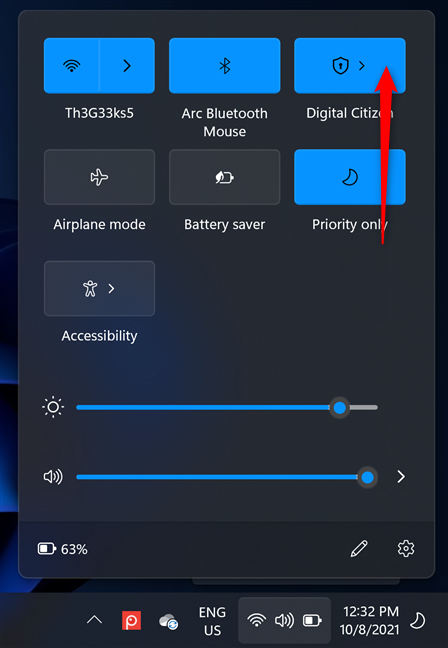
Click or tap on the VPN name
A list is shown with the VPN connections that exist in Windows 11. Click or tap the Disconnect button next to the VPN used right now.
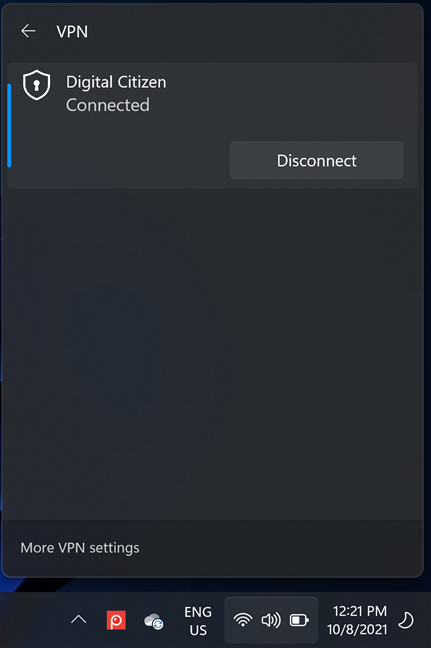
Press Disconnect
How to delete a VPN connection from Windows 11
To remove a VPN connection from Windows 11, open Settings and go to “Network & internet -> VPN.” Then, click or tap on the name of the VPN connection you want to be removed, and make sure you’re disconnected from it. Finally, click or tap its Remove button.
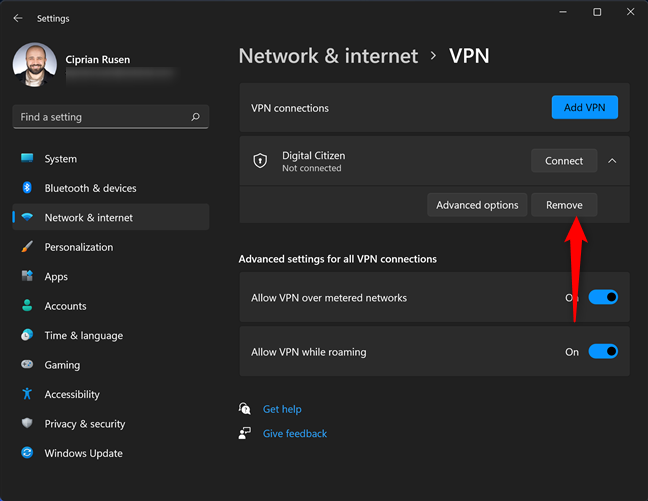
Click or tap the Remove button
Confirm your choice, and the VPN connection is deleted.
How to change the configuration of a Windows 11 VPN connection
If you need to change the way a VPN connection is configured, open Settings and go to “Network & internet -> VPN.” Click or tap on the name of the VPN connection you want to configure and then on its Advanced options button.
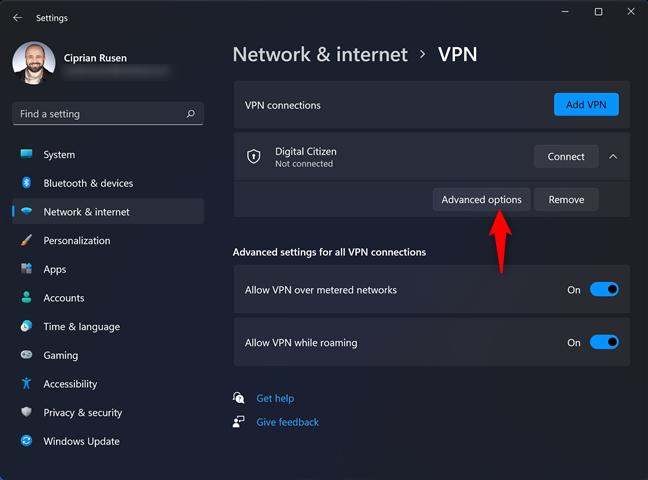
Click or tap Advanced options
Now you can Edit the properties of the VPN connection and change the IP address, its name, connection credentials, etc. You can also Clear the sign-in information used for the VPN to provide new details or Edit the proxy settings for this VPN connection.
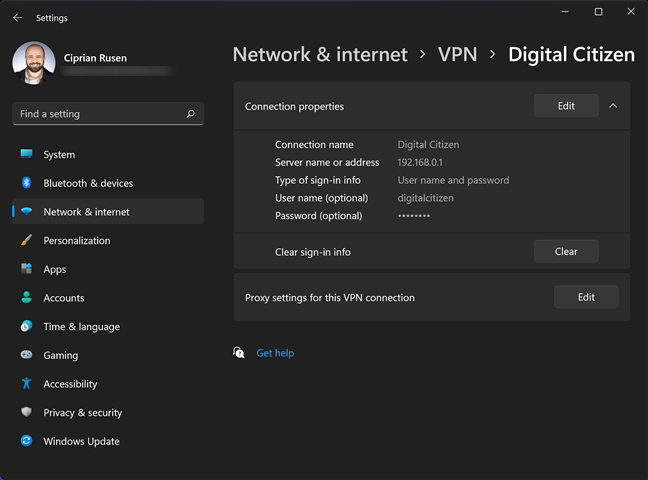
Edit the VPN connection settings
This way, you can adjust the settings of your VPN connection without having to recreate it.
Are you using Windows 11 VPN connections regularly?
As you can see, creating a VPN connection in Windows 11 is not that difficult, but it does require some technical details you can only obtain from your VPN provider. Be careful when entering the connection details because any erroneous data makes it impossible for you to connect to the VPN server, and you have to change the Windows 11 VPN settings. Before closing this tutorial, tell us if you have any questions or problems using VPN in Windows 11. Also, how often do you connect to a VPN? Comment below, and let’s discuss.


 26.10.2021