Voice Access is a new app that lets you control your Windows 11 PC with your voice. While Microsoft designed it with the purpose of helping people with disabilities or limited mobility to use their computers more easily and independently, anyone can use it. I know people without health issues who control Windows 11 using their voice and become more productive in their work. In this article, I’ll show you how to configure and use Voice Access on your Windows 11 device. Without further ado, here’s how it all works:
Prerequisites to using Voice Access in Windows 11
In order to be able to set up and use Voice Access, there are a couple of things you need:
- Your Windows 11 PC must have a microphone;
- You need an internet connection in order to configure Voice Access, but once you’re done setting it up, you can use Voice Access even if you’re offline.
After installing Voice Access on your Windows 11 computer, you can open it from the Start Menu, using Search, or using your voice. You’ll also be able to run it on the Windows 11 sign-in screen, and you can even set it to run automatically each time the operating system starts. For now, though, let’s see how to set up and configure Voice Access first:
How to open and set up Voice Access in Windows 11
To open and perform the initial setup for Voice Access, open the Settings app (Windows + I) on your Windows 11 computer, select Accessibility on the left sidebar, and then click or tap Speech in the Interaction section on the right side of the window.
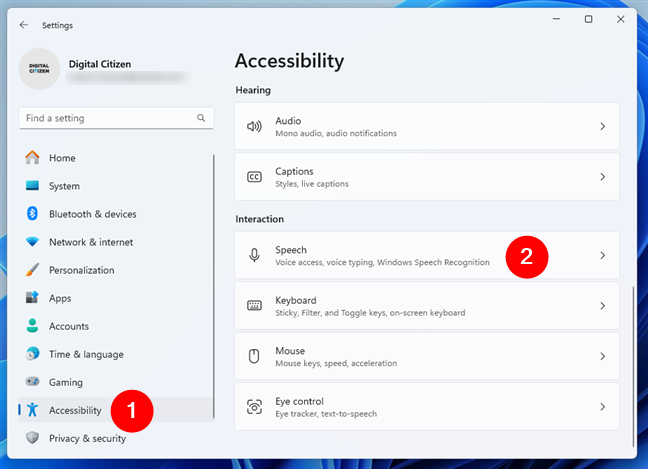
Open Settings, select Accessibility, and click Speech
On the Speech settings page, turn On the Voice access switch.
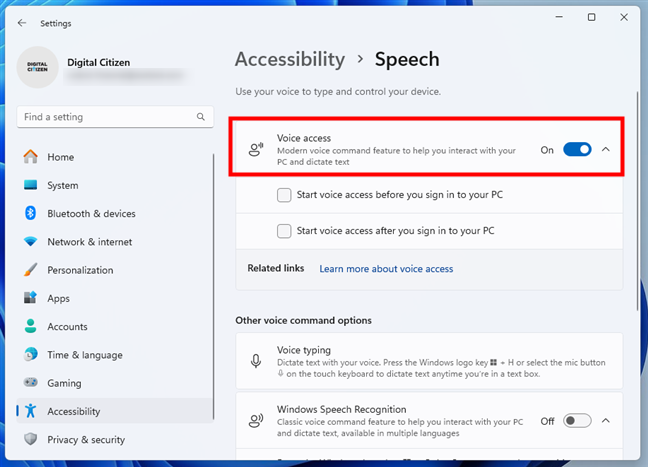
How to enable Voice access in Windows 11
TIP: If you want to have Voice Access open as soon as you start your Windows 11 computer or sign into your account, enable the “Start voice access before you sign in to your PC” or “Start voice access after you sign in to your PC” options.
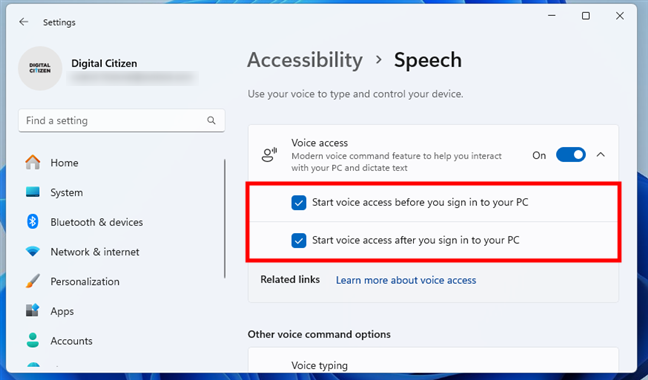
How to set Voice Access to start with Windows 11
When you enable Voice Access for the first time on your Windows 11 computer, you’re greeted by a welcome message. This is shown at the top of the screen, where you’ll also see the bar where Voice Access resides. The welcome message also tells you that in order to use Voice Access on your device, you need to first download a language model for the app to understand you when you speak. Click or tap the Download button on the bar.
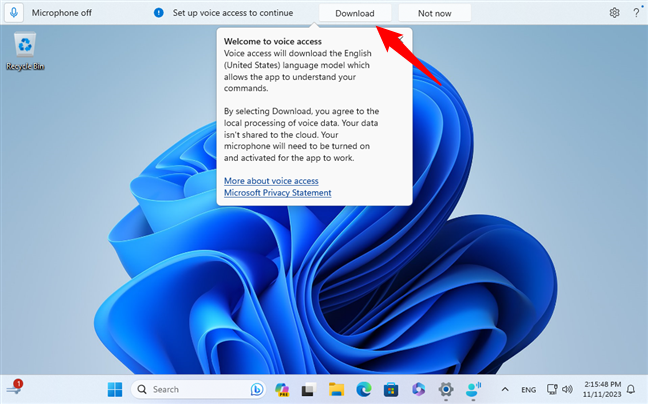
Download the language model for Voice Access
NOTE: At the time of writing, the Voice Access app supports only the English (US, UK, India, New Zealand, Canada, and Australia) language models. However, Microsoft will surely add more languages to the list.
Wait for Windows 11 to get all the files it requires from Microsoft’s servers. In the meantime, you can monitor the progress on the Voice access bar.
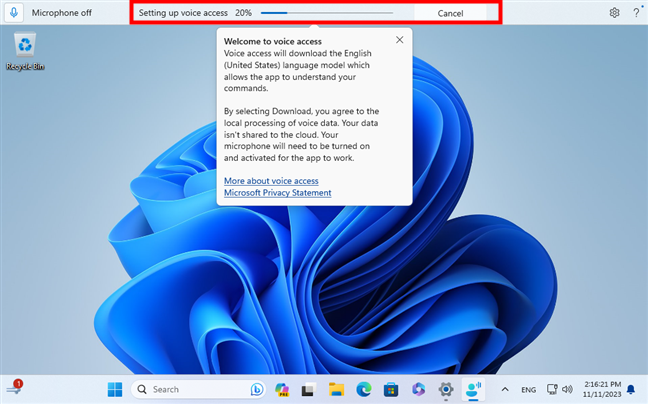
Setting up Voice Access
Once the language model files have been downloaded, the Voice Access app will guide you through its first configuration steps. Before anything else, you need to select the microphone you prefer using with Voice Access. As you can see in the next screenshot, the app recommends using headphones to eliminate potential speaker noise. If you want to connect another microphone to your Windows 11 PC or adjust the sound options before going ahead, you can click or tap either the Add new microphone or Sound settings buttons to get to the corresponding pages in the Settings app. Once you’ve finished and chosen the microphone to use with the Voice Access app, press Next in the bottom-right corner of the window.
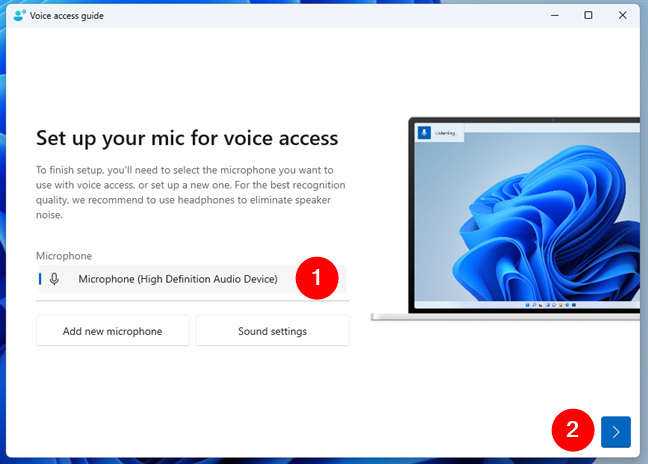
Set up your mic for voice access
Next, the Voice Access app tells you “You’re all set!” and shows a couple of hints on what you can do with it. You have two options here, marked by the two buttons in the bottom-right corner: Start guide and Done. Click or tap the latter to close the initial set-up for Voice Access and start using it right away. Or, click the former, Start Guide, if you want to familiarize yourself with how to work with Voice Access in Windows 11 and see examples of spoken commands you can use. If this is the first time you’re trying Voice Access, I recommend you open the guide, as it will make it easier for you to understand what this app can do.
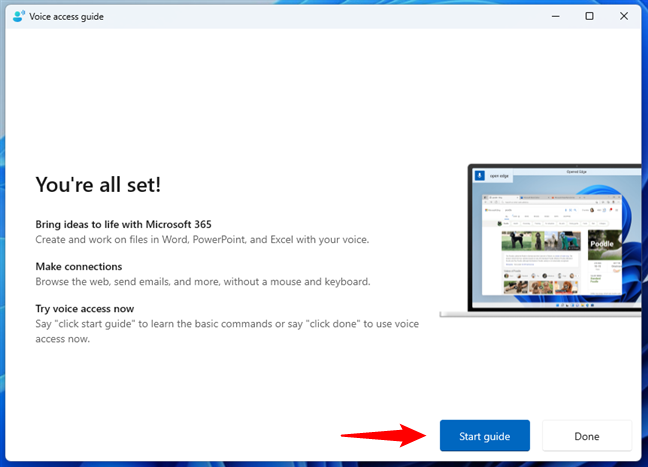
Start the Voice Access usage guide
The Voice Access tutorial will guide you through the basic commands and features of the app. You’ll learn how to open Voice Access with a simple spoken command, how to work with menus and options, how to click things on the screen, how to select items, how to dictate text, and so on. I’ll also cover the essential parts of using Voice Access in Windows 11 in the next chapters of this guide.
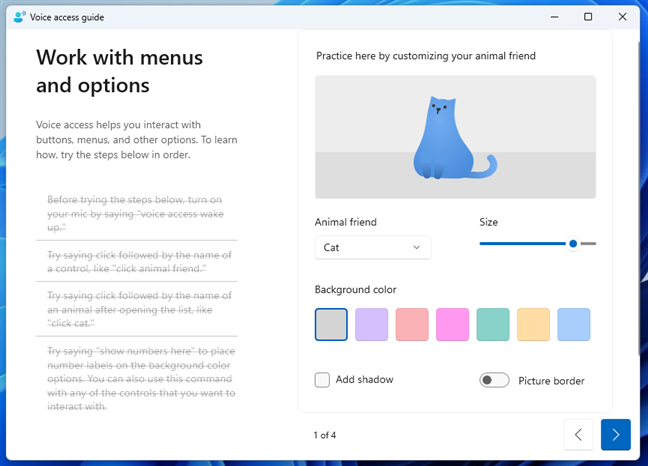
The Voice Access tutorial
TIP: If you want to, you can revisit the Voice Access tutorial from the app’s Help menu anytime later. To do so, click/tap the question mark icon to the right of the Voice Access bar, and select Start interactive guide in the menu.
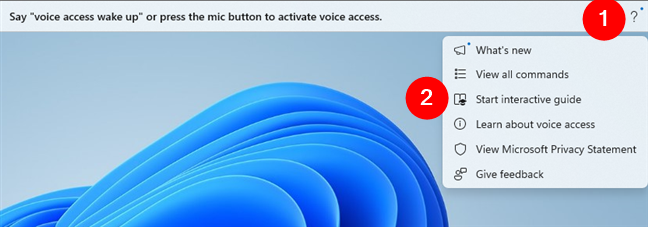
How to re-Start interactive guide
Next, let’s see how to use Voice Access on a Windows 11 device:
How to use Voice Access in Windows 11
To start using Voice Access, you can either tap the microphone icon on the left of the app’s bar from the top of the screen or simply say:

Say voice access wake up to start using it
You’ll know when Voice Access is turned on if the Sleep mode text you’ve seen in the previous screenshot changes to Listening. Like this:
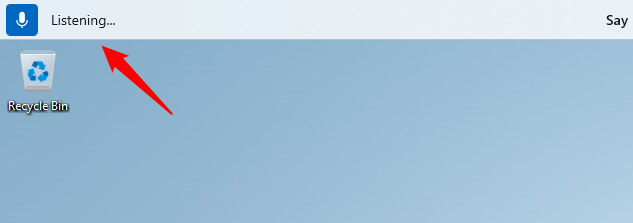
Voice Access is listening to your commands
When turned on, Voice Access always listens to your spoken commands. However, you can still use other methods of interacting with your Windows 11 PC, like your mouse, keyboard, or touchscreen. With Voice Access, you can now speak to perform various actions, such as opening apps, clicking, selecting, dictating text, scrolling, copying, and pasting.
One of the best things about Voice Access is that, in many cases, it allows you to use natural language. For example, if you want to open an app on your Windows 11 device, like Microsoft Edge, you can simply say:
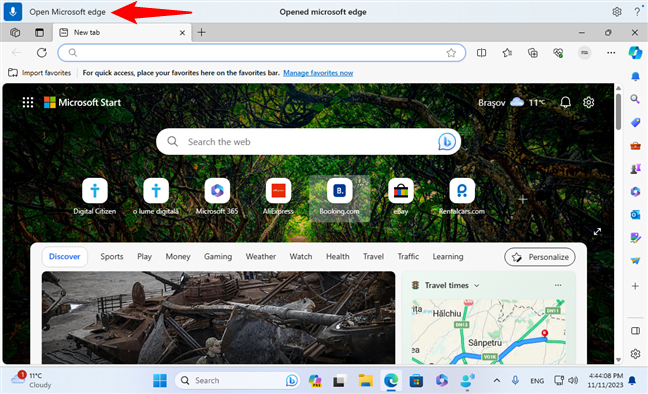
Using natural language to ask Voice Access to open Edge
In my example, once Microsoft Edge opens, it focuses automatically on its address bar. This is a text field; when Voice Access detects such a field, it lets you dictate the text to type. To continue with my example, I used my voice to say:
Voice Access immediately typed the address of our website in Microsoft Edge.
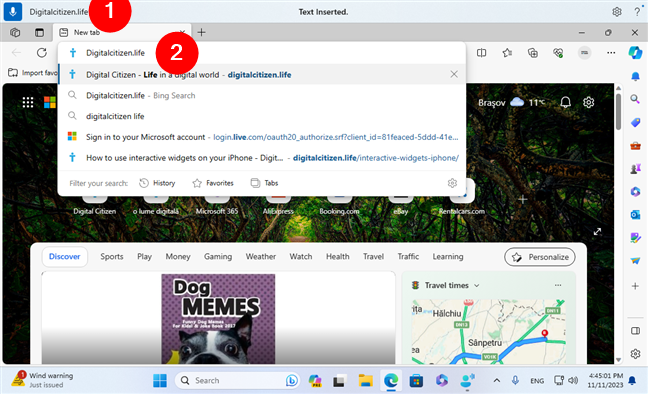
Using Voice Access to type text
To make Microsoft Edge load our website, all I had to do was say:
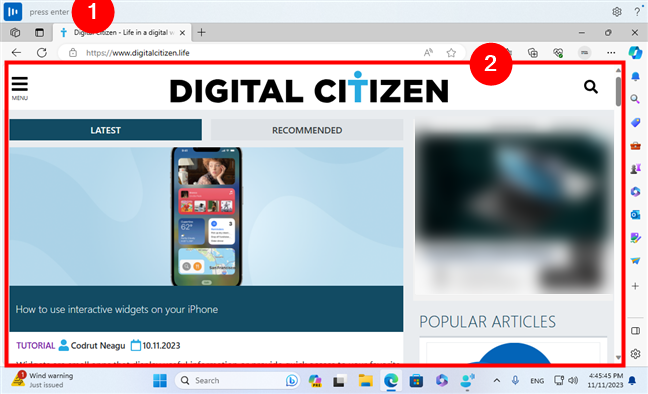
Asking Voice Access to press a key
Neat, right? And this is just the tip of the iceberg. In my tests, I found out that I could also use natural language to ask my Windows 11 computer to click on one of my articles to open it in Microsoft Edge:
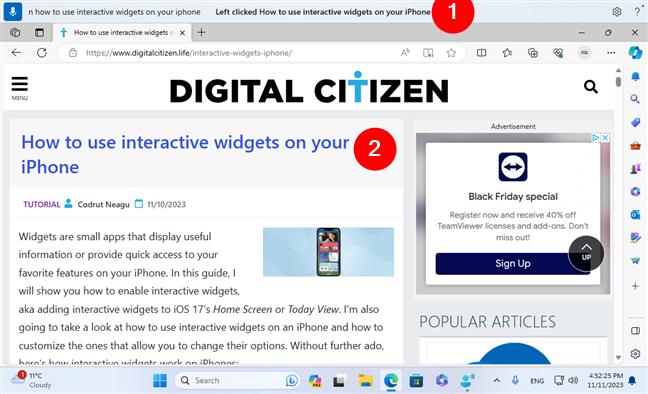
Using Voice Access to click and open a link in Edge
In more complex situations, Voice Access uses numbers to identify the elements on your screen that you can interact with. For example, I wanted to scroll down to read the article that I’ve opened on our website. But, to do that, I had to find a way to tell Voice Access where the scrollable area is. You can do this by asking Voice Access to:
This spoken command splits the screen into nine smaller sections, each marked by a number from 1 to 9. To focus on one of them, you say the number. In my case, that was 7.
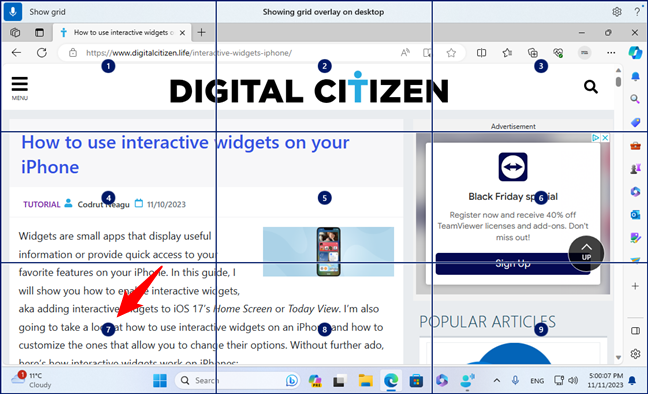
Using the grid view in Voice Access
When you do that, you get another smaller grid only for the section you previously selected. If the mouse cursor is now found where you need it for the next action, great: speak what you want next. As I wanted to read the article, I said:
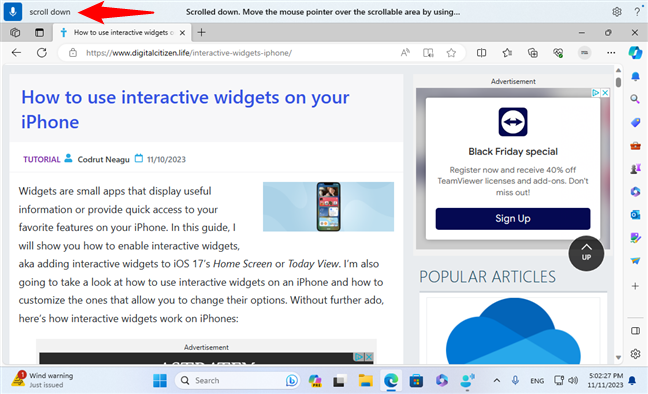
Scrolling down using Voice Access
If the cursor is not yet where you need it to be, you can continue to focus further by saying one of the numbers from 1 to 9.
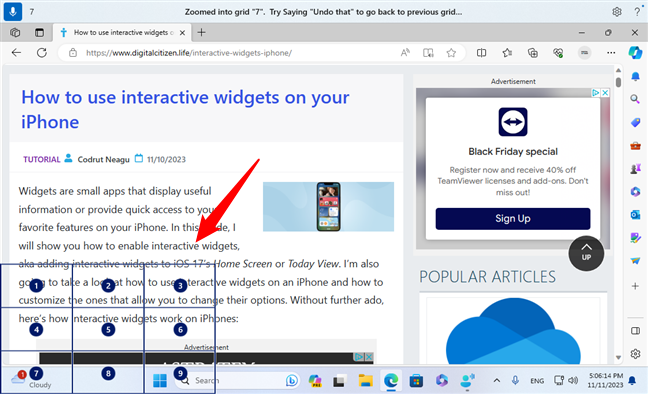
Continuing to use the grid view to focus on a detail
If somewhere on the line, you’ve miscalculated, you can undo the last action by saying:
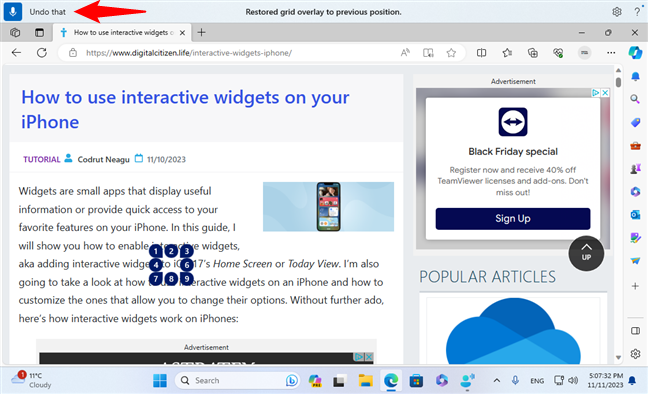
Voice Access can undo the last thing(s) you asked
If using the grid view feels a bit cumbersome, another way of interacting with what’s on the screen of your Windows 11 computer is by numbers. Voice Access can automatically identify the important things displayed. To see them, say:
…and you’ll get something like this:
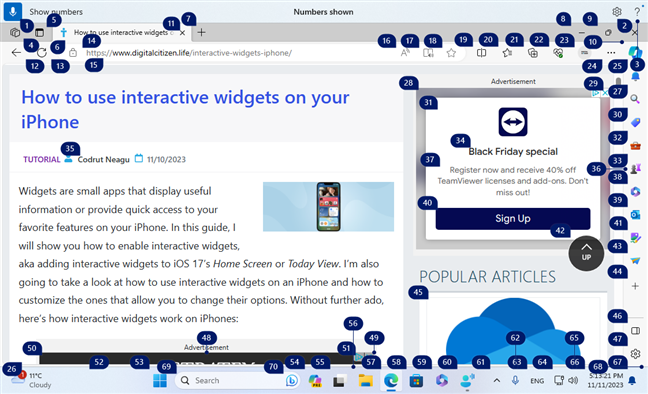
The numbers view feature in Voice Access
Then, you can say the number corresponding to the item you want to interact with. For instance, the number 7 in my example points to the New Tab button in Microsoft Edge. As I wanted to open a new tab, I had to use my voice to say:
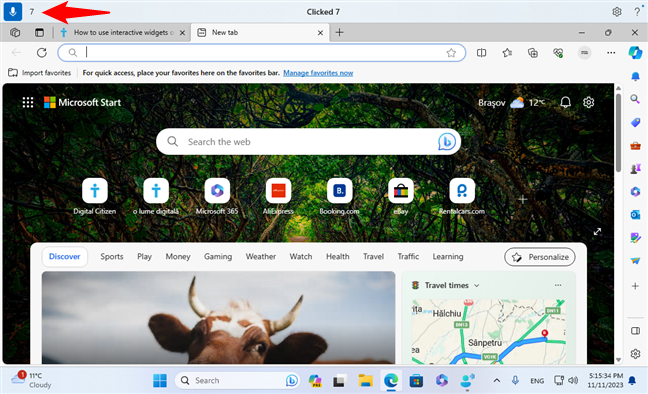
Using Voice Access to click an item in numbers view
This can also be useful when navigating the Start Menu or the Search in Windows 11 to find and open a certain app. To select the app you want to launch, you can use the “show numbers” command and then say the number that points to that app.
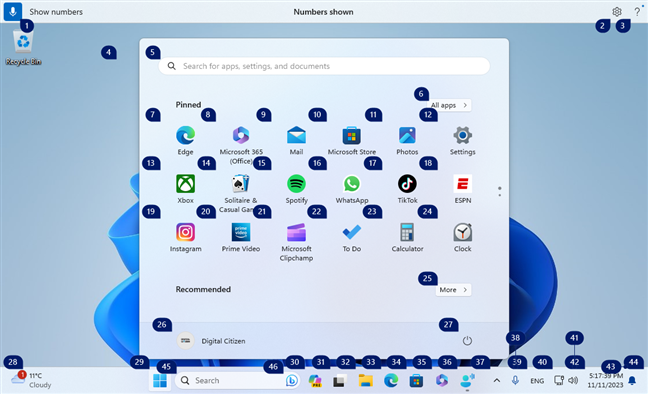
Show numbers in Voice Access to open an app
These are just a couple of things you can do with the Voice Access app. It has many, many more features and commands that you can explore and use according to your needs. You can find them all with this simple yet important question:
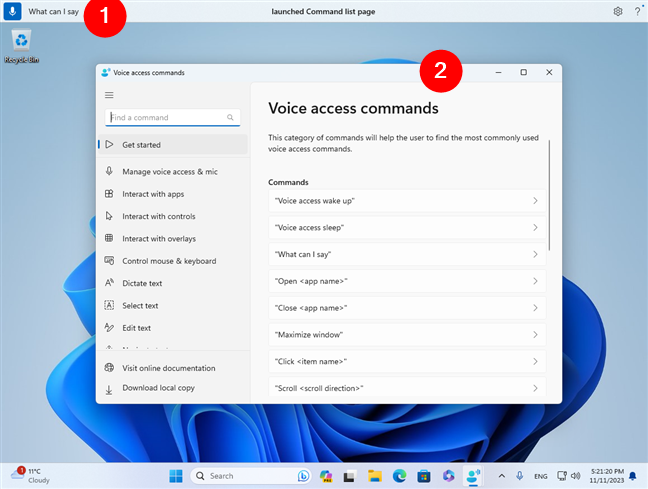
Asking Voice Access what you can say
If you prefer, you can also access the Help menu by clicking or tapping the question mark icon on the right side of the Voice Access bar and selecting View all commands.
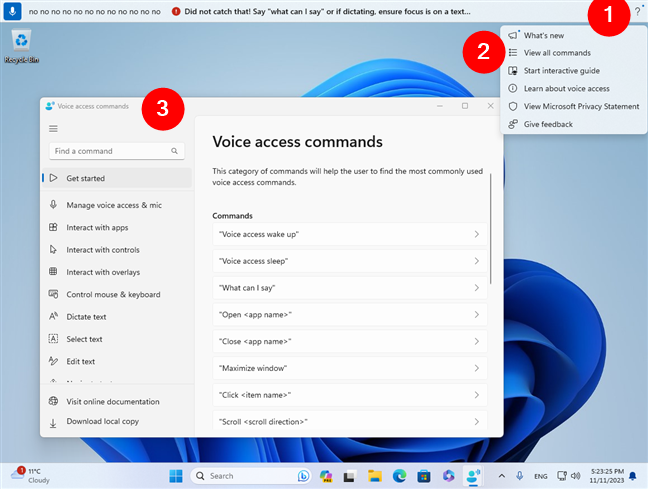
View all commands in Voice Access using the Help menu
TIP: The Help menu also lets you see what’s new in the Voice Access app, as well as replay the initial interactive guide if you want to (re)familiarize yourself with how it works.
How to pause or close Voice Access in Windows 11
If you want to pause Voice Access but intend to use it again after a short time, you can say this command:
As soon as you say that, the Voice Access will enter Sleep mode.

Asking Voice Access to sleep
If you want to close the app altogether:
And it will be gone in an instant.
What would you improve in Voice Access for Windows 11?
As you’ve seen, Voice Access is a powerful and convenient tool. And it can certainly make your Windows 11 experience more accessible and even more enjoyable. Although it’s available only in English for now, it will surely receive support for other languages, too. Hopefully, sooner rather than later. But other than that, what new features would you like to see Microsoft add or improve in Voice Access for Windows 11?


 05.12.2023