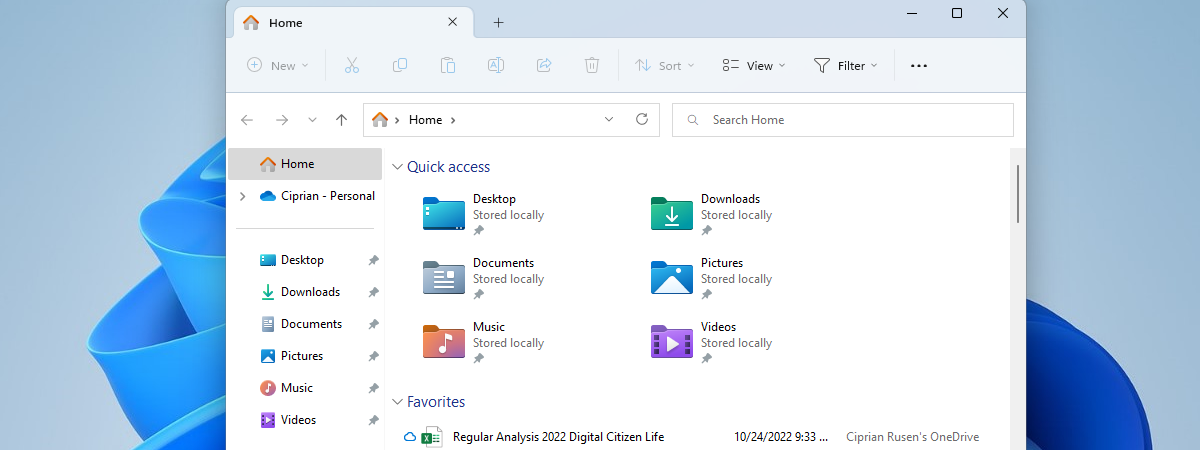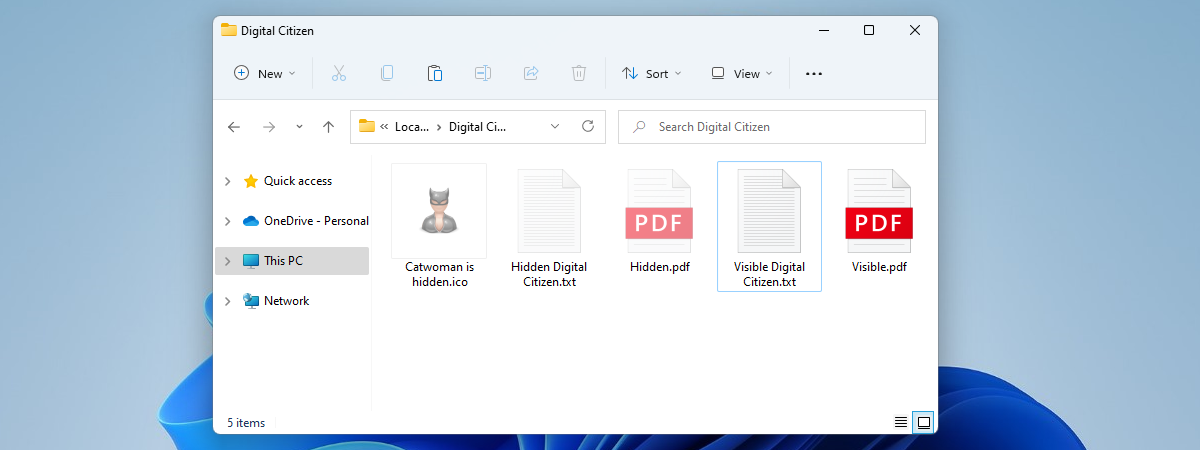
By default, both Windows 10 and Windows 11 hide many files and folders from your view. First of all, they hide any items you’ve set as hidden and those set as hidden by other user accounts, certain apps you installed, and the operating system itself. Second, Windows also hides from view the files and folders critical to its operation to ensure users don’t delete them by accident or change them in ways that lead to malfunctions. If you want to show all the hidden files and folders from Windows 10 or Windows 11, read this guide to learn how to do it:
NOTE: In both Windows 10 and Windows 11, there are two categories of files that are hidden from view: “standard” hidden files and “system protected” hidden files. To learn how to view them, read all the sections of this guide. At the end, we also offer examples of the differences between the settings you can change.
How to show hidden files in Windows 10
If you want to find all the hidden files in Windows 10, you’ll need to use File Explorer. A quick way to open it is to click or tap its taskbar shortcut or simultaneously press Windows + E on your keyboard. Then, in File Explorer, select the View tab at the top of the window and, in the Show/hide section, check the box called “Hidden items.”
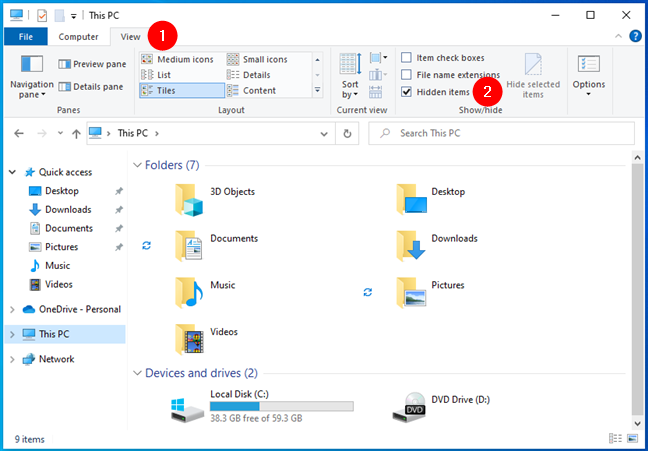
How to show hidden files in Windows 10
You’ll immediately start seeing the files you hid, those hidden by other user accounts, Windows 10, and the apps you’re using.
TIP: If you don’t know how to put files out of sight on your computer, here’s how to hide files and folders in Windows.
How to see all files on Windows 10, including hidden system-protected ones
The steps you need to take in order to see all the files in Windows 10, including the hidden system-protected files, are a bit different. Still, everything starts with the same File Explorer. Launch it, select the View tab at the top of the window, and then click or tap the Options button to the right.
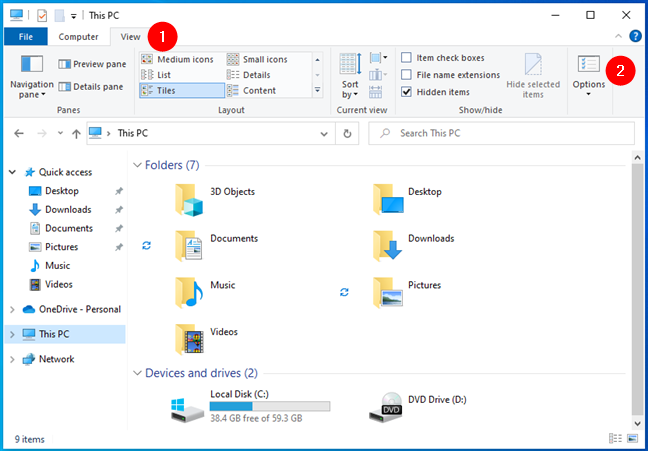
How to open Folder Options in Windows 10’s File Explorer
This opens the Folder Options window, where you’ll find many settings for how File Explorer works. In this window, go to the View tab. Then, in the Advanced settings list, find and uncheck the box that says: “Hide protected operating system files (Recommended).”
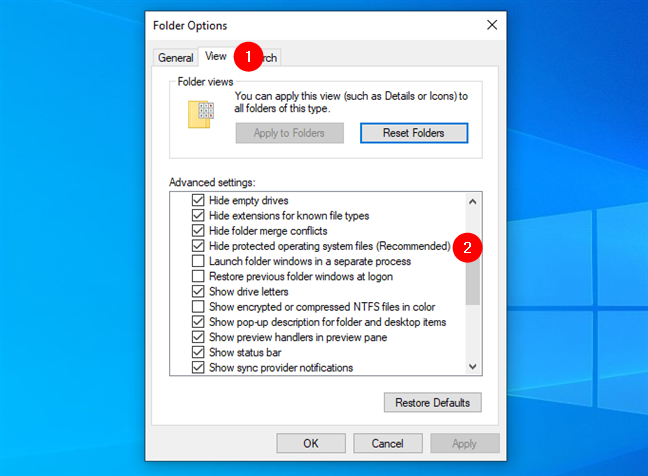
How to view protected operating system files in Windows 10
Windows 10 will warn you that you’ve “[...] chosen to display protected operating system files (files labeled System and Hidden) in File Explorer.” To go ahead with this change, click or tap Yes.
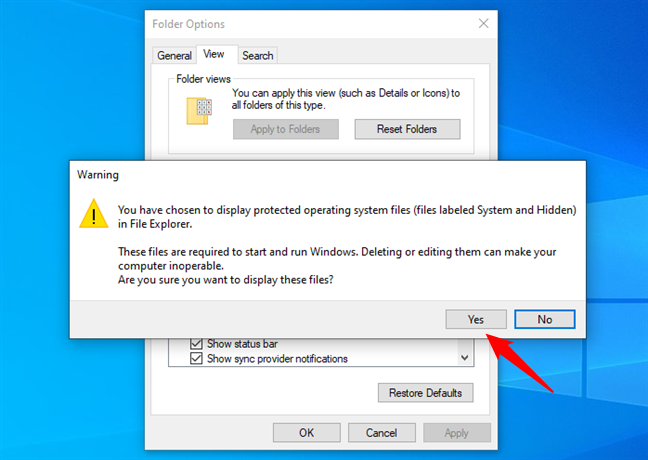
Windows 10 warning about hidden protected system files
Then, in the Folder Options window, click or tap on Apply or OK to save your settings. From now on, Windows 10 and File Explorer will make all the hidden files of the operating system visible.
How to show hidden files in Windows 11
Showing hidden files in Windows 11 is just as easy as in Windows 10. Maybe even a bit faster. Start by opening File Explorer (Win + E), and click or tap the View button from the top menu. Then, click or tap on Show at the end of the menu, and select Hidden items from the submenu displayed.
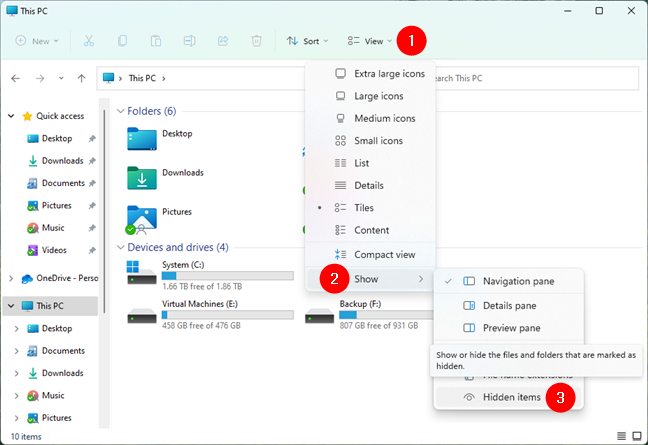
How to show hidden files in Windows 11
You’ll immediately start seeing the files hidden by Windows 11, yourself, or other user accounts, and any of the apps installed on your computer.
TIP: Did you just discover some hidden files on your computer that you no longer want to conceal? Here’s how to unhide files and folders in Windows.
How to show hidden protected operating system files in Windows 11
If you want to find all the hidden files from Windows 11, including the ones protected by the operating system, here’s how to do it:
Open File Explorer and click or tap on the … (See more) button from the top menu. Then, press Options in the menu displayed.
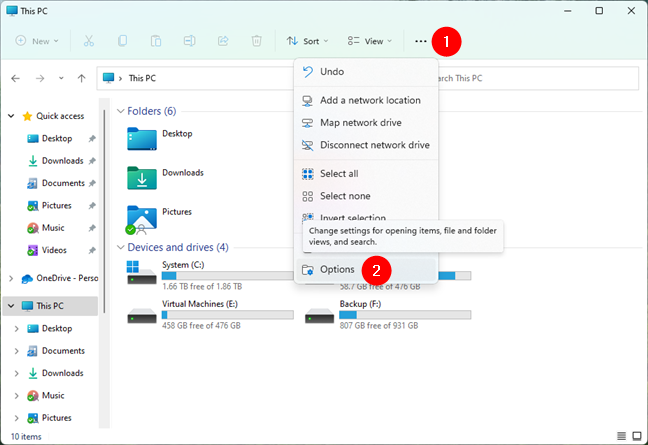
How to access the Folder Options in Windows 11's File Explorer
This opens the Folder Options window, where you can configure the way File Explorer works. Select the View tab, and go to the Advanced settings list. Find the setting that says “Hide protected operating system files (Recommended)” and uncheck it.
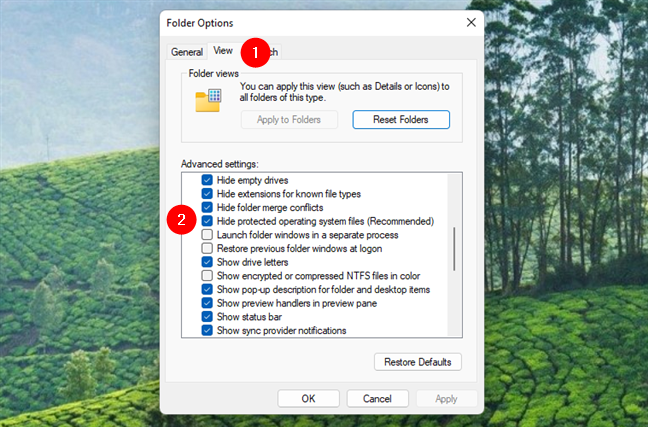
How to make Windows 11 show protected operating system files
You’re then warned that “you have chosen to display protected operating system files (files labeled System and Hidden) in File Explorer.” If you’re still sure you want that, click or tap on Yes.
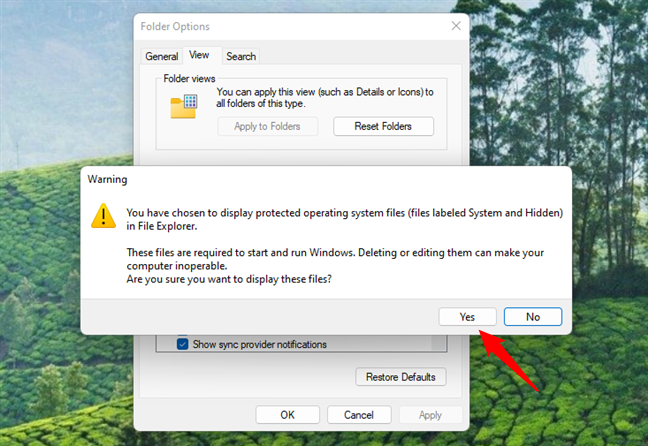
Windows 11 warns you that you'll be able to see protected system files
In the Folder Options window, press Apply or OK to save the changes. From here on, Windows 11’s File Explorer will display all the hidden protected operating system files.
What’s the difference between seeing hidden files and protected operating system files?
By default, neither Windows 10 nor Windows 11 shows hidden files. Therefore, your desktop displays only the files and shortcuts that you or your apps have added.
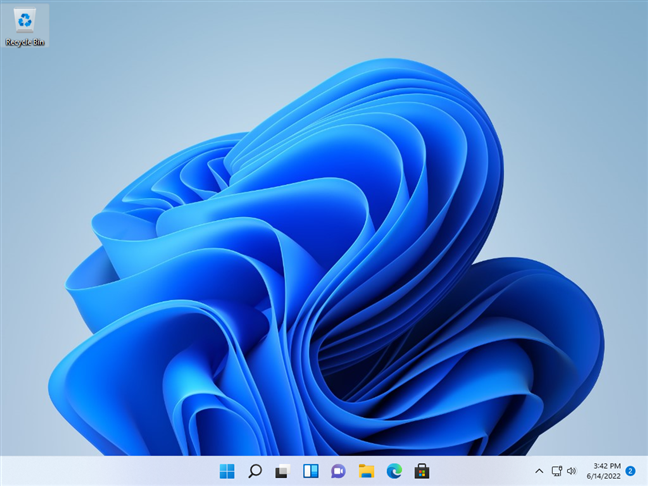
The Windows 11 desktop
When you disable the “Hide protected operating system files (Recommended)” setting on your desktop, you will see two desktop.ini files that store information about how Windows displays the desktop. Not only that, but you’ll see desktop.ini files everywhere, in all the folders on your computer.
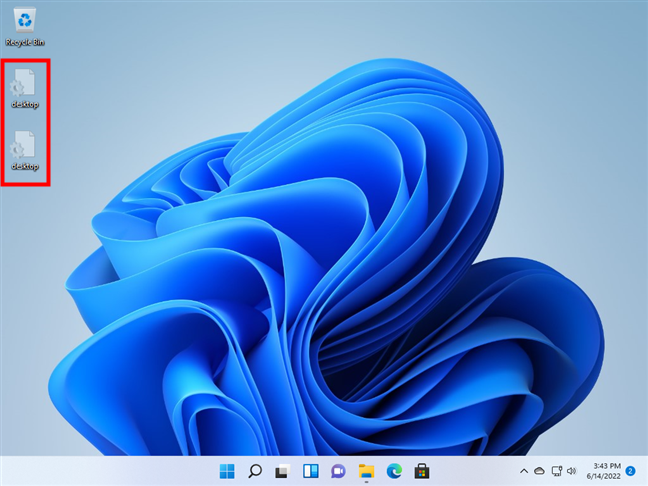
Two desktop.ini files on the Windows 11 desktop
To get a better perspective on how many hidden files and folders you might start seeing after enabling the settings discussed earlier, open File Explorer and go to “C:\Users.” Then double-click or double-tap on your user name. By default, in this location, you should see only your user’s folders, like Documents, Music, or Pictures.
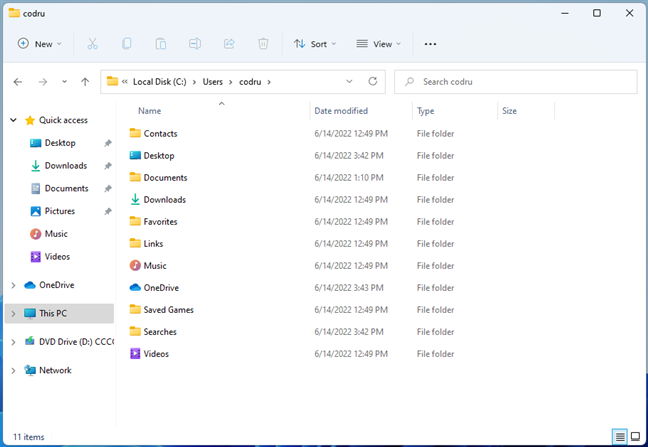
A user folder from Windows 11
When you enable File Explorer to show Hidden items, you start seeing a few new folders, like AppData, where many of your apps store data and settings for your user account.
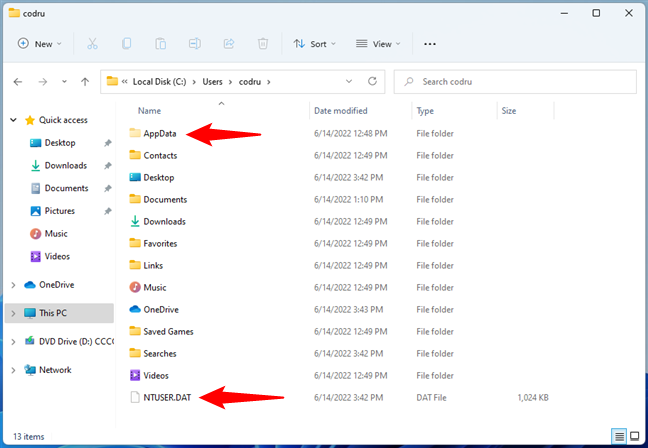
The hidden AppData folder is now visible
When you disable the “Hide protected operating system files (Recommended)” option from File Explorer, you’ll see many more folders and files. Things like Local Settings, SendTo, Start Menu, and so on. Windows uses these additional folders to interact with your user account and remember your settings.
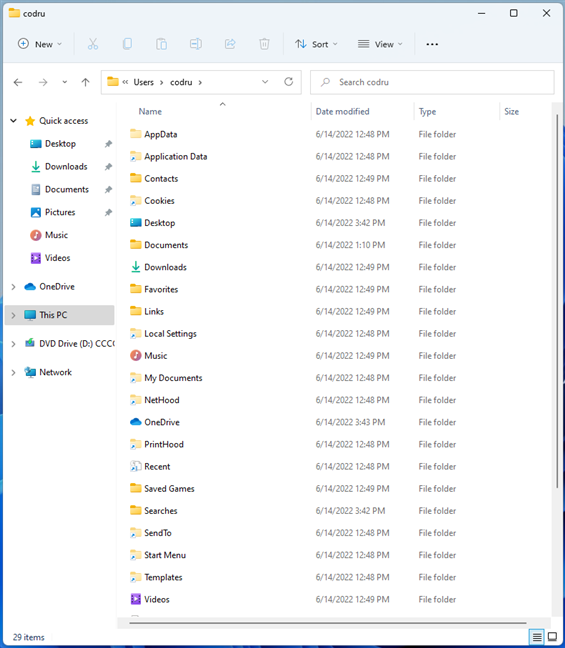
All hidden and protected operating system files are now visible
IMPORTANT: By default, the protected operating system files are hidden by Windows because they are critical to how the system works. You should not delete or edit their contents unless you know what you’re doing.
Did you find all the hidden files and folders you were looking for?
To see everything hidden on your Windows 10 or Windows 11 computer, you need to go through all the settings covered in this guide. However, we advise against displaying operating system-protected files and folders. Many users don’t know how to manage them, and they may end up messing up their Windows devices. Before you leave, let us know: Why did you choose to show hidden items on your Windows PC?


 15.06.2022
