Using a mobile device is handy, especially when you travel a lot, but these devices are limited by the amount of energy their batteries can provide. For this reason, paying attention to the power plan that you are using and its settings can make a huge difference in how much battery time you have available. Fortunately, Windows 10, Windows 7 and Windows 8.1 provide us with the necessary tools to see which power plans are available, which is the active power plan and easy ways to switch between power plans. Here is how it all works:
What is a power plan?
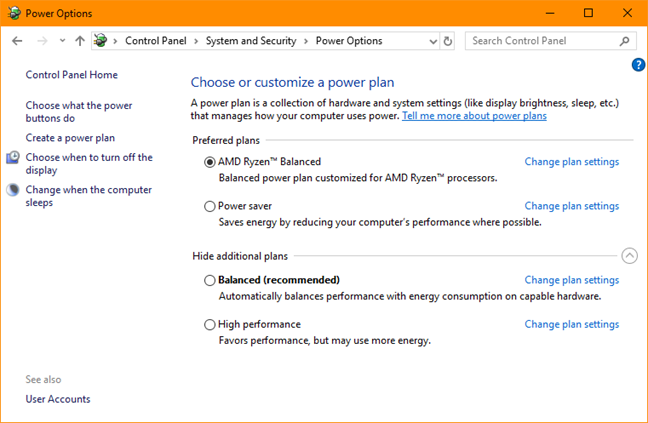
A power plan is a collection of hardware and system settings that manages how your PC, laptop, or tablet uses power. The power plans available depend on the kind of PC that you have and whether its manufacturer did or did not customize the default power plans available in Windows. Some power plans are designed to deliver high performance while compromising battery life while others are made so that you get as much battery life as possible while compromising the performance. In Windows, you can see all of the available power plans in the Power Options window.
Among others things, Windows power plans set how the following elements behave when on battery and when connected to a power source:
- The screen brightness, when the display dims and turns off
- When the computers sleeps
- When the hard disk turns off
- How fast Internet Explorer and Microsoft Edge render web pages
- How often the desktop background changes
- The performance of your wireless network card
- How quickly USB devices are suspended when they are not used
- How much power is used by the graphics card
- What happens when you close the lid on your device or when you press the Power button
- How much power is used by the PCI-Express cards in your system
- The processor's (CPU) active power management features
- How multimedia is rendered on the screen (video playback quality, and so on)
- The notifications you get depending on your battery level and the battery use
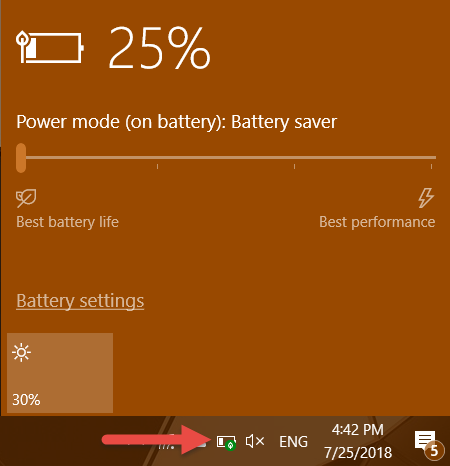
If you have Windows 10 with Fall Creators Update or newer, you might wonder why you also see a power slider when you click or tap on the battery icon from the system tray.
That power slider adds new power saving algorithms and technologies, on top of the active power plan, which has to be the Balanced one. The power slider does not change the active power plan! If you want to learn more about its benefits and how it can help you save battery, read this guide: Use the Windows 10 power slider to save battery or increase performance.
What is different between the default power plans in Windows
A power plan contains both the hardware and system settings that influence your computer's power management. By default, Windows has three power plans: Power Saver, Balanced (the one recommended by Microsoft) and High Performance.
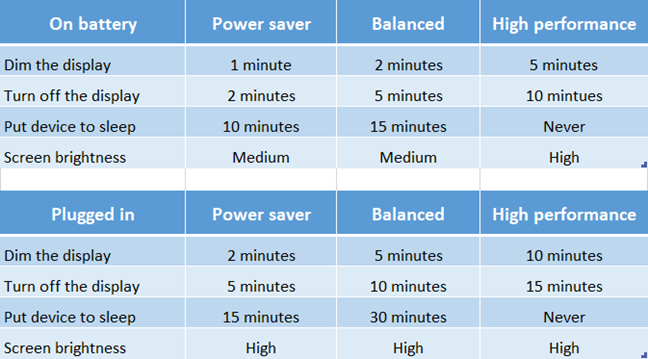
The most visible changes made by Windows when you select a power plan affect the screen brightness, the time until the display is dimmed and then turned off, and the time until your computer is put to sleep. These changes are also different depending on whether your computer is using the battery or it is plugged into a power supply. Below is a comparison between the settings of each power plan, for each of the two modes: on battery and plugged in.
You should keep in mind that the tables above do not show all the things that are managed by a power plan, only the most visible aspects to you as a user. We have published other articles that cover the more advanced settings managed by a power plan, in which you can find more technical details:
- How to create or delete your custom power plans in Windows
- How to use and configure the battery saver mode in Windows 10
- 13 ways to save power by tweaking power plans in Windows
How to access the power plans, in Windows
Enabling a power plan or modifying its settings is easy in Windows, but before you can do that, you first have to know how to access the power plans. If you do not know how to get to them, you should read this article that covers all the methods to access power plans: 9 ways to access the power plans in Windows.
Now that you know what power plans are and how to get to them, let's see which are the methods that you can use to switch the active power plan used by Windows:
1. Switch the power plan by using the Power Options section from the Control Panel, in any Windows version
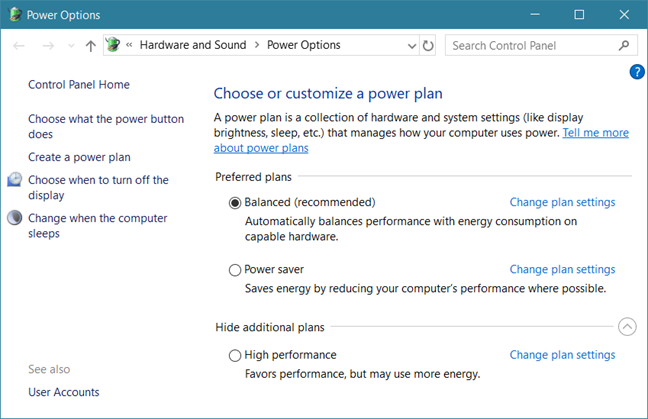
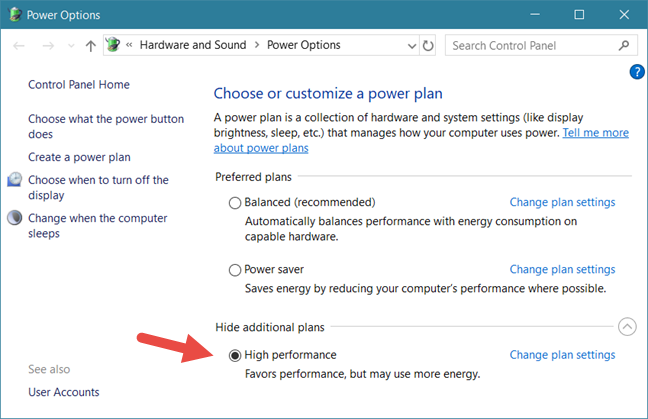
First of all, access the power plans section from the Control Panel, by following one of the methods described in this guide: 9 ways to access the power plans in Windows. You should get to a window similar to the screenshot below, regardless of whether you use Windows 10, Windows 7 or Windows 8.1.
This is where you can see what your active power plan is, and change it if you want to. By default, all Windows operating systems use the Balanced (recommended) power plan. To switch to another power plan to use, such as the Power saver or the High-performance plans, select the one you want by clicking or tapping on it.
This is all: you can close Control Panel now if you want.
2. Switch the power plan by using the Windows Mobility Center, in any Windows version
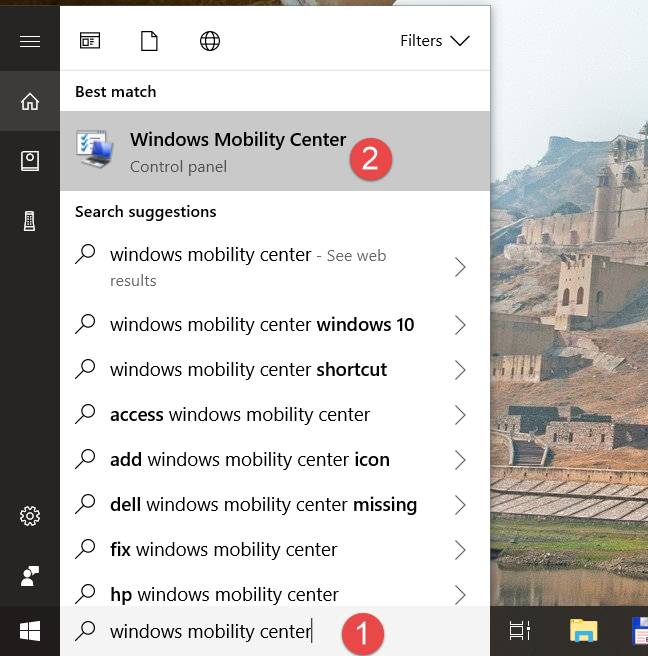
Another method to switch to another power plan available on your Windows device is to use the Windows Mobility Center. There are several ways to open it, and you can find some of them described in this guide: How to make the most of your laptop with the Windows Mobility Center. However, if you are in a hurry, you should know that one fast way to open it regardless of what version of Windows you have, is to use the search feature to look for "Windows Mobility Center."
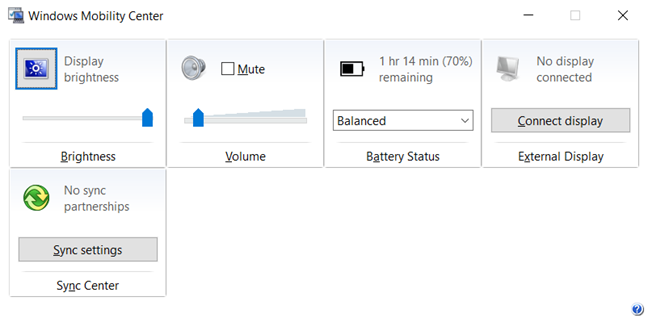
With only a few small visual differences, the Windows Mobility Center window looks the same in all Windows versions.
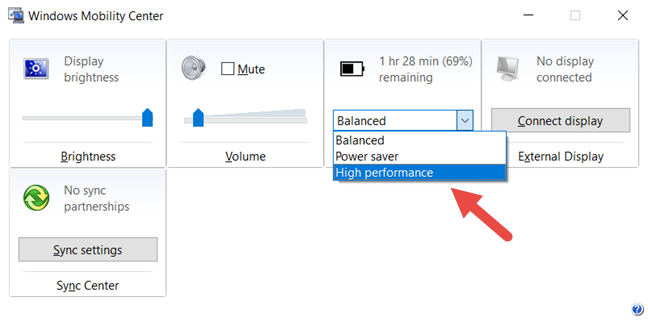
To switch to another power plan, click or tap on the Battery Status list and select the new power plan that you want to activate.
Now you can close the Windows Mobility Center.
3. Switch the power plan by using the battery icon from the system tray, in Windows 7 and Windows 8.1
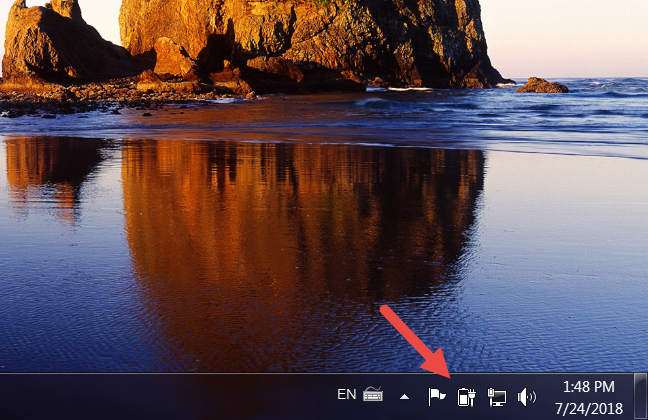
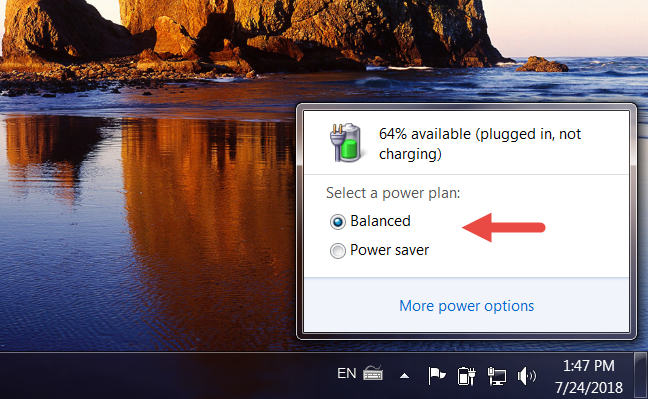
If you are using Windows 7 or Windows 8.1, you can also switch between the two recently used power plans using the battery icon from the system tray.
Just click or tap on it, and a small window should appear. In it, you can select which of these two power plans you want to enable.
Click or tap anywhere on a blank space on the desktop and you are done.
Conclusion
Now that you know what power plans are, which are the default power plans in Windows, what are the differences between them and how to switch between power plans, let us know if you have any questions. Do you find it easy to switch between power plans? Are they working as you would expect? For more articles on Windows, check out some of our related guides and if you have any suggestions, questions or problems, do not hesitate to use the comments section below.


 27.07.2018