Knowing how to change the touchpad settings in Windows 11 is important if you’re using a laptop, a tablet, or any other type of mobile computer. While there are many types of touchpads for laptops, Windows 11 laptops usually come with precision touchpads, so you have more options than you can imagine to customize the way your touchpad works. Furthermore, touchpad gestures help you trigger different actions to get things done faster than you would with a mouse. Read this guide to learn how to change the touchpad settings in Windows 11:
Where are the touchpad settings in Windows 11?
You can access the touchpad settings in Windows 11 from the Settings app. Open Settings and click or tap Bluetooth & devices on the left column.
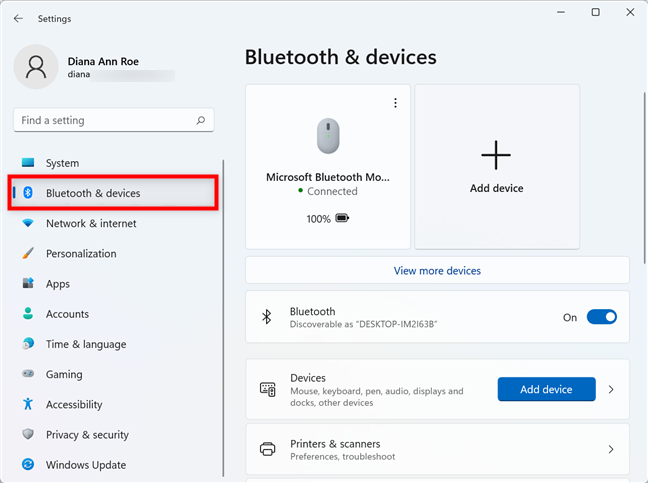
In Settings, go to Bluetooth & devices
Scroll down and click or tap on the Touchpad section.
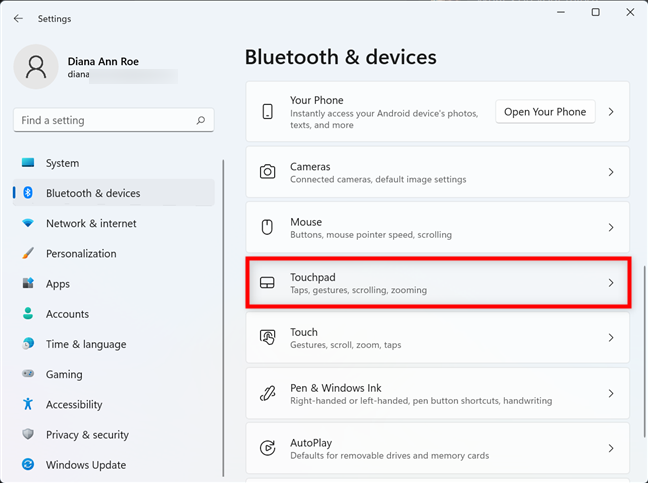
Access the Touchpad settings in Windows 11
You can change the touchpad settings in Windows 11 from the different categories displayed on the next page. Before we go through each of them, make sure the master switch is enabled. If you disabled the touchpad in Windows 11, there is no way to change its settings, as all the other options are greyed out. So, first, make sure the Touchpad switch at the top is On or activate it by clicking or tapping on it.
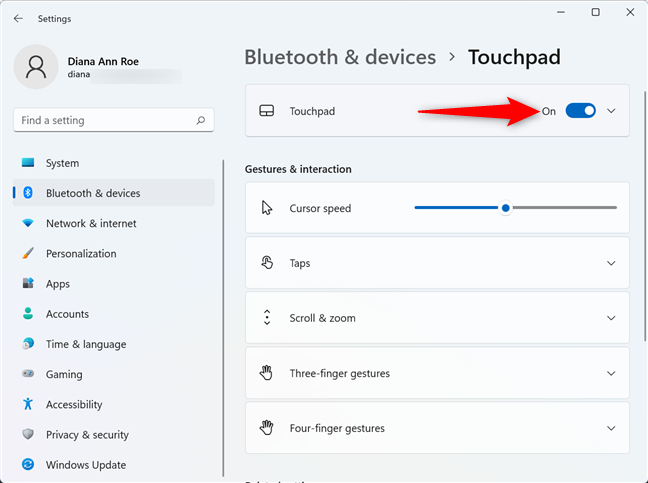
Turn On the switch to change the touchpad settings in Windows 11
How to change the touchpad cursor speed on Windows 11
If you think that the cursor is moving either too fast or too slow when you’re using the touchpad in Windows 11, you can adjust it to fit your own pace.
Use the Cursor speed slider under Gestures & interaction to do this.
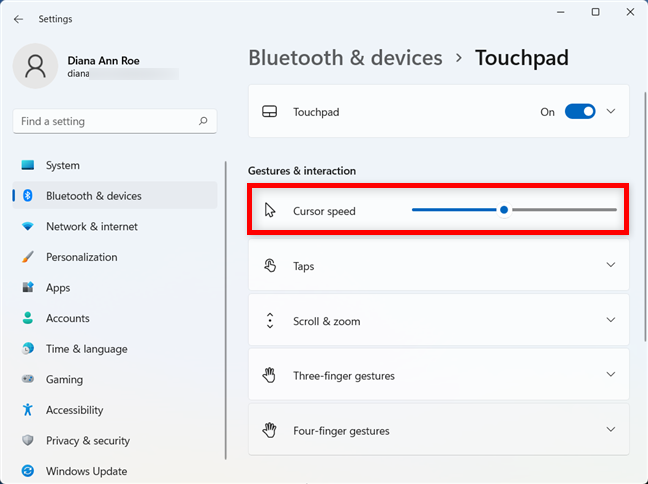
Use the slider to adjust the Cursor speed
How to adjust the touchpad sensitivity in Windows 11
It’s easy to change how sensitive your Windows 11 touchpad is to your taps. This is useful if you sometimes accidentally press the touchpad with the palm of your hand while typing. First, access the Taps section from the touchpad settings to expand it.
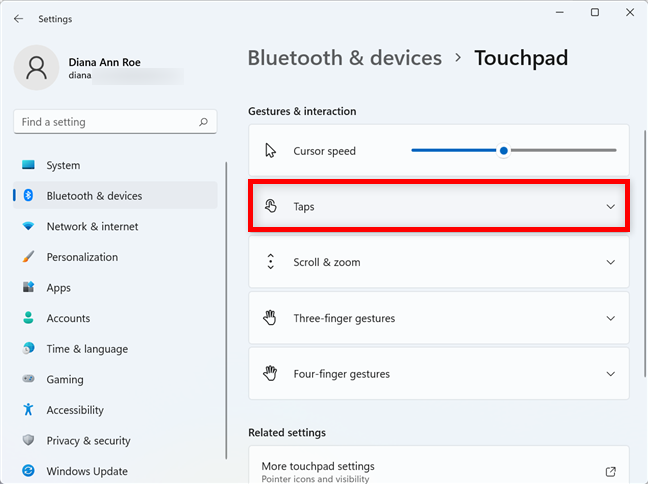
Click or tap to expand the Taps section
Next, click or tap on the box next to Touchpad sensitivity.
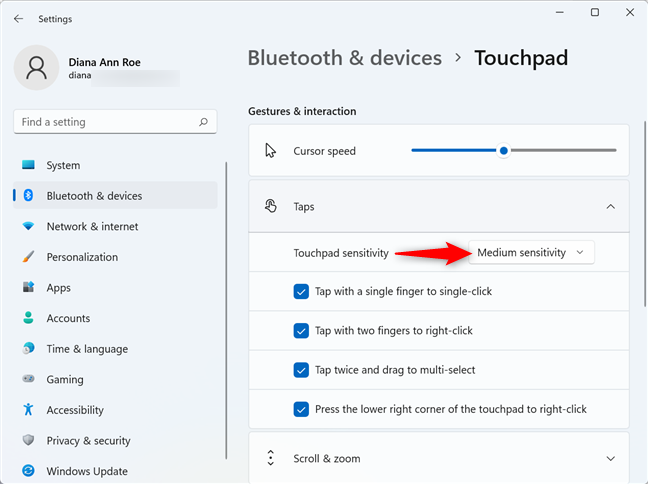
Press on the current sensitivity setting to adjust it
This opens a dropdown menu, where you can click or tap on the desired sensitivity level to select it.
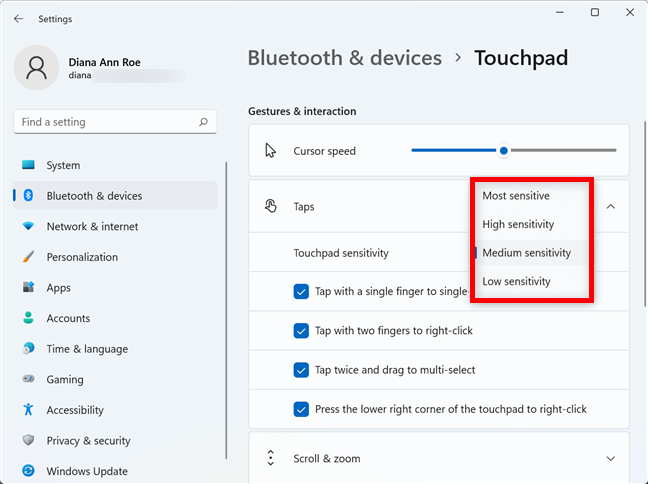
How to change the touchpad sensitivity in Windows 11
How to configure the touchpad taps in Windows 11
Even if your touchpad has separate buttons for click and right-click, you might find it faster to tap directly on it instead. In the extended Taps section on the Touchpad page, you get four settings to control how your touchpad interprets your taps:
- Tap with a single finger to single-click - tapping on the touchpad does the same as clicking once on your left mouse button or tapping the screen.
- Tap with two fingers to right-click - makes your touchpad right-click whenever you tap it with two fingers. In most cases, this should open a contextual menu.
- Tap twice and drag to multi-select - tap the touchpad and then quickly tap it again, but this time, instead of lifting your finger, drag it to select multiple elements.
- Press the lower right corner of the touchpad to right-click - Windows 11 performs a right-click whenever you press the lower-right corner of your touchpad.
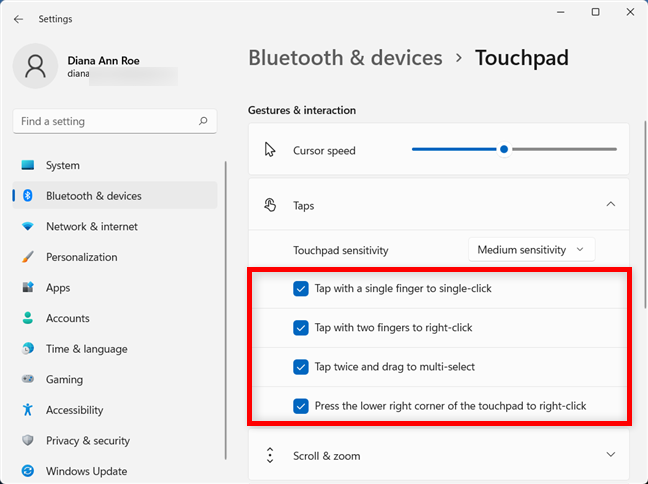
Configure what your touchpad taps do in Windows 11
Click or tap to check or uncheck each box according to your preferences. Feel free to experiment and decide which options work best for you.
How to change the touchpad settings for scroll and zoom in Windows 11
The following section lets you configure using your touchpad for scrolling and zooming. First, click or tap on the Scroll & zoom section in the Touchpad settings to expand it.
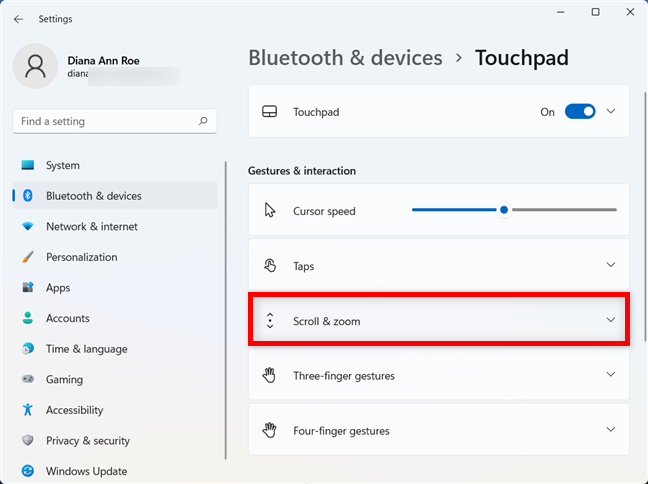
Access the Scroll & zoom settings
The first option in the extended menu is comfortable because you can scroll without moving the cursor to a window’s scroll bar. Check the box next to “Drag two fingers to scroll” if you want to scroll by placing and sliding two fingers on the touchpad.
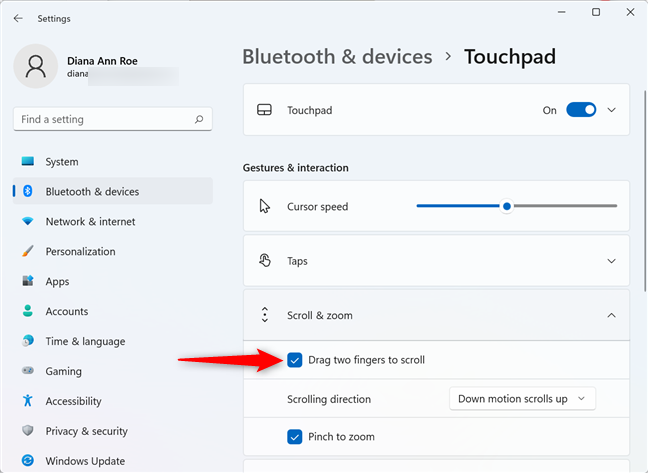
Have the touchpad scroll when you drag two fingers on it
Clicking or tapping on the box next to “Scrolling direction” lets you choose if you want a downward motion on the touchpad to scroll up or down.
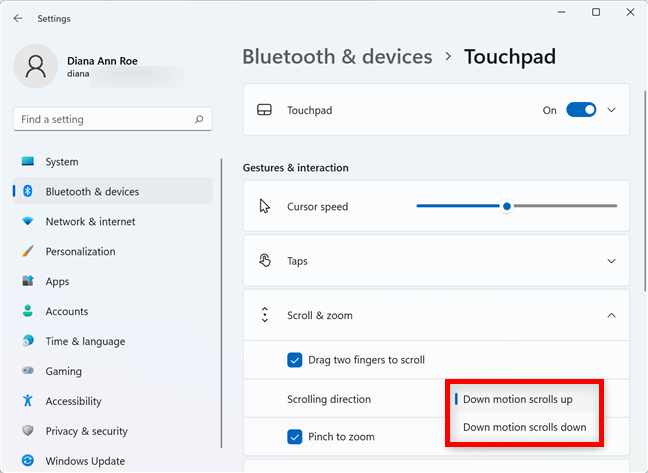
Choose the scrolling direction of your touchpad
Enabling the “Pinch to zoom” setting lets you place two fingers on your touchpad and then pinch to zoom out. You can also move your fingers away from each other to zoom in.
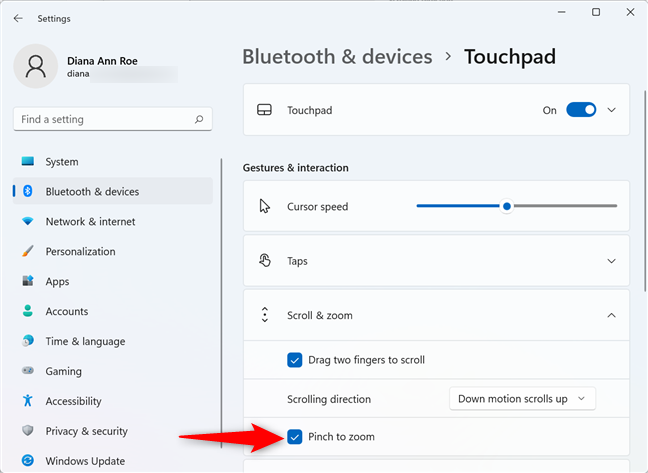
Check the box to use the touchpad for zooming in and out
How to configure the three-finger and four-finger gestures in Windows 11
While you get separate sections in the Touchpad settings for three-finger and four-finger gestures, the options in both menus are identical when expanded. First, click or tap on Three-finger gestures or Four-finger gestures, depending on the ones you want to configure.
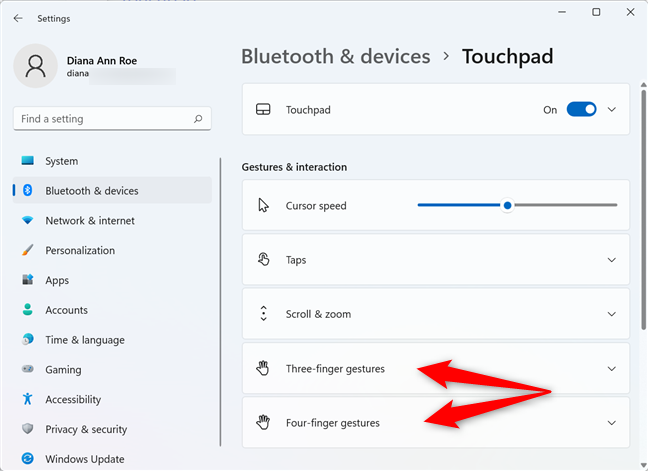
Settings for three-finger and four-finger gestures
At the top, click or tap on the box next to Swipes to open a dropdown menu. Decide what happens when you slide three or four fingers on your touchpad. You can have Windows 11 do Nothing or choose one of the other three presets:
- Switch apps and show desktop - the default for three-finger gestures. If you swipe up, you enter the Multitasking view, swiping down takes you to the desktop, and you can swipe left or right to shift focus between apps.
- Switch desktops and show desktop - the default for four-finger gestures. The only difference between this preset and the previous one is that swiping left or right switches between desktops instead of apps.
- Change audio and volume - Select this preset to control the volume in Windows 11 by swiping up and down. Swiping left or right jumps to the previous or next track.
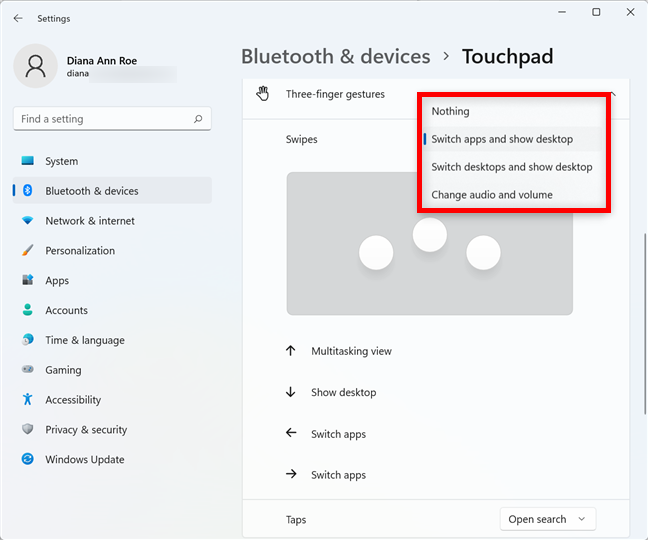
Decide what swiping with three or four fingers does in Windows 11
When you select each preset, the arrows at the bottom indicate what happens when swiping each direction.
Click or tap on the box next to Taps to choose what happens when you tap the touchpad with three or four fingers. You can have Windows 11 do Nothing, Open search, show the Notification center, Play/pause a media file, or act as a “Middle mouse button.”
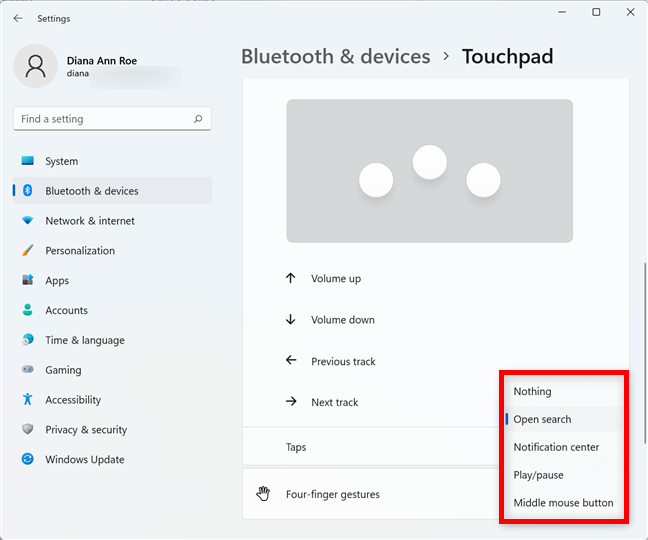
Decide what tapping with three or four fingers does
How to reset the touchpad settings in Windows 11
To reset the touchpad settings, click or tap on the Touchpad section at the top to expand it.
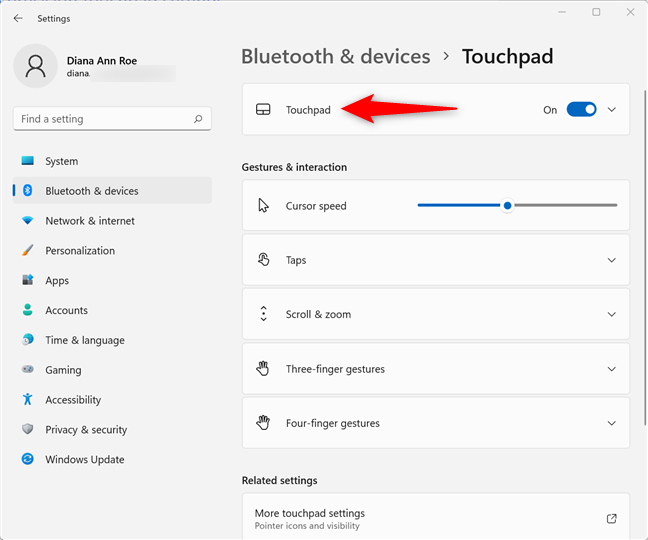
Access the Touchpad section
Click or tap on the Reset button.
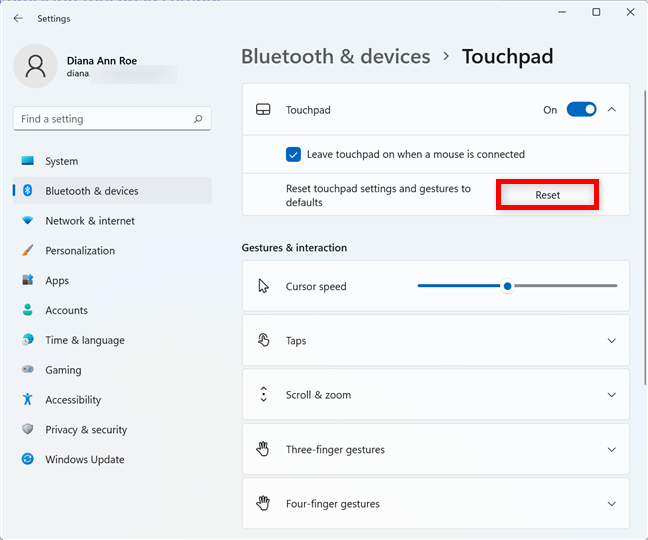
Reset the touchpad settings in Windows 11
All the touchpad settings and gestures are returned to their defaults in Windows 11.
Do you like the touchpad settings in Windows 11?
The touchpad settings in Windows 11 should be familiar to you if you also used a precision touchpad on Windows 10. Either way, if you spend time customizing each option, the touchpad becomes a powerful tool that improves both your speed and productivity in Windows 11. What do you think? Do you like the touchpad settings in Windows 11? How did they improve your workflow? Let us know in the comments.


 19.08.2021