We encourage you to create a recovery drive as soon as you install Windows 10 on a computer or as soon as you buy a new PC. It can be a lifesaver when Windows 10 stops working, and you cannot use your apps or access your files. What exactly can you do with it? How can it help you in your hour of need? It gives you tools and options to reset, restore, and tinker with Windows 10 to bring it back to life. Here are the things you can do with a Windows 10 recovery USB drive:
NOTE: If you don’t know what a Windows recovery drive is and how to make one, read this guide first: How to create a USB recovery flash drive for Windows 10. Even if your computer can’t start, a Windows 10 recovery drive can help you troubleshoot problems and even reinstall Windows.
How to start the recovery USB drive for Windows 10
To take advantage of the Windows 10 recovery USB drive, you first have to boot your system from the drive you created. Insert the recovery USB drive into your PC and make sure that it boots from it during the next restart. When loaded, the recovery drive first shows the options for the keyboard layout that you prefer using. Find the language you want to use for typing in the recovery environment, and click or tap on its name. If your keyboard layout is not shown on this first screen, go “See more keyboard layouts.” For most people, the “US” layout works well, even if they are not English speakers.
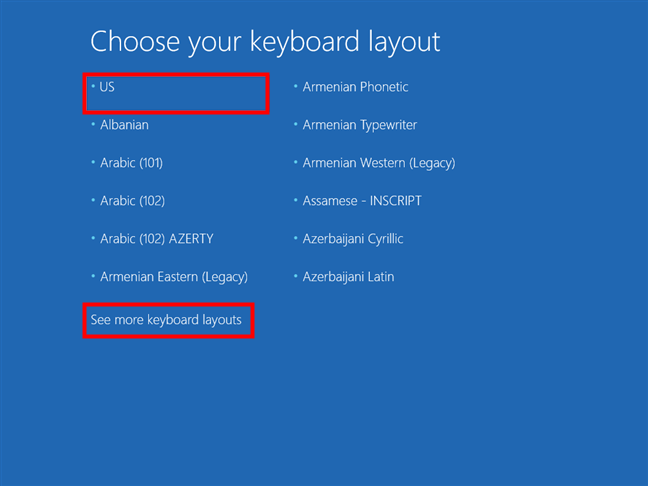
Choose the keyboard layout used by the Windows 10 recovery drive
The tool is started, and we are ready to restore Windows 10 from the USB stick or perform other recovery tasks. So, let’s see all the things you can do with the Windows 10 recovery USB drive:
1. Use the recovery USB drive to reset Windows 10
The reset of Windows 10 deletes all your personal files and settings from the computer. There are two reasons to run the reset:
- You want to get rid of all your files and changes to the settings in Windows 10. This is recommended as a drastic way to start fresh. It can improve the performance of Windows 10 if you have accumulated many system changes and your computer has gotten slower.
- You want to give your computer to someone else, while protecting your privacy. When performing the reset, your personal data and settings are not made available together with the PC.
On the “Choose an option” screen, choose “Recover from a drive.”
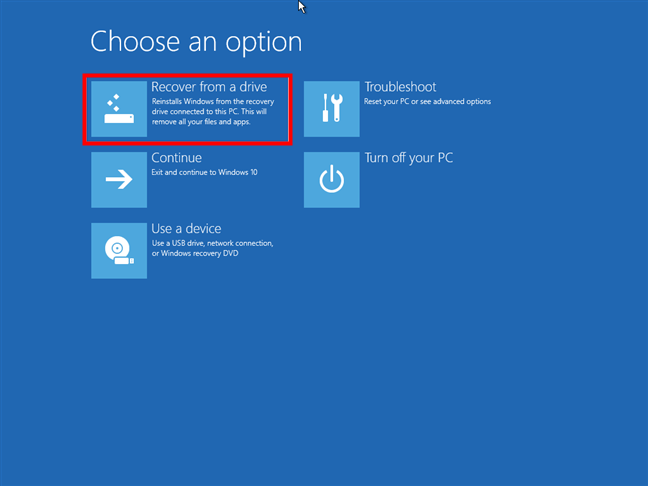
Recovering Windows 10 from a drive
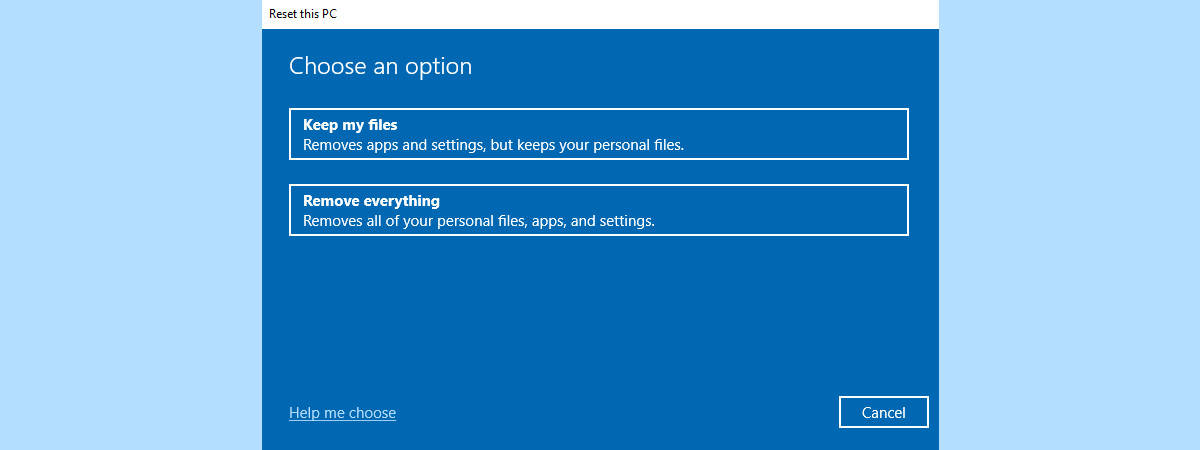
You are given two reset options:
- “Just remove my files” - personal files are deleted, and the Windows 10 settings are reset to their defaults. However, your personal files can still be restored using a data recovery tool.
- “Fully clean the drive” - makes sure that your data and settings are not available after you are done. The data is thoroughly deleted, and the common recovery tools are not able to restore it any longer. This is the best option if you want complete privacy. However, the process takes a lot longer to perform.
Select the option that fits your needs.
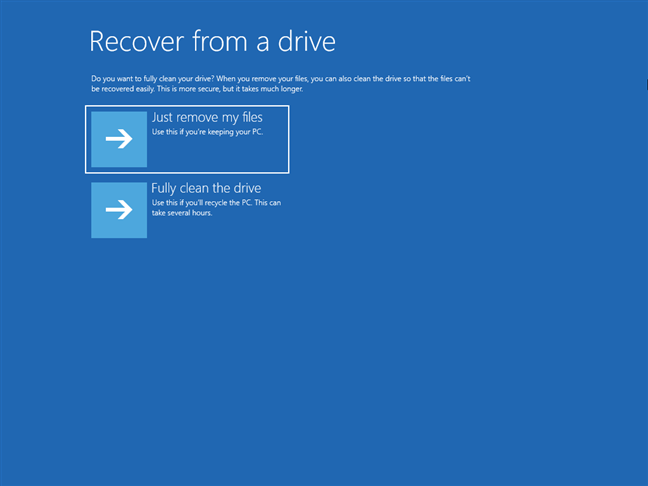
Resetting Windows 10 from the recovery drive
Windows 10 runs a bit of preparation, and when it’s ready, it presents you with the final confirmation of the resetting process. Click or tap “Recover” to start.
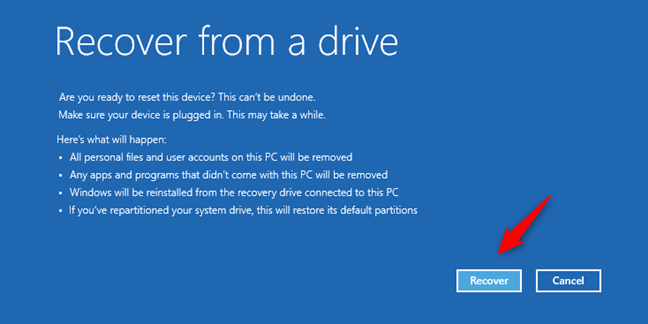
Resetting Windows 10 from the recovery drive
NOTE: If you’d rather do a clean Windows 10 install, follow these steps instead: How to install Windows 10 from DVD, USB, or ISO file.
2. Use the recovery USB drive to restore Windows 10 to a previous state
Windows 10 creates restore points that allow you to roll back changes that make your system malfunction. It is a good idea to create restore points on a regular basis and especially before any major hardware or software upgrades.
When everything seems lost, a system restore can be a lifesaver, allowing you to go back and recover your system from a bad driver, a botched Windows 10 update, or a nasty app. On the “Choose an option” screen, select Troubleshoot.
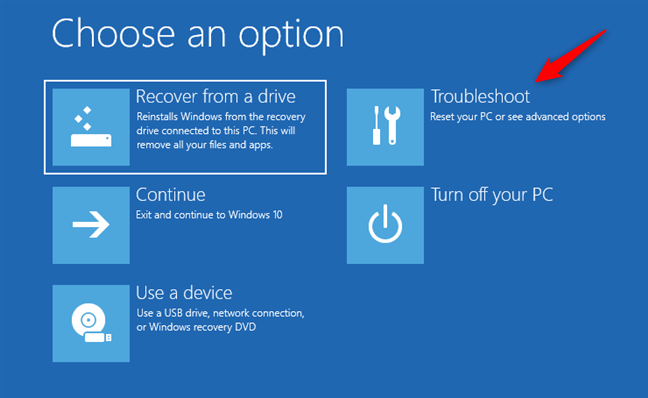
The advanced options offered by the Windows 10 recovery drive
On the “Advanced options” screen, click or tap on the “System Restore” option.
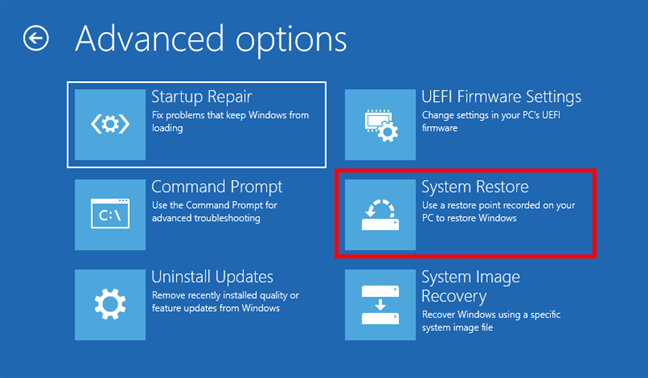
Accessing System Restore from the Windows 10 recovery drive
For the full procedure of working with system restore from a recovery drive, see How to do a Windows System Restore from the boot without reaching the desktop.
3. Use the recovery USB drive to go back to a previous version of Windows 10
Windows 10’s recovery USB drive also allows you to uninstall the last quality or feature updates. On the “Advanced options” screen, click or tap on “Uninstall Updates.” Note that in versions of Windows 10 before October 2020 Update, this option was called “Go back to the previous version.”
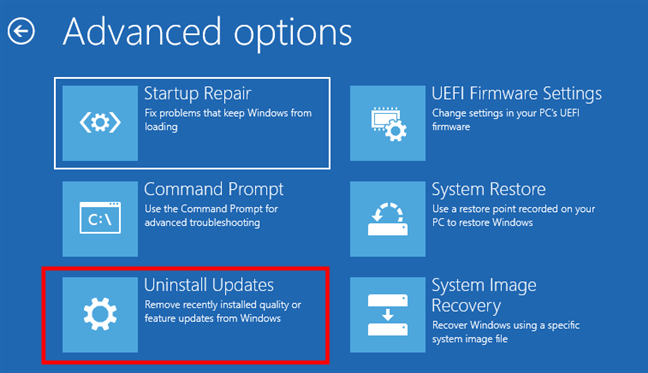
Uninstall Updates from Windows 10
Next, the Windows 10 recovery USB drive gives you two options: “Uninstall latest quality update” and “Uninstall latest feature update”. Select the one you want.
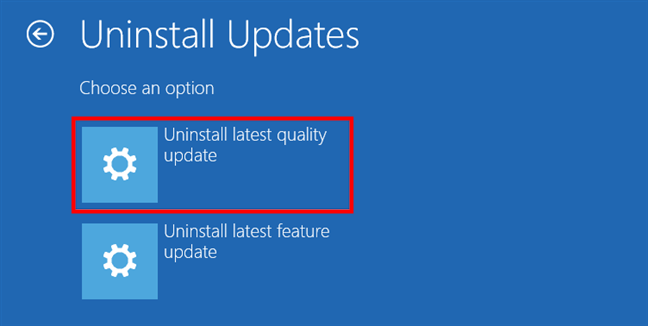
Choose to uninstall latest quality or feature update
On the next screen, if you chose to uninstall the latest quality update, you are notified that your personal files, apps, and settings are not going to be affected. On the other hand, if you chose to uninstall the latest feature update, you are warned that you’re going to lose all that. In both cases, confirm that you want to continue by pressing the “Uninstall quality update” or “Uninstall feature update.”

Uninstall quality update using a Windows 10 recovery USB drive
Then wait for the Windows 10 update to be removed from your PC.
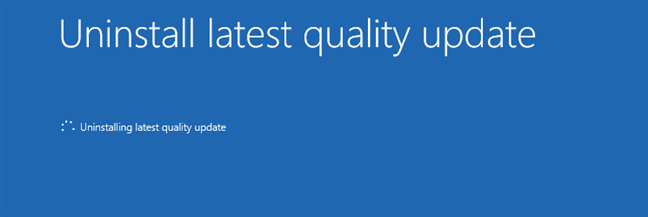
Windows 10 is uninstalling latest quality update
When the process is over, you’re notified, and you can push Done and reboot your Windows 10 PC. Hopefully, everything works as it should now.

Latest quality update has been uninstalled from Windows 10
NOTE: If this doesn’t work, you might want to enter Safe Mode and uninstall even more updates from Windows 10 to try to repair it.
4. Use the recovery USB drive to replace Windows 10 and your data with a system image
Windows 10 can create an image of the entire partition where it is installed together with all the apps and personal files stored there. The system image is a full copy of the system partition and, in the backup file, there is no differentiation between the system and personal data. When you use the recovery drive to recover Windows 10 with a system image, all system and personal data are replaced with what was available at the moment of the backup. Any changes made since this backup are lost.
You can access the system image recovery tool from the “Advanced options” screen by clicking or tapping on “System Image Recovery.”
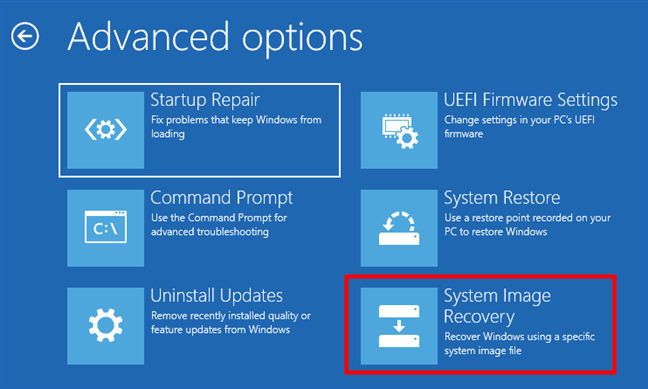
Using System Image Recovery from a Windows 10 recovery drive
On the following screen, select the operating system that you want to restore. This launches the system image restoration app where you complete the recovery.
5. Use the Windows 10 recovery USB drive to repair the system’s startup
When Windows 10 has problems starting up, you can fix them from the recovery drive. To repair the startup, on the “Advanced options” screen of the recovery drive, choose “Startup Repair.”
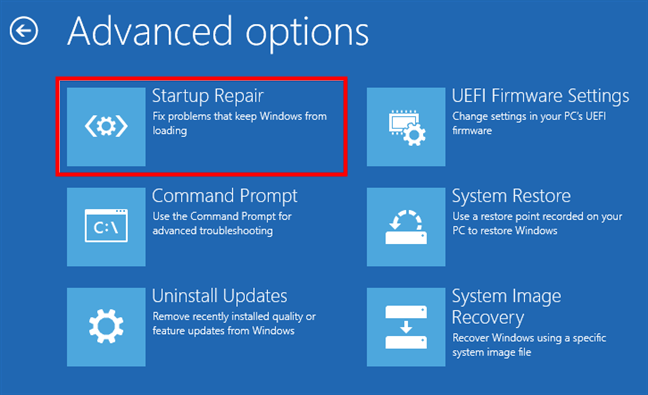
Startup Repair using the Windows 10 recovery drive
On the next screen, select the operating system that you want to restore. The troubleshooting program of Windows 10 runs for a few minutes showing the “Diagnosing your PC” message, as you can see in the screenshot below.
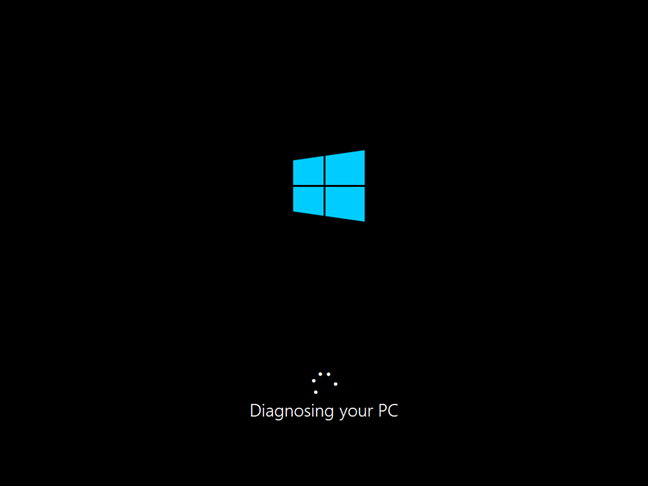
Diagnosing your PC using the Windows 10 recovery drive
When it is done, it presents you with the repair options identified for your system. If it is not able to identify problems and fixes, it offers you the option to go back to the recovery tool.
6. Use the Windows 10 recovery USB drive to launch Command Prompt
The launch of the Command Prompt from the recovery drive, on the “Advanced options” screen, click or tap “Command Prompt.”
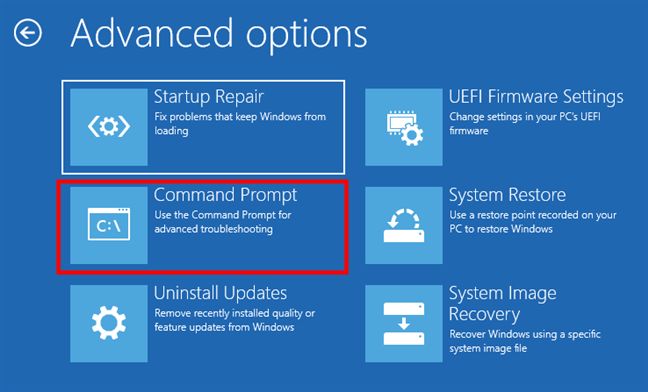
Starting the Command Prompt from the Windows 10 recovery drive
The Command Prompt window shows up, and you can start typing commands. When you are done, type the command “Exit” to go back to the Recovery tool.
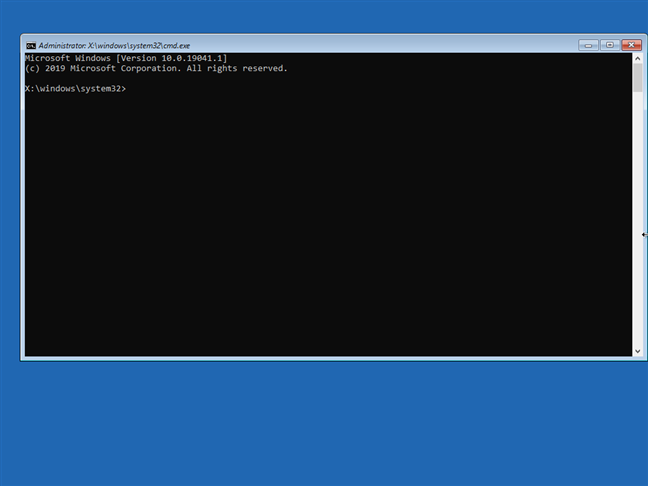
The Command Prompt from the Windows 10 recovery drive
If Windows 10 has trouble booting and Startup Repair can’t fix the problem, it’s worth trying the Bootrec.exe tool in Command Prompt to fix boot records.
7. Use a Windows 10 recovery USB drive to access BIOS or UEFI
Making changes in the UEFI firmware or the BIOS of your Windows 10 PC or device can be necessary to make the system usable again. The recovery drive offers a way to access the UEFI or BIOS. In the “Advanced options” screen, click or tap “UEFI Firmware Settings.”
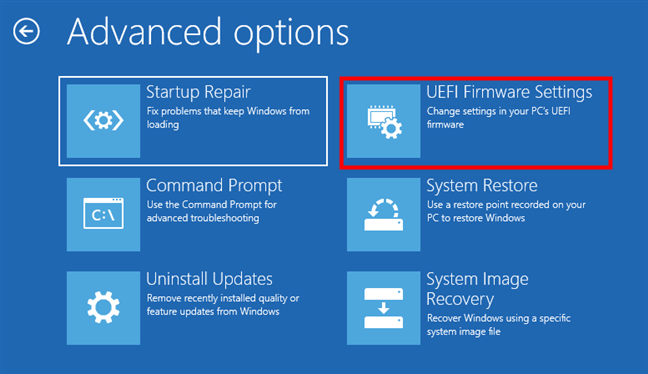
Accessing the UEFI Firmware Settings using the Windows 10 recovery drive
Next, click or tap Restart to start the process.
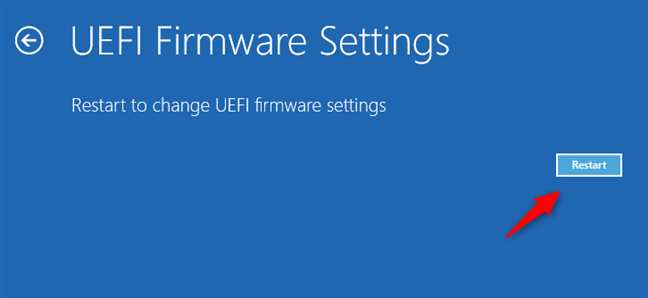
Restart to change UEFI Firmware settings using the Windows 10 recovery drive
After the restart, your PC or device loads the BIOS or UEFI settings where you can make changes.
Did you fix your problems with Windows 10?
The Windows 10 recovery USB drive is an essential tool for the troubleshooting of a system with crashes and problems. When Windows 10 fails to start or work correctly, the recovery drive gives you options to fix your problems. Try it out, see how it works, and let us know about your experience with the Windows 10 recovery drive. Did it manage to help you fix your problems with Windows 10?


 16.03.2021