Having multiple users on a Windows 11 computer is a great way to ensure each person who uses it has a pleasant experience and keeps their files, settings, and apps separate from others. However, this leads to a problem: not everyone knows how to switch the user when it’s their turn to sign in to Windows 11, which can cause data loss and, sometimes, even family conflicts. To help with this issue, I have created this complete guide with all the methods I know for changing the user in Windows 11, whether you’re using it on a laptop, a PC, or some other type of device:
IMPORTANT: When you switch the user in Windows 11, the previously used user account stays signed in. If the new user shuts down the computer, the work of the initial user might get lost because that user may not have saved their data or closed their running apps. Furthermore, the apps opened by the first user continue to run in the background, using hardware resources that may be required for the current user and the apps they’re using. Therefore, I recommend signing out from Windows 11 and logging in with a new user instead. This ensures the initial user is logged off and all their apps are closed. However, if you’re only going to use the device for a limited amount of time and prefer using Switch user instead of Sign Out > Switch user > Sign in, keep reading this guide.
1. How to switch the user in Windows 11 on the login screen
After Windows 11 loads on your laptop (it doesn’t matter who makes it: HP, Dell, Lenovo, ASUS, etc.) or PC, it first displays the Lock screen. Here, you see the date and time and possibly a beautiful wallpaper, like the one shown below. To see the login options, click or tap anywhere on the Lock screen or press any key on your keyboard.

The Lock Screen displays beautiful wallpapers
TIP: If you want to personalize Windows 11, here’s how to change the Windows 11 Lock Screen wallpapers.
Now you see the Login screen showing the user accounts available on your Windows 11 PC, laptop, or device. Simply click or tap on the user you want to switch to, and Windows 11 will request the last sign-in method used for the selected account: the password, PIN, picture password, etc. Enter the requested information to sign in to Windows 11.
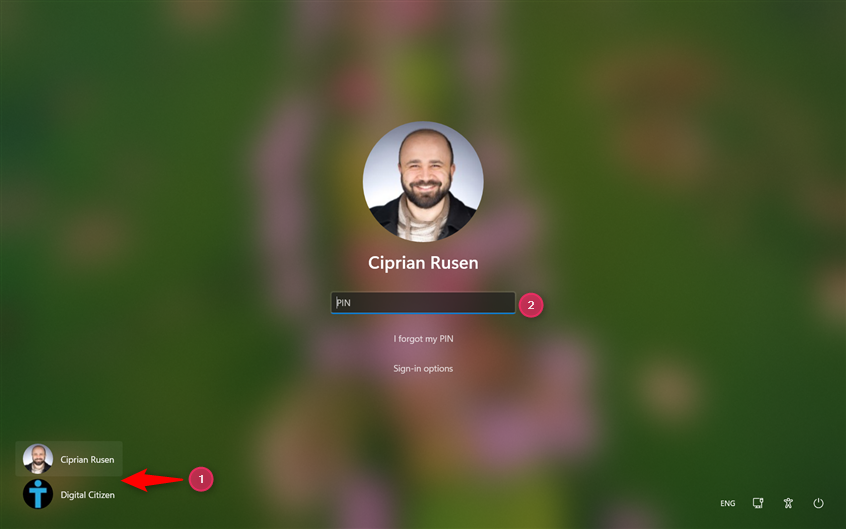
Choose the user on the Sign-in screen
IMPORTANT: If Facial recognition (Windows Hello) is enabled and your device detects your face, you may be automatically logged in. If this happens and prevents you from switching users, make sure you disable or block the camera, then try again.
In case you need to change the sign-in method for the selected user, click or tap the Sign-in options, choose the method you want to use, and enter the information required to sign in.
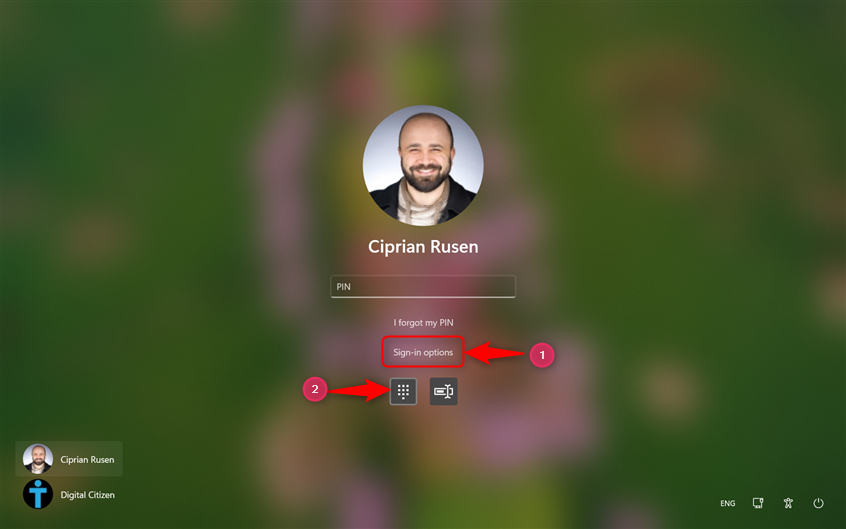
Switch the Sign-in options
After successfully signing in, Windows 11 shows you the desktop, and you can start using your PC.
2. Switch the user in Windows 11 using a keyboard shortcut (Windows + L)
If you need to leave your computer for a short while but want to make sure no one can access your data while you are away, you can lock your account by pressing these keys simultaneously:

Press Windows + L
This action locks your Windows 11 computer or device and displays the Lock screen, from where you can change users. Click or tap anywhere on the Lock screen to see the Login screen and choose the account you want to switch to. Enter the necessary login information, and you’re done.🙂
3. How to switch the user in Windows 11 from the Start Menu
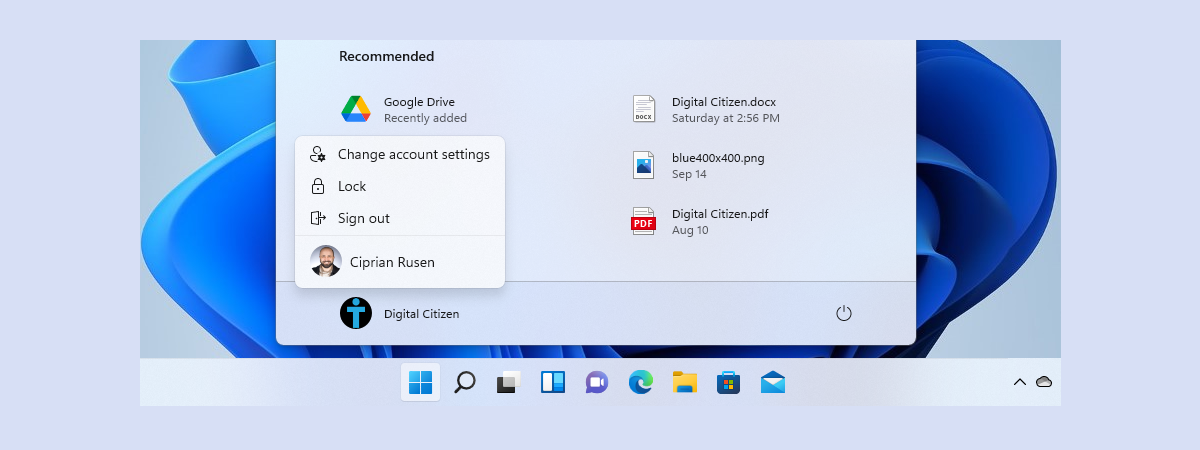
The Start Menu is a good place to switch users if you are already logged in. First, press the Windows key on your keyboard or click the Start button on the taskbar to open the Start Menu. Next, click or tap on your user name in the lower-left corner of the menu. This brings up a contextual menu that includes a list of all active users on your Windows 11 device. Click the user you wish to switch to, and you are immediately taken to the sign-in screen, where you are asked to enter the login information for the selected user.
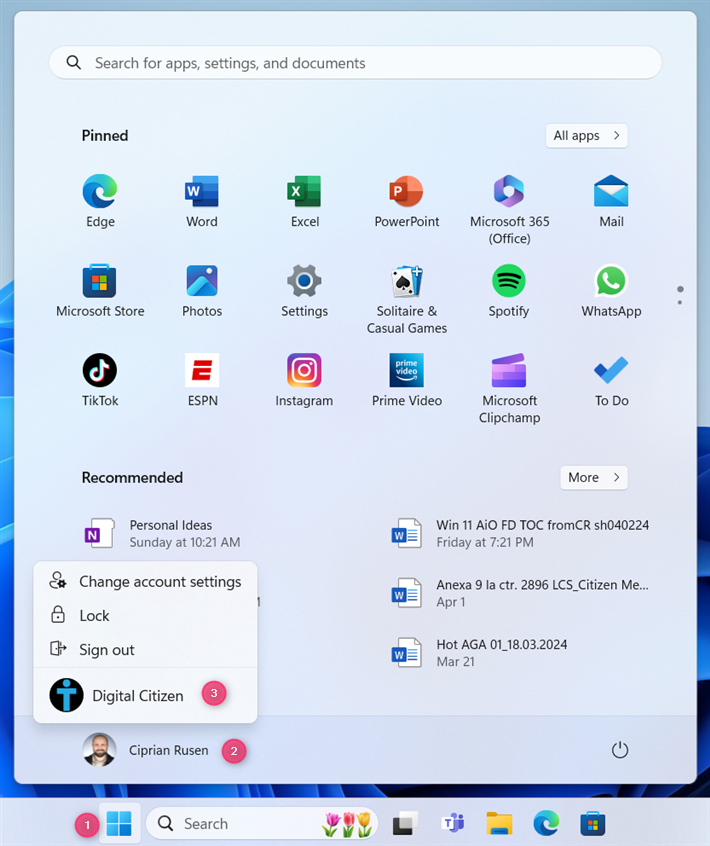
Switch the user from the Start Menu
NOTE: Remember that you can switch between sign-in options by clicking or tapping Sign-in options and selecting the one you want to use.
4. Switch the user in Windows 11 from CMD, PowerShell, or Windows Terminal
If you need to work inside the Command Prompt, PowerShell, or Windows Terminal, there are two commands you can use to switch the user. Open CMD or the command-line app you prefer, type this command, and press the Enter key to run it:
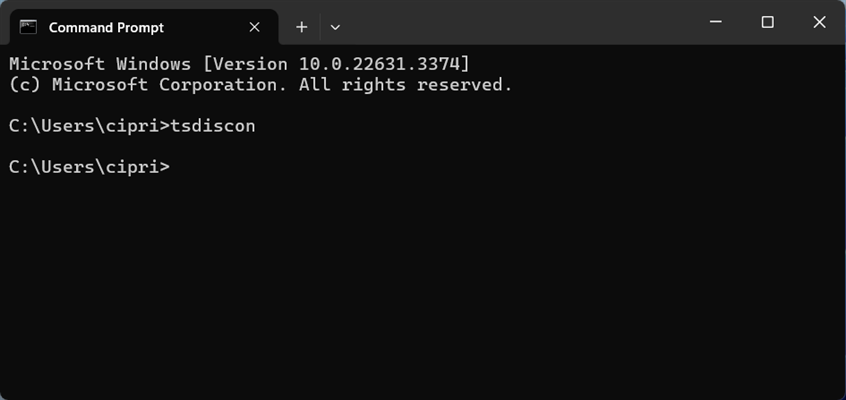
Run tsdiscon in CMD to switch the user
When you run tsdiscon, the current user is locked, and you are shown the Lock screen. Here, you can change the user and log in with a new one: click or tap anywhere on the screen, select the new user you want to use, and enter their sign-in information.
Note, however, that this method doesn't work in Windows 11 Home. When you try to run it on this edition of Windows 11, you receive this error: “tsdiscon is not recognized as an internal or external command, operable program or batch file.” This command can be used only in Windows 11 Pro, Windows 11 Enterprise, and other editions.
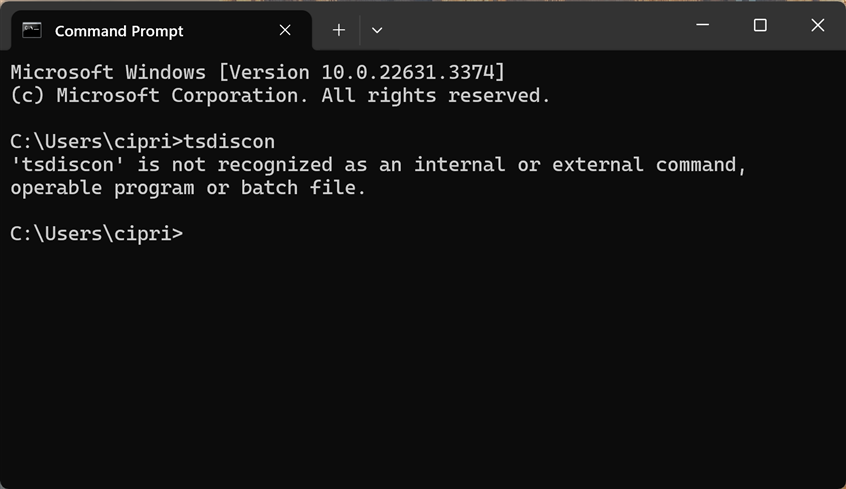
tsdiscon doesn't work in Windows 11 Home
Luckily, you can use another command that works in all editions of Windows 11:
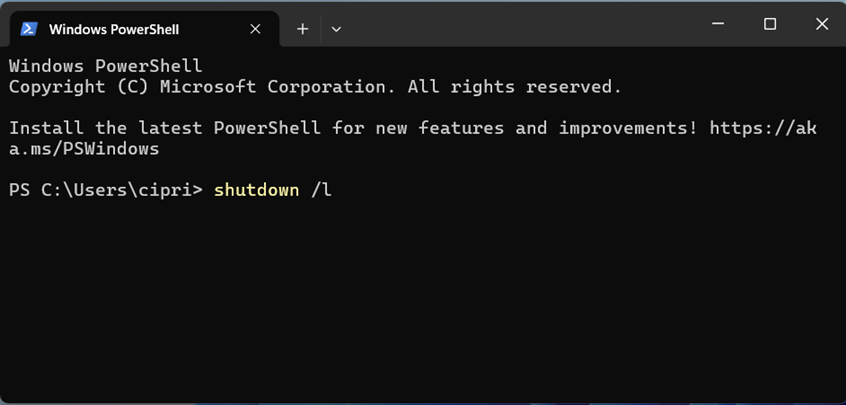
Run shutdown /l in PowerShell or CMD
This command doesn’t lock the computer. Instead, it signs you out from the current user and lets you sign in with another one. You can run it in PowerShell, Windows Terminal, or Command Prompt.
When you see the Lock screen, click or tap anywhere on the screen, and then choose the user you want to switch to.
5. How to switch the user in Windows 11 with Ctrl + Alt + Del
Another way to switch users if you are already logged in to Windows 11 is with the good old...
Press this key combination on your keyboard, and the Ctrl Alt Delete screen pops up. Click or tap Switch user.
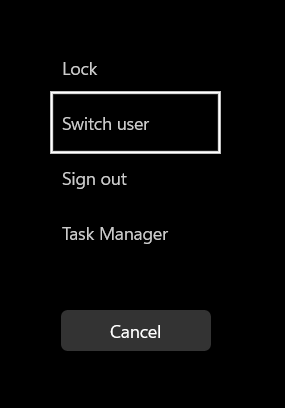
Select Switch user on the Ctrl Alt Delete screen
You are shown the Login screen, where you can choose the user you want to use and enter the login credentials.
TIP: If there are multiple people using your computer, and not everybody has their own user account, here’s how to create and add a new user in Windows 11.
6. Switch the user using the ALT + F4 keyboard shortcut
Although this is a useful keyboard shortcut that you can use to switch users, its downside is that it works only if you are already logged in with a user account. First, go to the Windows 11 desktop, make sure all apps are minimized, and press these keys:
The Shut Down Windows prompt pops up, asking you to choose what you want Windows 11 to do. Click or tap the drop-down list to see more options.
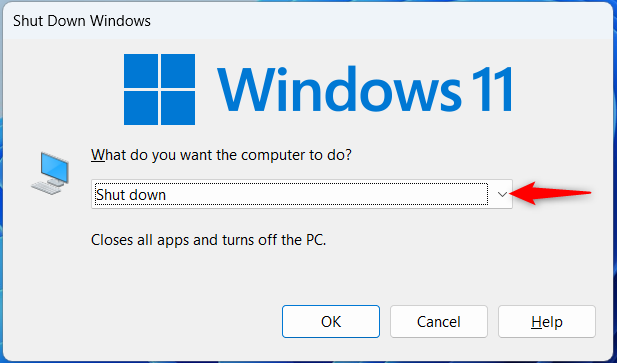
Shut Down Windows
In the list, select Switch user, and click or tap OK.
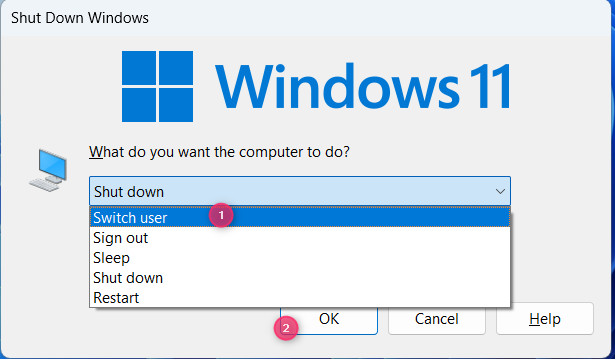
Select Switch user and press OK
You are greeted by the familiar sign-in screen. Select the user you want to switch to from the list in the lower-left corner and enter the requested login information.
7. How to switch the user in Windows 11 from the Task Manager
This method is a bit complicated, but it works, so I decided to be the last I include in this guide:
Start by opening the Task Manager (a quick way to do this is to press Ctrl+Shift+Esc on your keyboard). Then, go to the Users tab on the left, and right-click (or press and hold) the user account you want to switch to. In the menu that pops up, choose Switch user account.
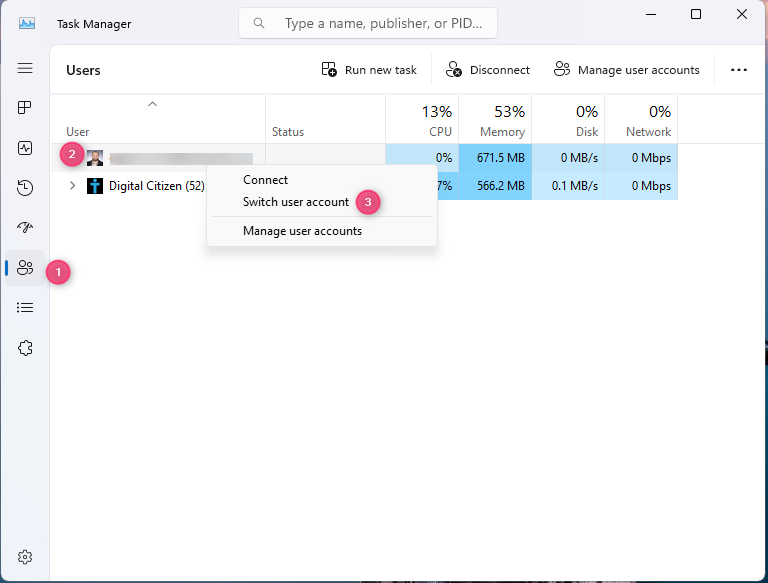
Switch user account from Task Manager
If you don’t see another user account on this list, it’s because it didn’t sign in earlier to Windows 11. In this situation, you can right-click (or press and hold) on your user, choose Disconnect, and confirm your choice. This action will sign your user out of Windows 11.
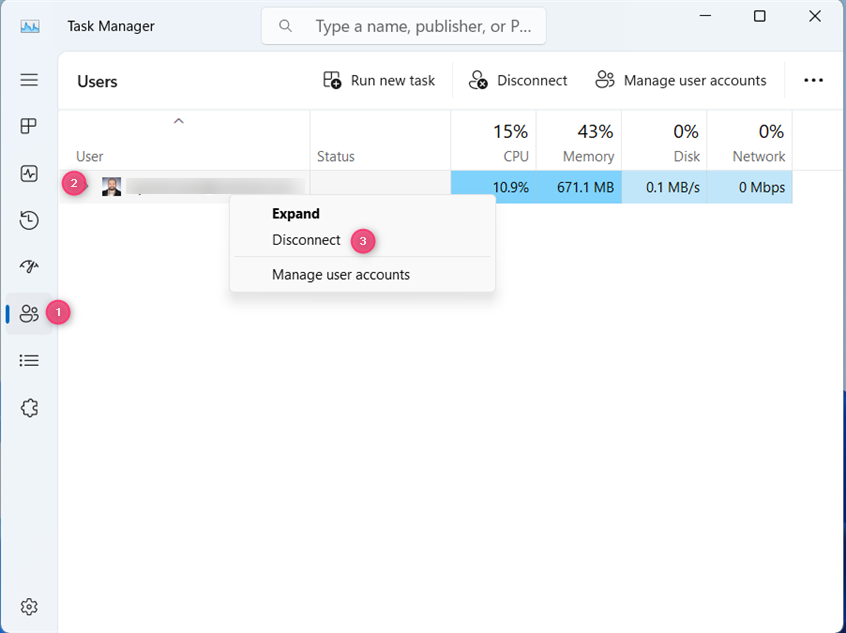
Disconnect from Task Manager
You then see the Lock screen. Click or tap on it, then choose the user you want to switch to.
TIP: If you have too many user accounts on your Windows 11 computer, here’s how to remove an account from Windows.
How do you prefer to switch users in Windows 11?
Now you know seven ways to switch users in Windows 11. These methods work on all Windows 11 devices, from standard desktop computers and laptops to tablets and 2-in-1 devices. Try them all, see which ones you prefer, and then let me know in a comment using the options below. I prefer switching users using the Windows + L keyboard shortcut. I find it fast and easy. What about you?


 16.04.2024