In Windows 10, you can use one of the five built-in view templates to have File Explorer display a folder's contents just the way you like them. This helps you optimize the way you see the files stored in that folder for increased efficiency and can also reduce the time it takes to open certain folders. This tutorial illustrates how to change the File Explorer view template of any folder in Windows 10:
First things first: About folder view templates in Windows 10
By default, Windows 10 detects the type of files in a folder and, based on the folder's contents, automatically sets a view template for it in File Explorer. There are five folder view templates in Windows 10: General items, Documents, Pictures, Music, and Videos. Each of them displays relevant details and options for the files they store.
When a folder is created, it usually starts with the General items template or uses the same template as its location (e.g., folders created in the Music library use the Music view template). As you add more files to it, the folder's view template changes automatically based on the type of the majority of files included in it. Add images, and the folder view template becomes Pictures, add files that contain text, the template is set to Documents, and so on.
TIP: To learn more about different folder view templates and how to customize them, read our tutorial about configuring the default templates to suit your preferences.
While this is normally helpful, it can become a problem if folders with a lot of files are detected as Pictures or Videos - the templates that display large icons in File Explorer. Every time you open such a folder, Windows 10 also has to display thumbnails for each file stored in it, so the folder takes longer to open.
If accessing one of your folders takes time you don't have, or if you simply want to modify which details are shown when you open certain folders, you can easily switch how you view them by following the steps below.
How to change a folder's view template in Windows 10
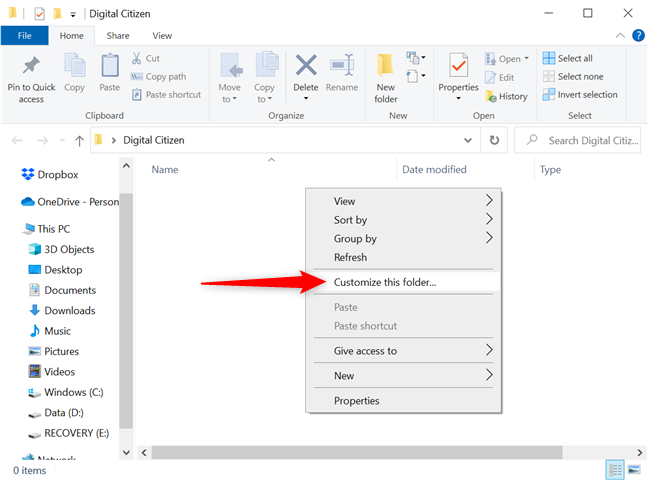
Use File Explorer to open the folder whose view template you want to change. Then right-click or press-and-hold on an empty area in that folder to open its contextual menu. Click or tap on "Customize this folder."
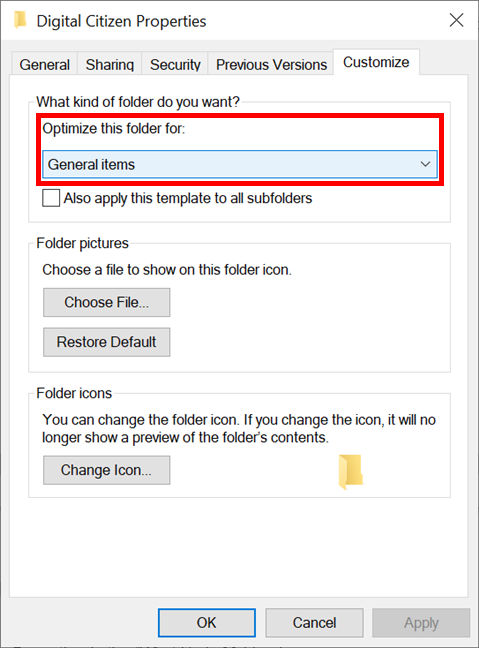
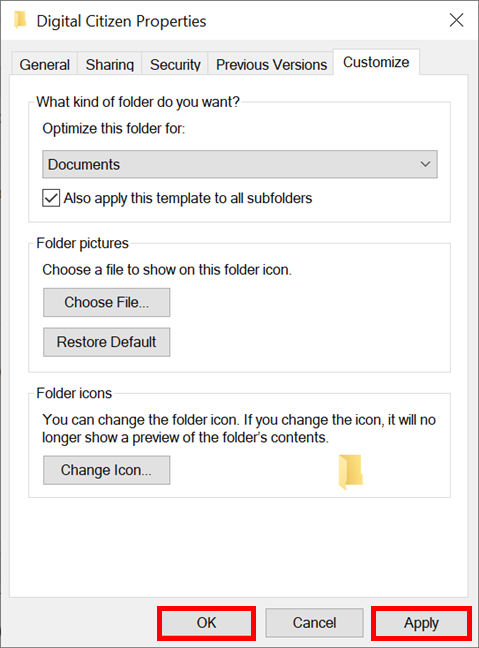
The folder's Properties window opens in the Customize tab.
In the "What kind of folder do you want?" section, click or tap on the field under the "Optimize this folder for" option.
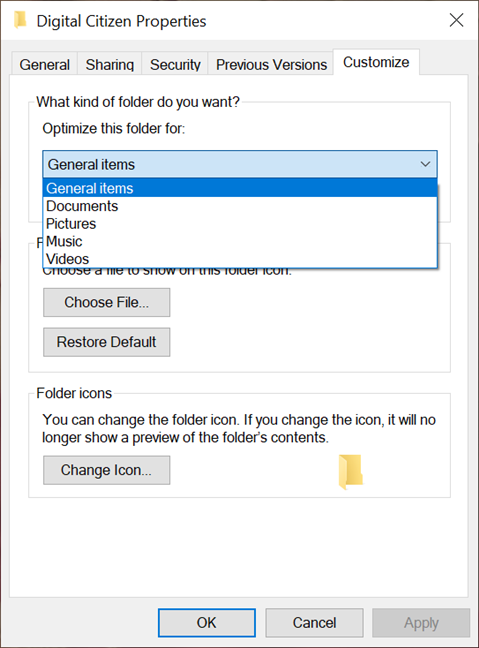
This opens a dropdown menu with the five folder view templates. Select the one you want to apply to your folder.
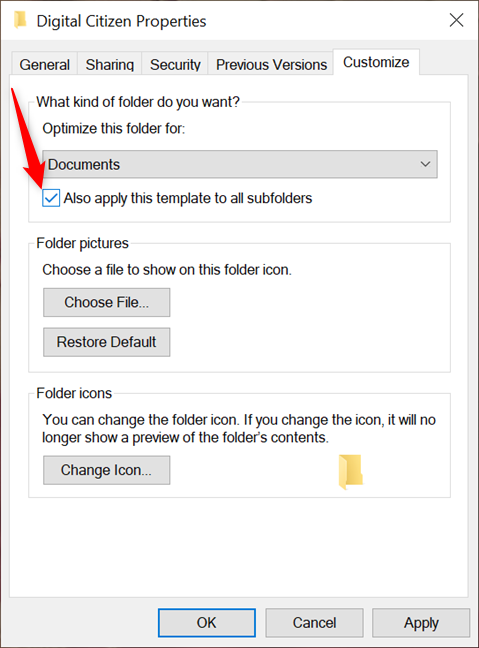
If you want to use the same template for all the subfolders in your folder, check the box next to the "Also apply this template to all subfolders" option.
When you are done, click or tap OK or Apply to save your changes.
The view is now optimized for the content type you selected, and Windows 10 automatically applies the corresponding template each time you open your folder (and its subfolders, if you also enabled the box).
TIP: If you also want to change the icon of the same folder (or any other folder), read: How to change a folder icon in Windows 10 in 3 easy steps.
What folder did you customize?
Changing the view template for your folders offers flexibility to how you see your data in Windows 10, helping you navigate and find files more efficiently. We hope Microsoft eventually introduces the option to create and name templates, as that would be both helpful and fun. Before you close this tutorial, let us know what folder you optimized. Was it taking forever to open or did you just want to keep things tidy? Leave a comment with your answer in the section below.


 05.08.2020
