Windows 11 includes many features and settings, and some of them can be looked upon as intrusive by privacy-concerned folks. The good news is that Windows 11 also provides us with plenty of switches and settings that let us control what hardware devices and what features Windows 11 can access. These are called Windows permissions and App permissions. In this guide, we’re going to show you how to check and set permissions in Windows 11:
What are Windows and app permissions in Windows 11?
Windows permissions are controls available in the Settings app that allow you to control what Windows 11 can access and use on your computer. These permissions mostly refer to features that contain some degree of personal information, which you may or may not want to allow Windows 11 or Microsoft access to. For example, your advertising ID, activity history, voice patterns, etc.
App permissions allow the user to control the access to hardware components or Windows features for each app separately. Windows 11 lets you set app permissions for many types of hardware and features, ranging from microphone to webcam, location, email, or even your calendar.
When installing an app or using some of its features, that app might ask for permission to access some hardware components or Windows 11 features.
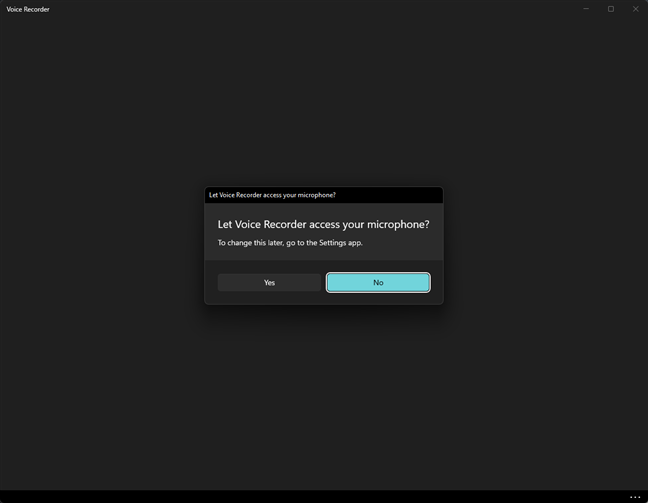
An app requesting access to the microphone in Windows 11
In many cases, that’s OK and is something you should do for that app to operate properly. However, in other cases, some apps might ask for permissions to things they don’t really need or you don’t want to give them access to. For example, you should give the Camera app access to your webcam, but you might not want to give Cortana access to your Microphone if you don’t intend to use her.
Read the following sections of this tutorial to see how to access and set Windows and app permissions in Windows 11.
How to access an app’s permissions in Windows 11
If you want to change the permissions of an app in Windows 11, you must first get to them. The most straightforward way to access an app’s permissions is from the Start Menu. Open the Start Menu and locate the app in the Pinned section or in the All apps list. Once you find it, right-click or press and hold its shortcut, and click or tap App settings in the contextual menu. Note that, if you found the app in the All apps list, in the contextual menu, you must first select More, and only then press App settings.
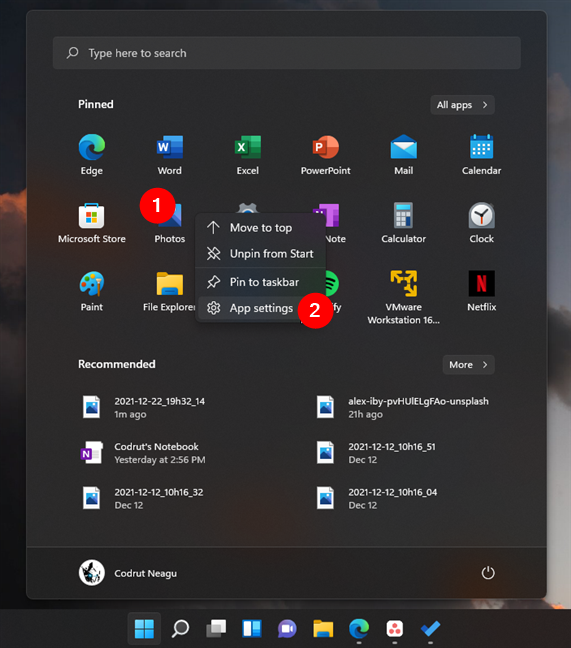
Open the App settings of an app in Windows 11
This makes Windows 11 launch the Settings app on that app’s page. There, you can immediately see its App permissions. Here’s what they should look like:
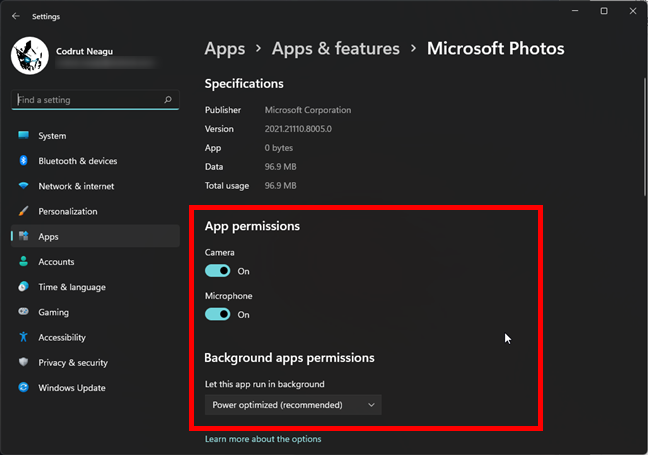
App permissions of an app in Windows 11's Settings
There’s also another method to access app permissions in Windows 11, but it’s not as straightforward. Here’s how it goes:
Open the Settings app, select Apps on the left side of the window, and click or tap on Apps & features on the right.
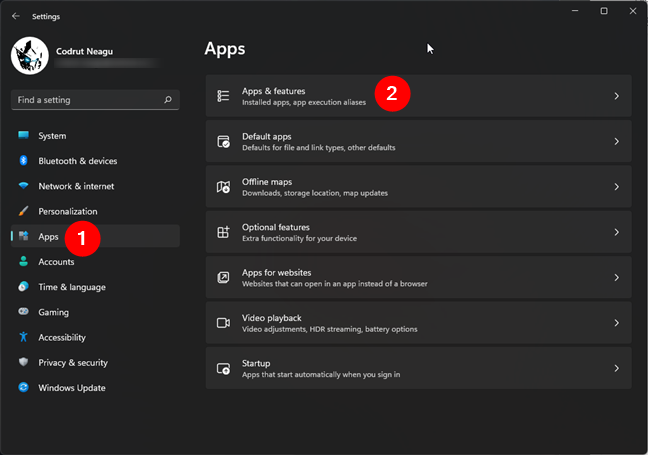
Open Apps > Apps & features in Windows 11's Settings
On the Apps & features page, search or scroll through the App list to find the app you want. Then, click or tap the button that looks like three stacked dots from its right side. In the menu that shows up, select Advanced options to see the app permissions section.
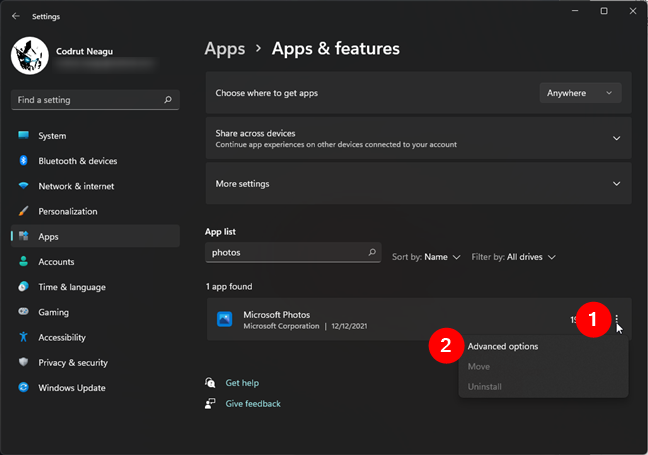
Advanced options of an app in the Windows 11 Settings
How do you change an app’s permissions in Windows 11?
On the app’s settings page, Windows 11 allows you to set that app’s permissions using simple switches that you can enable or disable as you want. For example, if you want the Microsoft Photos app to be able to access your webcam, you need to turn the Camera switch on. But, if you don’t want to allow it to access your microphone, turn the Microphone switch off.
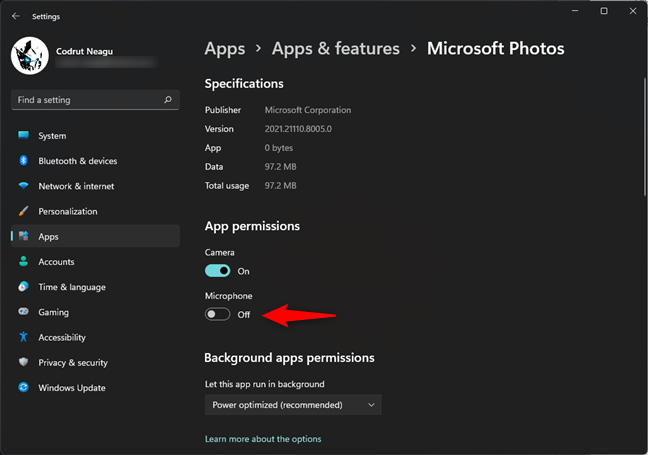
How to change app permissions in Windows 11
A special kind of permissions in Windows 11 are the Background apps permissions. This is a setting that allows you to specify whether and how an application can run in the background. The permissions you can set here are:
- Always lets the selected app run in the background no matter what.
- Power optimized, which is also the recommended option, lets the app run in the background, but limits its power usage when your device runs on batteries.
- Never denies the selected app from running in the background.
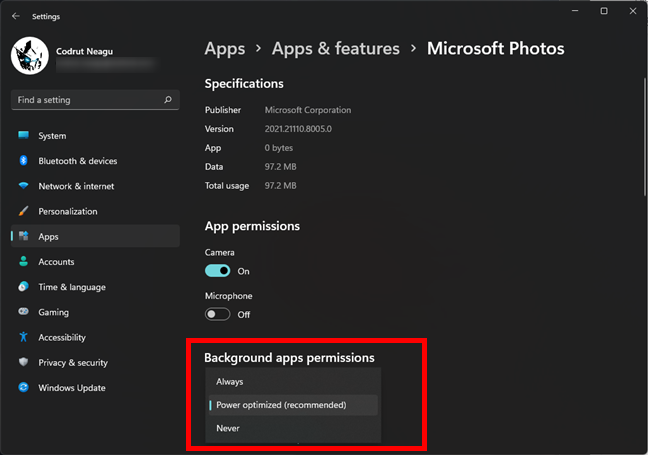
Background app permissions
NOTE: You should pay extra attention when you decide to change app permissions. If you deny an app access to hardware or features that it really needs to do its job right, you might break its functionality. For example, if you choose to deny the Background apps permissions for Diagnostic Data Viewer, it may be unable to collect all the diagnostic information it could while running in the background on your computer.
How to access Windows permissions and App permissions (by category)
Besides letting us access app permissions individually, Windows 11 also has a special location for controlling system-wide Windows and app permissions by category. Here’s how to get there:
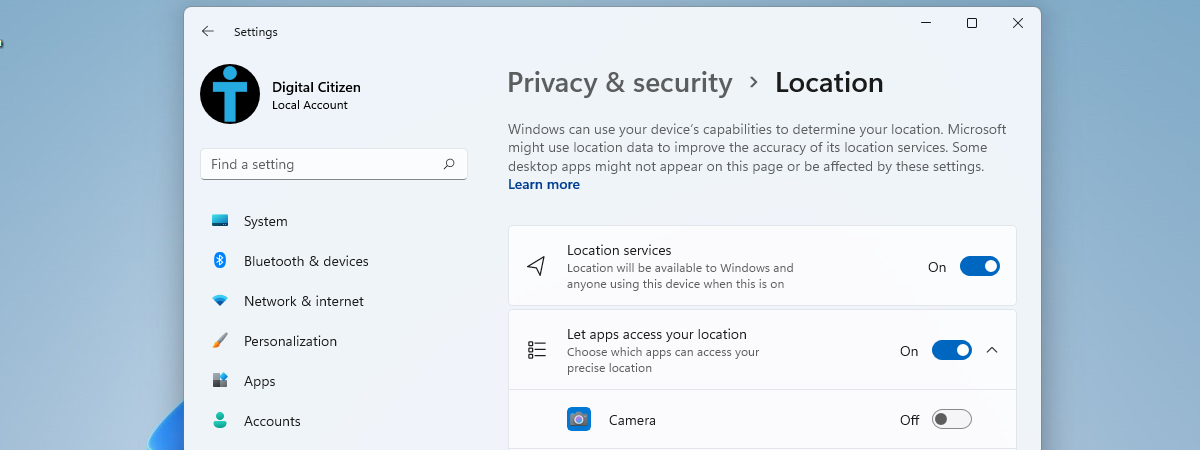
On your Windows 11 PC, open the Settings app (Windows + I) and select Privacy & security on the left sidebar. On the right panel, scroll until you get to the Windows permissions or App permissions list, depending on which interests you, and select one of the options in it. Each entry corresponds to a type of Windows or app permission. For example, if you want to let apps show you personalized ads, open the General entry under Windows permissions. Or, if you want to see and control which apps are allowed to use your microphone, select the Microphone option. There are many controls and switches available here, in Windows permissions and App permissions, so it’s best to just take your time and browse through all of them until you find all the privacy and security controls you want.
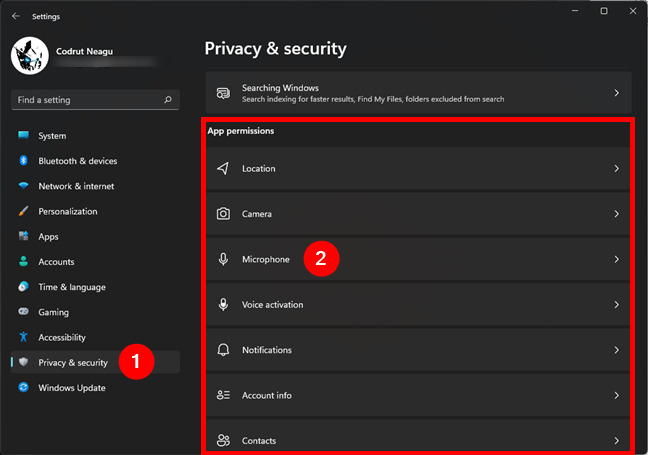
Control apps access to a device or feature in Windows 11
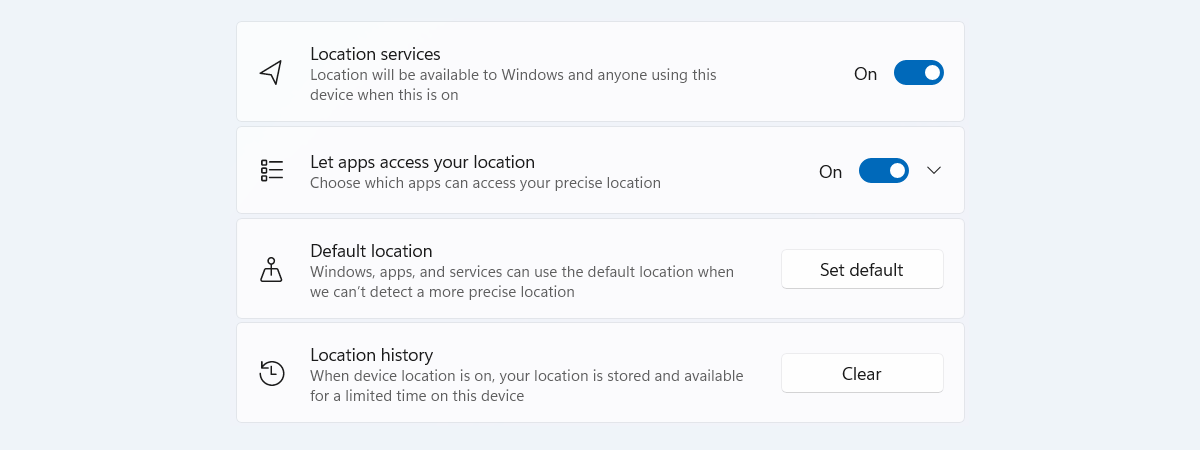
Similarly, you can choose to see and control any other type of app permissions, like Location, Camera, Contacts, etc.
How do you give permissions to apps in Windows 11 by category?
Once you’ve selected an option from the App permissions list, the Settings app shows you all the things you can set for it. Let’s take, for example, the Microphone entry. When you get to its page, Windows 11 lets you choose whether you want to let people using your PC and its apps access the microphone, or you’d rather deny all from using it. All this can be controlled all at once by turning the Microphone access and “Let apps access your microphone” switches on or off, at the top of the page.
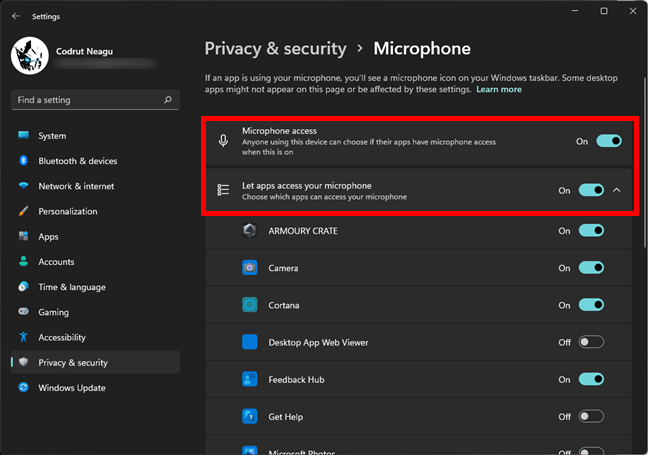
Let or deny people and apps from using a device or feature
However, you may want to control only which apps can use your microphone (or the device/feature you selected in the App permissions list). In that case, scroll down the list under the “Let apps access your microphone [or the option you chose]” switch. It shows you all the apps that can access and use that device or feature. Each of them comes with a switch that you can toggle to allow or deny it access. For example, if you don’t want Cortana to be able to use your microphone, set its switch off. Or, if you want to allow the Camera app to use it, enable the switch on its right.
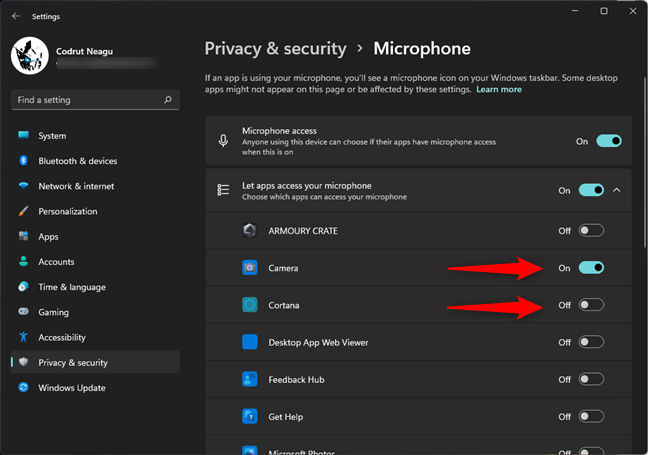
Set permissions for apps in Windows 11
That was it: you can follow the same steps to set permissions for all the apps and Windows features.
Which app permissions did you change?
Now you know more about what app permissions are in Windows 11, how to access them, and how to change app permissions. What made you search for information on this subject? Did you want to control the permissions of only one app that behaved strangely on your Windows 11 device? Were there many apps or a certain device that you worried about in terms of privacy? Let us know in the comments below.


 12.01.2022