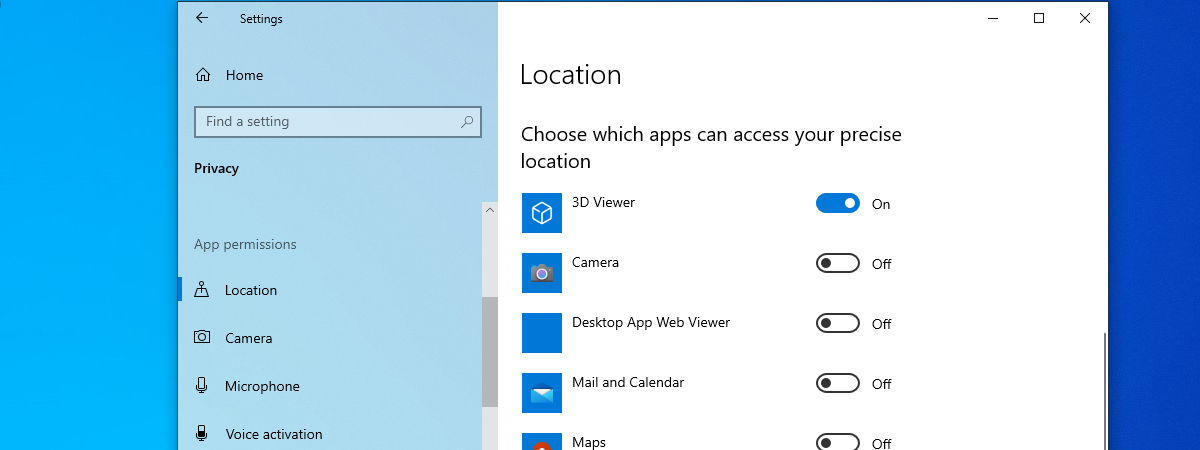
Just like Android and iOS, Windows 10 has a built-in feature called App permissions. Maybe you’ve heard about permissions and have an idea of what they do, but do you know exactly how to get to them and how to set app permissions in Windows 10? This tutorial explains what app permissions are, what types of app permissions are available in Windows 10, and how to set app permissions individually, for specific apps, and systemwide for all apps that can use a certain device or Windows 10 feature. Are you interested? Then, read on:
What are app permissions in Windows 10?
App permissions are settings from Windows 10 that let specific applications access certain devices connected to your computer or particular features available in the operating system. Windows 10 allows you to set app permissions for many types of hardware and features, ranging from location to webcam, microphone, contacts, or even your documents.
When you install an app or you try using some of its features, it may ask you to allow it to access certain hardware components or Windows 10 features in order to run as expected. However, some apps might ask for permissions to things they don’t really need or you don’t want to give them access to. For example, you might want to give the Camera app access to your webcam, but you might not want to give the same permission to the Photos app. So, here’s how to access and set app permissions in Windows 10:
How to access an app’s permissions
In order to change an app’s permissions, you must first know how to access them. And the easiest way to do that in Windows 10 is from the Start Menu. Open it and find the app, either in your Tiles section on the right or in the All apps list on the left. After you locate it, right-click or press and hold its shortcut, select More in the contextual menu, and click/tap on App settings.
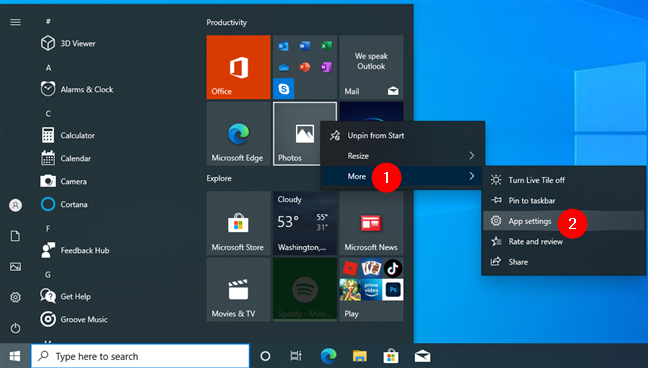
Open the App settings for a certain app
Windows 10 immediately opens the app’s settings page from the Settings app, where you can also find the App permissions for it.
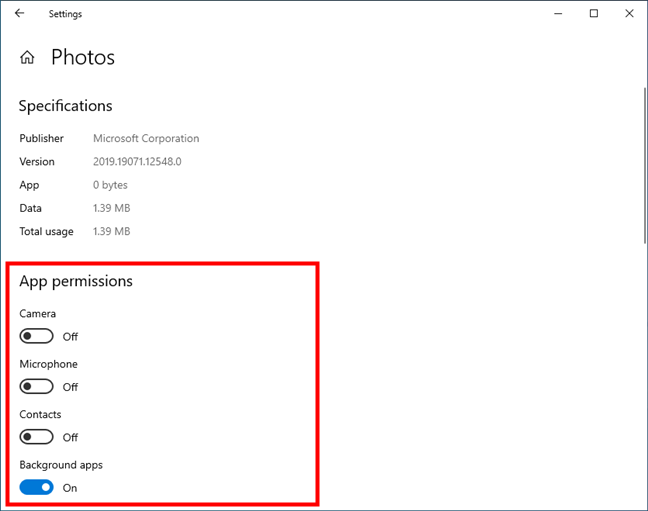
App permissions of an app in Settings
Another lengthier way to access an app’s permissions is available in the Settings app.
Use it to navigate to Apps > Apps & features, locate the app you need in the list, select it, and then click or tap on Advanced options.
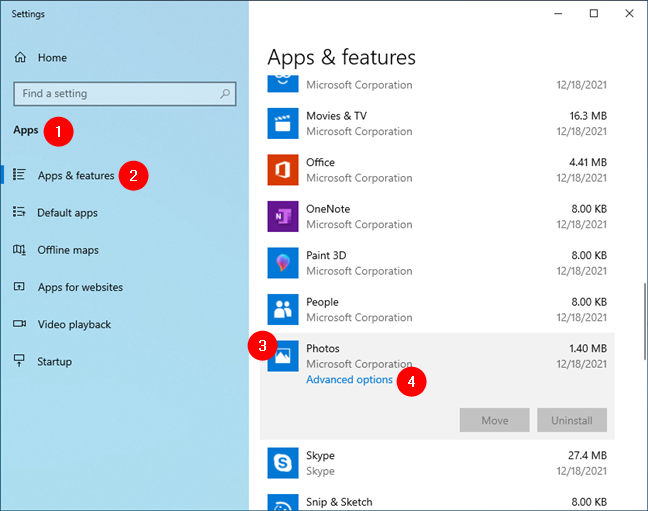
Advanced options of an app in the Windows 10 Settings
How do you change an app’s permissions in Windows 10?
Once you’ve accessed the app’s settings page, you can set its permissions by turning their switches on or off as you please. For example, if you want the Photos app to be able to access your contacts (which can be useful if you want to group photos by people), enable the Contacts switch. Or, if you don’t want it to have access rights to use your microphone, turn the Microphone off.
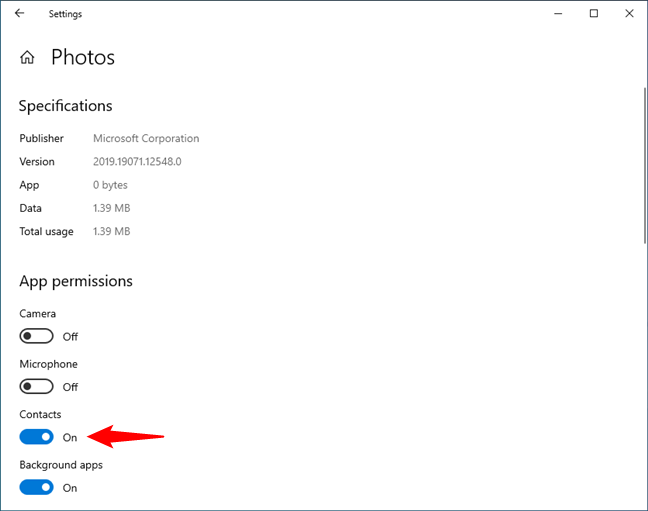
Change permissions for an app in Windows 10
NOTE: Be careful when you change the permissions of an app. Some might not work as they should if you deny them from accessing certain hardware or features on your Windows 10 PC. For example, if you disable the Background apps permissions for Diagnostic Data Viewer, it may not be able to collect all the diagnostic information it could while running in the background on your computer.
How to access apps permissions by category
Besides allowing access to the permissions of apps individually, Windows 10 also has a dedicated place to control systemwide app permissions by category. Here’s how to do that:
Open the Settings app (press Windows + I on your keyboard) and enter the Privacy category.
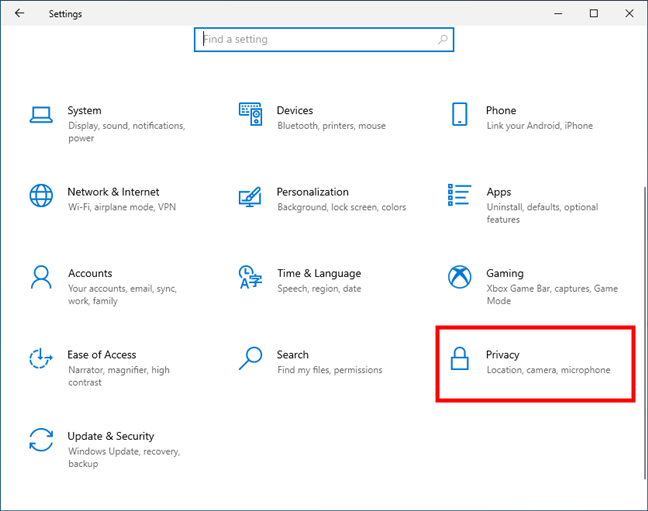
The Privacy entry from the Windows 10 Settings
On the left sidebar, go to the App permissions list and select one of the options under it. Each option corresponds to a type of app permission. For example, if you want to see and control which apps are allowed to use your webcam, select the Camera entry.
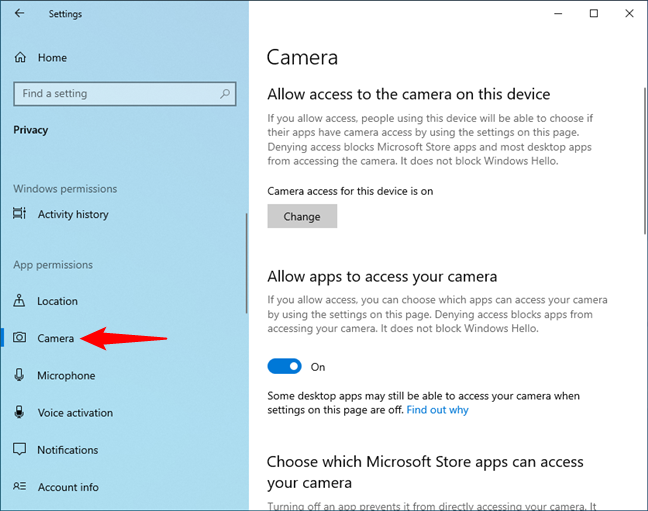
Allow apps access to a device or feature in Windows 10
Similarly, you can choose to see and control any other type of app permissions, like Location, Microphone, Email, etc.
How do you give permissions to apps in Windows 10 by category?
Once you’ve selected an entry on the sidebar, the right panel from the Settings app shows everything you can change regarding the permissions apps have to use it. For example, in the case of Camera, Windows 10 lets you choose whether you want people using your PC and its apps to be allowed to access the webcam or if you’d rather deny all from using it. Pressing Change and turning the “Camera access for this device” switch off denies other people from being able to use the webcam. Similarly, you can toggle the second switch to “Allow apps to access your camera” or deny it globally.
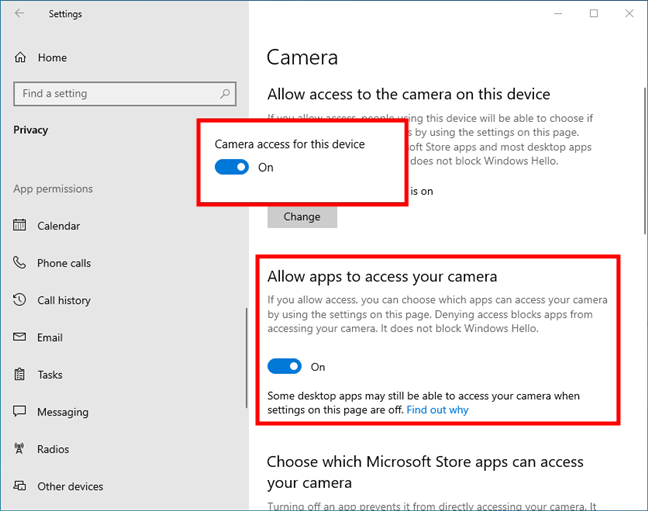
Allow or disallow people and apps to use a device or feature
But, if you want to control which apps can use your camera (or any other device/option you’ve selected in the App permissions list from the left sidebar), you can scroll down to the list called “Choose which Microsoft Store apps can access your camera [or the option you chose].”
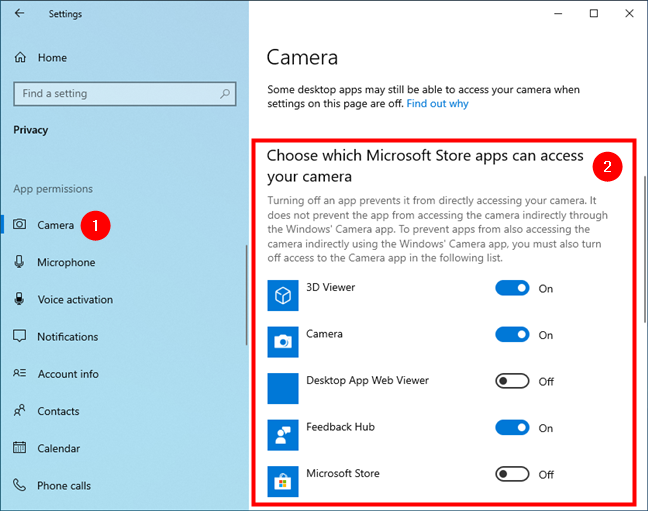
Choose which apps can use the selected device or feature
Then, Windows 10 shows you all the apps that can work with that device or feature. For each of them, you get a switch on the right which you can turn on or off as you wish. For example, if you don’t want the Feedback Hub app to be able to use your webcam, turn its switch off, and if you want to allow the Camera app to use it, turn its switch on.
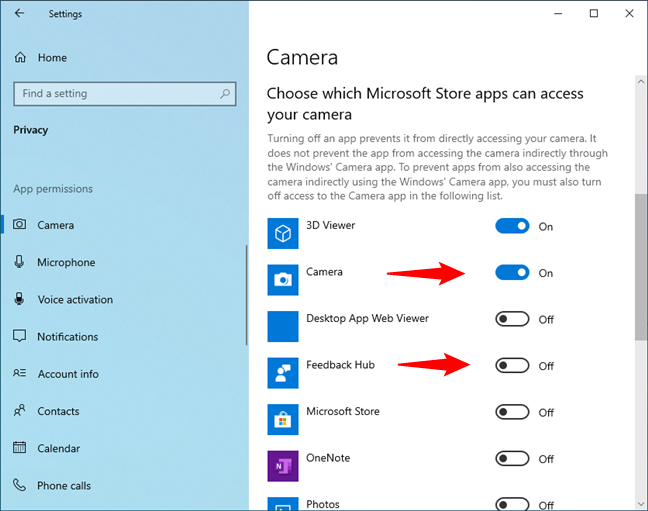
Give or take access permissions for apps
That’s pretty much it, so just repeat the same steps for all the devices and Windows 10 features under App permissions to set everything up as you prefer.
What app permissions did you change?
Now you know more about what app permissions are in Windows 10, how to access them, and how to set app permissions too. Which ones did you change? Was there just one odd app that made you think more about your privacy, or did you want to know and control what each of your apps can access on your Windows 10 PC? Let us know in the comments below.


 29.12.2021