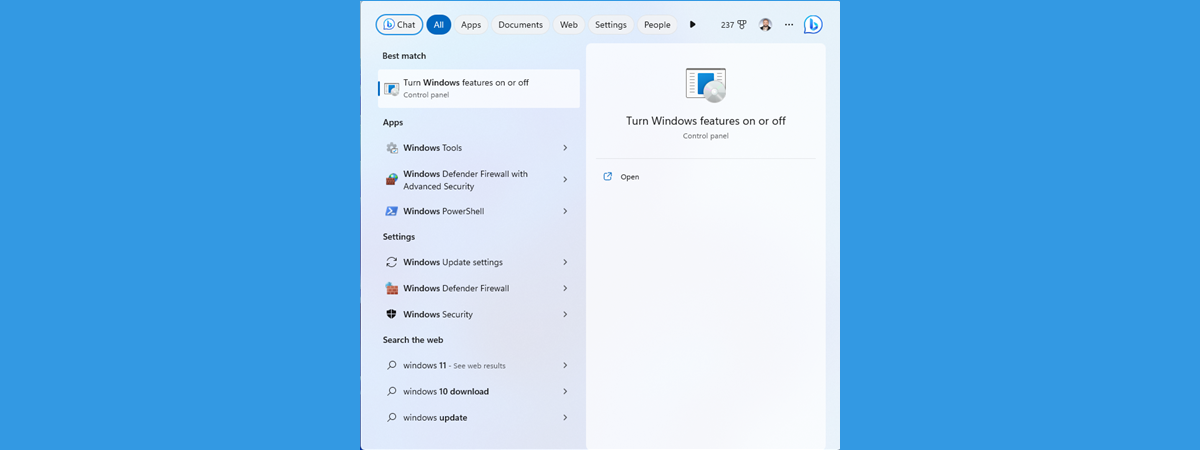
Windows Search is a feature that has been around for more than 15 years, starting with the ancient Windows Vista. It has evolved and matured over the years, and in the latest iteration of Windows 11, it is (theoretically) simpler, faster, and more efficient than in previous versions. Furthermore, after the Moment 2 Update for Windows 11, Search now also offers us access to the AI-powered Bing Chat based on the already famous ChatGPT. Here’s how to access Search in Windows 11 and use it to find what you want:
How to access Search in Windows 11
There are several ways to access the Search feature in Windows 11. I’ll start with the most obvious ones, that only require you to click or tap on things, and then continue with the Windows 11 keyboard shortcut keys. Here’s how to open Search:
How to access Windows 11’s Search using its taskbar button or box
The most obvious method of launching Windows 11’s Search is by clicking or tapping on its entry on the taskbar, next to the Start button. Depending on the version of Windows 11 you’re using and its settings, this can be a small magnifying glass button, a larger Search button showing a magnifying glass icon and the Search text next to it, or a full-fledged Search box.
Windows 11’s latest Search bar design, seen in the following image, is the latest one introduced by Microsoft in Windows 11 22H2 Moment 2 Update. However, only the design is different, as the button’s functionality remains the same as in older versions.

The Search bar in Windows 11
If you’re using a version of the operating system previous to the Moment 2 Update, the button is smaller, showing a magnifying glass icon with the Search text next to it.
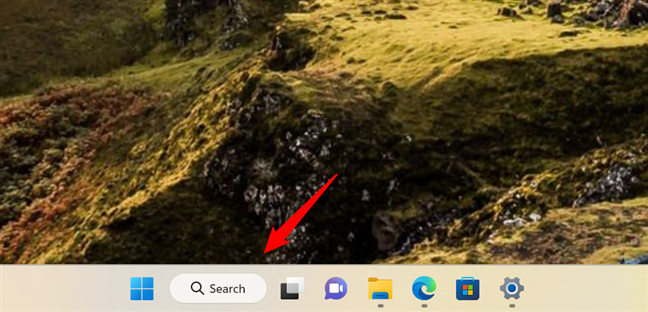
The expanded Search button (with icon and label)
In even older Windows 11 versions, you only get a small Search button with just a magnifying glass icon, as seen below.
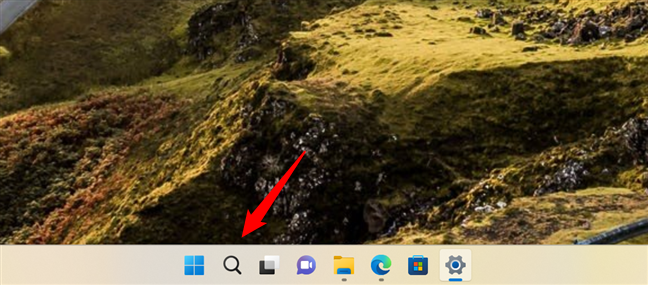
The old Windows Search icon on the taskbar
How to access Windows 11’s Search using the Start Menu
If, by any chance, the Search box is missing from the taskbar, you can use the Start Menu to launch it. Press Windows on your keyboard or click/tap the Start button on the taskbar. This opens the Start Menu, showing the Windows Search input field at the top.
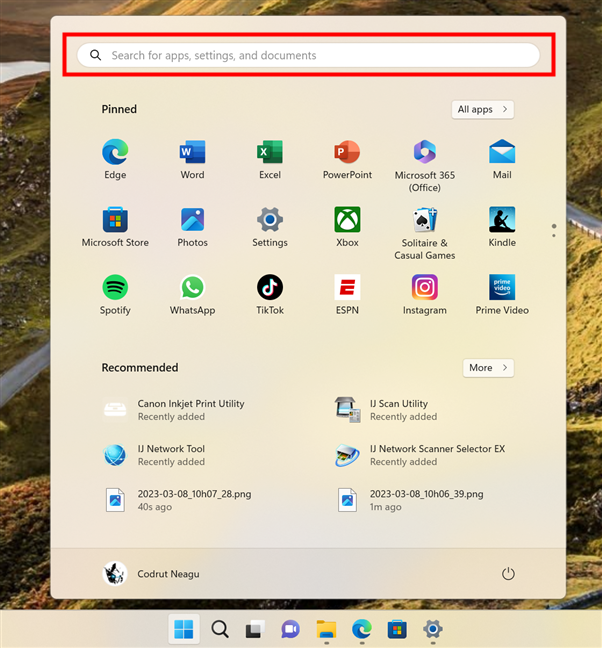
The search field in Windows 11's Start Menu
You don’t have to select the field; you can just start typing immediately after pressing the Windows key. Either way, as soon as you do any of these actions, Windows 11 automatically switches to the Search window, where it looks for any results matching what you’ve typed.
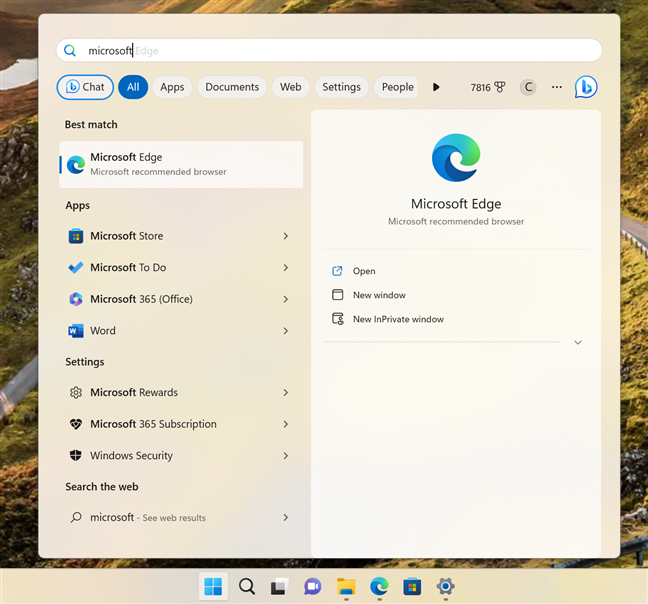
Typing while on the Start Menu automatically triggers Windows Search
TIP: If by any chance, the Search is missing from your taskbar, you can add it back from the Settings app. For that, press Win + I on your keyboard to open Settings and head to Personalization > Taskbar. Then, next to Search, select how you want to see Search on your taskbar: Search box, Search icon and label, or Search icon only. The fourth option there is Hide which obviously removes Search entirely from the taskbar.
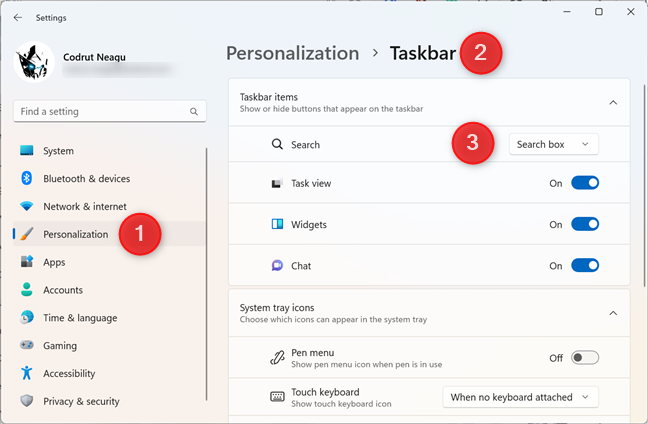
Choosing how to show Search on Windows 11's taskbar
Next, let’s see what’s the standard keyboard shortcut for Search in Windows 11.
How to access Windows 11’s Search using keyboard shortcuts
If you prefer using your keyboard instead of the mouse, you can access Search with keyboard shortcuts. In the previous paragraphs, I’ve already shown you one way to do that: press the Windows key on your keyboard and start typing what you want to search. However, another way to access Windows Search from your keyboard is to use this shortcut:

The keyboard shortcut for Windows Search is Win + S
This opens the Search window and, if Windows 11 is set to show the full Search box on your taskbar, it automatically focuses on its box, where you can enter the terms you want to use for the search.
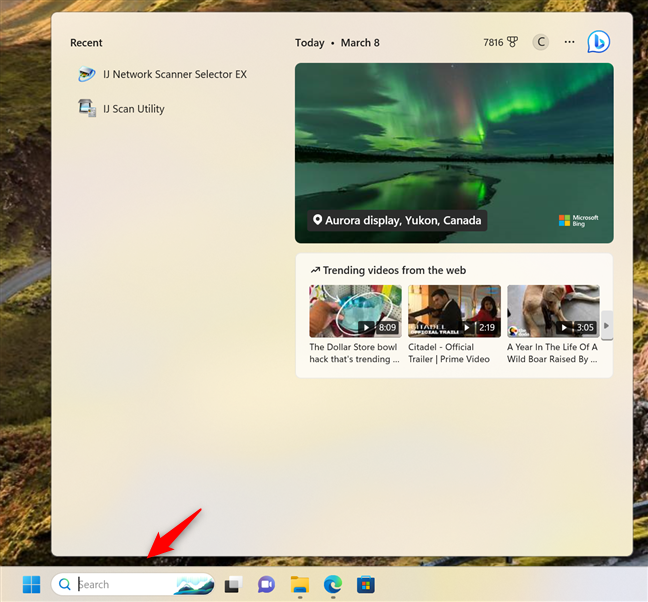
The Search box in Windows 11
If Windows 11 is set to show only a Search button (with or without a label) on the taskbar instead of the full Search box, when the Search window opens, you’ll see the text input field at the top of the window (not on the taskbar).
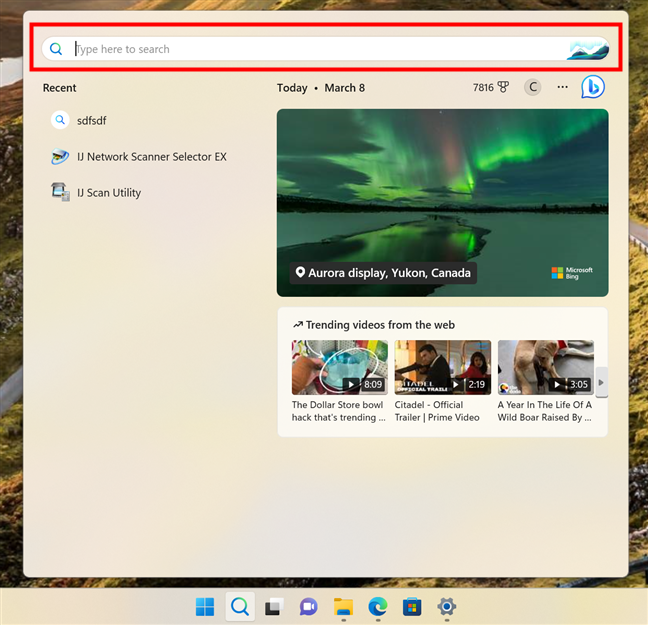
The Start Menu contains an input field for Windows Search
Either way, the functionality of the Windows 11 Search remains the same.
How to access Windows 11’s Search in File Explorer
Finally, you have the option to enter search terms in File Explorer. You just have to go to the Search field on the top right and click or tap on it to start typing the search terms. However, this only searches for files and folders stored locally or in your OneDrive.
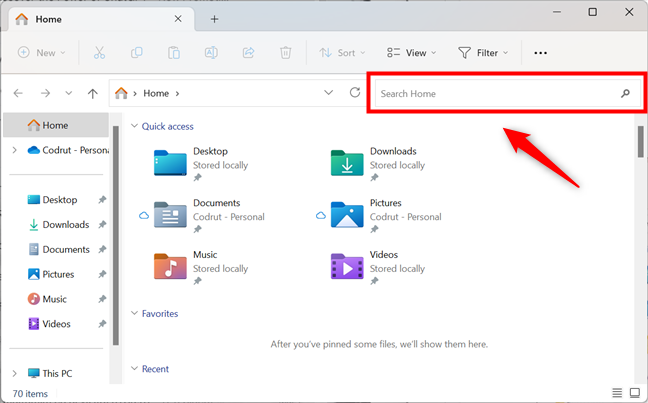
The Windows Search input field in File Explorer
Just like in the Windows Search window, File Explorer starts displaying results as soon as you begin typing.
How to use Search in Windows 11
Now that we know how to access it, let’s see how to use Windows 11’s Search. I’ll start by showing you how the Search is organized, continue with how to interact with the search results, and finish with how to filter search results.
How the Windows 11 Search is organized
The Windows Search window has many useful links and settings. Just like I mentioned earlier, the text input field is either shown in the box on the taskbar or as a separate field at the top of the window. If you didn’t enter any terms in the input field, the Search window shows you a list of Recent apps and searches. Next to it, you’ll also see Microsoft’s Featured on Bing picture of the day and a couple of Trending videos from the web:
- Click or tap on the featured image, and Windows 11 will launch Microsoft Edge to give you additional information about it.
- Click or tap on a video, and it will start playing in Microsoft Edge.
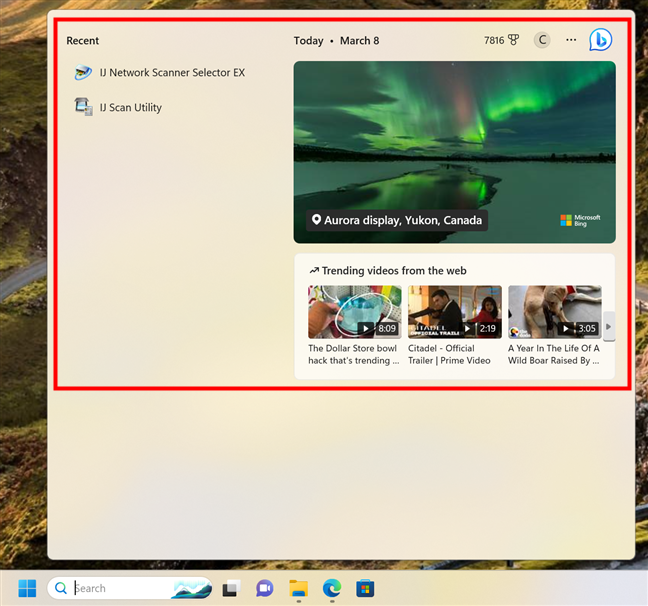
Recent apps and featured snippets in the Search window
On the top-right side, above the Featured on Bing image and next to the date, there are four buttons:
- The Bing Chat button launches Microsoft Edge and initiates a conversation with Microsoft’s AI-powered helper, based on ChatGPT.
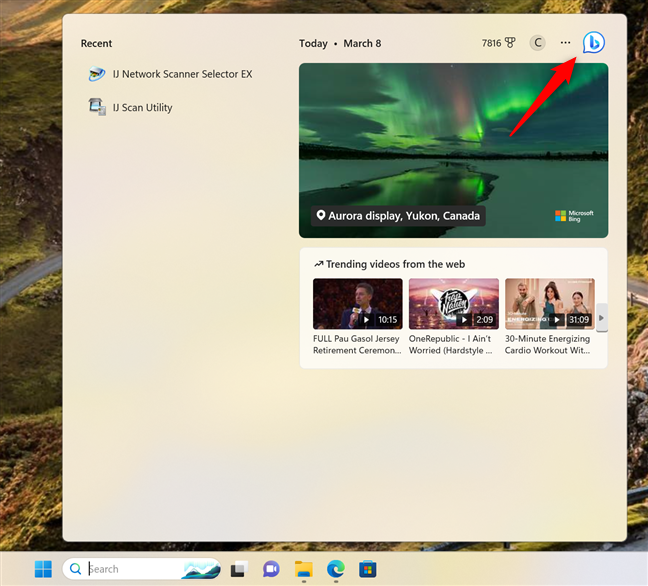
The Bing Chat button in Windows 11's Search
- The three dots button opens the Options menu, where you can configure the Windows Search settings and Indexing options, as well as provide Feedback to Microsoft;
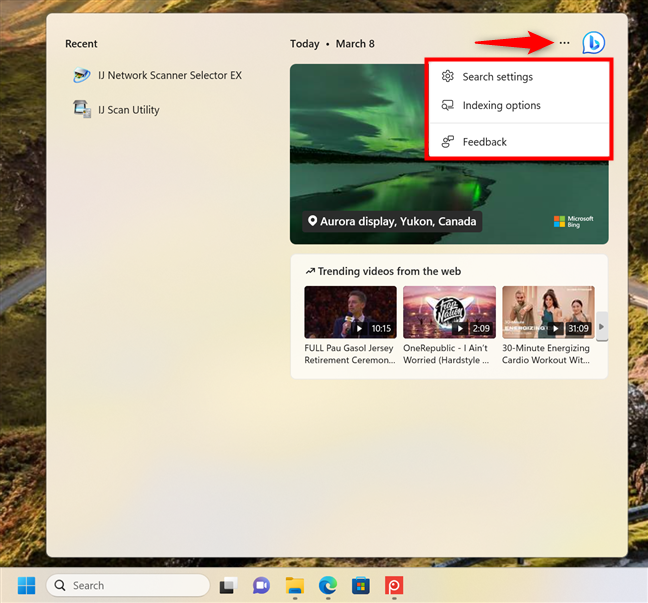
The Options menu from Windows 11's Search
- The portrait icon allows you to sign in or select the Microsoft account you’re using; the Manage accounts option opens the Settings app.
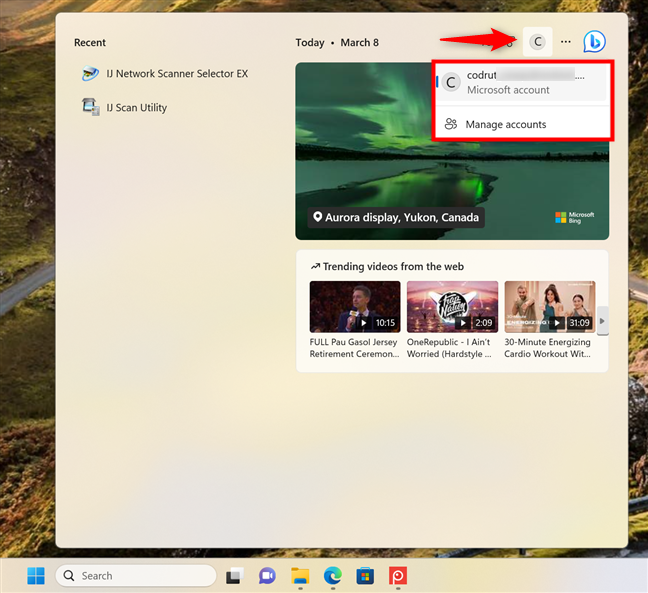
Change the account you're using in Windows 11 Search
- The medal/badge icon shows you how many Microsoft Rewards points you’ve gathered next to it. If you click/tap on it, Windows 11 opens Microsoft Edge and takes you to your Microsoft Rewards page, where you can see more details about your points as well as redeem them. This program is available in the USA and several other regions.
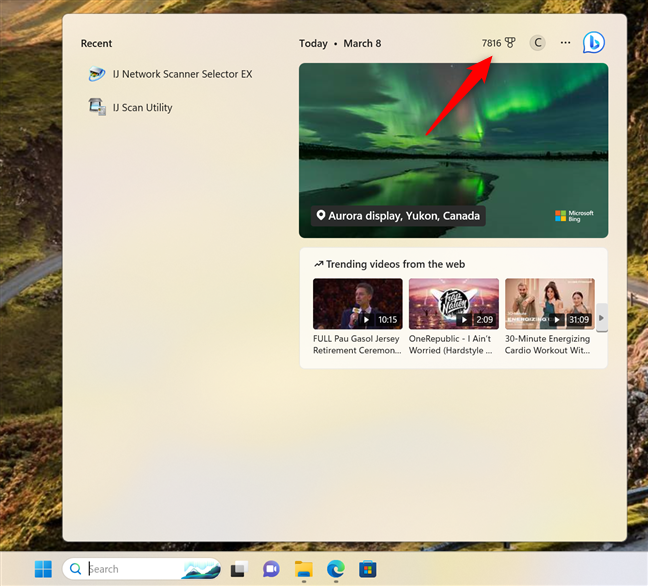
The medal button in Windows 11 Search takes you to the Microsoft Rewards page
Now let’s see what searching is actually like:
How to search in Windows 11
In order to search in Windows 11, type a search term in the Search box on your taskbar or the input field at the top of the Search window, depending on which one is shown.
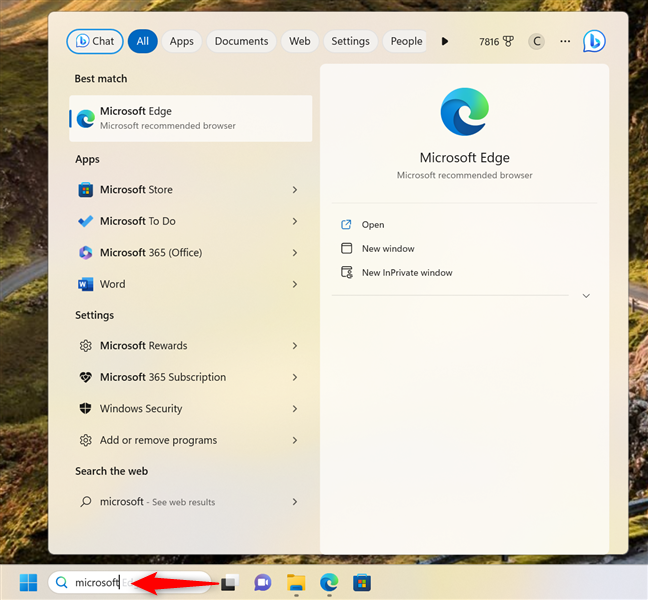
How to search in Windows 11
When you search for an item, Windows Search shows the results instantly, displaying them in order of importance. It shows the Best match first, then Apps, Settings, Search the web results, Folders, etc.
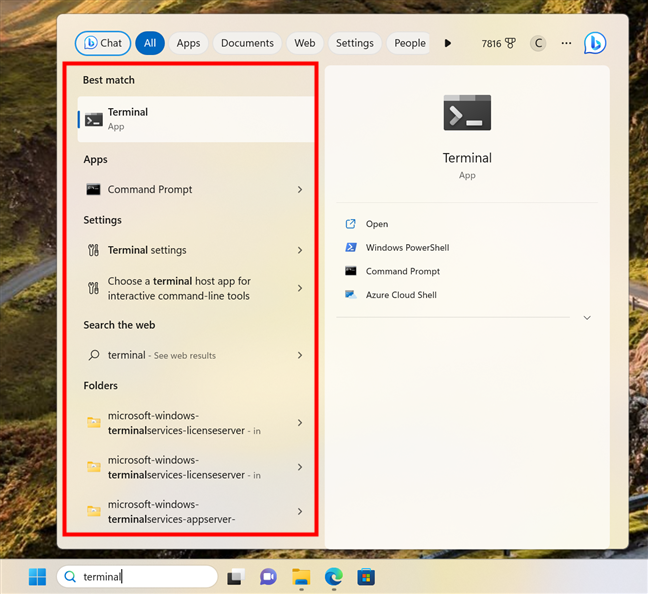
Search results are categorized automatically
There are several actions you can take at this point:
- Pressing Enter on your keyboard after typing the search term automatically opens the result in the Best match category.
- By default, the right pane shows a list of available actions for the Best match item. Clicking or tapping on the arrow (“See more information”) next to a result different from the Best Match shows the context menu for that result. You can also use the up and down arrow keys on your keyboard to navigate the results and get more details about each of them.
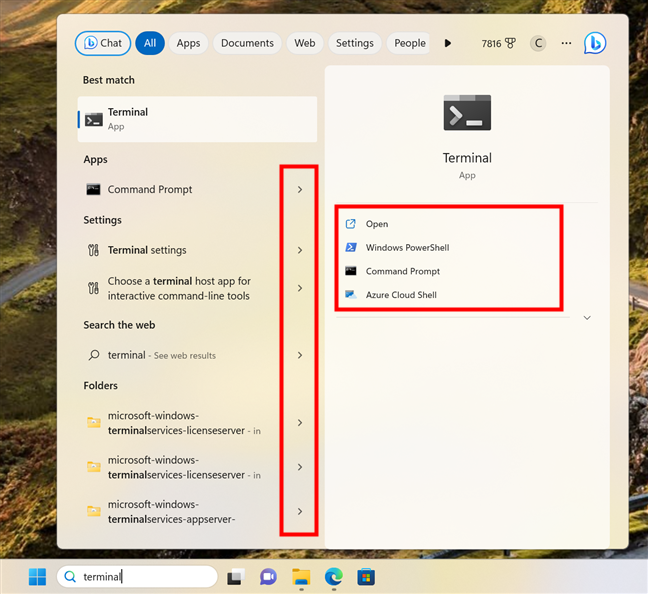
Actions can be accessed by clicking on the arrow next to a result
- Right-clicking (or pressing and holding - for devices with a touch screen) on a search result opens a contextual menu where you can choose other actions. For apps, you can run them as administrator, pin them to Start or the taskbar, uninstall them, access their settings, etc. The actions available vary depending on the item. Some items, like settings and web searches, don’t get a contextual menu.
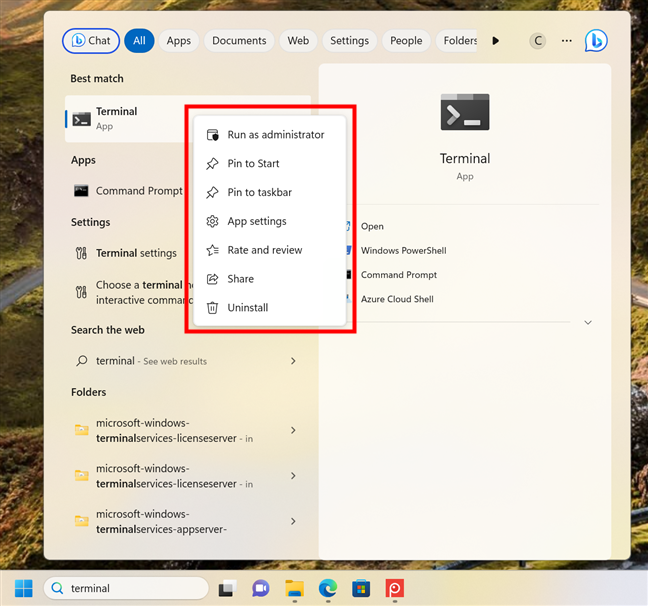
Right-clicking a search result opens a contextual menu with other options
Let’s now focus a bit on the Windows 11 search filters.
How to use filters in Windows 11’s Search
The Windows 11 Search does much more than search for files stored locally on your computer. Depending on the options you select in the Search window, it can even search for the term on the internet. By default, Windows Search shows the results in all categories, but if you are looking for a specific item, you can narrow the scope to search faster. You do this by first opening the Search window (Win + S). Then, enter the search term(s) and select the category you want by using the options shown under the Search box at the top. You can choose between Bing Chat, All (default), Apps, Documents, Web, Settings, People, Folders, and Photos.
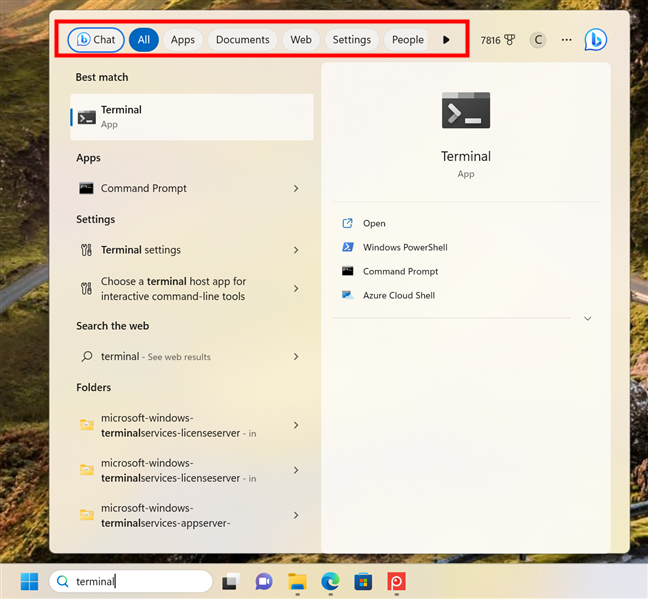
How to make an advanced search in Windows 11 using filters
While most filters (like Apps, Documents, or Photos) are self-explanatory, there are two that deserve a bit more attention: Bing Chat and Web.
Let’s take the first one: clicking or tapping the Chat option from the filters list launches Microsoft Edge and automatically initiates a conversation with Microsoft’s AI-powered Bing Chat helper using the terms you entered in the Windows 11 Search.
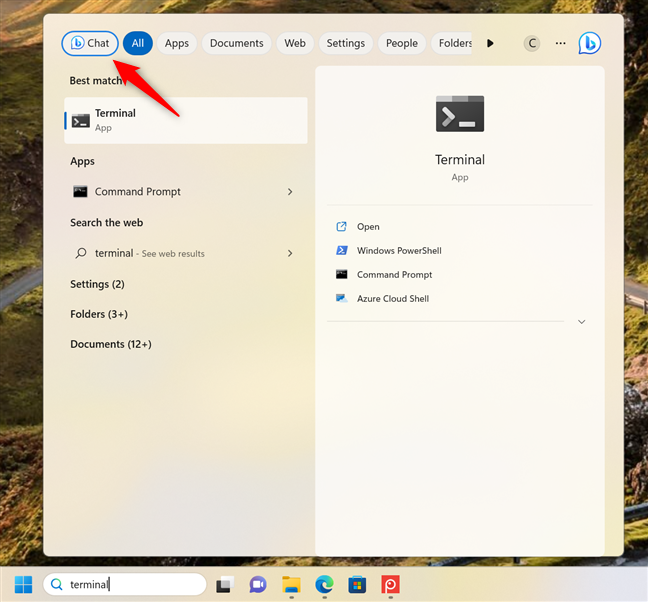
The Chat filter opens Bing Chat in Microsoft Edge
The other filter, Web, makes searches using Microsoft’s (Windows 11) default search engine: Bing. Furthermore, when using the Web filter in the Search window, you only get quick links to results from Microsoft’s Bing search engine, and they always open in Microsoft Edge.
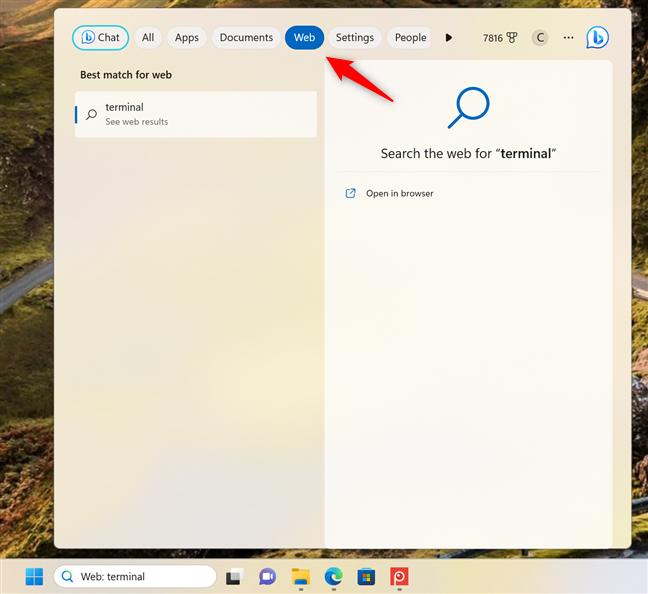
The Web filter opens Microsoft Edge and searches using Bing
If you want to get results from another search engine, your only real option is to use a web browser and navigate to your favorite search engine.
What’s your experience with Windows 11’s Search?
I believe that Windows Search is an essential tool for the day-to-day usage of Windows devices. But how often do you use Search? Is it daily or very rarely? Personally, there’s no work day without me using it at least twice. What about Microsoft’s latest feature, the Bing Chat AI helper? Comment and tell me about your experience and whether you are satisfied with the Search in Windows 11.


 10.03.2023
