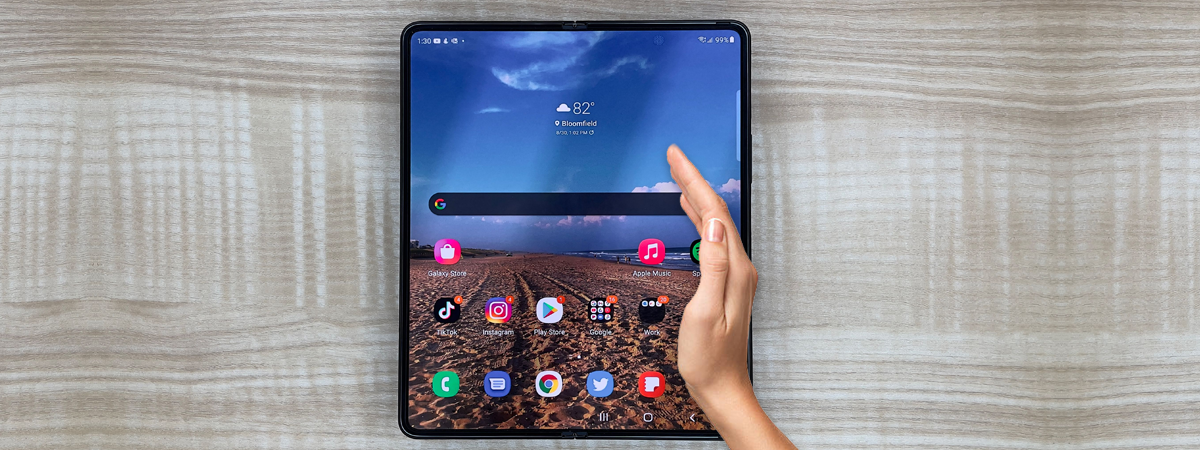
If you have an Android smartphone and want to capture what's happening on the screen, it’s really simple. You can record your game, make a guide, or show a problem in an app. Recording your screen is quick and easy; anyone can start a screen recording quickly with just a few taps. Moreover, it’s free as Android comes by default with a built-in screen recorder feature. In this guide, I’ll show you how to screen record on both stock Android phones and Samsung Galaxy devices. Without further ado, let’s start:
NOTE: To write this guide, I used a Google Pixel 6a and a Samsung Galaxy A54 smartphone, both running on Android 14. The process is similar on all Android-powered devices, so you should be good to go even if you have a smartphone from Xiaomi, Oppo, Motorola, OnePlus, or some other manufacturer.
How to record the screen on an Android smartphone
To record your Android phone’s screen, you must first access its quick settings. To do that, swipe down twice from the top of your screen.
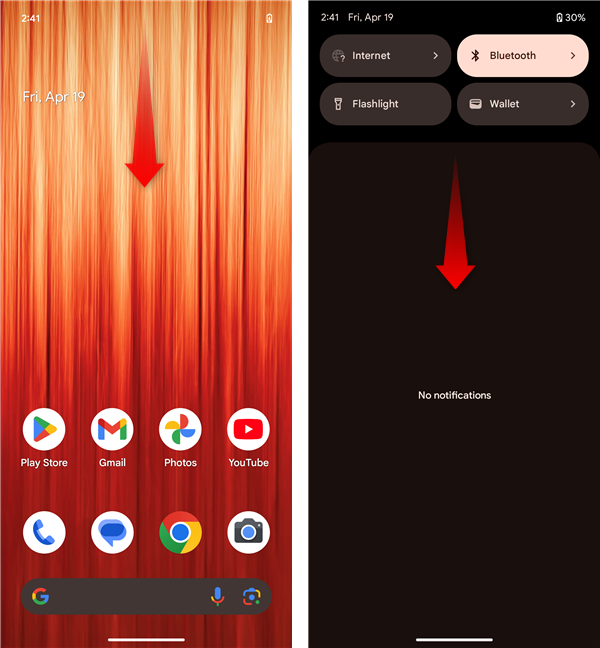
Access the quick settings
This will load all the quick settings available on your smartphone. Among them, you should find a button called Screen record. If you don’t see it, you might have to swipe right.
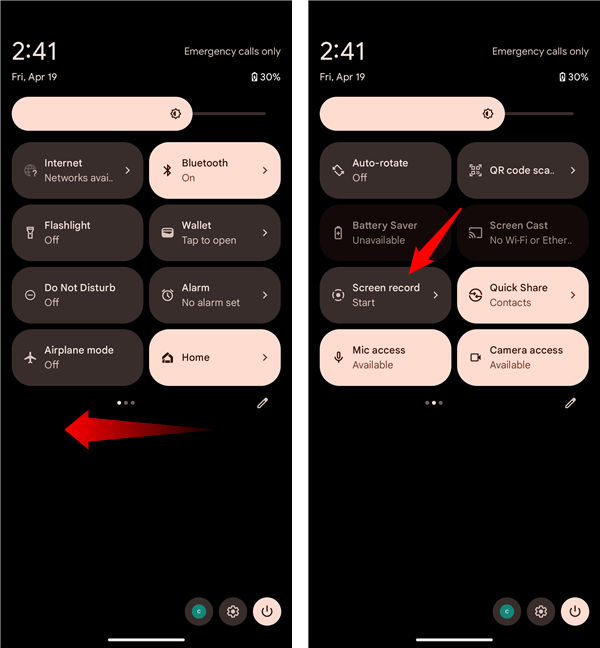
Swipe right and tap Screen record
Then, a popup called “Start Recording?” shows up. You’ll see a button bearing the same name, so you might be tempted to tap it and immediately start screen recording. Don’t do that if you’ve never used this feature before, as you’ll be missing out on configuring the recording first.
Start with choosing what to record. Tap the dropdown menu and select whether you want to record A single app or the Entire screen. It’s clear what each option is all about:
- A single app makes Android record only the current app on your screen, without surrounding elements.
- Entire screen means that Android will record the whole screen of your phone, regardless of the apps you’re currently using, and it will include everything you see.
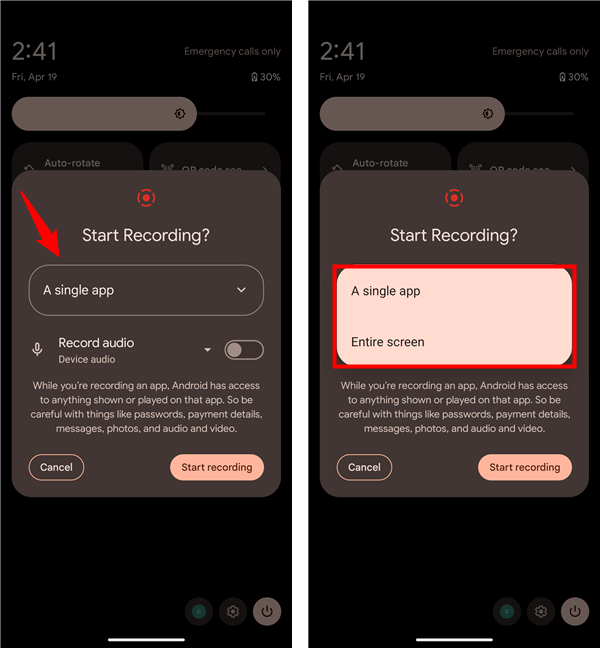
Choose what to record
The next thing you can customize about the screen recording on your Android device is audio. If you want the recording to include sound, tap Record audio and select one of the options available:
- Device audio: the screen recording will include “Sound from your device, like music, calls, and ringtones”
- Microphone: the recording won’t include device audio but will include sound from its microphone
- Device audio and microphone: the screen recording will have sound both from the smartphone and from the microphone
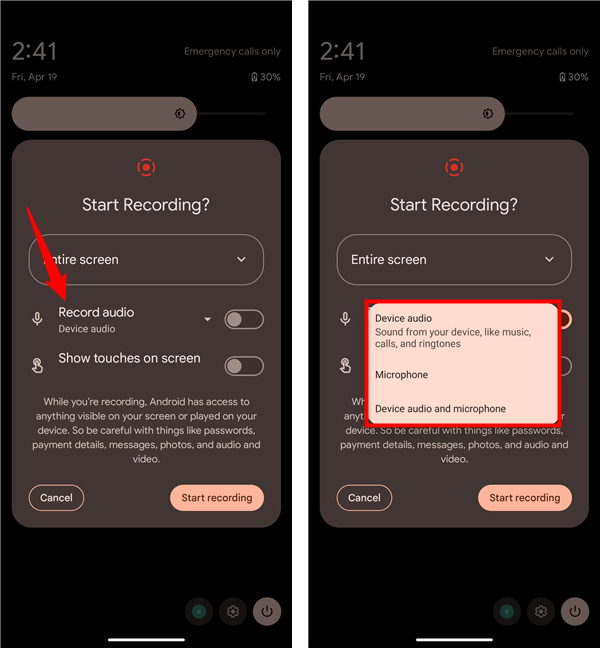
Select the audio input for the screen recording
Once you’ve selected the audio sources that will be used in the screen recording, make sure you enable the Record audio switch.
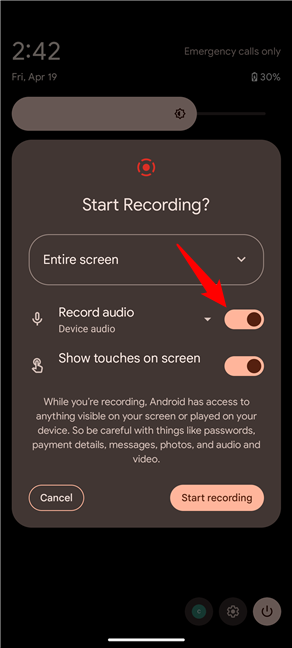
Enable Record audio
Then, choose whether you want the recording to also “Show touches on screen.” If you do, the resulting video will include small visual elements (circles) that indicate any taps you make while screen recording on your Android phone.
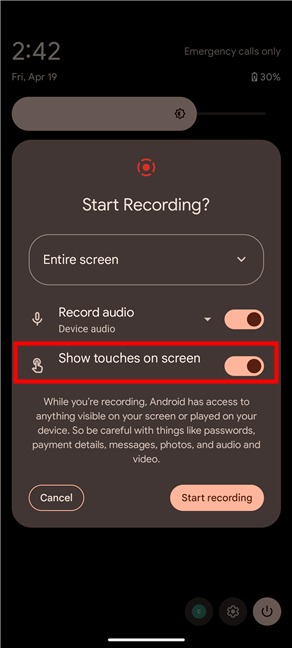
Show touches on screen
Now that you’re done configuring everything, tap the Start recording button to initiate the process.
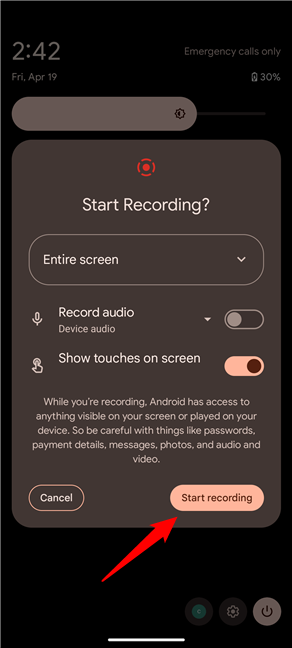
Tap Screen recording
A small icon will show up in the top-right corner of the screen. After a short 3 seconds countdown, your Android phone starts recording the screen.
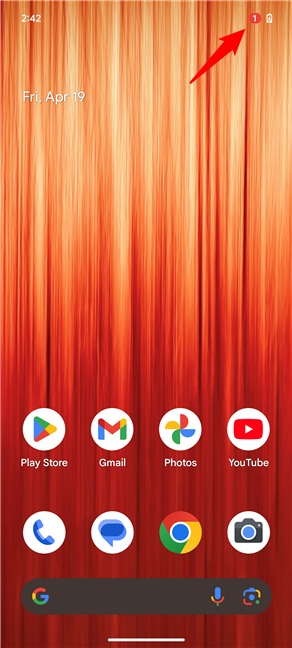
The countdown is shown in the top right
As long as you’re screen recording, Android will continue to show the small status icon in the top-right corner.
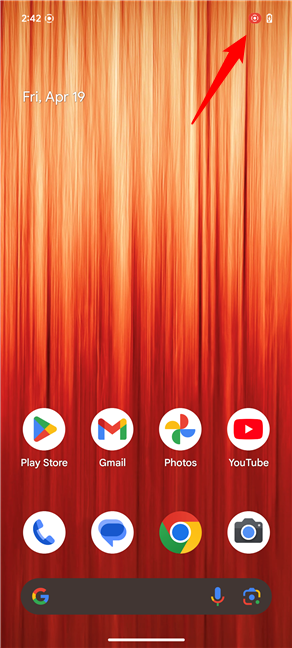
The status of the screen recording is indicated by a small icon
To stop screen recording on your Android phone, swipe down from the top again and press the Stop button in the Recording screen notification.
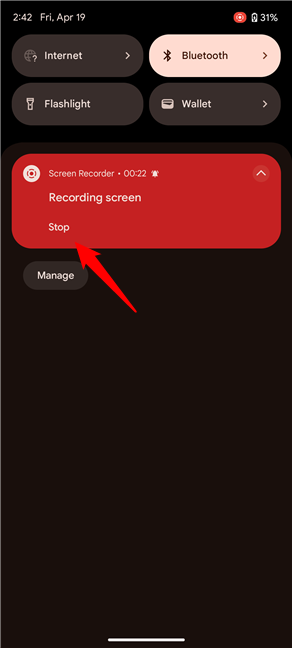
Tap Stop in the Recording screen notification
You’ll then find your screen recording in the Photos app, in Library > Movies.
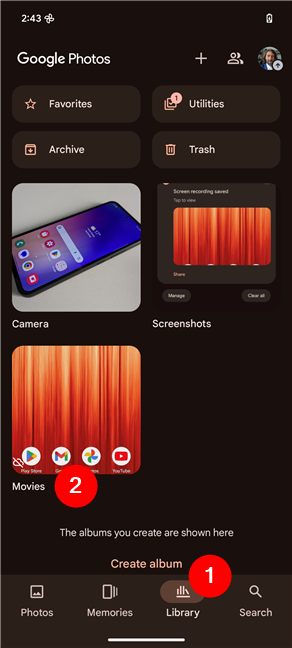
Screen recordings are saved in the Movies folder of the Photos app
TIP: If you’re curious to know where all the screenshots are stored on your Android, check our guide on Where are screenshots saved on Windows, Mac, Android, and iOS?.
How to record the screen on a Samsung Galaxy device
To record your screen on a Samsung Galaxy smartphone or tablet, you need to access its quick settings. To do that, swipe down from the top of the screen two times.
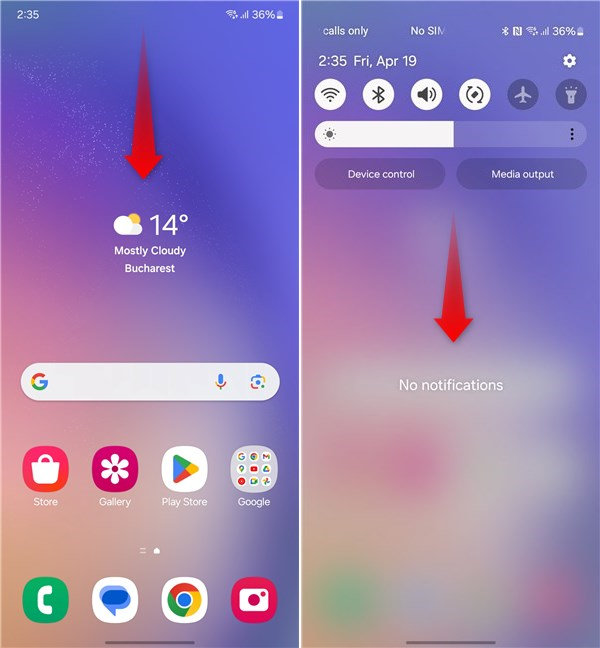
Access quick settings on a Samsung Galaxy
Then, in the quick settings list, find the Screen recorder button and tap it. If it’s not there, swipe to the left to load the other pages of quick settings - the button should be displayed on one of them.
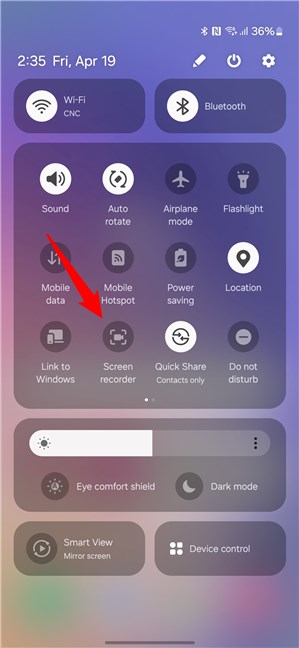
Tap the Screen recorder button
This will make your Samsung Galaxy phone display a “Start recording with Screen recorder?” pop-up. It starts with a warning:
Keep that in mind when screen recording!
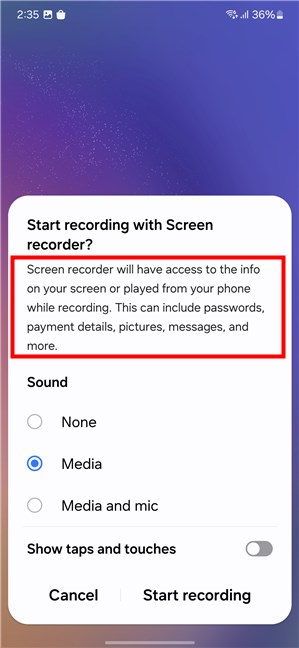
Waring about screen recording on Samsung devices
Choose the sound settings you prefer:
- None: the recording will be muted, with no sound whatsoever
- Media: the video you record will capture sounds from your Samsung Galaxy, such as music and ringtones
- Media and mic: the screen recording will have sounds from both your phone and its microphone.
Once you’ve selected the audio to be recorded, you must also decide whether you want the video to include the taps you make on the screen. If you do, turn the “Show taps and touches” switch on; otherwise, disable it.
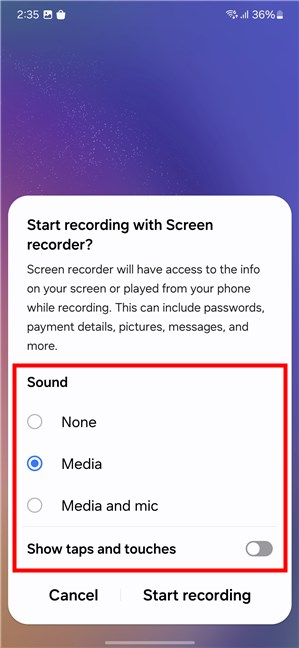
Select the sound options for the screen recording
Now you’re ready to screen record. To begin, tap the Start recording button in the bottom-right corner.
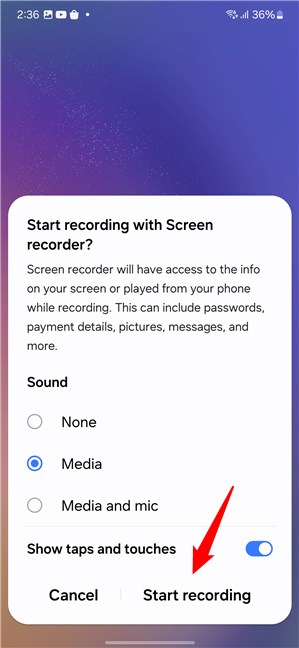
Tap the Start recording button
Wait for the 3-second countdown to end, or tap the Skip countdown button to start recording your screen immediately.
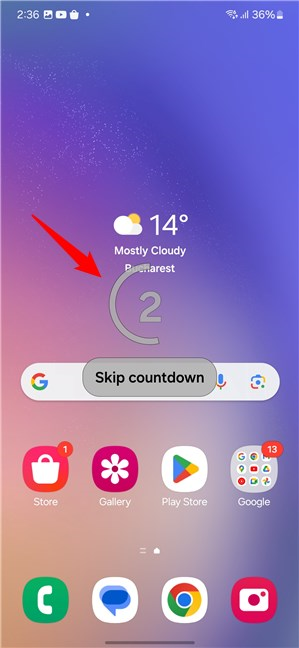
The countdown for the screen recording
Then, your Samsung Galaxy device will start recording the screen. As long as it does that, you’ll see a small bar with several options in the top-right corner of the screen. Besides the recording controls - Pause and Stop - the bar includes two others, one for annotating on the screen and another for including a selfie view of yourself in the video.
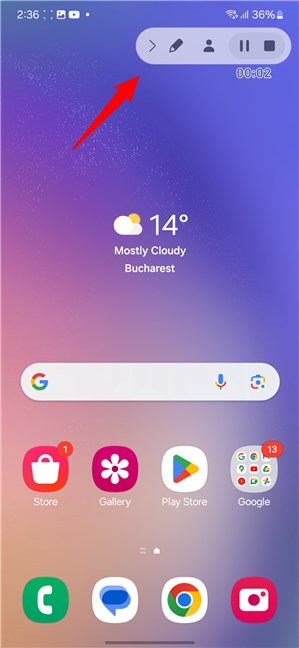
Screen recording on a Samsung device
The first one looks like a small pencil, and if you tap it, you can select the color you want and draw on the screen, like in the screenshot below.
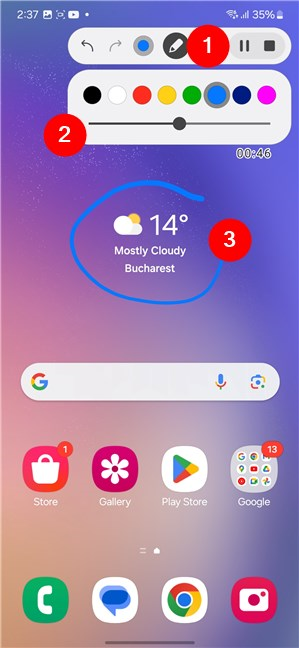
The editing button while screen recording
Tapping the Selfie icon makes the screen recording include footage of you from the front camera of the smartphone. Tapping it again removes you from the screen recording.
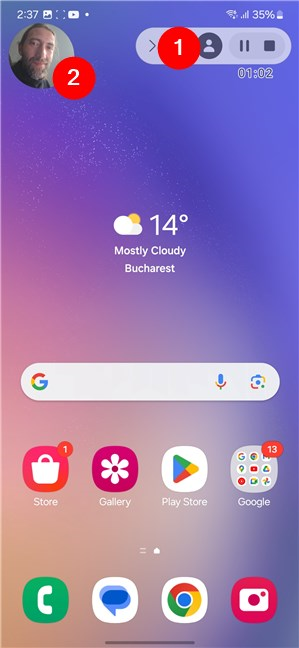
The selfie video button for screen recording
Going back to the media controls, if you need to pause, press the Pause icon in the top-right corner of the screen.
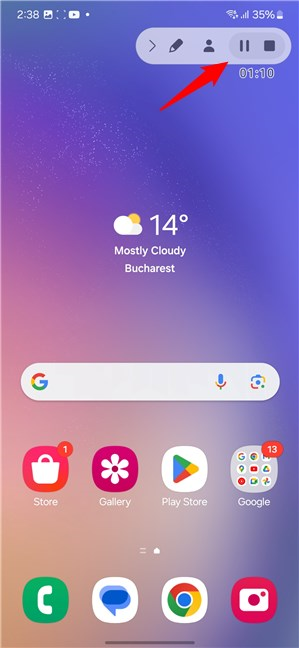
How to pause a screen recording on a Samsung Galaxy
And when you’re done screen recording on your Samsung Galaxy phone, hit the Stop button.
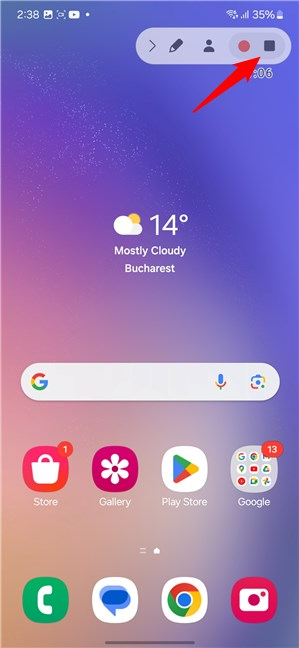
Stop a screen recording on a Samsung Galaxy
Your video will be instantly saved. If you want to get to it as fast as possible, swipe down from the top of the screen and tap the Video saved notification.
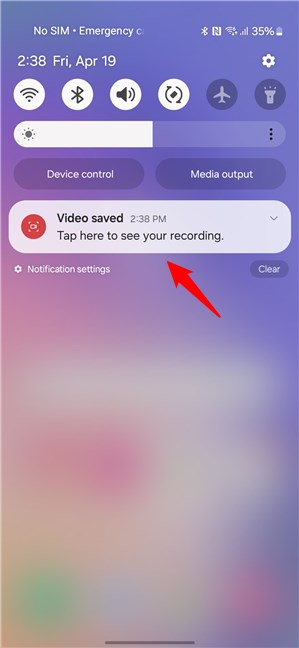
Tap the notification to open the screen recording
Later on, you can also look for your screen recording video in the Gallery app, where you’ll find it inside the Screen recordings folder.
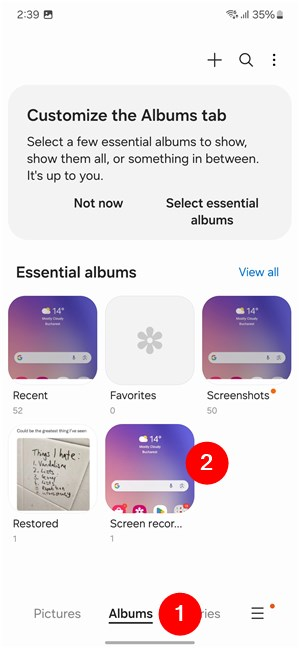
Videos are saved in the Screen recordings album
That’s it!
Why did you need to screen record on your Android phone?
You know now how to screen record on Android devices with or without sound. Moreover, you know that you can do that without any third-party app, as Android has its default screen recorder feature, regardless of whether you have a Samsung Galaxy or a smartphone made by another manufacturer. Before you go, would you mind letting me know why you wanted to use this tool? Leave your answers in the comments section below, as well as any questions or information you’d like to share.


 25.04.2024
