
Do you want to put your Wi-Fi on a schedule to make it available only when you are home? For instance, do you want the Wi-Fi to be available only during the evening, during the weekends, or just on workdays? If you have a TP-Link Wi-Fi 6 router, it’s easy to set up a wireless schedule. Here’s how to set it up exactly how you want and turn it off when you no longer need it:
NOTE: This guide was made on a TP-Link Archer AX10, and it should work the same on all TP-Link Wi-Fi 6 routers.
How to schedule your Wi-Fi to turn off on your TP-Link Wi-Fi 6 router
Setting a schedule for when your Wi-Fi turns off can be done only from the firmware of your TP-Link router and not from the Tether app. To set it up, first, open your favorite web browser and navigate to tplinkwifi.net or 192.168.0.1. Enter the admin password for your TP-Link router, and press LOG IN.
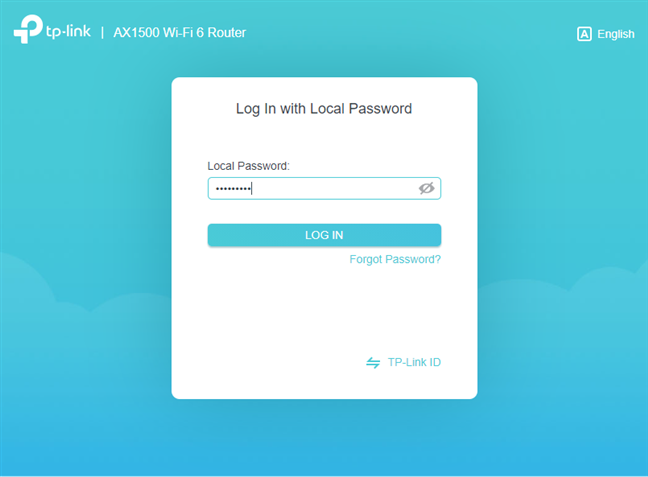
Log in to your TP-Link Wi-Fi 6 router
TIP: If none of the two addresses mentioned above work, see all the ways to find the IP address of your router. Also, if the TP-link firmware is not in the language you want, here is how to change the language on your TP-Link Wi-Fi 6 router.
In the TP-Link firmware, click or tap Advanced to see a list of all the settings available.
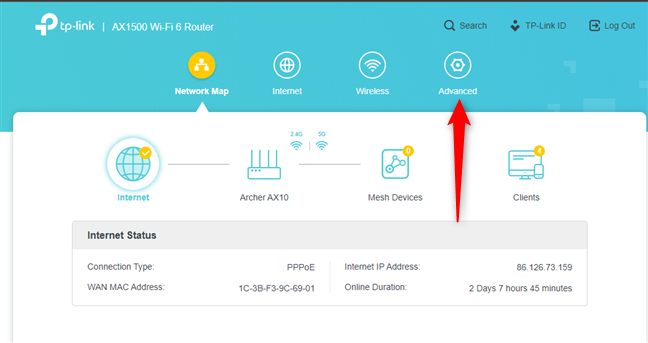
Go to Advanced
In the left column, go to Wireless and then to Wireless Schedule. This is the place where you configure when the Wi-Fi is turned off on your TP-Link Wi-Fi 6 router.
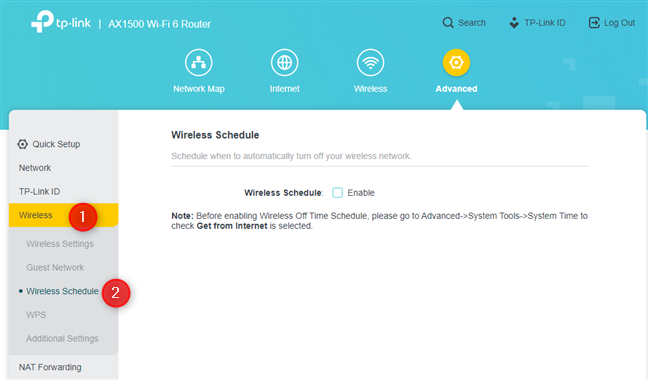
Go to Wireless, followed by Wireless Schedule
Check the box to Enable the Wireless Schedule, and then press Add.
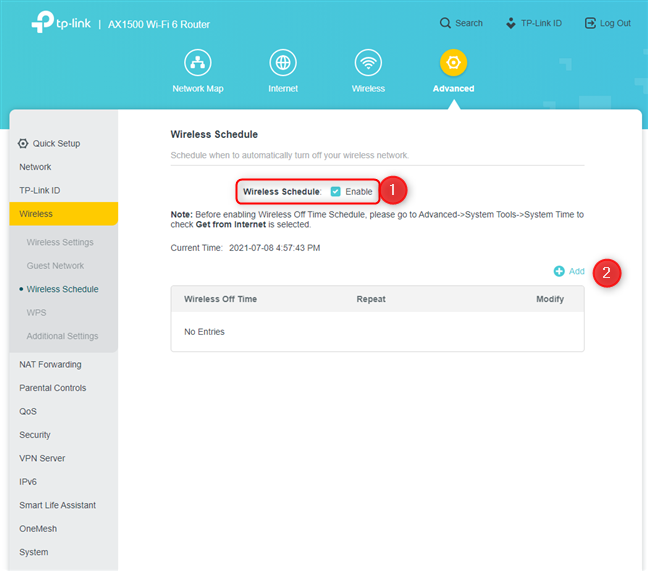
Enable and add a wireless schedule
You see a pop-up where you can choose the days (and hours) when the Wi-Fi is turned off. For example, below, we decided to disable the Wi-Fi during the weekend: Saturday and Sunday. Set things the way you prefer, and press Save.
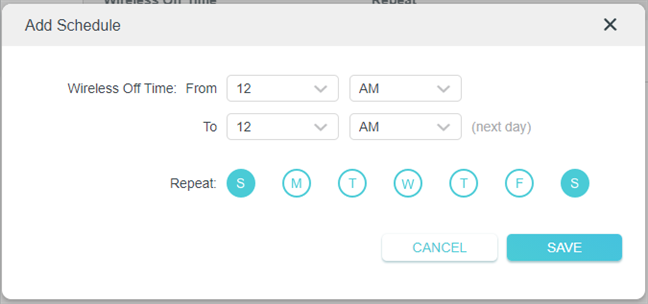
Set up the Wi-Fi schedule
You can then see your new settings in the Wireless Schedule. Repeat the process if you want to add more days to your Wi-Fi schedule.
To make your TP-Link Wi-Fi 6 router use the restrictions you want, press Save one more time.
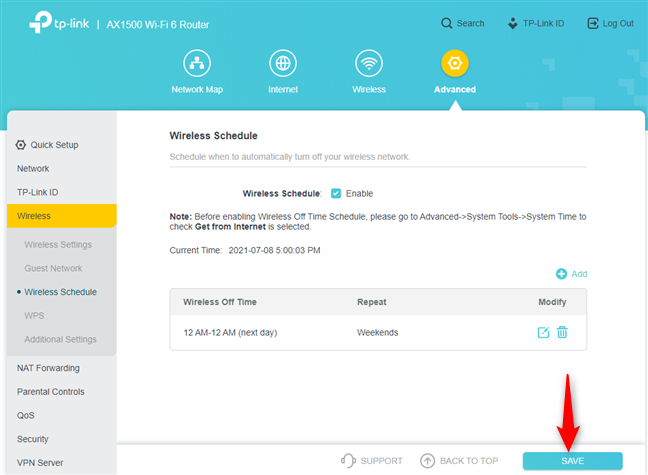
Press Save to apply your schedule
The Wi-Fi schedule is now enabled and used by your router.
How to change or turn off the Wi-Fi schedule on your TP-Link Wi-Fi 6 router
If you need to change the Wi-Fi schedule, go back to Advanced -> Wireless -> Wireless Schedule and use the Edit button next to the schedule you want to reconfigure.
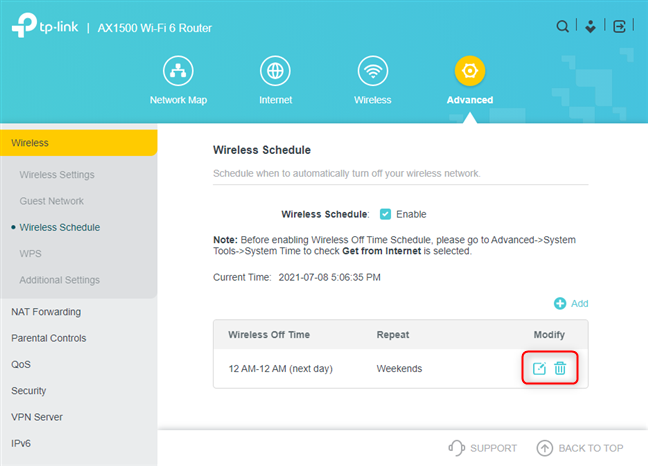
Modify or delete the wireless schedule
To disable a schedule, press the Delete icon next to it. When you’re done, don’t forget to press Save to apply your changes.
Are you satisfied with your Wi-Fi schedule?
As you can see in this tutorial, setting up a Wi-Fi schedule is easy on a TP-Link router. Before you go, tell us whether everything worked well for you and if you have any questions about the Wireless Schedule feature on TP-Link Wi-Fi 6 routers. Comment below, and let’s discuss.


 16.07.2021

