Do you need to jot down a few thoughts in a text file? Are you trying to make a list on your computer and looking for an easy-to-use app that lets you do that? Whatever it is, if all you intend to do is write some text and don’t mind not being able to make complex edits, then Notepad is the app you should use - a simple yet handy and useful app that’s already available on all of your Windows computers, including the ones that run on Windows 11. Here’s what Notepad is, its purpose, and how to use Notepad in Windows 11:
What is Notepad in Windows 11? What is Notepad used for?
Notepad is an old application found in all Windows versions ever released by Microsoft. It’s been around since 1983, so right now, it’s about 40 years old! Its basic purpose hasn’t changed much throughout time, but its appearance and some of its features did. What is the use of Notepad? What are the main features of Notepad in Windows 11? Well, Notepad is one, if not the most basic, text editor you can get, and it’s definitely the simplest app for writing and editing text in Windows.

Notepad in Windows 11
While Notepad doesn’t have advanced features like other, more complex document editors (e.g., Microsoft Word, Notepad++, LibreOffice Writer), that’s not necessarily a disadvantage. Its simplicity makes Notepad very easy to use, as you’ll soon find out in the next sections of this article.
How to open Notepad in Windows 11
Opening Notepad in Windows 11 is as easy as it can be, and, like most things in Microsoft’s operating systems, there are multiple ways to do it. You can find them all in this tutorial: How to open Notepad in Windows (11 ways).
However, if you don’t have the time to read them all, you should know that one of the fastest ways to open Notepad is to use Windows 11’s Search. Click or tap the search button next to Start on your taskbar, type notepad, and select the Notepad app from the search results.
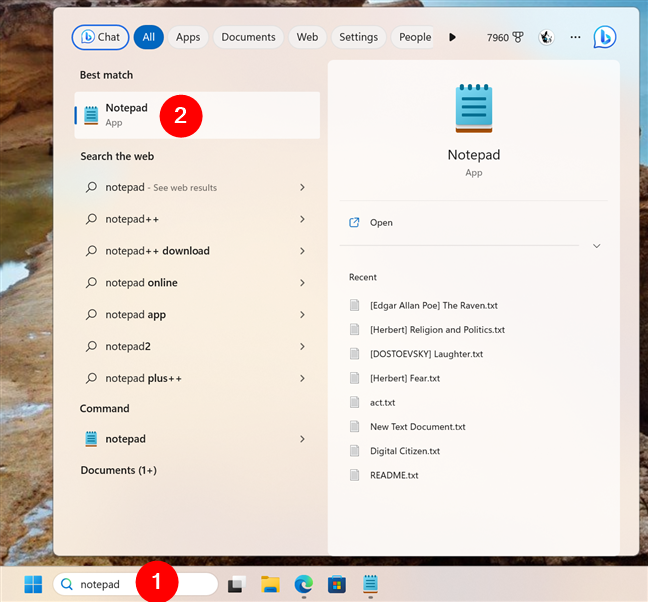
Opening Notepad in Windows 11
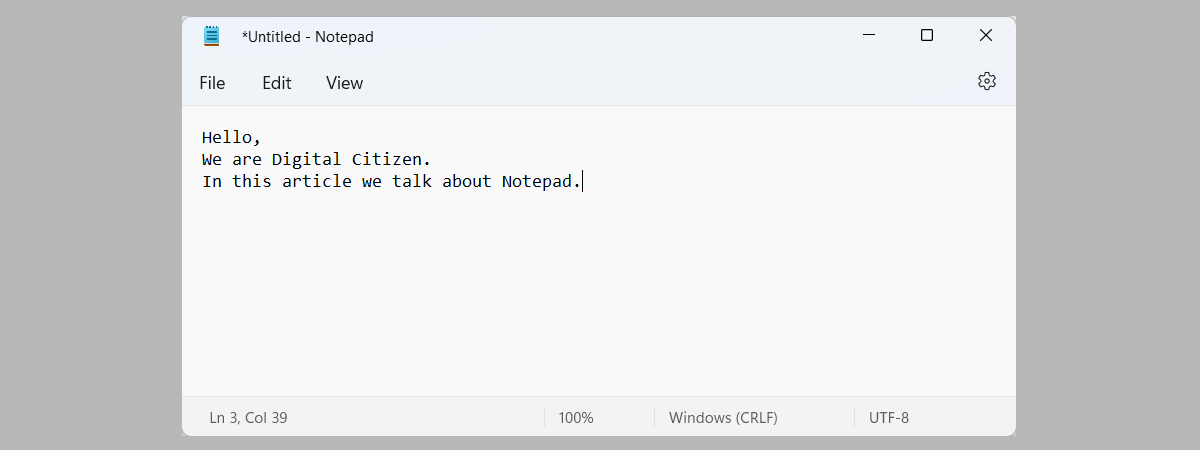
Once you open Notepad, you should see a window similar to the one in the following screenshot.
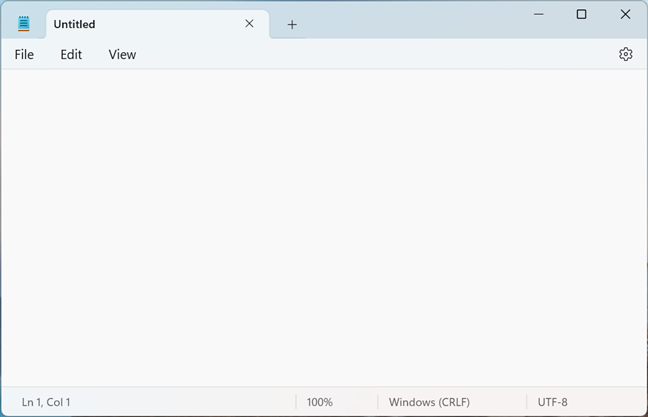
Create a new Notepad text file
Another intuitive way to launch Notepad is to simply double-click or double-tap on any text document bearing the standard .txt file extension. Unless you’ve previously changed file associations, this action should trigger the launch of Notepad and automatically load that file.
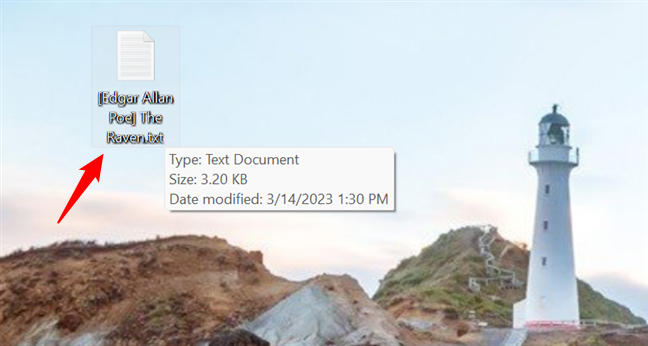
You can launch Notepad by opening a text file
Repeating the process by double-clicking on another text file will open that one too, but in a new tab inside Notepad.
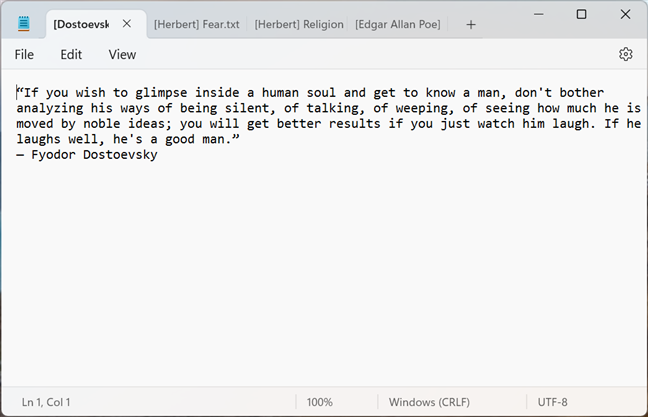
The next text files you open are loaded in new tabs inside Notepad
TIP: Tabs were added to the Notepad app with the Moment 2 Update for Windows 11. While you can’t disable tabs completely, if you’d rather have Notepad launch a new window for each new document you open, check the last section of this guide.
How to create a text file in Windows 11 with Notepad
If you want to create a text file with Notepad, there are two simple ways to do that. One of them is to launch the app on its own, not by double-clicking on an already created document, and then simply start typing.
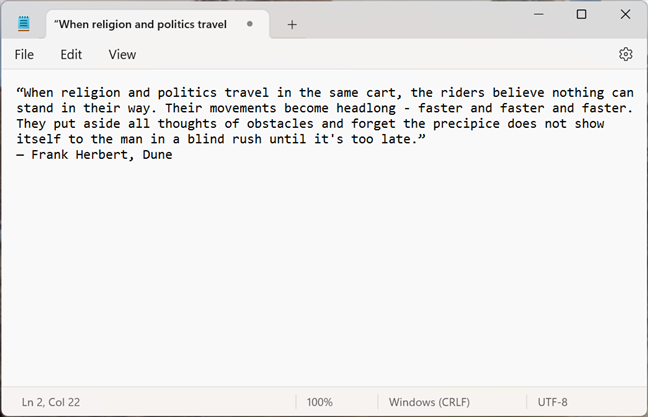
Write text inside Notepad
Alternatively, if Notepad is already open and there are text documents loaded in it, you can create a new file by creating a new tab. In Notepad’s window, click or tap the + (plus) sign next to the open tabs at the top of the window, right above the menu.
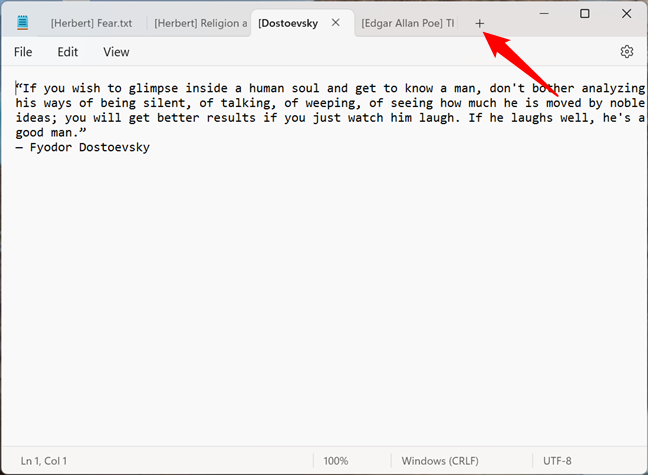
Press the + button to create a new tab in Notepad
That will create a new file in a new tab, where you can start typing anything you want.
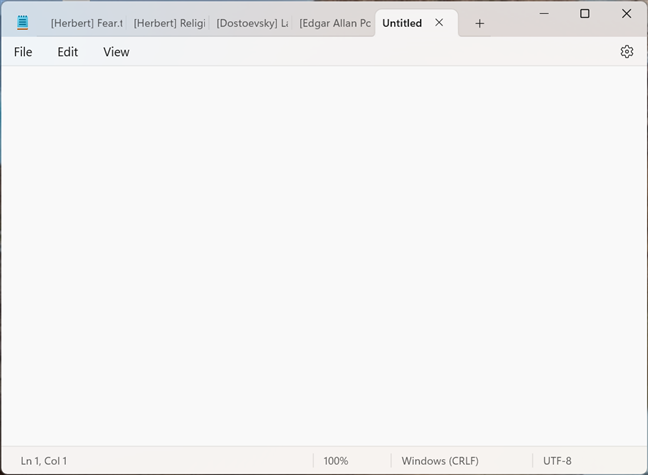
Create a new document by writing inside a new tab
Nothing complicated until now, right? Let’s see what’s next:
How to edit a text file with Notepad in Windows 11
All the editing options available in Notepad for Windows 11 are found in the Edit menu. If you’ve used Notepad in other Microsoft operating systems, such as Windows 10 or Windows 7, you should already be familiar with everything here.
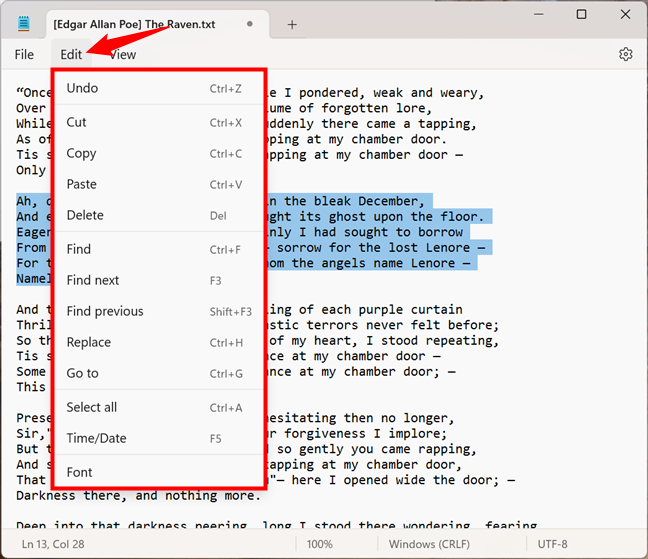
Editing options available in Notepad for Windows 11
However, for the sake of completeness, let’s take a look at each of them to see what they’re all about. In Windows 11’s Notepad, you can edit the text using the following options:
Undo changes to text
Undo (Ctrl + Z) removes the last change you made to the text file. For example, it deletes the last word you’ve typed.
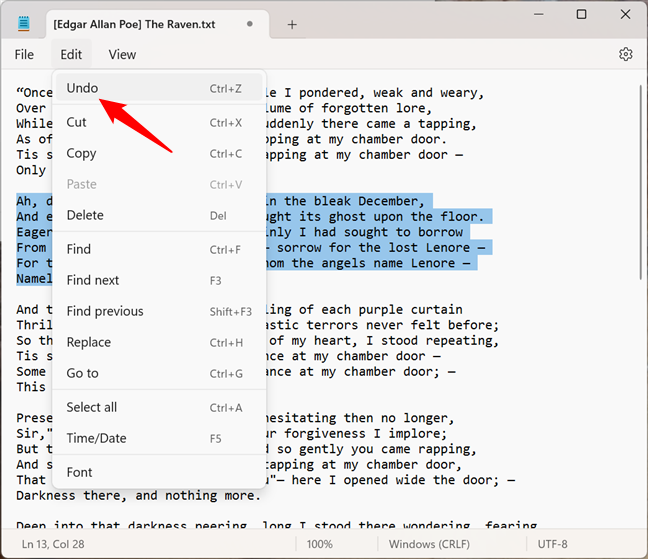
Undo changes in Notepad
Cut, copy, paste, and delete text in Notepad
Cut (Ctrl + X), Copy (Ctrl + C), Paste (Ctrl + V), and Delete (Del) are the common commands found in any document editing application. You can use them to move text, duplicate or delete words, paragraphs, or entire portions of text from your file.
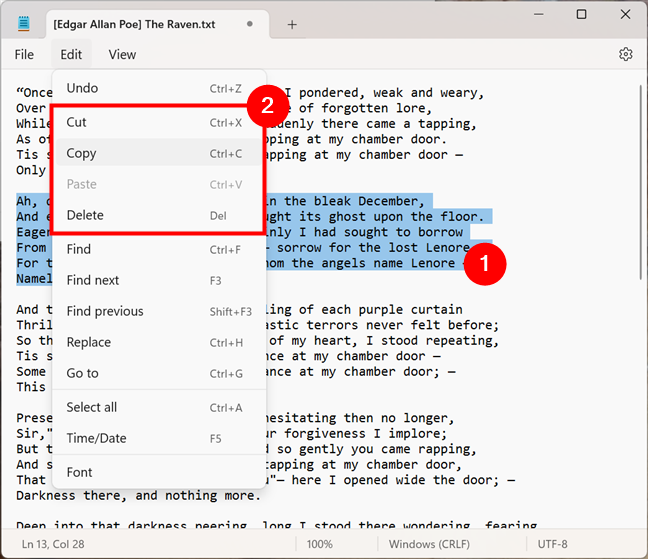
Cut, copy, paste, and delete text in Notepad
Find, replace, and navigate in text files with Notepad
Find (Ctrl + F), Find next (F3), Find previous (Shift + F3), Replace (Ctrl + H), and Go to (Ctrl + G) allow you to search for, replace, or navigate to a specific text in the file opened in Notepad.
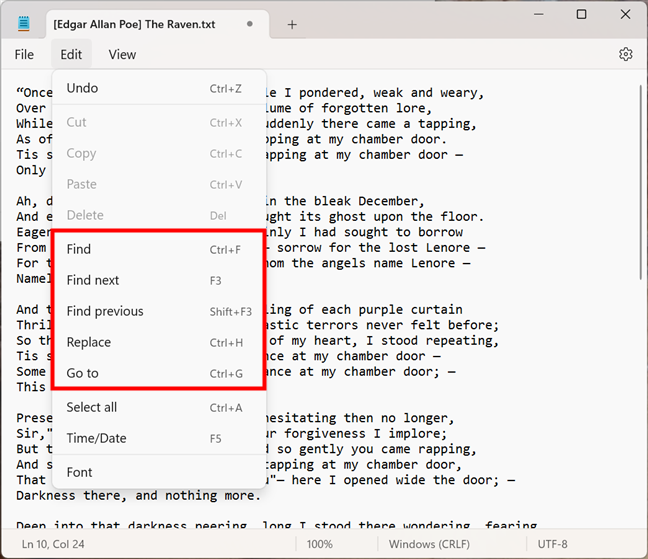
Find or replace text, and navigate in Notepad
If you use the Find or Replace commands, Notepad opens a dialog where you can enter the text you want to find or replace.
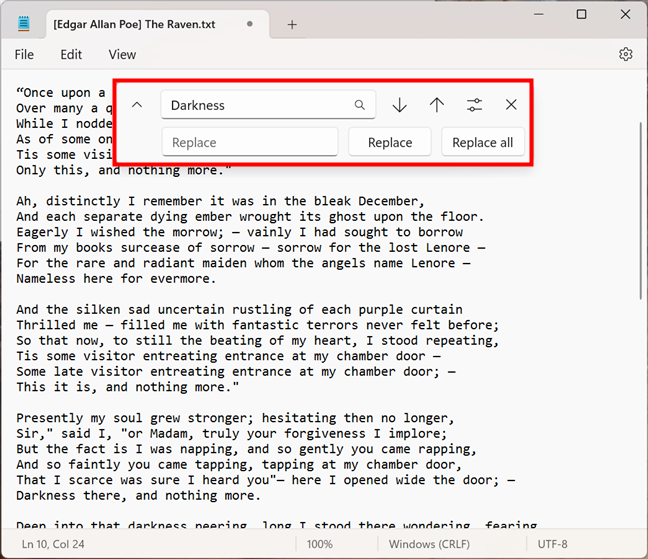
Using the find and/or replace text options in Notepad
Additionally, you also get a couple of search options. Next to the search field, you can choose whether the search will be run downwards or upwards throughout the file, as well as whether you’d like the search to Match case or Wrap around.
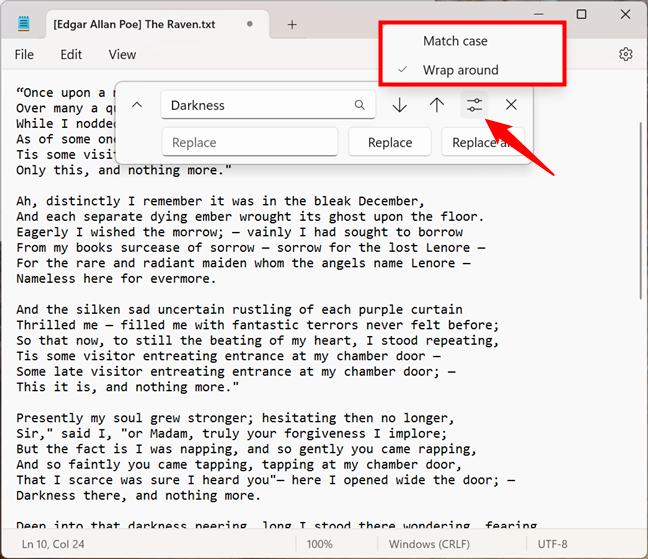
Choose whether to Match case and/or Wrap around
While the former options are self-explanatory, the latter is interesting. Wrap around enables Notepad to continue the search for the text you entered, even after reaching the end or the beginning of the text file. By default, Notepad starts searching from where the cursor is found in the text file, and if you go downward, it stops at the end of the file. Similarly, if you go upward, it stops the search when it reaches the beginning of the file. With Wrap around activated, Notepad continues your search: when it reaches the end of the file, it carries on from the beginning and the other way around.
TIP: Wrap around is a feature that’s also present in Notepad for Windows 10. You can read more about that here: What is Notepad? 9 things you can use it for.
Select all the text in Notepad
Select all is a command with an obvious purpose: it selects all the text in your file.
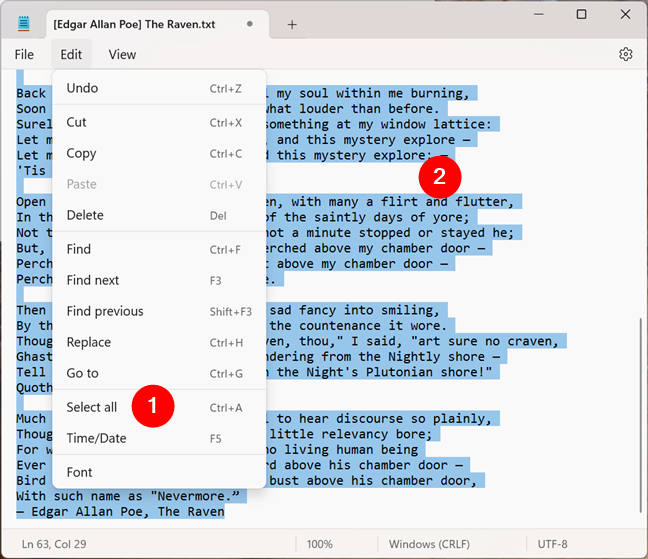
Select all text in Notepad
TIP: If you spend a lot of time working with text, like yours truly, here are all the ways to select or highlight text in Windows.
Insert the time and date in a Notepad text file
Time/Date allows you to automatically insert the current time and date in Notepad.
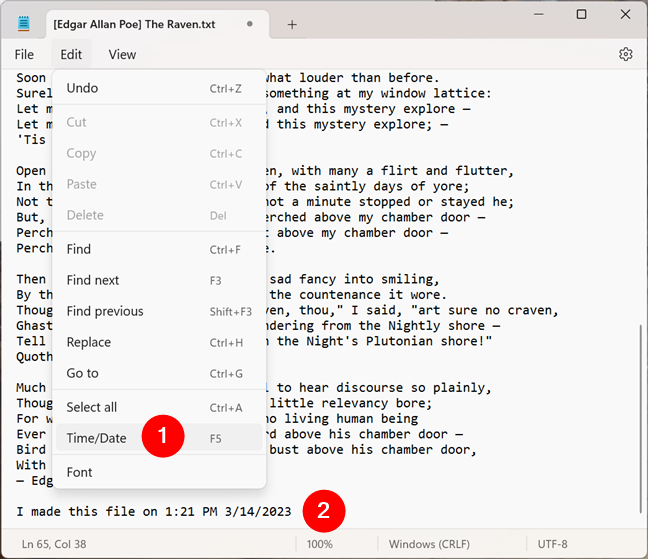
Insert time and date in a Notepad text file
Change the font used by Notepad
Font takes you to the font settings from Notepad, where you can change the font family, style, and size used by the app to display text.
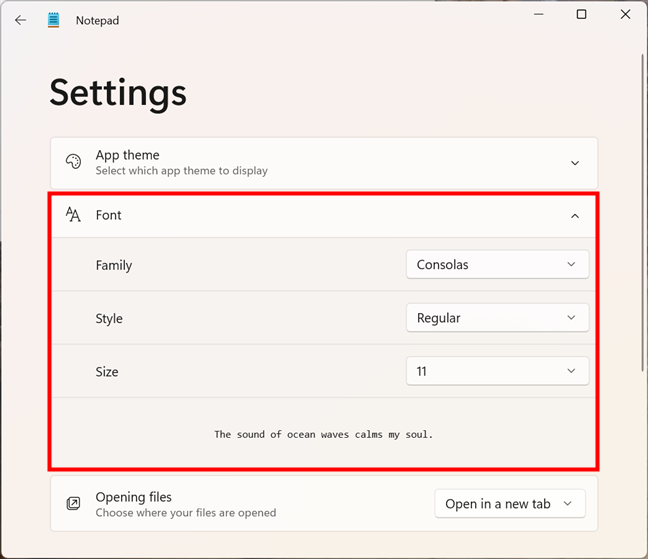
Font settings in Notepad for Windows 11
Keep in mind, though, that changing the font applies to the entire text. Unlike in more advanced document editors (like WordPad or Microsoft Word), in Notepad, you can’t use a font for one portion of text and another one for the rest.
How to change the way you view a text file in Notepad for Windows 11
In Windows 11, Notepad also offers a couple of different options for displaying the text files you open with it. These are all found in the View menu, and they allow you to change the zoom level, show or hide the status bar at the bottom of the window, and wrap words.
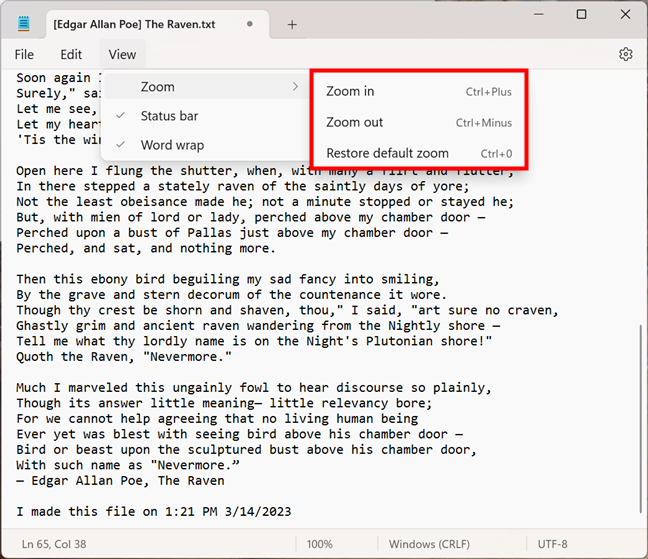
The viewing options available in Notepad
Zooming in or out is done either from the menu or by using the keyboard shortcuts Ctrl + Plus or Ctrl + Minus.
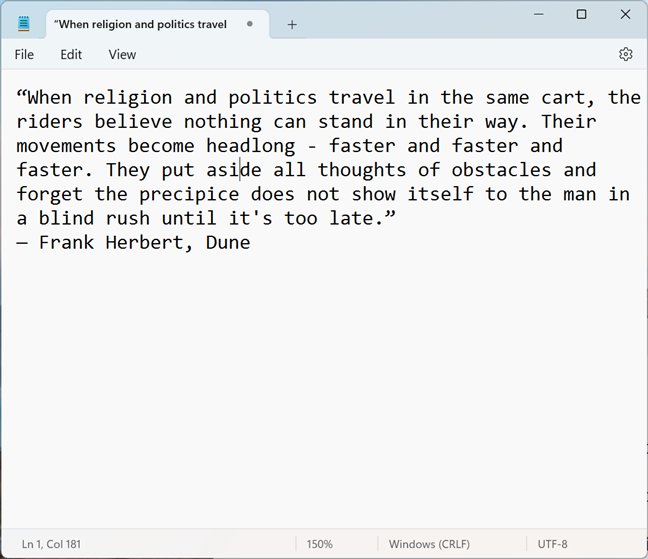
Zooming in Notepad for Windows 11
The Status bar is useful for some people, as it keeps you informed about the position of the cursor inside the text file (unless you enable Word wrap), the current zoom level, and the text encoding used.
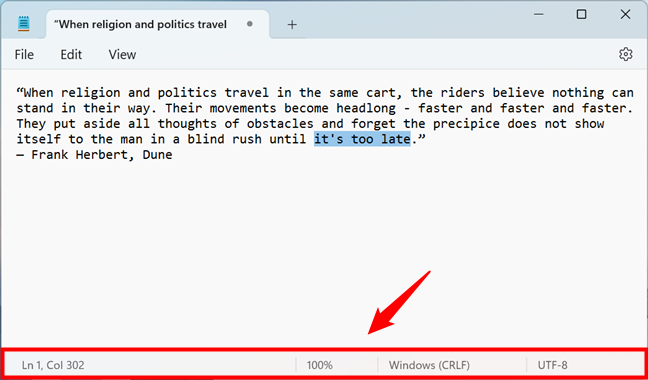
The status bar from Windows 11's Notepad
Speaking of Word wrap, you might be wondering what that is. In older versions of the app, Notepad used to show every line of text from beginning to end in a single row. The only way to split a line of text into two rows was to press Enter. That meant that to read a long line of text, you probably had to scroll horizontally inside the Notepad window to reach its end.
The Word wrap feature, which is enabled by default in the latest versions of Notepad, automatically fits the text inside the Notepad window, displaying it on the next row, instead of forcing you to scroll. So, if you want to read text easier, without having to scroll horizontally, you should definitely have Word wrap enabled.
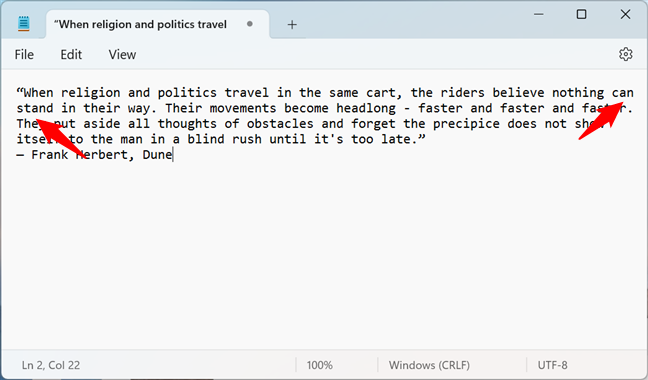
Word wrap turned on in Notepad
How to save a text file with Notepad
When you’re done editing, you can save everything as a text file bearing the .txt extension anywhere you want on your computer. To do so, click or tap on one of the saving options available in the File menu:
- Save (Ctrl + S) - saves the currently open file using its original name or, if it’s a new file, it first asks you to name it.
- Save as (Ctrl + Shift + S) - saves the currently open file using a name and location you specify manually.
- Save all (Ctrl + Alt + S) - saves all the files that are open in any tabs inside the active Notepad window. This doesn’t apply to other open windows of Notepad or the tabs inside them.
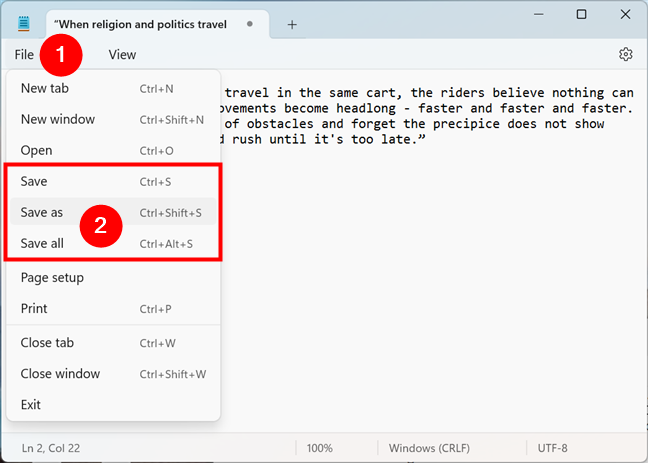
How to save text files with Notepad
If you’ve just created the text file, choosing either save option will trigger the same response. Notepad will ask you where you want to save it and what name you’d like to give it. Choose what you prefer, and then press the Save button.
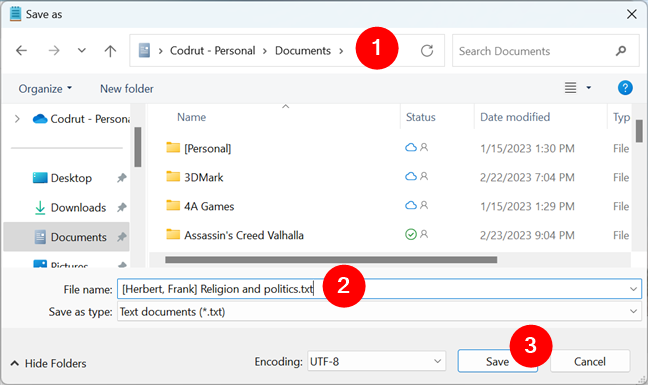
Saving a text file under a different name or in another location
There’s also the possibility that you didn’t create the text file just now from scratch, instead opening and editing a previously created one. In that case, choosing Save or Save all will automatically update the text file(s) you’ve edited. Choosing Save as allows you to create a new text file in your desired location, leaving the old one untouched.
How to print a text file from Notepad in Windows 11
If you want to print a document that you’ve opened or edited in Notepad, things couldn’t be simpler: access the File menu and select Print. However, before you print anything, you might want to adjust how your document will look on paper. For that, you can use the Page setup option from Notepad’s File menu.
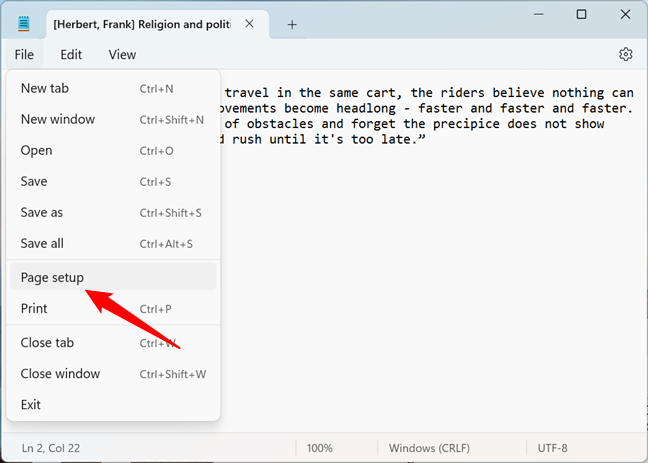
Page setup in Notepad for Windows 11
Although the Page setup options are relatively limited in Notepad, they do provide you with all the basics. You can select the paper size and printer tray used, the orientation (portrait or landscape), margins, as well as the header and footer used, if any.
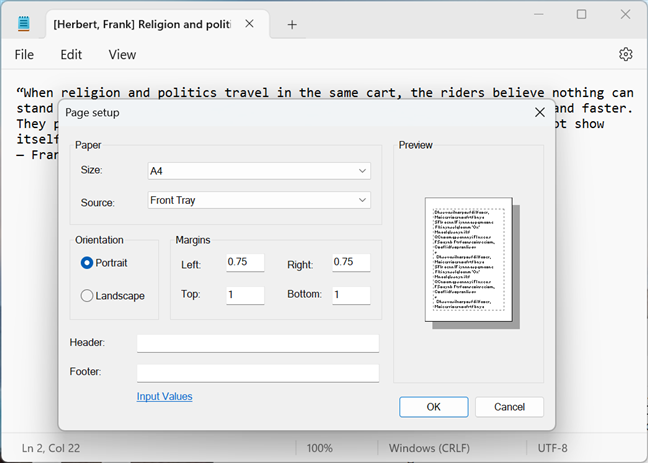
Page setup options available in Notepad
Then, go back to the File menu and select Print.
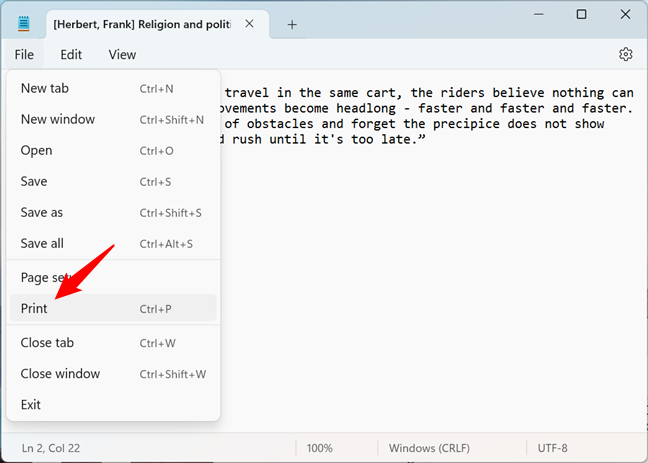
How to print a text file with Notepad
Notepad will launch the Print dialog, where you can further adjust how you want the document to be printed on paper. Change the settings according to your wishes, and press the Print button to send the file to the printer.
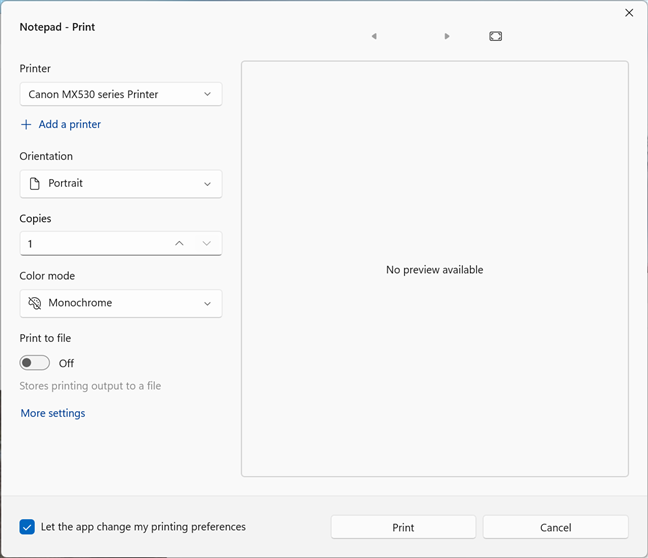
Notepad's Print dialog
TIP: If you have more than one printer installed, here’s how to set the default printer in Windows.
How to display Notepad in dark mode on Windows 11
Windows 11’s Notepad has a feature that’s not available in older Microsoft operating systems, not even in Windows 10. That’s its ability to display its interface in light or dark mode, depending on what you prefer. To change Notepad’s visual interface, press the Settings button in the top-right corner of its window.
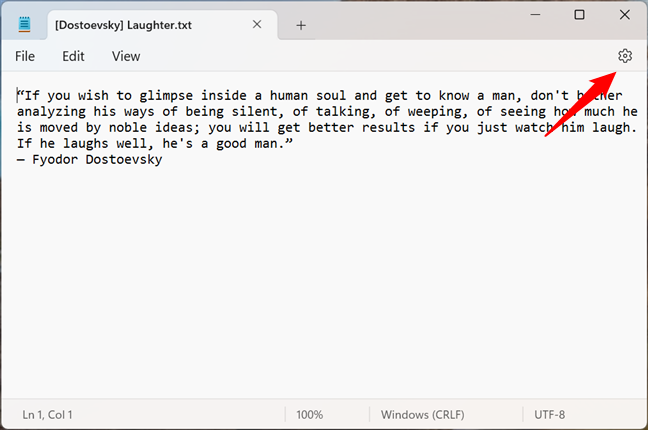
The Settings button from Windows 11's Notepad
Then, on the Settings page, click or tap on App theme and select the display mode you like best: Light or Dark.
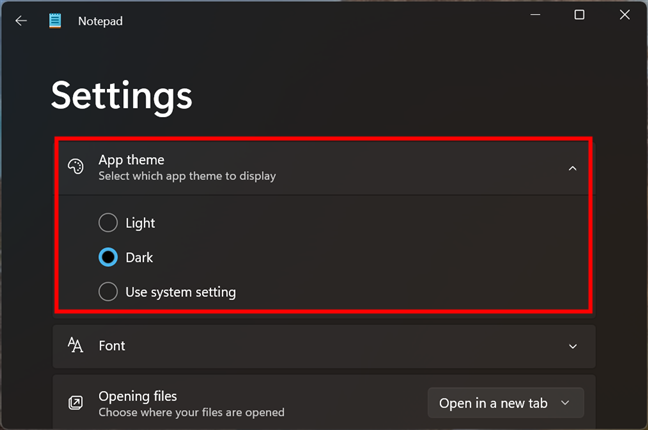
How to turn Dark Mode on for Notepad in Windows 11
Additionally, you can also let Notepad “Use system setting” if you prefer its appearance to automatically change depending on the system-wide settings from Windows 11’s Personalization options. For more about Dark Mode in Windows 11, read this guide: How to turn on Dark Mode in Windows 11.
How to make Notepad open files in new tabs or new windows
There’s one last setting we should cover before ending this Notepad guide: Opening files. As you know now, after the Moment 2 Update for Windows 11, Notepad received support for tabs. Moreover, its default behavior when opening files is to open each in a new tab, not in a new window like in the past. However, you can change that as you please.
To alter the way Notepad opens files, launch the app and head to its Settings by clicking or tapping on the small cogwheel button found at the top-right corner of its window.
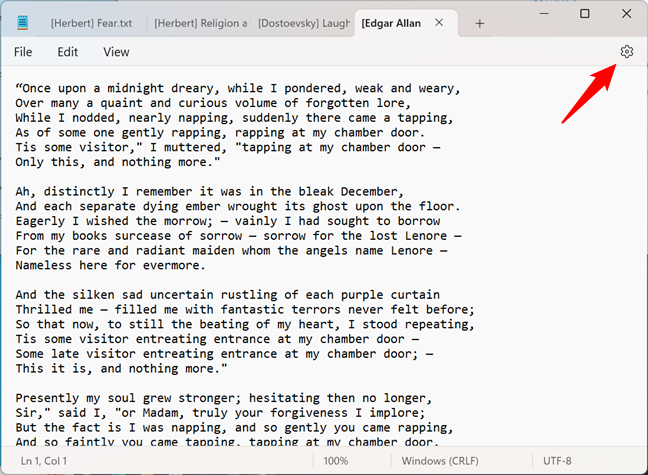
Open the Settings of Notepad
In Settings, click or tap on the drop-down list next to Opening files (Choose where your files are opened), and select the option you prefer: “Open in a new tab” or “Open in a new window.”
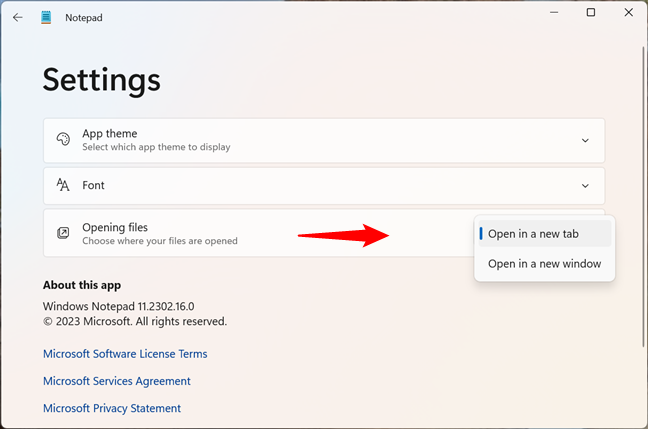
Select how to open files: in a new tab or window
The change happens instantly, so you can just carry on with your work afterward.
Do you use Notepad in Windows 11?
Truth be told, I don’t really use Notepad that often. However, I find it helpful every now and then when I’m in a hurry and want to write something down. What about you? Do you use Notepad on a regular basis? Let me know in the comments below if you find it handy and whether you like its features in Windows 11. What else would you like Microsoft to add to this app?


 16.03.2023