One of the less known features of Windows 7 is the network map. This feature does what its name implies: it shows you a complete map of all the computers connected to your network at a specific point in time. It was first introduced in Windows Vista and it was kept pretty much unchanged in Windows 7. In this guide I will show you how to view a network map, explain what information it shows, how to use it, and what to do in case of issues.
How to View the Network Map
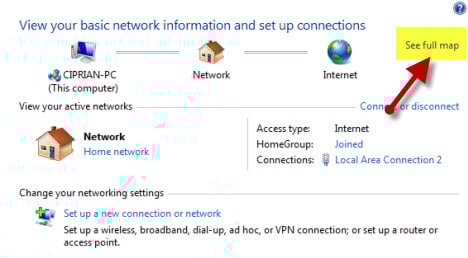
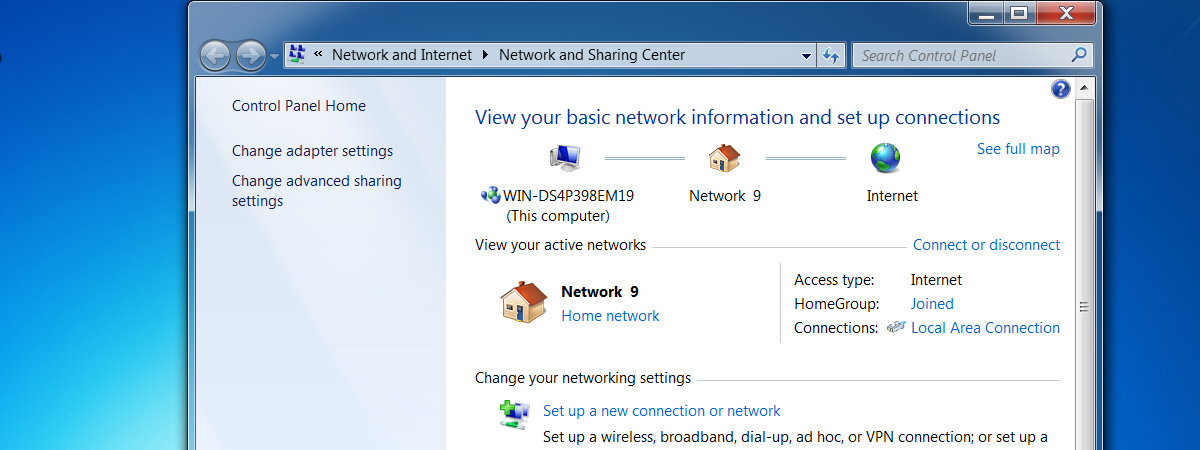
First, open the Network and Sharing Center. On top of the window, you will see a basic network map, showing if and how your computer is connected to the internet.
To view the full network map, click on 'See full map'.
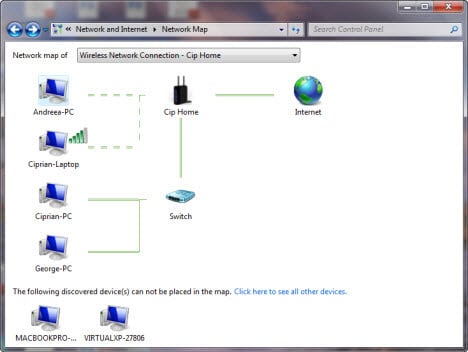
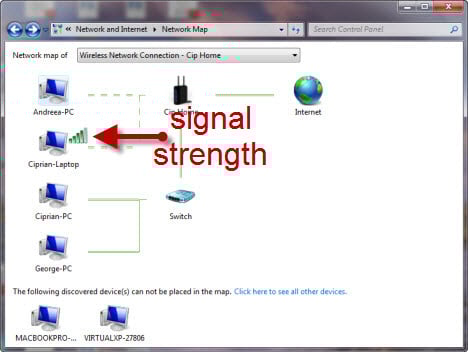
The network map should look somewhat like this.
If you are connected to more than one network, you can switch between network maps. Go to the 'Network map of' section and click on the drop-down menu to select the network you desire.
What Information Can You Get from the Map?
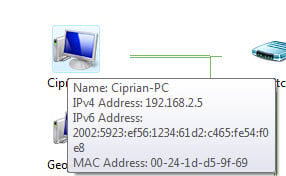
On the first view, the network map just shows how your computers are interconnected. However, the network map can tell you much more. For example, if you hover your mouse over a computer name, you will see some useful information: computer name, IP address, and MAC address.
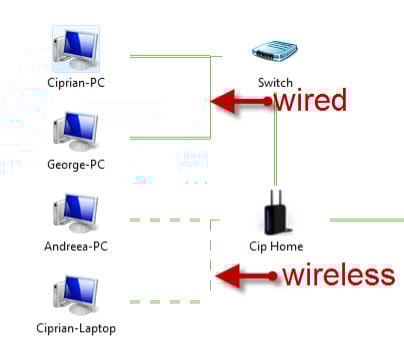
Depending on how the lines are shown, you can tell which computers are connected via cable or wireless signal. All computers connected via cable have a line for each of their connections. The ones connected via wireless have an interrupted line showing their connections.
Depending on the model of your laptop and the type of wireless network card, Windows 7 can also show you the signal strength for each of the computers connected via wireless.
You can also do some actions on the computer map:
- Click on a computer - this will open a Windows Explorer window showing you all the shared files, folders, and devices on that computer.
- Click on the router icon - it will open the administration page of that router in a new browser window.
- Click the Internet icon - it will open the Internet troubleshooting wizard.
Why are there Computers Missing from the Network Map?
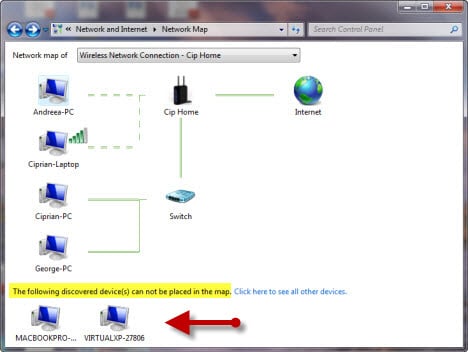
Some of the computers on your network may not show up in the network map or, they may show up in a separate section, like the one shown below.
If that's the case, it means that your Windows 7 computer cannot detect it properly and place it on the network map. This can occur for the following reasons:
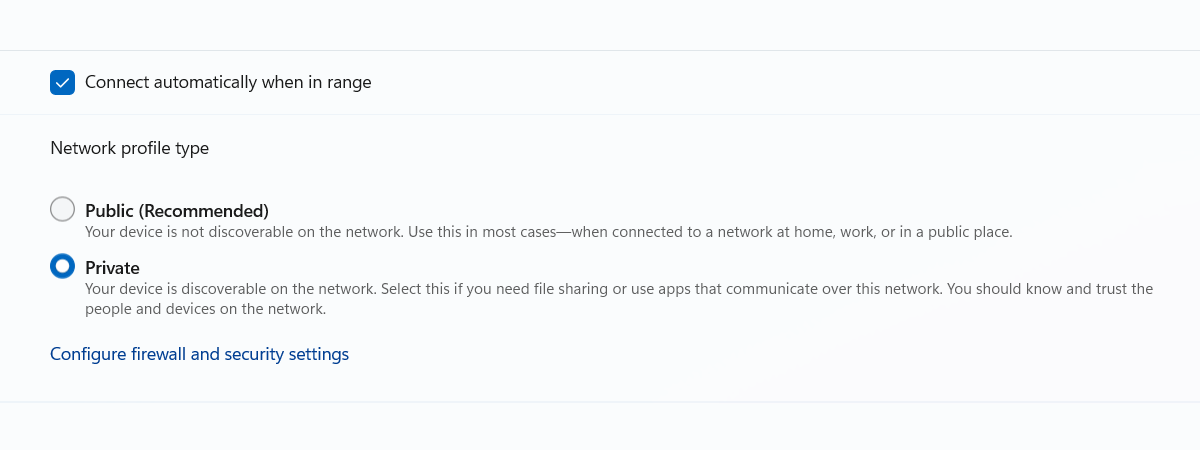
- You are connected to a Public network - on public networks computer discovery is not enabled, so your network map will not include other computers.
- Network discovery is turned off
- The computer is running Windows XP - in this case, you need to install this update on the Windows XP computer and follow the instructions documented by Microsoft.
- A firewall is blocking the network discovery - you need to check the firewall settings on the computer which is not showing up and make sure it allows for network discovery and sharing.
- The computer runs non-Microsoft operating systems - if you have a Mac or a computer with a Linux OS, chances are it will now show up on the map.
What to Do in Case of Errors
It can happen that your computer displays an error message that the mapping process did not work. Personally, it never happened to me, no matter how much I tried. However, if it happens to you, try the following:
- Press F5 to refresh the network map. If the error persists try the suggestions below.
- If you are connected to a wireless network and the signal is poor, move closer to the wireless router providing the signal.
- The router can be incompatible with the protocol used by Windows 7 (Layer Topology Discovery - LLTD) to show the map. If that is the case, the only thing you can do is to replace the router with a newer model.
Conclusion
Even though this feature is not well known, it can prove to be very useful. After playing with it for a while, I really love it and use it surprisingly often to access the computers on the network and check which computers are turned on or off.


 12.02.2010