From the very beginning, laptop manufacturers have included special function keys on their keyboards, offering users quick and easy access to common tasks. However, each manufacturer’s idea of what would be useful was unique, so there was no consistency from brand to brand. Microsoft has built the Windows Mobility Center right into the operating system, so all notebook and tablet users can have fast access to some of the most useful settings for portability. In this tutorial, we’re going to show you how to use Windows Mobility Center in Windows 10:
What is Windows Mobility Center?
Windows Mobility Center is an application designed to offer quick access to the features and settings most commonly accessed by users of mobile devices such as laptops, tablets, and convertibles. It’s important to keep in mind that you don’t get access to the Windows Mobility Center unless you have a portable computer of some kind, like a laptop, a tablet, or hybrid device.
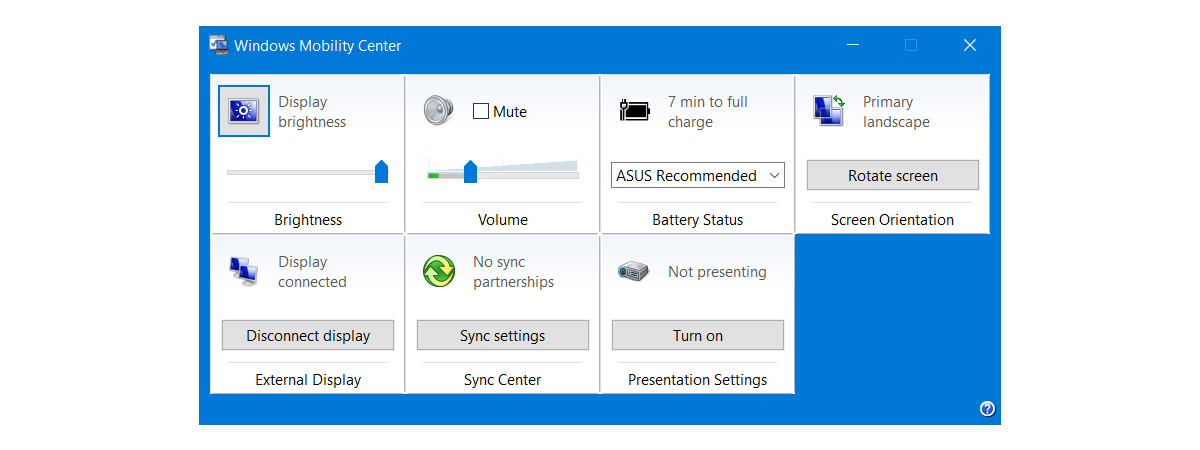
Windows Mobility Center is not exactly a popular application, and not many people know about it. Still, Microsoft offers it in all Windows versions after Vista, including Windows 10. Among the things offered by Windows Mobility Center, the ones we deem most important are the ones that let you access battery settings, display brightness, sound volume, and presentation mode. We’ll talk about them, in detail, in the next section of this article.
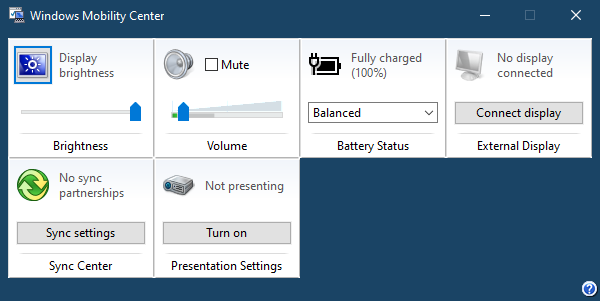
Windows Mobility Center in Windows 10
Windows Mobility Center is included both in Windows 10 Pro and Home editions. Before we show you how to use Windows Mobility Center, first make sure you know how to open it by reading this guide: 10 ways to open the Windows Mobility Center in Windows.
How to use Windows Mobility Center
The power of Windows Mobility Center lies in its simple interface. Instead of multiple key-presses on proprietary keys or navigating through the Start Menu, you can use familiar sliders and drop-down menus. Since most of the extra functions on laptop keys are printed in colors that don’t usually stand out, using the Windows Mobility Center saves a lot of squinting for people whose eyesight isn’t what it once was.
The Display brightness and Volume sliders are self-explanatory, and you’ve probably used them outside the Windows Mobility Center before. Use the slider you want and move it to the level you want. Reducing your screen brightness is one of several quick and easy ways to make your battery last longer. Although the battery power plans automatically lower your screen’s brightness, you can choose your own setting by moving the slider to a level that suits your preferences.
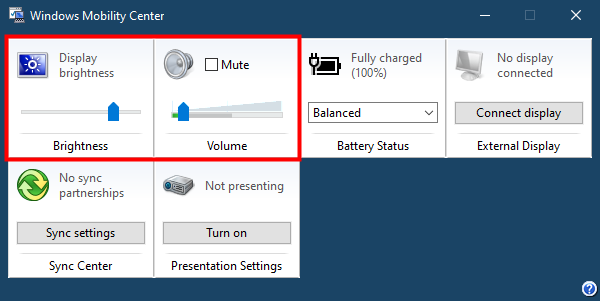
Windows Mobility Center in Windows 10: Brightness and Volume
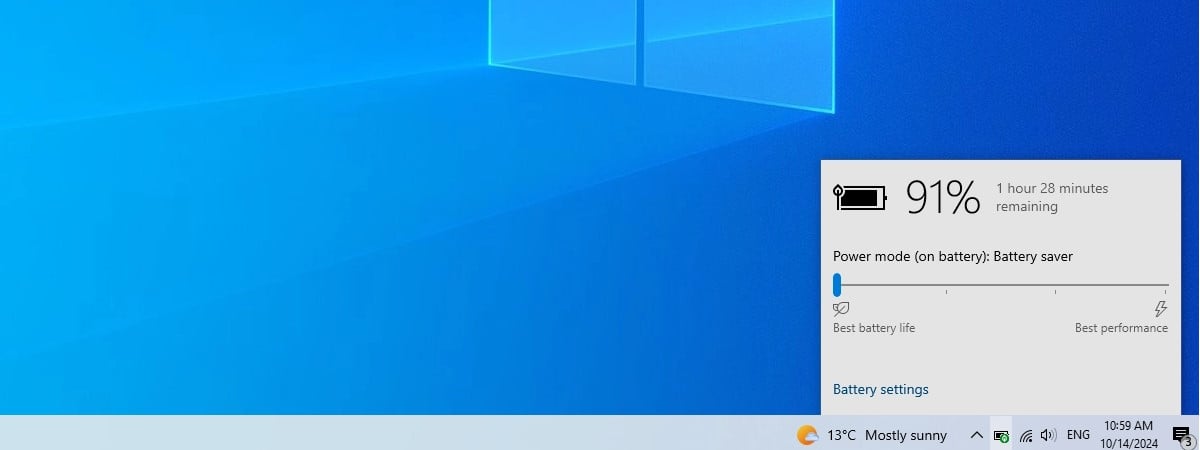
The Battery Status tile immediately lets you see how much charge is remaining and lets you choose one of Windows 10’s built-in battery power plans. Microsoft’s terminology gives you a choice of Balanced, Power saver, and High performance.
The Balanced power plan, which is usually the default, lets Windows 10 work automatically to balance power savings and performance. The other two are self-explanatory: they allocate resources to maximize battery life or to maximize performance. It’s worth experimenting with all three settings to see which best suits your style.
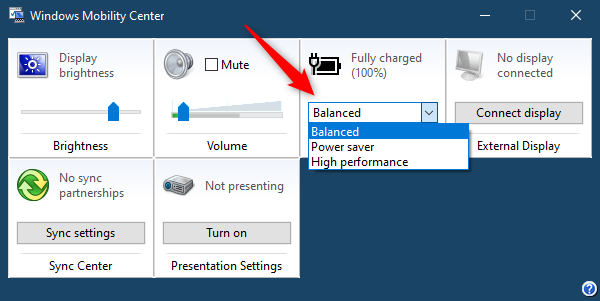
The Battery Status from Windows Mobility Center lets you select Power Plans
The External Display tile helps you set up a connection with a secondary display. Pushing the Connect display button opens Windows 10’s Project (keyboard shortcut: Win + P) options that allow you to connect your laptop (or tablet) to a secondary screen.
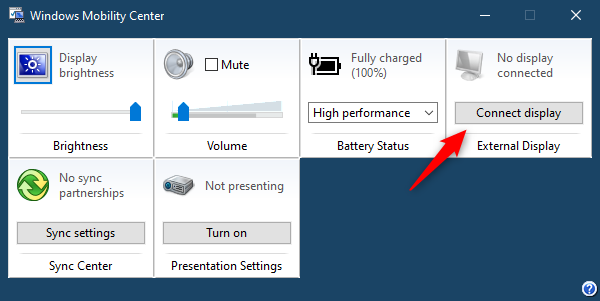
Connect a display via Windows Mobility Center in Windows 10
Once a connection to an external monitor or similar screen is safely in place, Windows Mobility Center lets you know that a “Display [is] connected.”
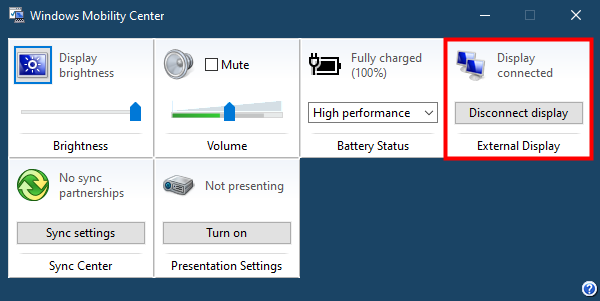
Windows Mobility Center - Display connected
The Sync Center tile from Windows Mobility Center takes you to something called the Windows Sync Center. It’s a feature from Windows operating systems that allows you to sync data like folders and files between desktop PCs and mobile devices such as laptops or tablets.
It’s an old tool that could be useful in older versions of Windows but feels useless in Windows 10, where features like the local HomeGroup are gone, and sharing files is something that Microsoft wants to be handled by OneDrive. Furthermore, the old Sync Center looks like it has significant problems - at least on our computers, it refuses to enable Offline Files, which is practically its essential feature.
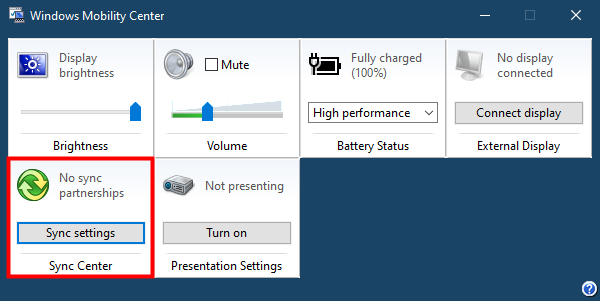
Opening the Sync Center from Windows Mobility Center in Windows 10
In some earlier versions of Windows, getting set up for a presentation was a time-consuming and sometimes frustrating process. Windows Mobility Center makes everything incredibly simple. When you click or tap “Turn on” for the first time, on the Presentation Settings tile, Windows 10 pops up a window that asks you if you are doing a presentation.
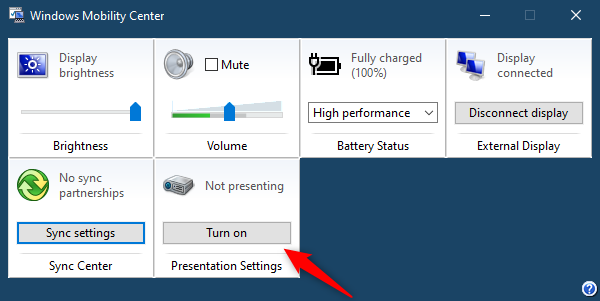
The Presentation Settings from Windows Mobility Center
When you check the box that says “I am currently giving a presentation,” Windows 10 immediately disables any power-saving settings that would turn off your display, and all system notifications should be silenced. You can also choose to turn off the screen saver, adjust the speaker volume, and change your desktop background to one that can’t distract you from your presentation.
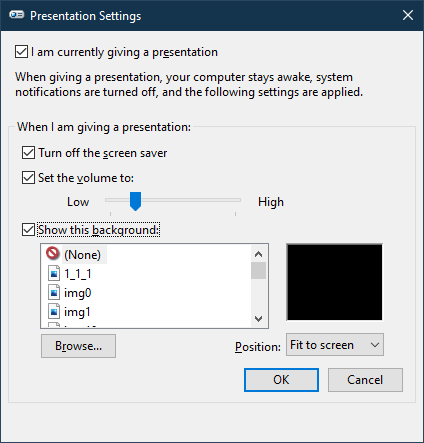
Adjusting the Presentation Settings
After the first time, Windows Mobility Center turns that button into an on/off toggle. If you want to change the presentation settings again, you can quickly launch the presentationsettings.exe file from the Run box (Win + R).
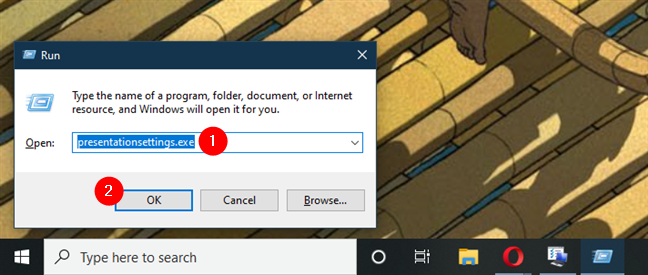
How to open Presentation Settings: run presentationsettings.exe
What do you use the Windows Mobility Center for?
Windows Mobility Center can be useful if you have a portable computer like a laptop, tablet, or 2-in-1 device. Being able to control the basic settings available in it can be helpful if you struggle remembering which proprietary keys to use. With it, preparing for a presentation is also just a matter of a few clicks or taps. If you didn’t use Windows Mobility Center yet, why not check it out today? You might like it. 🙂


 26.02.2021
