If you want to make sure others can’t access your data when you step away from your PC, it’s a good idea to learn how to lock the screen in Windows 11. This also saves battery while keeping your Windows session active in the background, so you can simply log in to get back to what you were doing. This guide illustrates how to lock a Windows 11 PC in seven different ways:
1. Use a keyboard shortcut to lock Windows 11
If you’re in a hurry and want to lock Windows 11 as fast as possible, the Windows lock screen shortcut is your best option. Press Windows + L simultaneously on your keyboard to lock your Windows 11 device.
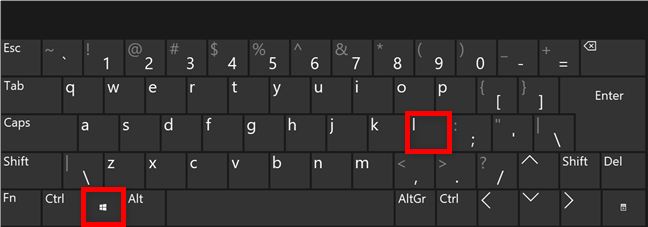
The Windows lock screen shortcut
The Windows 11 lock screen is immediately displayed.
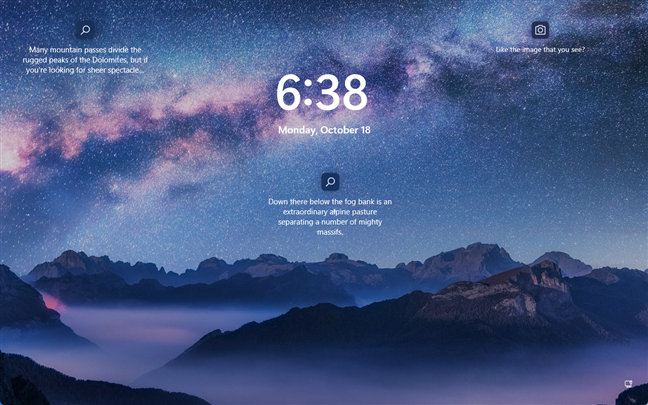
The Windows 11 lock screen
2. How to lock Windows 11 from the Start Menu
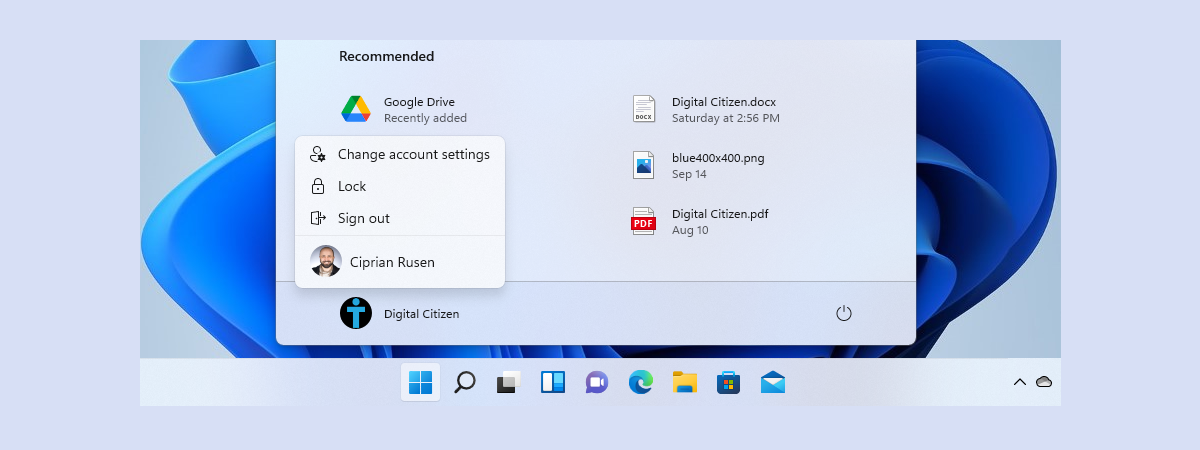
The Windows 11 Start Menu offers another quick way to lock the screen. First, press the Windows key or the Start button on your taskbar to open the Start Menu, and click or tap on your username in the bottom-left corner. Then, in the account menu, click or tap on Lock.
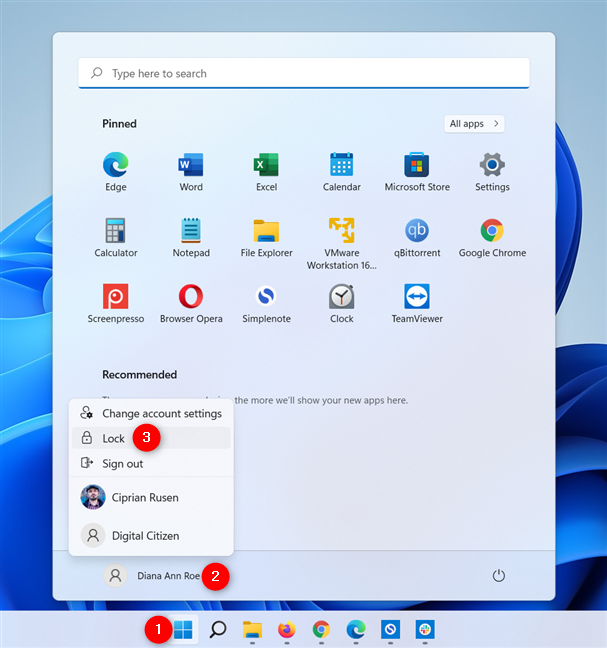
Lock screen in Windows 11 from the Start Menu
3. How to lock a computer with Windows 11 from the Ctrl + Alt + Delete screen
Another fast way to lock Windows 11 begins by pressing Ctrl + Alt + Delete simultaneously on your keyboard. This opens the Ctrl Alt Delete screen, where the first option is to Lock your Windows 11 device. Click or tap on it.
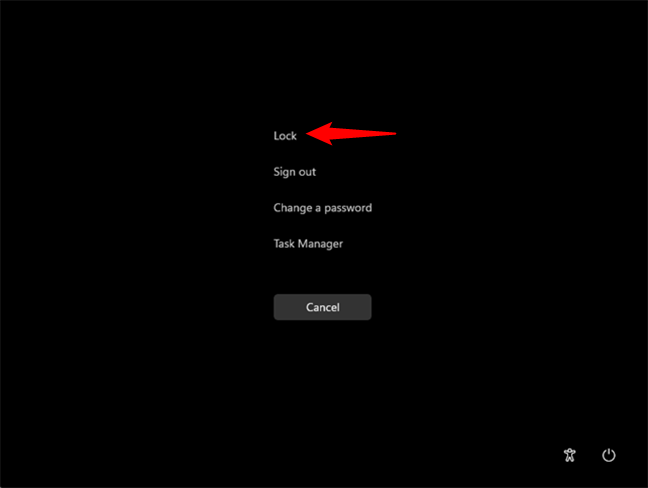
In Windows 11, lock screen from the Ctrl + Alt + Delete screen
You can also use this screen to launch the Task Manager, used in the following Windows 11 locking method.
4. How to lock Windows 11 using the Task Manager
First, open the Task Manager and, if necessary, expand it by pressing the More details button in the lower-left corner. Then, access the Users tab, select the current user account, and click or tap on Disconnect in the bottom-right corner.
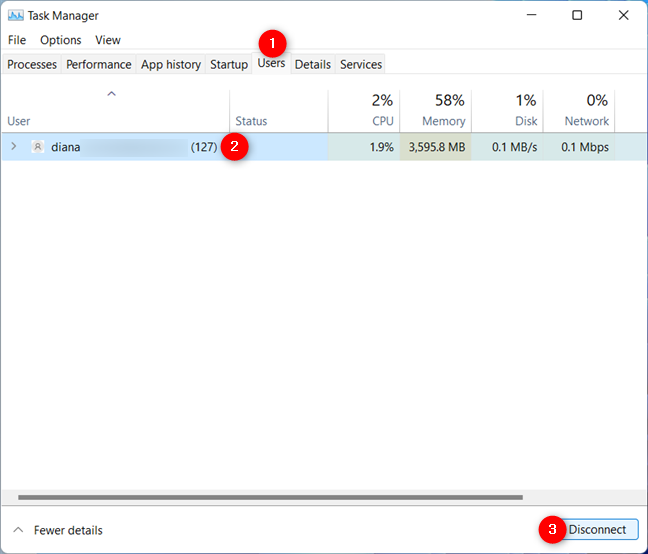
Use the Task Manager to lock Windows 11
5. Use the Windows 11 lock screen command
If you work with command-line interfaces, you can lock Windows 11 using Command Prompt, PowerShell, or Windows Terminal. The Windows lock screen command can also be executed from the Run window. Open the application you want and insert the following command:
Then, press Enter on your keyboard (or OK in the Run window), and your Windows 11 device is locked.
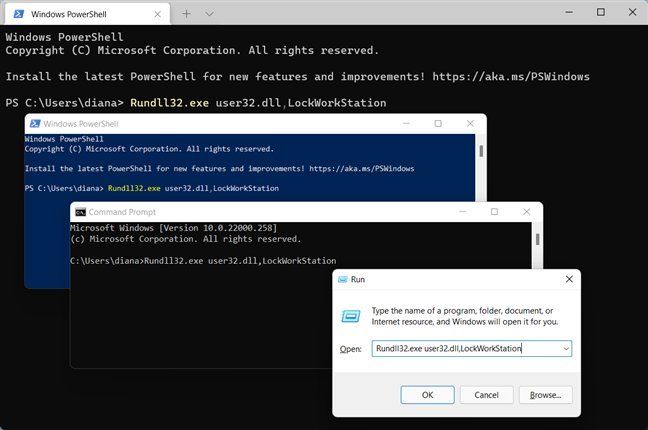
In Windows 11, lock screen using a command line
6. How to lock Windows 11 by creating a shortcut
You can also create a shortcut to lock Windows and place it in a location of your choice. First, right-click or press-and-hold on an empty space on your desktop. Next, tap or hover over the New option, and then click or tap on Shortcut.
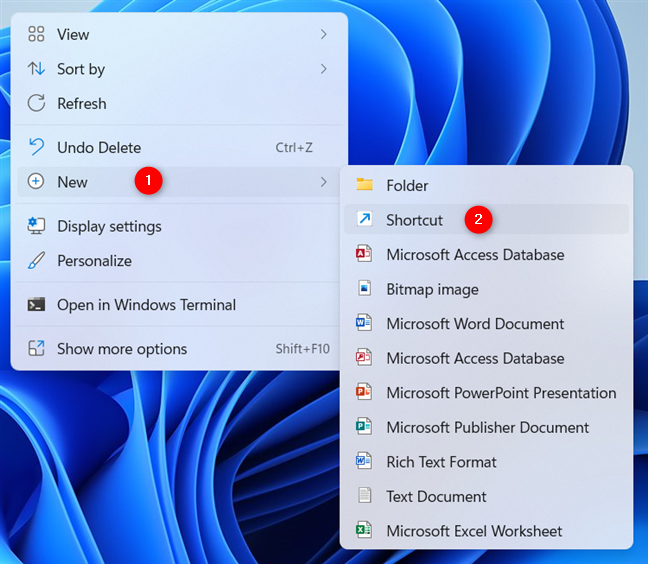
Create a shortcut
This opens the Create Shortcut window.
Set this item’s location, and click or tap on Next:
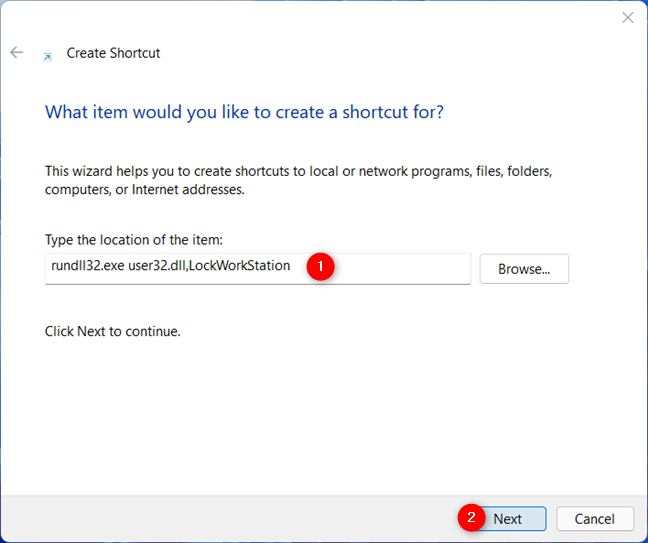
Type the location and press Next
Choose a name for your shortcut and click or tap on Finish.
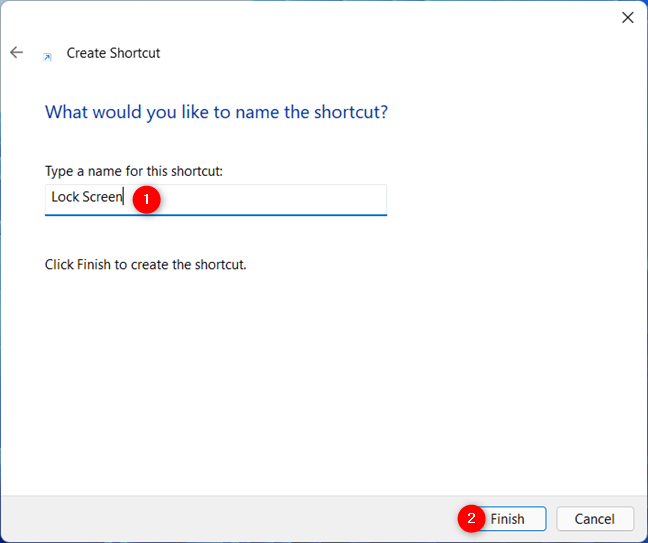
Insert a name for your shortcut and press Finish
The shortcut is added on the desktop, and you can now use it to lock Windows 11.
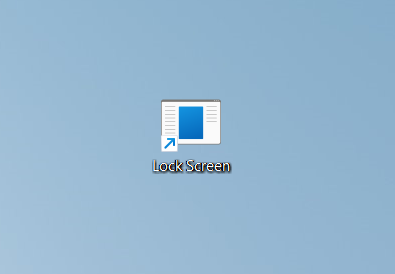
Use the Windows lock shortcut on your desktop
7. How to lock the screen in Windows 11 automatically from Screen Saver Settings
You can use a screensaver to have Windows 11 lock the screen automatically when you’re inactive for a certain period of time. To begin, open the Start Menu and search for screen saver. Then, click or tap on “Turn screen saver on or off” or “Change screen saver.”
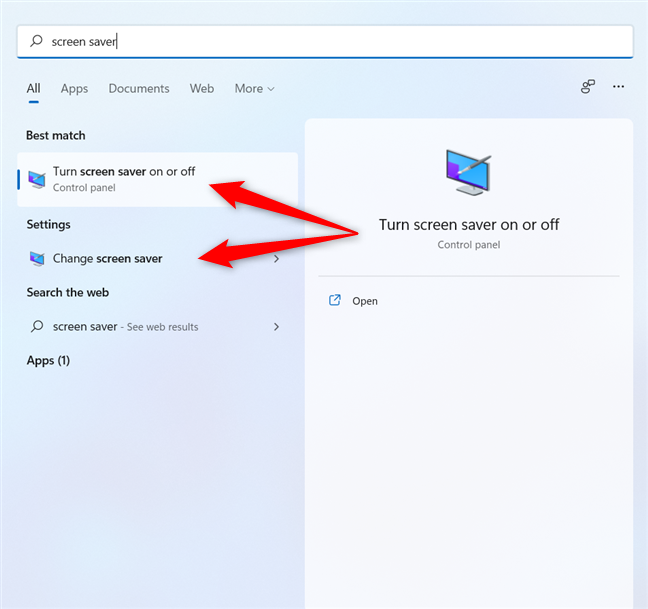
Search for screen saver and open one of the two entries
This opens the Screen Saver Settings window. First, choose one of the options available in the Screen saver dropdown menu, other than (None).
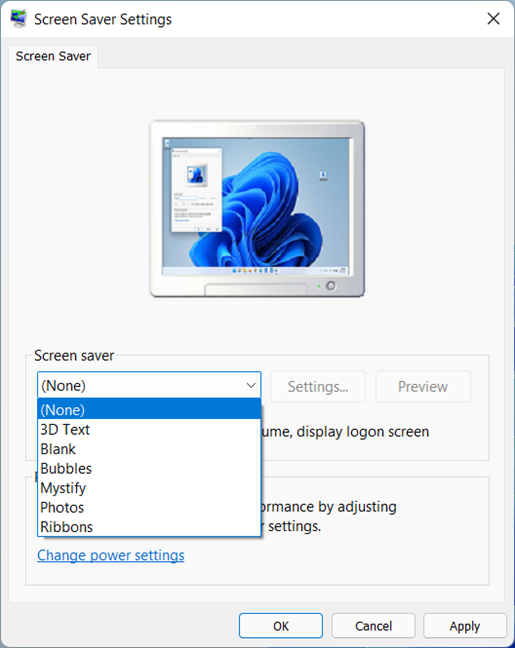
Choose a screensaver for Windows 11
Then, in the Wait box, set the number of minutes that should pass before your PC locks. Finally, make sure to check the “On resume, display logon screen” option and click or tap OK.
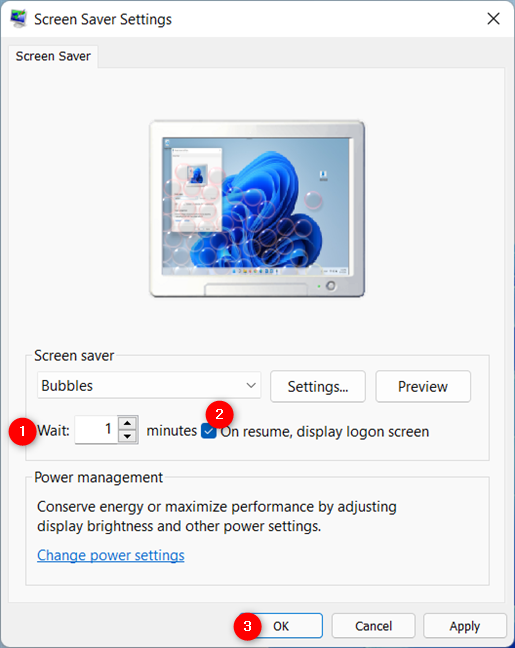
How to lock Windows 11 by enabling the screen saver
If you are inactive for as many minutes as you chose, your screensaver starts, and Windows 11 is locked.
How do you lock the screen in Windows 11?
We recommend locking the screen in Windows 11 whenever you step away from your computer because it’s the fastest way to prevent unauthorized access to your device. However, if you always forget to do so, having the screen in Windows 11 lock automatically is also a good idea. Which method of locking Windows 11 do you prefer? Do you find the shortcut to lock Windows 11 easy to use? Let us know your thoughts in the comments below.


 26.10.2021

