
 02.08.2024
Setting up a business network typically conjures images of tangled cables and complex configurations made from a computer or more. But what if you could do it all with just your smartphone? ASUS aims to simplify the network setup process for its ExpertWiFi line-up using a mobile app bearing the same name. Install the app on your smartphone, and with a few taps, you can set up and install both wired and wireless routers, as well as other types of networking equipment. Let's see how this app works and go through the necessary steps to set up your ASUS ExpertWiFi network using nothing but your mobile device:
How to install an ASUS ExpertWiFi wireless router
Many SMBs have larger locations where they need solid WiFi coverage. For such locations, using only a router like an ASUS ExpertWiFi EBR63 may not be enough, and you may have to add an access point like the ASUS ExpertWiFi EBA63 or more.
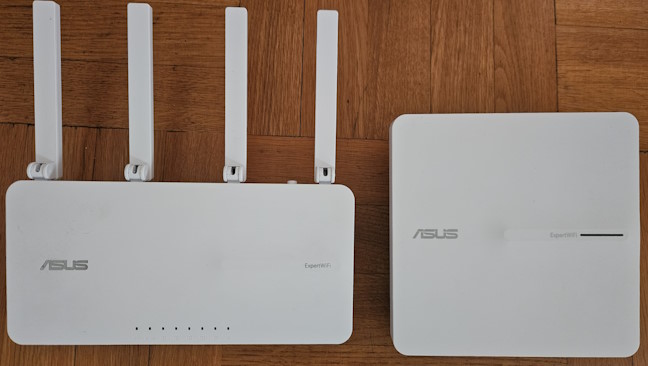
ASUS ExpertWiFi EBR63 and ExpertWiFi EBA63
In situations like this, you install the ExpertWiFi router first, add the access point as a secondary node, and build an AiMesh mesh Wi-Fi system. Plug the router into the power outlet, connect it to the internet, and then fire up the ExpertWiFi app on your smartphone. It is available for free on Android and iOS. After you install the app, open it, accept its terms and conditions, and sign in with an ASUS account. You can then use it to set up a new router or manage one to which you’re already connected. Since you’re starting to set up your ASUS ExpertWiFi network, choose Setup.

In the ExpertWiFi app, tap Setup
You are asked to choose whether you want to install a wireless networking device like a router, mesh Wi-Fi system or access point, or a wired router. You’re dealing with the first scenario, so choose the ASUS ExpertWiFi Wireless series. The second scenario has its own section further down in this guide.
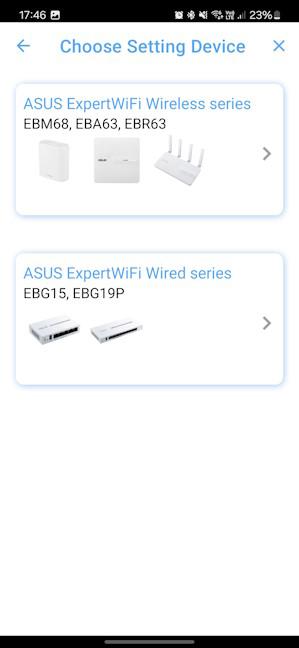
Choose ASUS ExpertWiFi Wireless series
If you’re near the ASUS ExpertWiFi router or mesh Wi-Fi, the app should detect its network and display it. Tap the network name to continue and enter its password, printed on a sticker on the back of the router or mesh Wi-Fi system.
You can also tap Enable Camera and Scan. Then, point the camera of your smartphone to the sticker on the back of the router/mesh Wi-Fi, which has a QR code for connecting to it, tap OK to connect to its network, and confirm your choice.
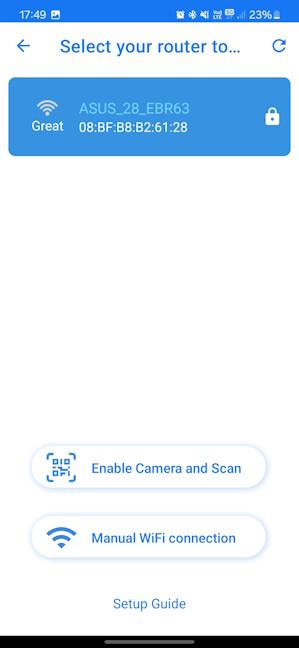
Tap the network name
The ExpertWiFi app then connects to the selected network emitted by the router or mesh Wi-Fi you want to install. When the process is finished, you see a picture of the router/mesh Wi-Fi and its device name, similar to the screenshot below. Tap Get Started to install it.
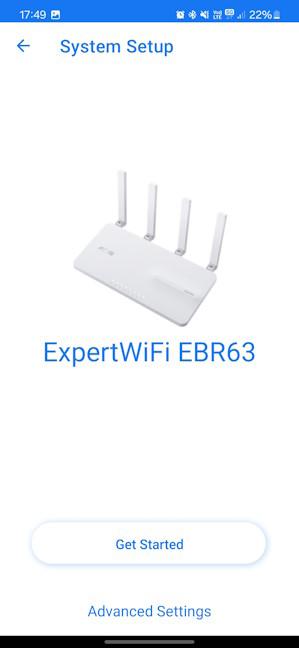
Tap Get Started
The ExpertWiFi app takes some time to detect the type of internet connection you’re using and then requests the necessary connection information from you. In my case, I’m using a PPPoE connection, so it requested the connection username and password. Enter the necessary information and tap Check.
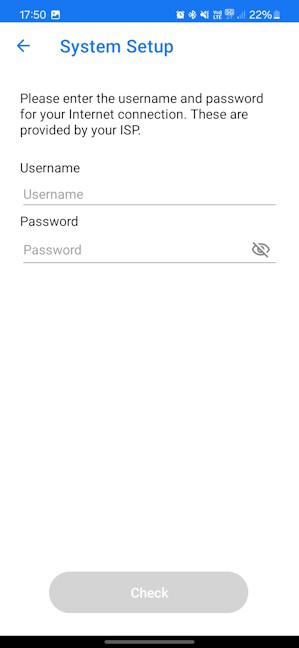
Enter the details for connecting to the internet
You are then asked if there’s a special requirement from your internet service provider (ISP) for IPTV streaming. If there is, enable the switch and provide the necessary information. However, in most situations, tapping Next is sufficient.

Tap Next
Your ASUS ExpertWiFi router or mesh Wi-Fi shows you the default network name and password. I advise you to personalize the name of your Wi-Fi and its password. It is also a good idea to separate the 2.4 GHz and 5 GHz bands. When you’re done setting things up, tap Next.

Enter the name and password for your Wi-Fi
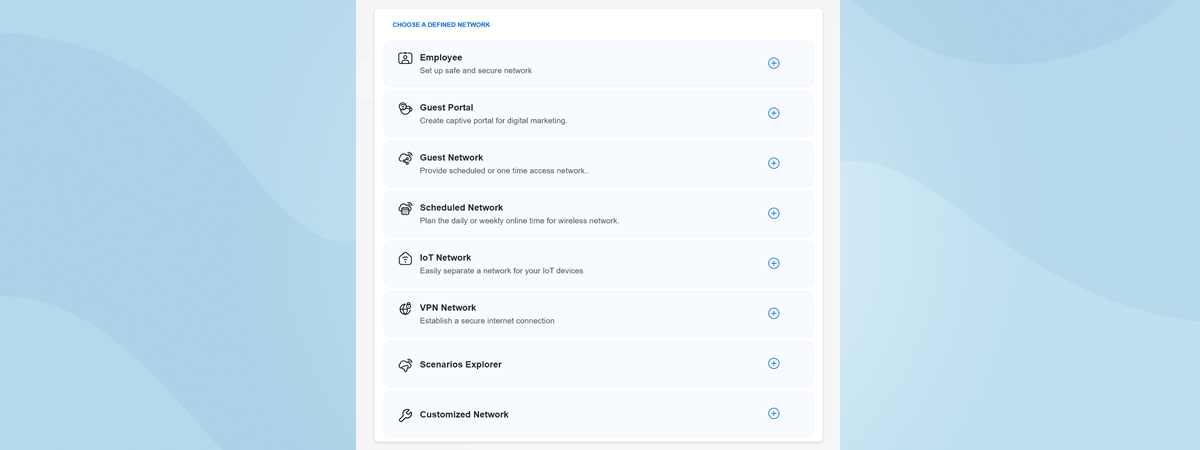
You are informed that the main wireless network has been set and asked if you want to add one more network for special use, like a Guest Portal or Guest Network. For now, tap Later, and configure it after having added all your ASUS ExpertWiFi networking equipment.

Tap Later
TIP: Here’s how to use the Self-defined Network (SDN) on ASUS ExpertWiFi.
You are asked whether you want to keep using the local login account for your ASUS ExpertWiFi router or mesh Wi-Fi that was set by its manufacturer or whether you want to personalize them. These details are printed on the back of your router/mesh Wi-Fi.
However, I recommend changing them and using an account with a name different from admin. This change alone will make hacking into your ExpertWiFi harder. 🙂When you’re done making your choices, tap Apply.
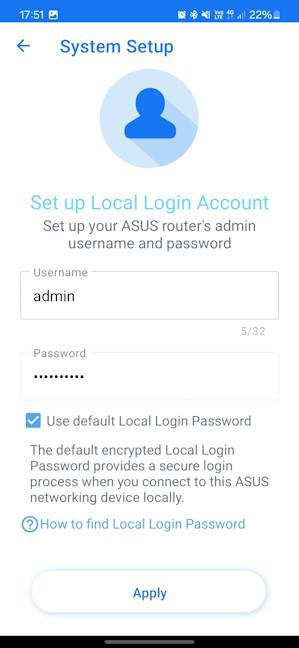
Set up the local admin account for your router
The ExpertWiFi app spends some time to send your settings and apply them. During this process, your router/mesh Wi-Fi will change the network name according to your settings, and you have to reconnect your smartphone to the new Wi-Fi that is being created. After you connect to the new Wi-Fi, your ASUS account will also get bound to the router/mesh Wi-Fi that you’ve just set up.
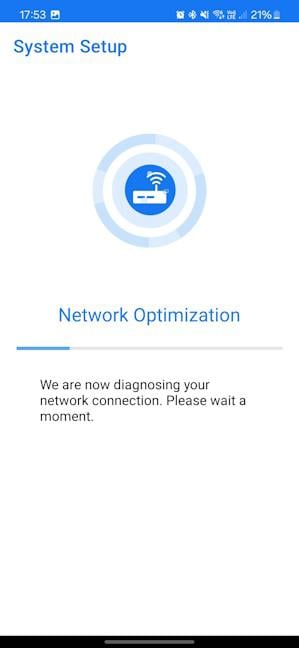
ExpertWiFi applies your settings and optimizes your network
When the initial setup is over, you’re informed that the network is operating perfectly, and you see the new Wi-Fi name and password. Tap Finish.
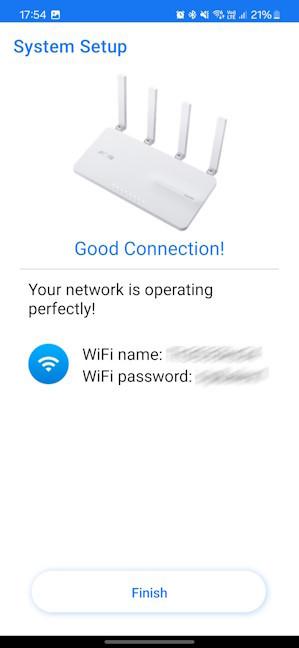
Tap Finish
You then see the Home tab of the ExpertWiFi app. You may also receive notifications to enable different settings. Go through them and make your choices.
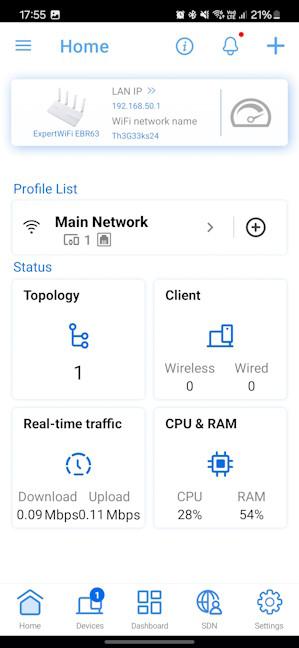
The Home tab of the ExpertWiFi app
If you need to add an ASUS ExpertWiFi access point, continue reading the dedicated section later in this guide.
How to install an ASUS ExpertWiFi wired router
Businesses that require a more complex network may need to use a wired router instead, one with Power over Ethernet (PoE) capabilities like the ASUS ExpertWiFi EBG19P, and add one or more access points like the ASUS ExpertWiFi EBA63 pictured below.
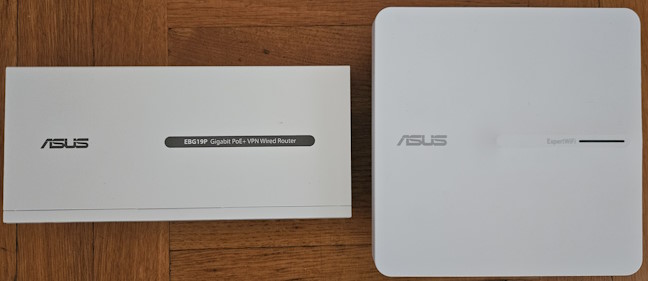
ASUS ExpertWiFi EBG19P and ExpertWiFi EBA63
In this situation, you also have to install the router first. However, most network administrators start by connecting a computer to the router and setting it up from there, as shown in this guide: How to install your ASUS ExpertWiFi networking equipment. Few people know that the ExpertWiFi wired routers have a built-in Bluetooth chip which allows you to connect to them from a smartphone and set them up using the ExpertWiFi mobile app like this:
Plug the wired router into the power outlet, connect it to the internet with the appropriate cable, and then fire up the ExpertWiFi app on your smartphone. After you install the app, open it, accept its terms and conditions, and sign in with an ASUS account. When you see the screen below, choose Setup.
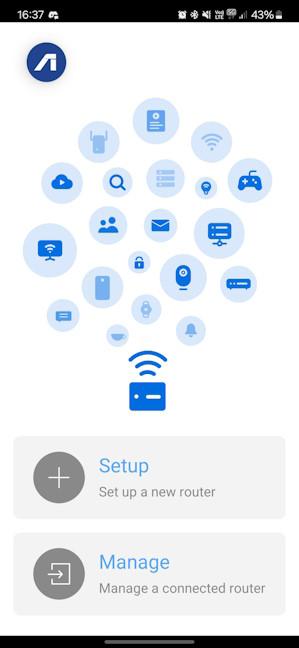
In the ExpertWiFi app, tap Setup
Next, choose the ASUS ExpertWiFi Wired series. This choice is a must when setting up any wired router from the ExpertWiFi family, including the smaller ASUS ExpertWiFi EBG15.

Choose ASUS ExpertWiFi Wired series
Look for the QR code on the bottom of your ASUS ExpertWiFi router, tap Enable Camera and Scan, and point the smartphone’s camera towards this code.
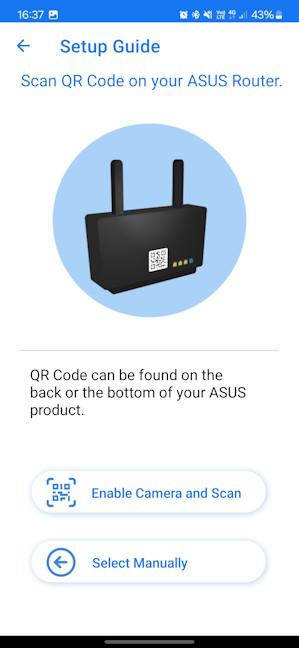
Tap Enable Camera and Scan
When asked if you want to connect to the router, tap OK.
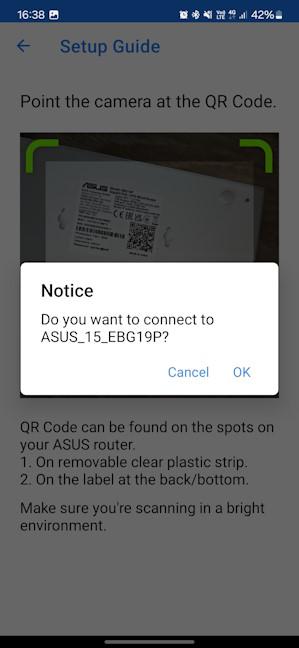
Scan the QR code on the back of your router and connect
The ExpertWiFi app spends some time connecting to the router. Please keep in mind that Bluetooth connections are slower than Wi-Fi ones, so the remainder of this process will be lengthier than when setting up a wireless router. After the app has connected to the router, you see a picture of it and its name, similar to the screenshot below. Tap Get Started.
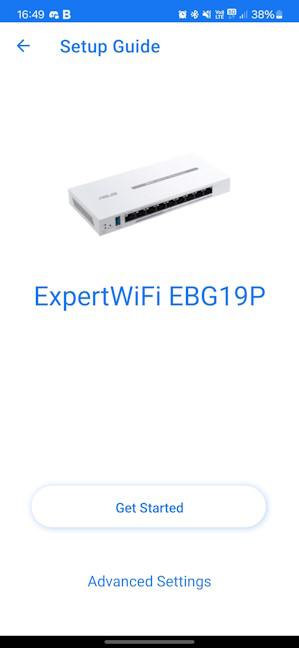
Tap Get Started
ExpertWiFi detects the type of internet connection you’re using and then asks for the necessary connection details. Type them and tap Next. Keep in mind that for your internet connection you may not be required to enter a username and password, but something else entirely.

Type the internet connection details
You are then asked if there’s a special requirement from your internet service provider (ISP) for IPTV streaming. If there is, tap Go and provide the necessary information. Otherwise, tap Skip.
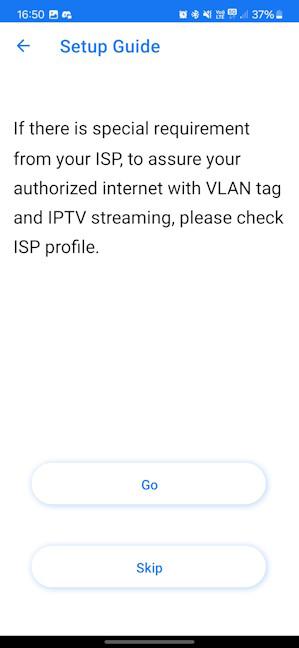
Tap Skip
ExpertWiFi spends some time applying your settings, and binding your router with your ASUS account. When it finishes, it informs you that the network is operating perfectly. Tap Finish.
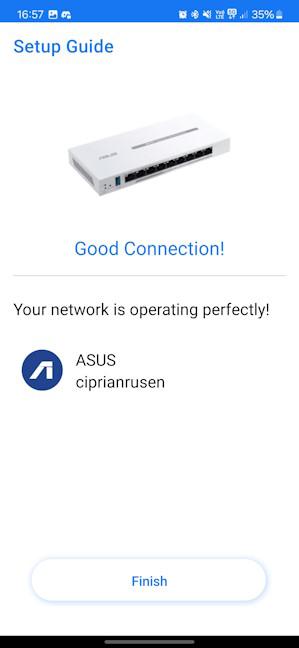
Tap Finish
You finally see the Home tab of your ExpertWiFi app, where you can configure which notifications you want to receive and add more ExpertWiFi networking equipment.
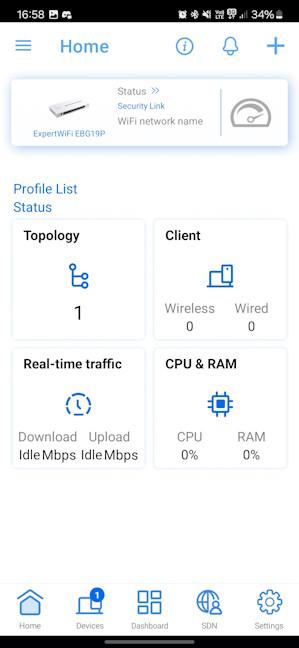
The Home tab of the ExpertWiFi app
Continue reading to learn how to add an access point.
How to install an ASUS ExpertWiFi access point
After you have installed the ASUS ExpertWiFi router using the method appropriate to your specific model, connect your access point to it, and make sure it gets the required power to work. When it is turned on, and with its blue light lit up, it means that it is ready for setup.
Open the ExpertWiFi app on your smartphone, go to the Home tab, tap the + (plus sign) in the top right, followed by Add AiMesh node.
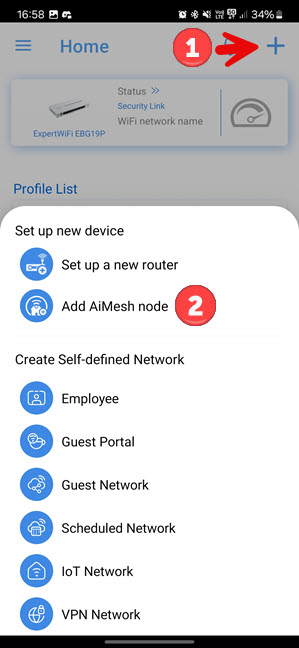
Tap + followed by Add AiMesh node
The app spends some time detecting the devices available for joining your network as an AiMesh node. It then shares them in a list. Tap the name of your access point.
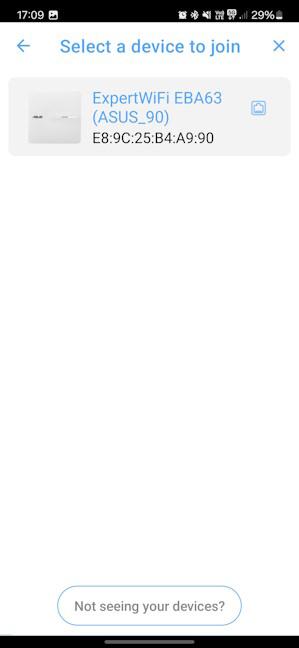
Choose the access point from the list
If you have connected the access point to a wired router, you are asked to create a Wi-Fi network and give it a name and password. If it’s connected to a wireless router, this step is skipped, and the access point simply copies the wireless settings from the router. Enter the necessary information, and then tap Next.
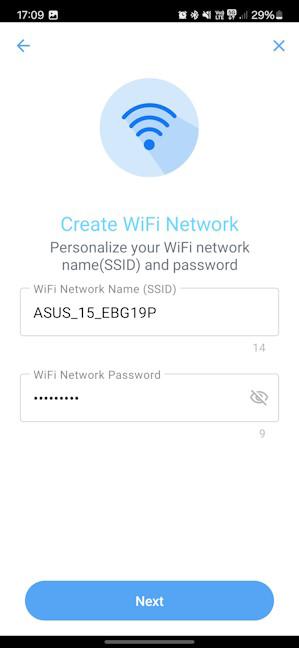
Configure your Wi-Fi name and password
You are asked to select the device's location. Tap the button at the top, select the location where you’re going to place it, and hit Apply.
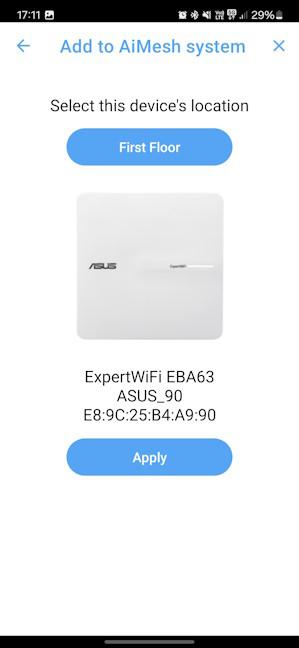
Choose the location for the access point
The access point is then added to the network. This process takes a few minutes, during which you see a progress bar like the one below. Be patient and wait.
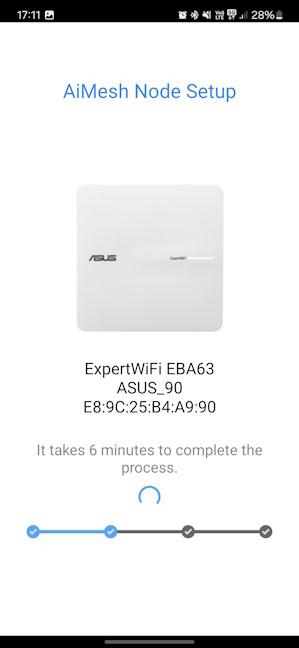
Your access point is added to the network
You are informed that the access point has been added to the network. Tap Done or OK, depending on the option you see on this screen.
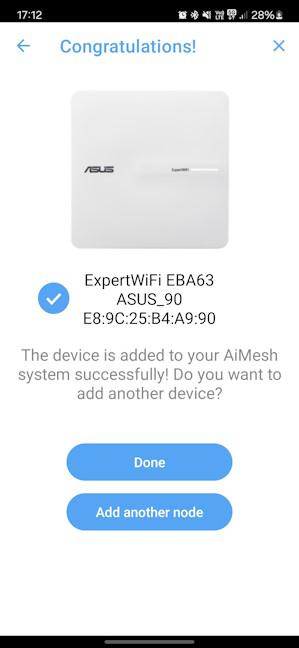
Tap Done or OK
If you have more than one access point to install, you can repeat the same process again, step by step.
Did you get everything installed?
As you have seen in this guide, ASUS has simplified its business network setup process with the help of the ExpertWiFi mobile app. This approach allows you to install and configure both wired and wireless networking equipment using just your smartphone, making the process more accessible and flexible than ever before. While the process is not as fast as it would be on a laptop or a computer, it does work, and it allows you to get the network up and running from any Android smartphone or iPhone. Try it out and see how it works for you. And if you encounter any complex issues, ASUS support is available to help.🙂