One way to use the OneDrive service is with the help of a web browser. You can use it to add or remove files, edit documents, create documents and many other things, without the need for external applications. Read on to learn all you need to know about working with files in the OneDrive website.
How to Add Files to OneDrive from the Browser
Log in to your OneDrive account using your Microsoft account credentials.
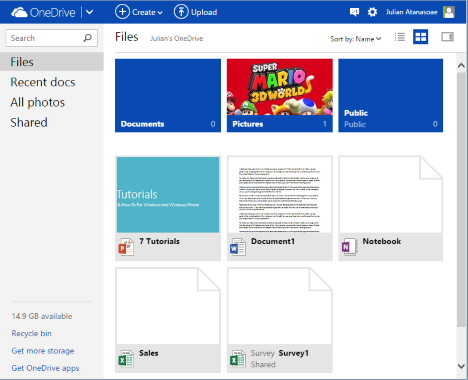
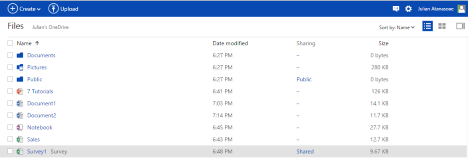
This is the part of your drive where all of your documents are stored. You'll notice that folders are depicted as dark blue tiles while files are depicted as colored tiles based on their filetype.
To get files onto your drive, you have two options: you can create a file from scratch using Office Online, or you can upload a preexisting file from your computer.
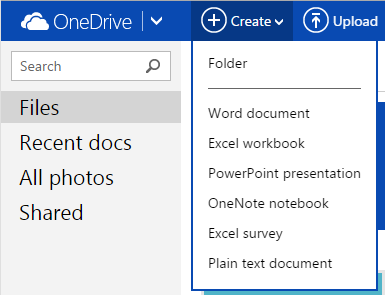
To create a file, click or tap Create and select a file type from the drop-down list. You can choose between a Word, Excel, PowerPoint, OneNote document, Excel survey or plain text file.
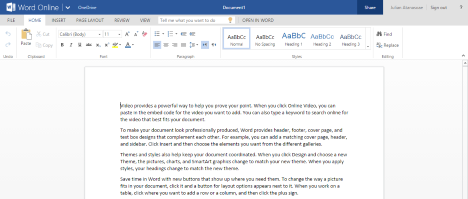
OneDrive will launch a free web version of the appropriate Office Online application, allowing you to create a file and save it to your drive, just like you would on your computer.
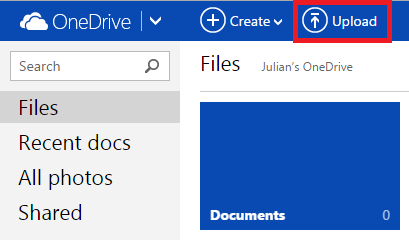
To upload a file from your computer or device, click or tap Upload.
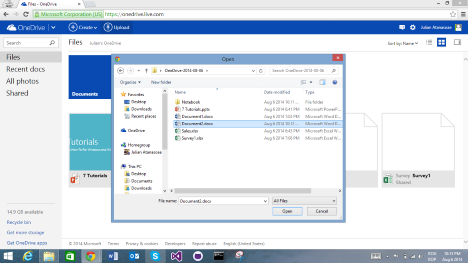
File Explorer will open up, granting access to your computer's file system.
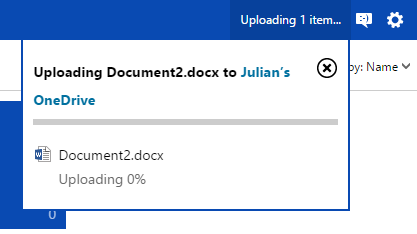
Browse through your files and select anything you want to upload and click or tap Open. You will see the upload progress, as shown in the picture below.
How to Change the Way OneDrive Displays Your Files
The view we showed you above is the default thumbnail view that you'll see when you first enter your OneDrive account. While it is pretty and all, it isn't exactly the most efficient way to display files. If you want to change the way your files are displayed, take a look at the buttons in the top-right corner of the window.
This button is the default thumbnails view we just spoke about.
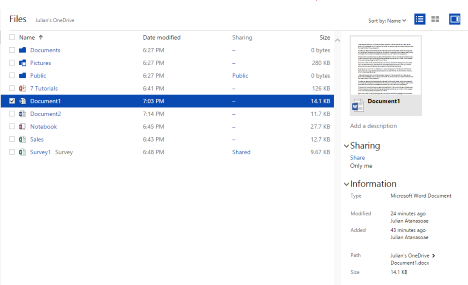
Click or tap the Details View button next to it to switch to a list view. This gives you more information about your files including the date it was last modified, whether or not it's shared and how large it is.
Click or tap the Details Pane button to open or close the pane on the right side of your window. This pane shows detailed information about any file or folder selected. At a glance you can see who added the file, who last accessed it, who it's shared with and a bunch of other information. You can even edit the Sharing permissions right from it.
How to Sort your OneDrive Files in the Browser
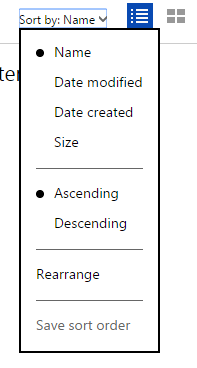
Once you've decided on a view you like, you'll need to choose how you want your files sorted. Click or tap the arrow next to Sort By to see your options. Select a modifier to sort your files by such as Date modified or Size. Next, select whether or not you want your files sorted in ascending or descending order based on your selected modifier.
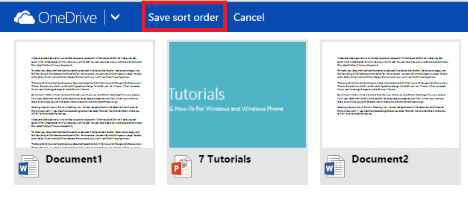
You can also select Rearrange if you want to manually reorder your files based on some arbitrary scheme that only you could devise. Click or tap and drag tiles around to find the order you like and click or tap "Save sort order".
How to Edit and Manage your Files in OneDrive
Now that your OneDrive is full of files and you can sort through them at will, you're ready to start editing and managing them. Try right-clicking or long-pressing a file to see what you can do.
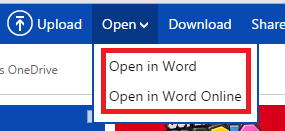
Up at the top you'll find options for opening and editing your files:
The Open menu contains two options:
- "Open in …" opens the file in the actual Office application installed on your computer.
- "Open in … Online" allows you to edit your file using the free online version of an Office application.
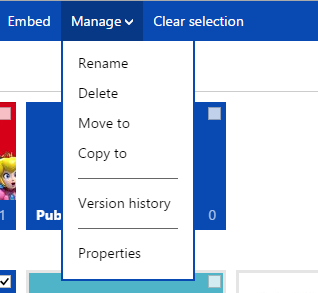
The Manage menu contains several options:
The Rename and Delete options are pretty self-explanatory. Click or tap Rename to change your file's name and click or tap Delete to send it to the OneDrive Recycle Bin. If you delete a file by mistake, don't worry about it, you can recover it without issue. We'll cover that later on.
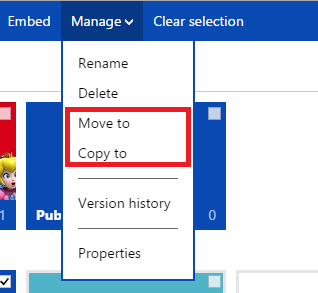
Select "Move to" or "Copy to" if you want to change the location of your files. "Move to" effectively picks up a file and puts it somewhere new. "Copy to" keeps a copy of the file in its current location and creates a new copy in a new location of your choosing.
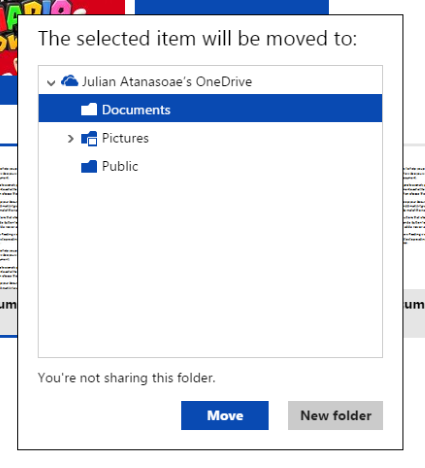
Once you click or tap "Move to" or "Copy to", you'll have to select the new location where you want to save the file.
If you want to download a copy of a file stored in your OneDrive to your computer, you can click or tap Download. This will launch a File Explorer window you can use to find a place to save the file. Click Save to store the file on your computer's hard drive.
What If I Delete a File by Mistake?
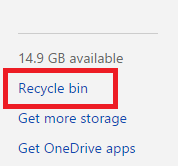
OneDrive has you covered. When you delete a file it's actually moved to the OneDrive Recycle Bin. If you delete a file by accident, you can go to the Recycle Bin by clicking or tapping the link in the lower-left hand corner of your browser, as shown in the picture below.
More details about how much OneDrive stores your deleted files, all the recovery methods that are available and so on, can be found in this tutorial: How to Restore Files You Have Deleted from Your OneDrive.
Conclusion
There you have it. The OneDrive website has everything you need for managing your files, built right in. All you need is your Microsoft account information to log in and you're ready to get to work. With this information you know how to do the most basic file management, but OneDrive has a lot more to offer. If you want to learn more about this great product, don't hesitate to read our recommendations below.


 07.08.2014