The Windows Registry is a database that stores configuration settings and options for the operating system and the applications available on it. The Registry contains information like user preferences, file associations, device drivers, and system policies. It is organized into a hierarchical structure of keys and values, where each key can have subkeys, and each value can have data. In order to navigate the Windows Registry, you need to use the Registry Editor. It lets you open, browse, and edit the Registry, and it’s easy to use. Without further ado, here’s how to navigate the Windows Registry using Registry Editor’s keys tree, search feature, and address bar:
NOTE: The Registry Editor is the tool that lets you work with the keys and values stored in the Windows settings database, called the Registry. If you don’t know much about the Windows Registry, it may be a good idea to read this article first: What is and how to edit the Windows Registry.
How to open the Registry Editor in Windows
To be able to navigate and work with the Windows Registry, start by opening the Registry Editor. A quick way to launch it in both Windows 11 and Windows 10 is to search for it: click or tap on the search field or button on the taskbar, type regedit, and then click or tap on the Registry Editor search result.

How to open Registry Editor in Windows
TIP: There are many other ways to launch Registry Editor in Windows. If you want to know them all, read: How to open the Registry Editor in Windows 11 and Windows 10.
How to navigate the Windows Registry with Registry Editor
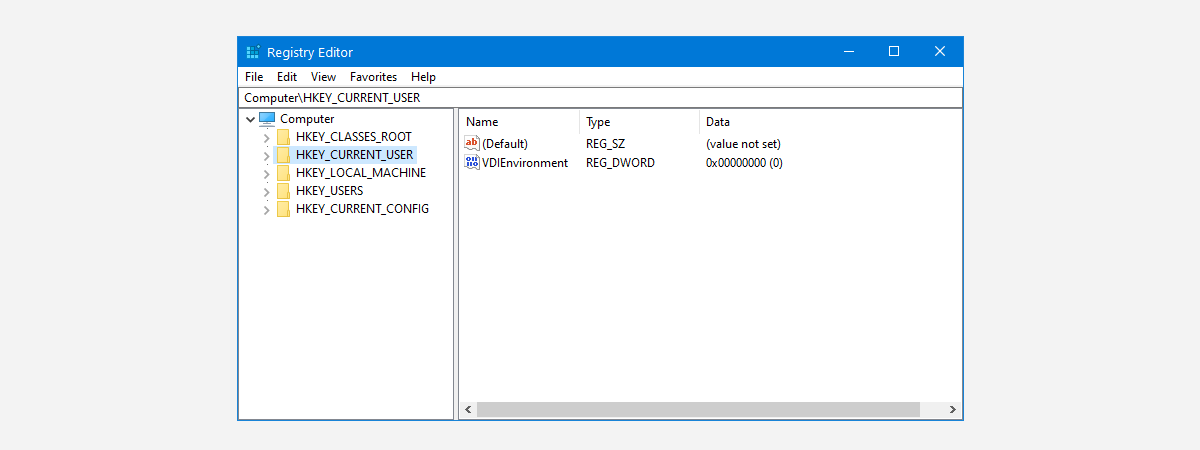
When you open the Registry Editor, you should see a window with two panes. The left pane shows the tree view of the Registry keys, while the right one displays the values and data of the selected key.
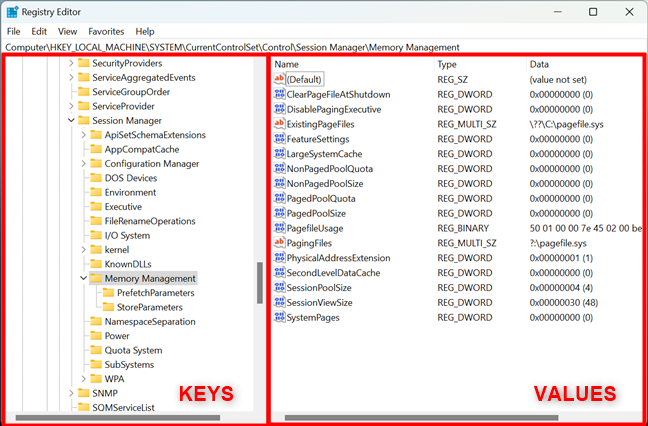
The Registry Editor window
There are a couple of ways to navigate the Windows Registry with Registry Editor. Here’s what you should know:
How to browse the Windows Registry
If you want to browse the Windows Registry until you find the key or value you’re looking for, you can navigate through the Registry Editor manually. Similar to how you’d browse through File Explorer to find a folder or file on your computer’s drives, you can expand or collapse a registry key by clicking the “greater than” (>) or “inverted caret” (∨) sign next to it. You can also double-click on a key to expand or collapse it.
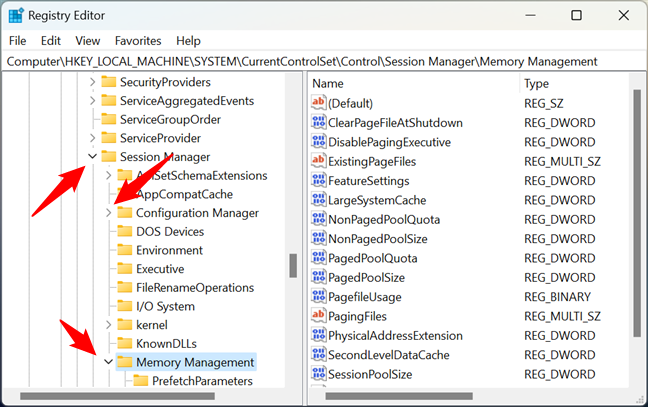
How to browse through Windows Registry
It may take a while to get to the registry key you’re interested in, but you will eventually find it. 🙂 Fortunately, if you already know the path to the key or value you need to access, there’s a much faster way to navigate to it, which I’ll show you in the next section:
How to navigate to a registry key or value using the address bar in Registry Editor
In Windows 11 and Windows 10, the Registry Editor includes an address bar located right under the app’s menu. When you browse through the keys on the left panel, the path you’re following is also displayed on the address bar. For instance, if you go to:
…this path is automatically shown in the address bar too. It’s right there, at the top of the Registry Editor window.
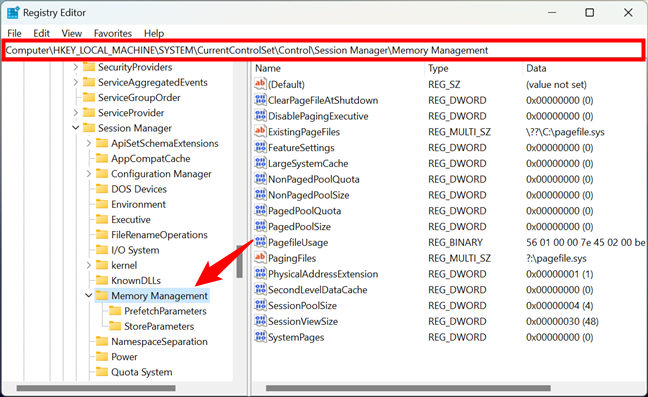
The address bar in Registry Editor
The address bar is editable, meaning that you can enter text inside it, and you can copy and paste its contents. That can save you a lot of time when you already have the path you want to access written down. You can just copy and paste it into the address bar and then press Enter on your keyboard to get there.
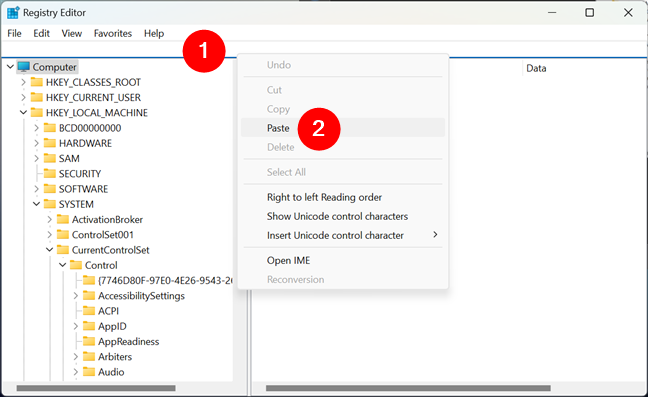
Use the address bar to quickly navigate to a registry key location
The address bar is also quite useful when you want to share a key/value path with others. Once you reach the desired item in your Registry Editor, you can copy its path from the address bar and then share away. Simply right-click on it, and choose Copy.
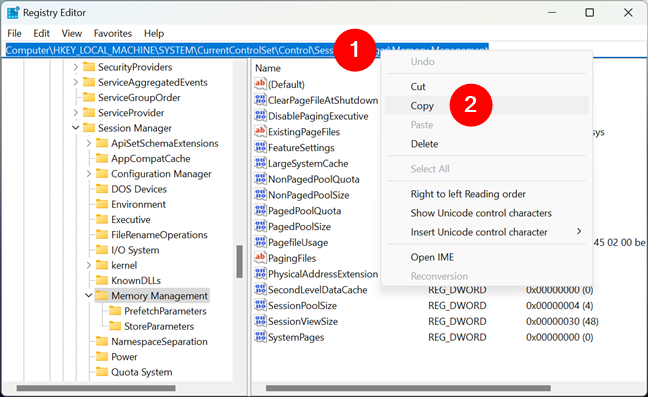
Copy the location of a registry key
TIP: By the way, a quick way to focus on the address bar is to simultaneously press the Alt + D keys on your keyboard, just like you do in File Explorer.
The address bar in Registry Editor is useful, yet some techies might prefer to hide it from view. Others, though, might not see it by default and may complain about the regedit address bar missing. Fortunately, both hiding and showing the address bar are simple things to do. At the top of the Registry Editor window, click or tap on View to open a menu. The first option is called Address Bar. Click or tap on it to switch between hiding and showing the address bar from view.
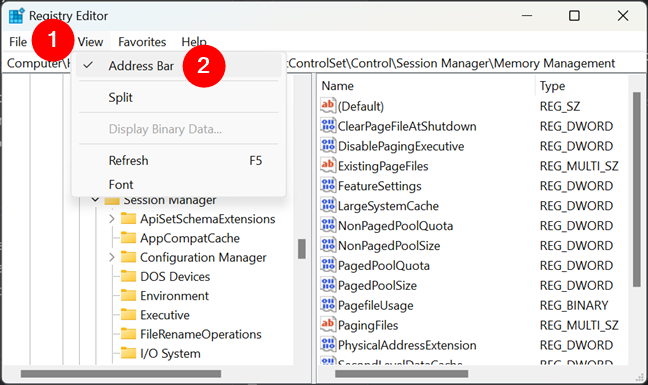
Show or hide the Registry Editor address bar
What if you don’t fancy the idea of manually browsing the vastness of the Windows Registry, and you don’t know the path to the key you’re looking for either? In this case, you can take advantage of the search feature in Registry Editor to quickly navigate the Windows Registry. Here’s how to use it:
How to navigate to a registry key or value using search
The Registry Editor includes a Find feature that you can use in order to search for a key or value by name or data. To use this feature, press Ctrl + F on your keyboard or select Edit > Find from the menu bar.
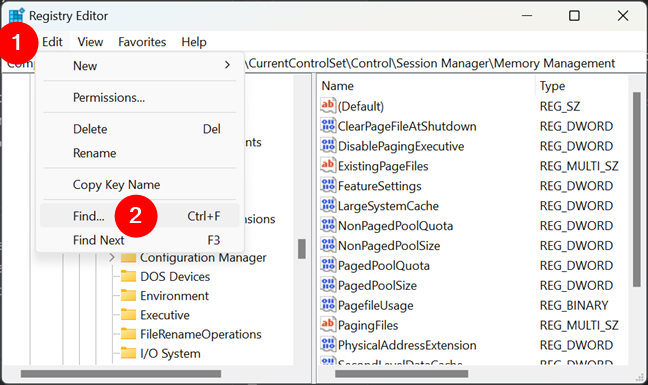
Opening the Find feature in Registry Editor
In the Find dialog box, enter the name or data of the key or value you want. Then, select the search options you want to use and click or tap on Find Next.
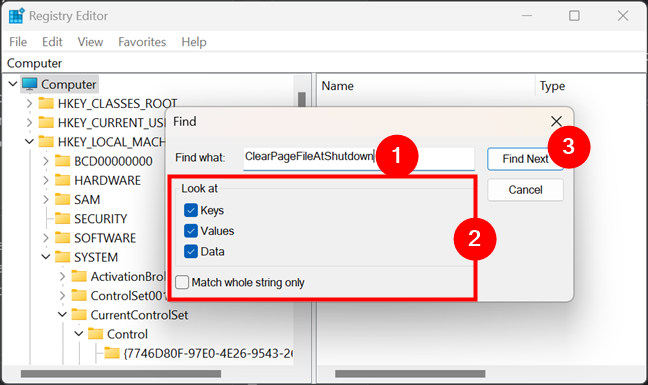
How to search for a registry key or value
The Registry Editor will then make the search and highlight the first match in the tree view.
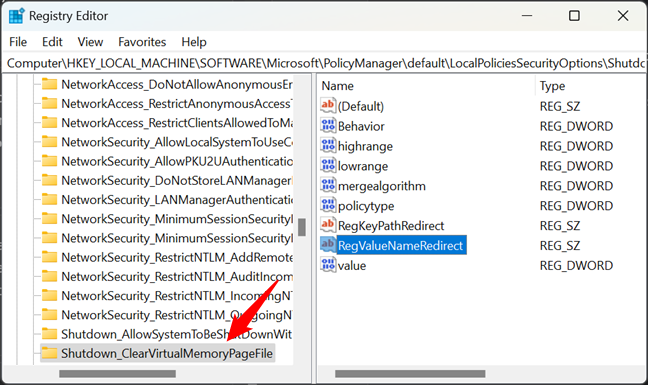
The first match for the search terms
To find the next match, press F3 on your keyboard or click/tap the Find Next button from the Edit menu.
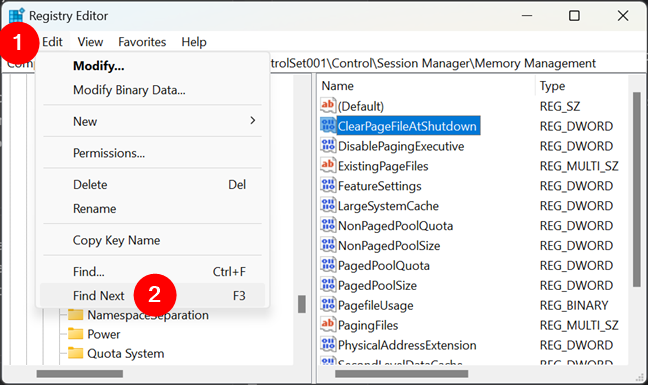
Continue the search for a registry key/value
Note that you can repeat this step as many times as needed until you get to the registry key or value you’re looking for.
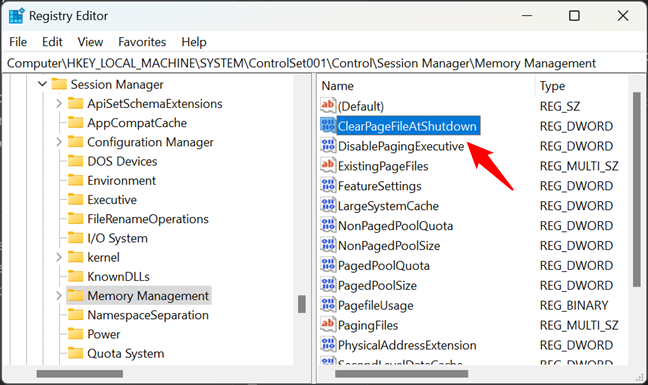
Finding the registry key/value
And.. that’s it!
TIP: If you don’t want the Registry Editor to be available for fiddling and changing settings, here are three ways to disable the Windows Registry.
How do you like to navigate the Windows Registry?
In this tutorial, you’ve learned how to navigate Windows Registry using three different methods. Hoping this information helps you use this tool better, I’m curious: what’s your favorite way of navigating through Registry Editor? Are you browsing it manually, are you using search, or do you prefer taking advantage of the address bar? Let me know in the comments section below.


 19.07.2023