If you enjoy reading on your Windows PC but don’t have a Kindle device, you’re in luck! Amazon offers a free Kindle app for PC that allows you to access over a million books from the Kindle Store, including bestsellers and new releases. With the Kindle reader for PC, you can read your favorite ebooks, as well as bookmark pages, highlight text, and add notes for an enhanced reading experience. In this guide, I’ll show you how to use the Kindle for PC app so you can enjoy your Kindle books directly on your computer. Without wasting any more time, let’s begin:
NOTE: The Kindle app is free, and you can use it to access all your Kindle books on any PC running Windows 10 or Windows 11. The app looks and works identically in both operating systems.
Download, install, and launch the Kindle app for Windows PCs
First, you need to download the app’s installer from Amazon’s website. To download the PC version for the app, make sure you press the Download for PC & Mac button.
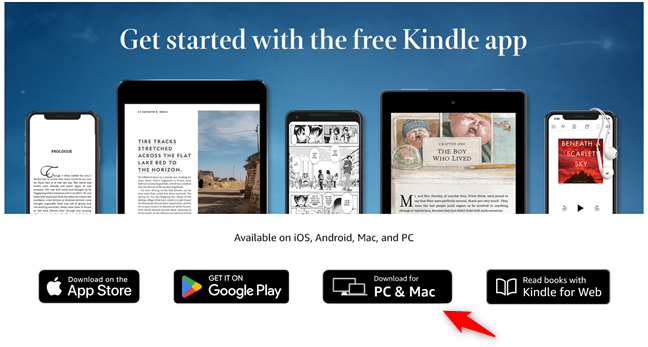
How to download the Kindle app for PC
Wait for the installer to get downloaded and open it. Then, wait again while the Kindle app is automatically installed, and you’re done. Once installed, you can find a Kindle shortcut on your desktop, as well as in the Start Menu. Use any of them to open the Kindle app on your Windows PC.
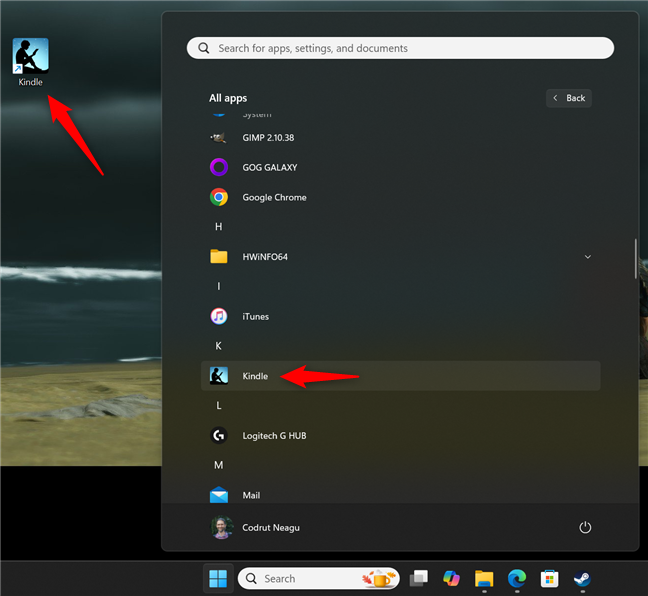
The Kindle app has shortcuts on the desktop and in the Start Menu
You can type kindle in the search box on the taskbar and click or tap the Kindle search result.
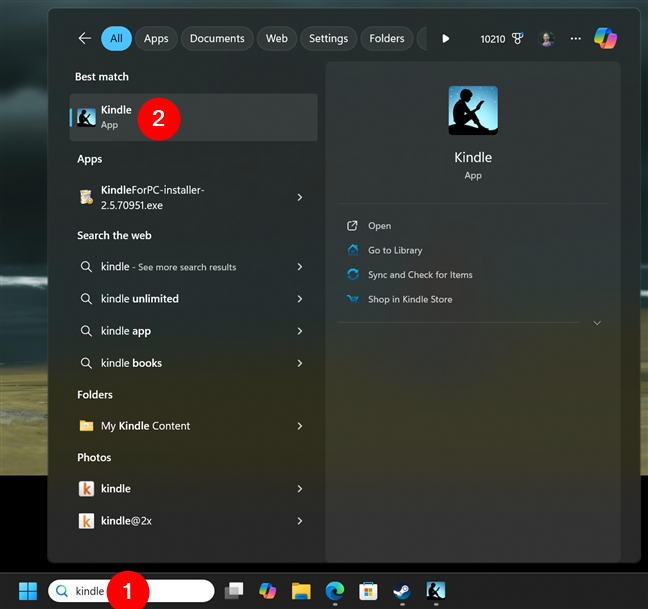
You can also search for kindle
If this is your first time using the Kindle app on your Windows computer, you are asked to log in with your Amazon account.
How to view your ebooks using the Kindle app
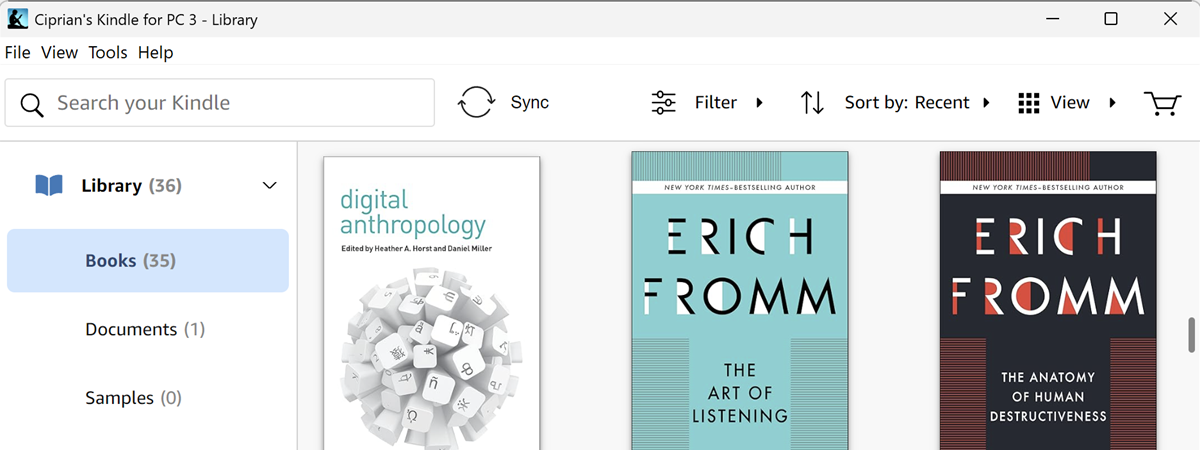
If you have the Kindle app installed on another device and you registered with the same Amazon account, your ebooks can easily be downloaded to your PC. If you want to view all the ebooks that are associated with your device, click or tap the Library section in the left sidebar.
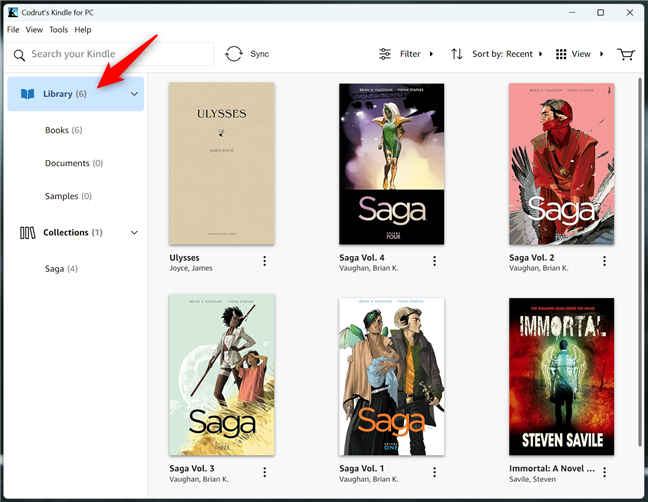
The Library in Kindle for PC
The Library expands and, if you want to, you can filter your Kindle content so that only your Books, personal Documents, or Samples are shown.
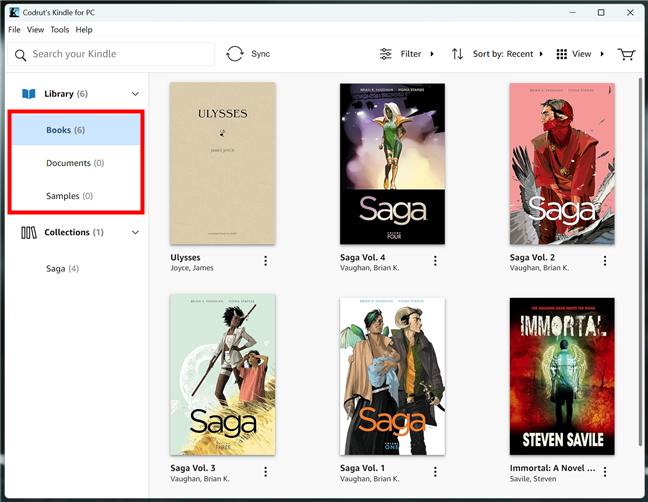
How to see your books in Kindle for PC
If you have many titles in your account, you can further Filter the books you see in the Kindle app. Click or tap the Filter button at the top, and then choose the filters you want to apply. You can make the app show only the content you’ve Downloaded on your Windows device, or you can choose to show only the books available through your Subscriptions: KindleUnlimited, Prime, or Comixology Unlimited.
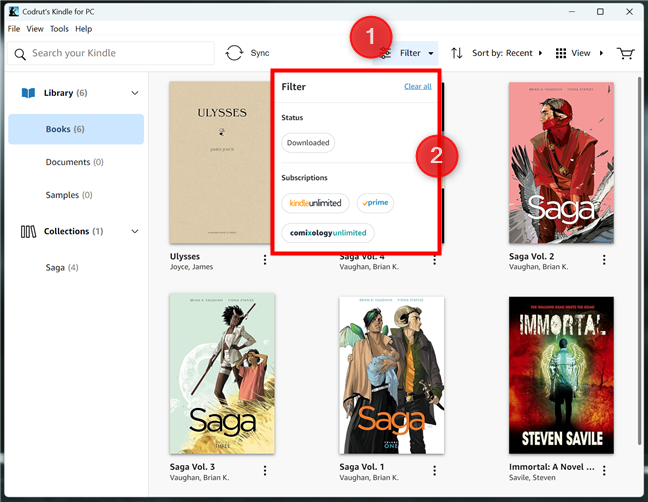
Filtering the books in Kindle for PC
Additionally, you can sort the ebooks in the Kindle app by opening the Sort by menu at the top of the window, and selecting the Recent, Title, or Author option. This can be useful if you have a lot of books and don’t want to scroll through the entire list just to find one.
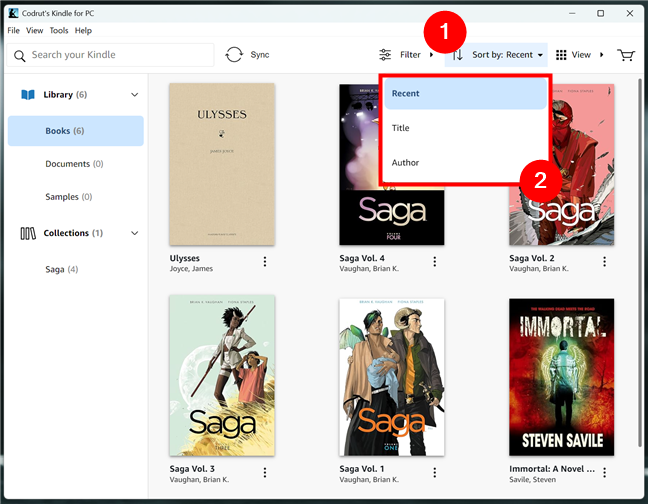
How to sort books in Kindle for PC
Of course, you can also find your ebooks easily by typing their name in the search bar placed at the top of the window.
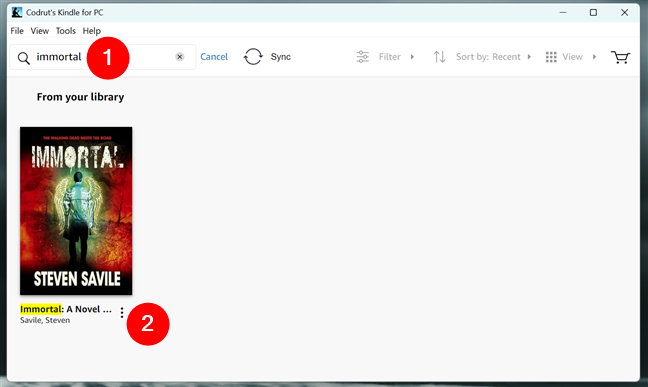
Search for a book in Kindle for PC
The Kindle app displays your ebooks as tiles using their cover by default. If you don’t like this view, you can also display them as list items. You can switch between these two modes at any time using the options placed in the top right area of the window.
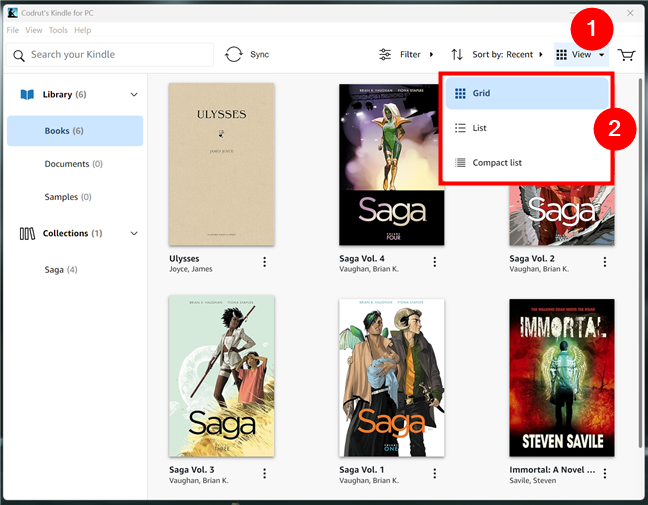
Change how you view books in the Kindle reader for PC
If you want to continue reading your ebooks even when you’re offline, you can download your ebooks to your Windows PC. To do this, right-click or press and hold any book in the Library section and select Download in the context menu. Note that you can also double-click or double-tap an ebook to download it to your PC.
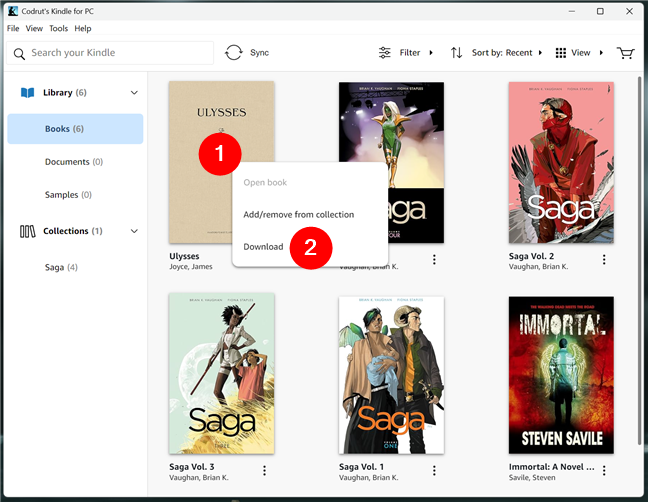
How to download books in Kindle for PC
The ebook you selected is immediately downloaded to your Windows PC’s storage. And not only the ebook, but also your bookmarks, notes, and progress on other devices.
How to buy ebooks using the Kindle app for Windows
You can download millions of ebooks from the Kindle Store using the Kindle app. The procedure is simple, and straightforward, but your Windows device needs to be connected to the internet, and you need to use a valid payment method. Here’s how it goes:
First, tap the Kindle Store button in the top-right corner of the Kindle app.
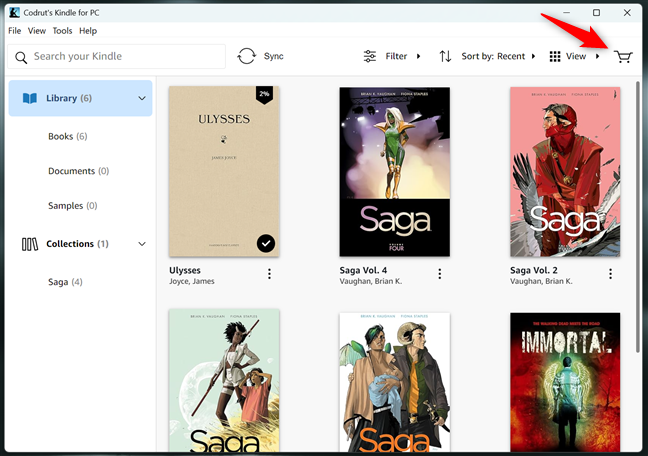
Press the Kindle Store button
The Amazon Kindle Store webpage loads in your default browser, and you can now look for the title you want to buy.
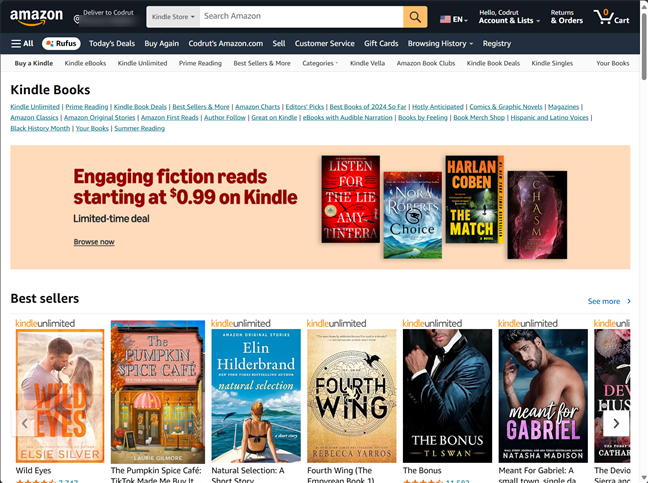
Browse Amazon's Kindle Books
Once you find it, click or tap the Buy Now with 1-Click button.
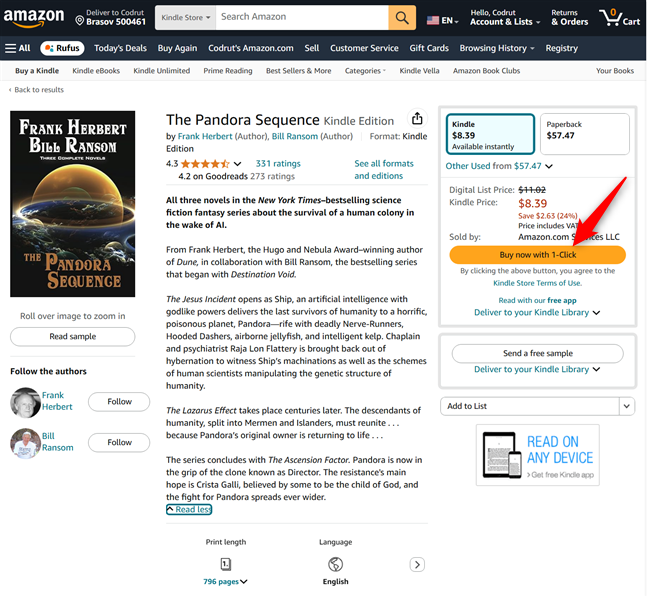
How to buy a book on Amazon's Kindle Store
If you have all the payment details set up in your Amazon account, the book will automatically be delivered to all your devices, including the Kindle app on your Windows computer. Otherwise, you must enter your payment information first, before the book becomes available on your devices.
How to create a collection using the Kindle app in Windows
If you like to keep your library clean and organized or you want to group your ebooks by genre, you can do this by creating a collection. First, right-click or press and hold on the first book you intend to add to the collection. In the context menu, choose Add/remove from collection and then click or tap the + Create collection option.
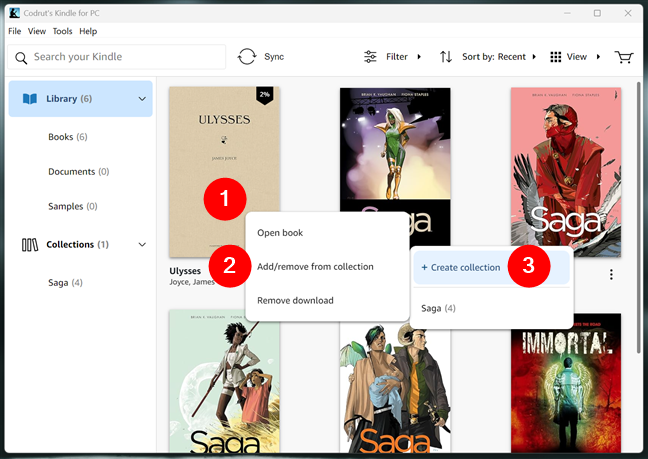
Create a collection in Kindle for PC
Name your new collection and click or tap the Create button.
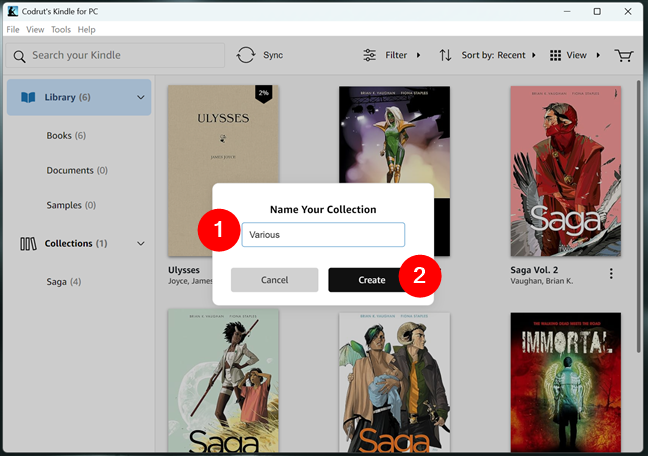
Give a name to the Kindle collection
Your collection is now created: press Ok to save it.
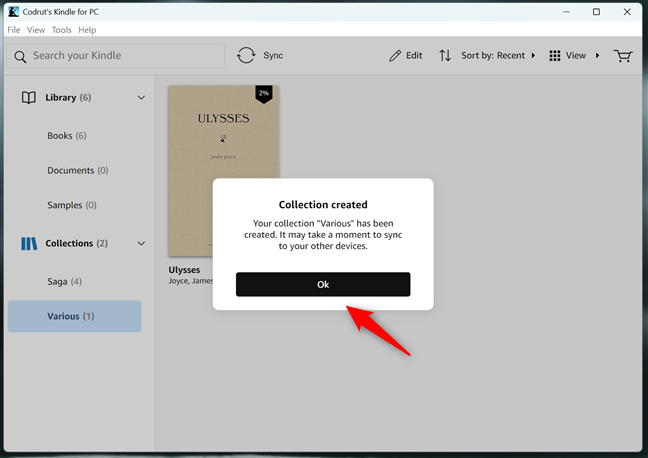
Save the new Kindle collection
The collection you’ve just created contains only one book right now, so it’s not a collection per se, right? The next step is to add more ebooks to it. Go anywhere in your Library, right-click or press and hold any ebook, choose the Add/remove from collection option, and select the collection where you want to add the ebook. If the ebook is already in that collection, the same steps remove it.
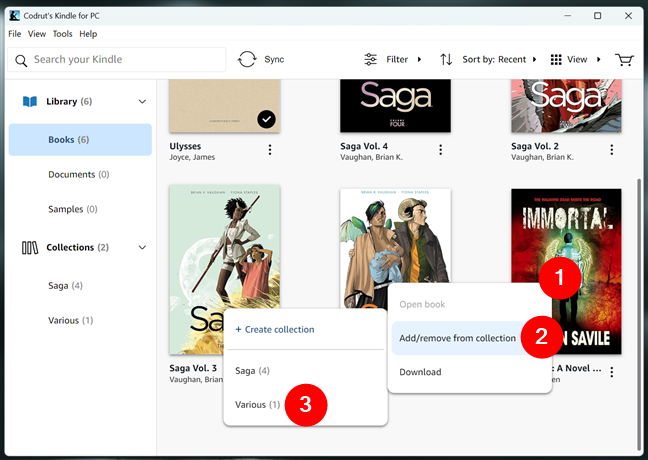
Add new books to your new Kindle collection
How to use the Kindle app to open and read an ebook in Windows
Now that you’ve set everything up and learned how to purchase ebooks, you can start reading in seconds. Just double click or double tap any ebook in the Kindle app and it opens right away.
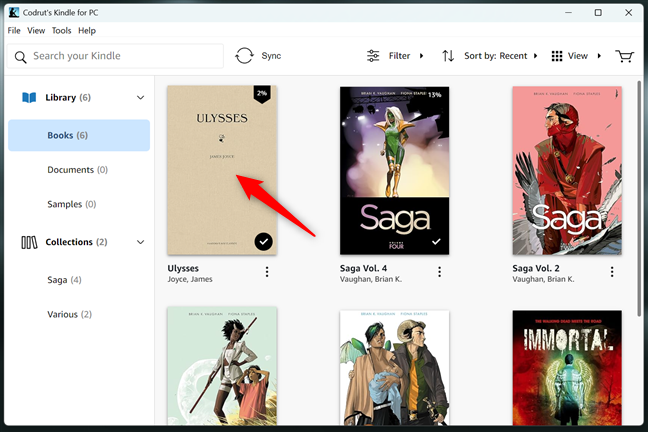
Double click/tap to open a book in Kindle for PC
You can now start reading. When you need to turn the page, swipe or click the right side of the window to go to the next page and the left side to go to the previous page. You can also use the arrow keys on your keyboard.
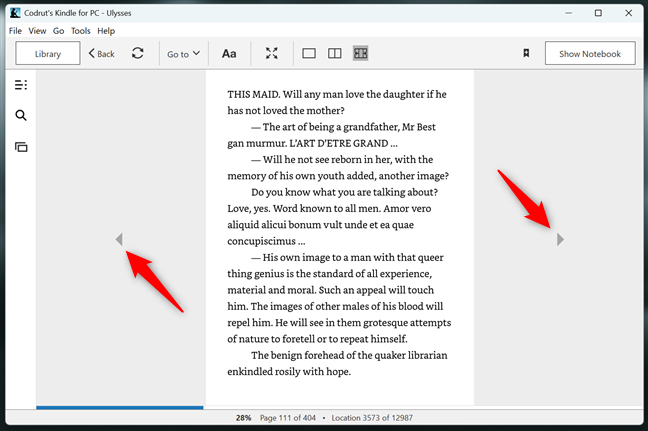
Turn the pages in a book in the Kindle reader for PC
Read the next page of this tutorial to see how to change the way your ebooks look, add bookmarks, jump to a particular page, search for word definitions, highlight words, and add notes to the ebook you’re reading in the Kindle app for PC.


 12.09.2024