


A WiFi extender is a handy tool for boosting your network’s reach, particularly if you have areas in your home with weak or no signal. By following these simple steps, you can easily install your WiFi extender to improve coverage and ensure a stronger, more reliable internet connection throughout your home.
1) Prepare for WiFi extender installation
Before setting up your extender, ensure your router is properly configured and has the latest firmware. This will help ensure a smooth installation process and prevent connectivity issues later on.

Also, for optimal performance, place your extender about halfway between your router and the area with poor WiFi coverage. Avoid positioning it too far from the router, as this can result in weak signal strength.
2) Use WPS (Wi-Fi Protected Setup) to connect the extender
Press the WPS button on your router, and within two minutes, press the WPS button on your extender.
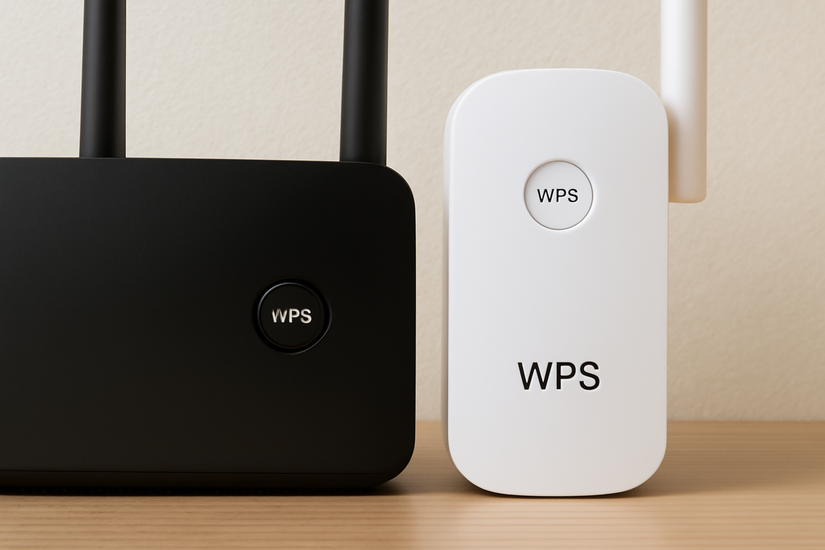
Wait for the extender to connect to your router automatically. Once connected, the extender’s lights will indicate a successful setup.
Pro Tip: WPS is the fastest way to connect, but it only works if your router supports this feature.
3) Manual setup through a web interface
Plug in your extender and connect your device to it via WiFi or Ethernet cable. Next, open your web browser and enter the IP address provided in the extender’s manual to access the setup page.
From here, follow the onscreen instructions to configure your network name (SSID) and password. Finally, save your settings, disconnect from the extender, and reconnect using your new WiFi network.
Pro Tip: Make sure you use a strong password to protect your network.
4 Using an app
Download the app for your extender from the App Store or Google Play. Then, open the app and follow the setup instructions.
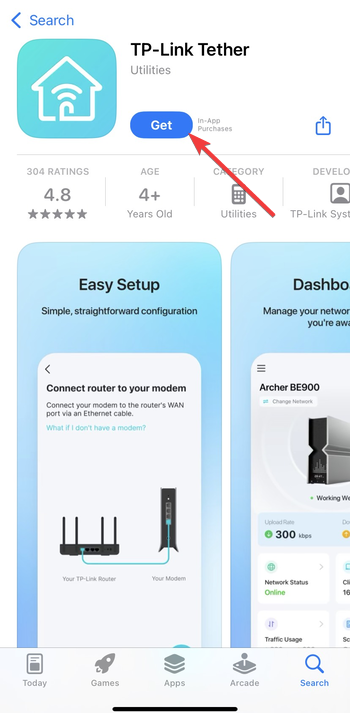
The app will guide you through connecting the extender to your router and setting up the network.
Pro Tip: Many modern extenders come with apps that make setup even easier and allow for real-time troubleshooting.
Troubleshooting common WiFi extender issues
- No signal after setup: If your extender isn’t picking up a signal after setup, check its placement. Move it closer to your router, as it might be too far to receive a strong signal. Make sure your router’s SSID and password are correctly entered.
- Slow internet speeds: Slow speeds can be caused by interference or poor placement. Try moving the extender to a location with fewer obstructions or changing the channel settings on your router.
- Intermittent connections: If your connection drops randomly, check if your extender is on the same band as your router (2.4GHz or 5GHz). Additionally, check for interference from other electronic devices, such as microwaves or baby monitors, and try adjusting the channel settings.
Best practices for maintaining WiFi extender performance
- Periodic reboots and updates: Regularly restart both your router and extender to maintain performance. Make sure to check for firmware updates for your extender to improve security and functionality.
- Monitor your network’s health: Use WiFi analyzer apps to monitor your network’s performance. These apps can help identify weak signal areas or interference and allow you to adjust your extender’s placement for better coverage.
FAQs
What is a WiFi extender and how does it work? A WiFi extender amplifies your router's signal and rebroadcasts it to areas in your home with weak or no WiFi coverage, helping to eliminate dead zones.
How do I set up my WiFi extender? You can set up a WiFi extender using WPS, a web interface, or an app. Follow the instructions based on your extender's setup method.
Can a WiFi extender increase my internet speed? A WiFi extender improves coverage, but it doesn’t increase your internet speed. In fact, you may experience slight speed reduction due to the extended signal range.
Do I need to place my WiFi extender near my router? For optimal performance, place the extender halfway between your router and the area with weak WiFi coverage. Avoid placing it too far from the router.
Summary
- Prepare for installation: Check your router’s settings and find the optimal placement for your extender.
- Install the extender: Use WPS, manual setup via web interface, or an app for a seamless installation process.
- Troubleshoot common issues: If there's no signal, slow speeds, or intermittent connections, check placement, settings, and interference.
- Maintain performance: Periodically reboot and update your extender and monitor your network’s health for optimal coverage.
Conclusion
Installing a WiFi extender is a straightforward way to improve your internet coverage at home. By following these steps, you can easily extend your WiFi signal to eliminate dead zones and enjoy a more reliable connection. Don’t forget to choose the right extender for your needs and place it in an optimal location for the best performance.

Discussion (0)
Be the first to comment.