
 Published on 10.12.2025
If you watch FPV clips and want the same view through goggles, learning how to build an FPV drone is the best way to start. A DIY FPV drone teaches you how every part works, so you can fix crashes, upgrade parts, and tune performance instead of throwing the quad away. This guide focuses on a typical 5-inch FPV drone, but the same basics apply to smaller or larger builds.
You need some basic soldering skills and patience, but you do not need to be an electronics expert. As long as you follow each step and double-check your work, you can complete a beginner FPV drone build that flies well and stays easy to maintain.
Understand The Core FPV Drone Parts

Before you order anything, you should know what an FPV drone needs. Every FPV quad uses the same core pieces, even if brands and sizes change. Understanding the FPV drone parts list helps you avoid buying parts that do not work together.
A typical DIY FPV drone uses a 4 in 1 ESC, a modern flight controller, and either an analog or digital FPV system. At the time of writing, most new builds use ExpressLRS or another modern radio link because it gives great range with low latency.
- Frame: Carbon fiber frame sized for a 5 inch FPV drone, including arms, base plate, and top plate.
- Motors: Four brushless motors that match your frame size and battery voltage, such as 2207 motors for 4S or 6S packs.
- ESC: A 4 in 1 ESC stack that handles the current your motors draw under full throttle.
- Flight Controller: The board that runs firmware like Betaflight and reads your radio and sensors.
- Radio Receiver: ExpressLRS, Crossfire, or another receiver that matches your radio transmitter.
- FPV Camera: Small camera that provides the live view you see in goggles or on a monitor.
- Video Transmitter: Analog or digital VTX that sends video from the camera to your FPV goggles.
- Battery: LiPo pack that matches your build, such as 4S 1300 mAh or 6S 1100 mAh for a 5 inch quad.
- Props: Correct propeller size and pitch for your motors and frame, usually 5 inch tri-blade for freestyle.
- Accessories: XT60 lead, low ESR capacitor, antenna, buzzer, and 3D printed parts if you want extra protection.
Gather Your FPV Drone Parts And Tools

When you know what each part does, you can build FPV drone from scratch with parts that match. A consistent FPV drone parts list prevents power issues and makes tuning easier. You should also gather the basic tools you need before you start the build.
Choose reliable components instead of chasing the lowest price. A stable stack and decent motors matter more than a flashy shell when you build your first FPV quadcopter.
- Pick a proven 5-inch frame with enough space for a flight controller and ESC stack plus VTX mounting.
- Match motor KV and battery voltage, such as 4S with higher KV motors or 6S with lower KV motors.
- Buy a matched FC and ESC stack rated for the current your motors pull, with at least a small safety margin.
- Choose an analog VTX and camera or a digital FPV system based on your budget and goggles.
- Use quality LiPo packs from a known brand and size them for three to five minutes of aggressive flying.
- Get a temperature-controlled soldering iron, 60/40 solder, flux, side cutters, and heat-shrink tubing.
- Keep a multimeter and a smoke stopper on hand to catch wiring mistakes before you plug in a LiPo.
- Install a PC simulator and practice FPV flying with your radio before you arm your real quad.
Build And Wire The FPV Frame
Once all parts and tools arrive, you can start the actual FPV drone build. Start with the frame and dry-fit the main components so you know where everything will sit. A clean layout makes wiring easier and reduces vibration problems.
Think about wire routes and camera position early, especially if you plan a freestyle build that takes hard crashes. Leave room for the battery strap and ensure nothing rubs against the props.
- Assemble the bottom plate, arms, and mid plate according to the frame diagram, then tighten all screws.
- Test-fit the flight controller and 4 in 1 ESC stack in the center, using soft gummies or rubber spacers.
- Mock up the VTX, receiver, and capacitor placement so you know how to keep power and signal wires separate.
- Drill or use existing holes for zip ties that hold motor wires and battery leads away from the props.
- Install the FPV camera plates in the front and confirm that the camera can tilt without hitting the frame.
Install Flight Controller, ESC, And Motors
The heart of the FPV quadcopter build sits in the stack. Modern 4 in 1 ESC boards reduce wiring clutter and make it easier to build FPV drone from scratch on a first try. Take your time with solder joints, because a clean power section keeps your quad reliable.
Always check for shorts with a multimeter before you connect any LiPo pack. That simple habit saves a lot of money and burned hardware.
- Mount the 4 in 1 ESC on the frame first, with the motor pads facing the arms and power pads facing the rear or side.
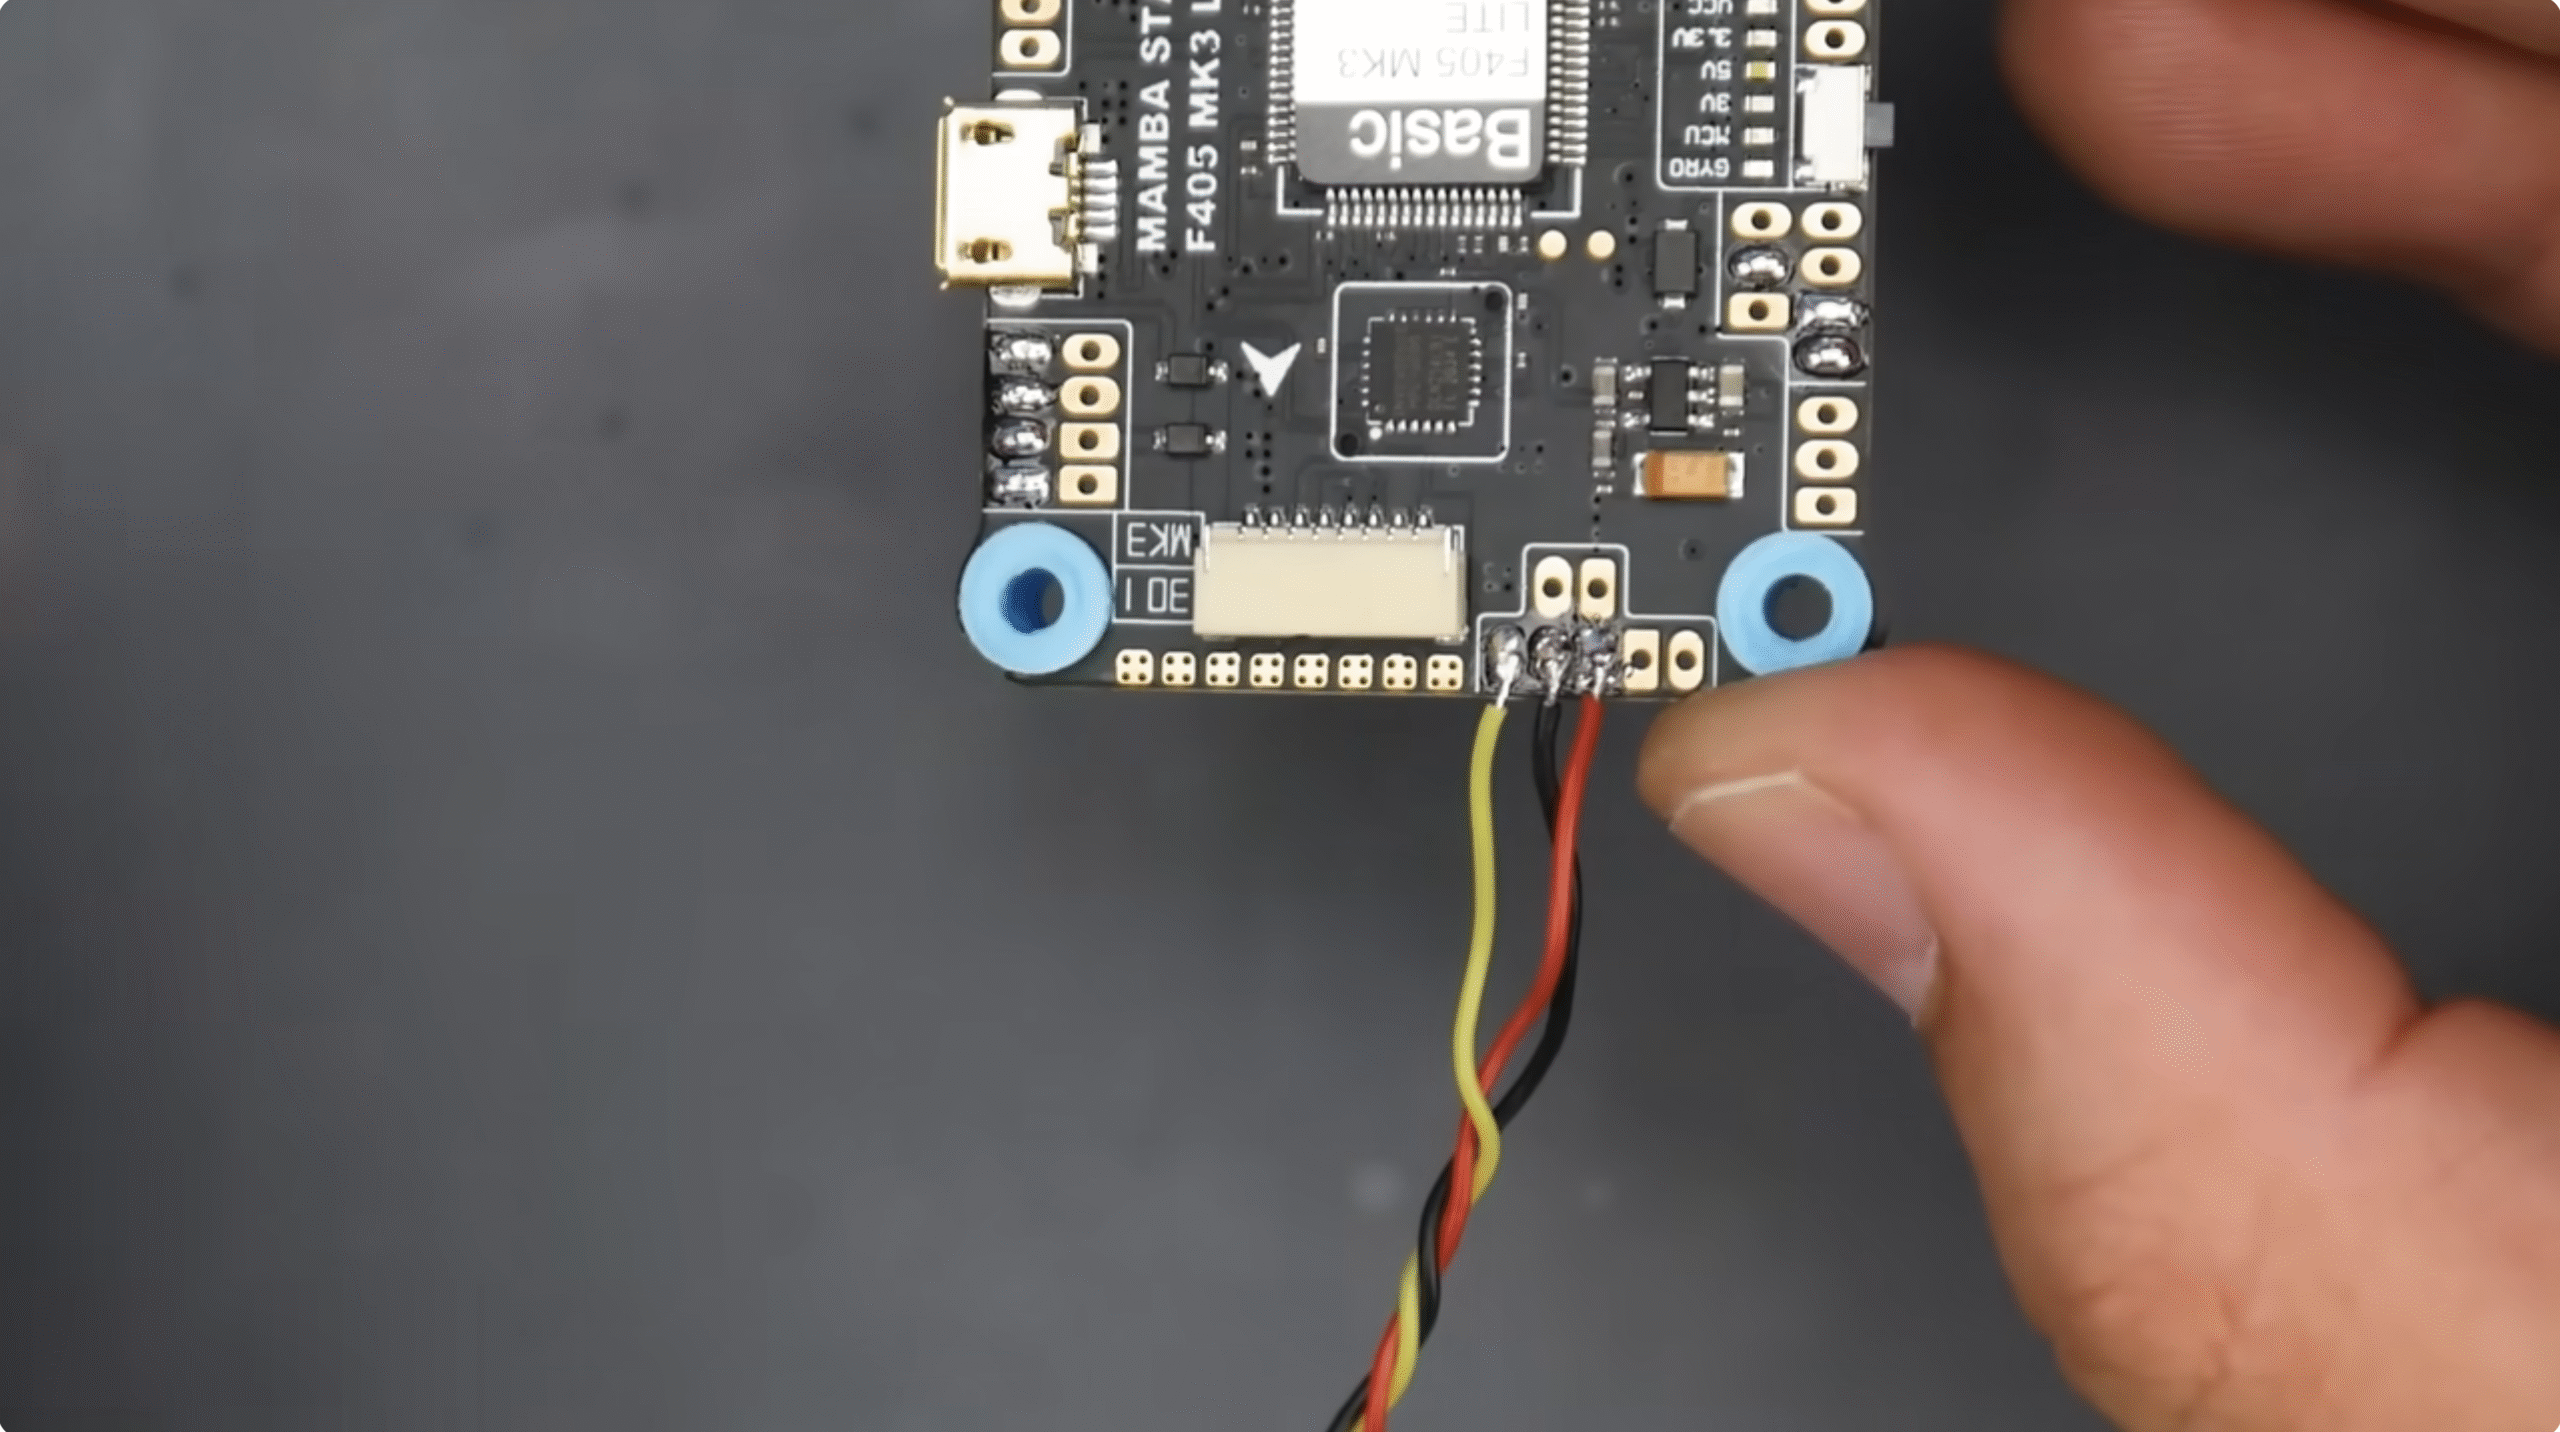
- Solder the XT60 pigtail and low ESR capacitor to the ESC power pads, keeping leads short and properly insulated.
- Install the motors on each arm with thread locker on the screws if the manufacturer recommends it.
- Cut motor wires to length with a bit of slack, then tin and solder them to the matching ESC pads on each corner.
- Stack the flight controller above the ESC using nylon standoffs, minding arrow orientation toward the front.
- Solder receiver, VTX, buzzer, and any other accessories to the labeled pads on the flight controller.
- Use zip ties and tape to secure loose wires along the arms and center area so they cannot reach spinning props.
Set Up Radio Link And FPV System
Without a stable radio link and FPV video feed, you cannot safely fly an FPV drone. A modern ExpressLRS receiver or another low-latency system gives you responsive control that feels natural once you practice in a simulator. The FPV system then gives you the live view that makes FPV flying unique.
Mount antennas where they stay clear of the props and frame, and avoid crushing coax cables with battery straps.
- Bind your radio receiver to your transmitter following the specific ExpressLRS or other system instructions.
- Place the receiver on an arm or the rear of the frame and route the antennas away from carbon and electronics.
- Mount the FPV camera in the front plates, then connect its signal and power wires to the VTX or flight controller.
- Install the video transmitter on the top or rear, add its antenna, and set legal power levels and channels.
- Power the quad from a smoke stopper and confirm you see a clear FPV feed in your goggles with no major noise.
- Check that stick movements on the radio show correctly in your flight controller setup tool.
Configure Firmware And Test The Drone
Most DIY FPV drone builds today use Betaflight or similar firmware for tuning and control. The firmware lets you map channels, set arm switches, and tune how the drone responds to stick moves. This FPV quadcopter build guide keeps configuration simple so beginners can get airborne without deep tuning skills.
Later you can explore advanced filters, rates, and PID settings, but a default beginner profile usually works well for a first quad.
- Connect the flight controller to your computer with USB and install the correct Betaflight target for your board.
- Run accelerometer and receiver calibration, then confirm roll, pitch, and yaw directions match quad movement.
- Assign an arm switch, a beeper or lost model switch, and a mode switch for angle and acro modes.
- Configure motor protocol such as DShot and run the motor test without props installed to check directions.
- Reverse any motor direction in software if needed so the quad matches the standard Betaflight diagram.
- Set a low voltage warning level and ensure the buzzer or OSD alerts you when the LiPo gets close to empty.
Do A Safe First Hover Test
After you finish wiring and firmware setup, you can finally test your FPV drone in the air. Start with a short line-of-sight hover in a wide, open area. Treat this as a system test rather than a freestyle session.
Remove all distractions, keep people well away from the test zone, and always respect local regulations when you fly.
- Inspect every screw, connector, and cable tie, then confirm the props sit tight and spin freely.
- Power the quad with a partially charged LiPo and arm while holding it above your head to feel for vibrations.
- Place the quad on flat ground, stand several steps back, and gently raise throttle to lift a few feet in angle mode.
- Check that the quad responds correctly to small pitch, roll, and yaw inputs and lands cleanly when you lower throttle.
- Disarm after a short hover, then check motor and ESC temperature and look for any loose hardware.
- Once the hover looks stable, fly short FPV circuits at low altitude before you attempt acro tricks or fast passes.
Troubleshooting Common Problems
Even a careful beginner FPV drone build can show issues the first time you plug in. You can usually fix most problems with a visual check and a few changes in firmware or wiring. This section helps you solve issues that appear often during a first FPV build.
- If the quad does not power on, confirm XT60 polarity, check the ESC for burn marks, and test continuity for shorts.
- When motors beep but do not spin in Betaflight, verify motor protocol settings and that the ESC signal pads match the correct outputs.
- If the quad flips on takeoff, confirm motor order, motor direction, and prop direction against the flight controller diagram.
- When you get no FPV video, check that the camera and VTX share a good ground and that channel, band, and region settings match your goggles.
- If radio inputs do not move in the setup tool, confirm receiver wiring, protocol selection, and channel mapping on the radio.
- When the quad feels twitchy or unstable, lower rates and add a bit of filtering or use the default beginner preset in Betaflight.
Tips
- Practice in an FPV simulator with the same radio before you fly your new DIY FPV drone outdoors.
- Use a smoke stopper every time you power up a fresh build or after major wiring changes.
- Start with a milder LiPo, such as 4S on a 6S-capable 5-inch FPV drone, while you learn basic control.
- Keep a written record of your FPV drone parts list so you can reorder spares quickly after crashes.
- Inspect arms, motor bells, and props after every hard impact and replace damaged parts before the next pack.
- Learn one change at a time when you tune Betaflight, so you always know which adjustment helped or hurt.
FAQ
Is It Hard To Learn How To Build FPVDrone?
Building an FPV drone takes patience but not expert-level skills. If you can follow diagrams, learn basic soldering, and double-check steps, you can complete a beginner FPV drone build safely.
How Much Does A DIY FPV Drone Cost?
A typical 5-inch FPV drone from scratch usually costs more than a basic toy drone, but you get better parts and easier repairs. Most new pilots spend more on the radio, goggles, and charger than on the quad itself.
Should I Buy A Ready-To-Fly FPV Drone Instead?
A ready-to-fly FPV drone helps you start quickly, but a DIY FPV drone build guide teaches you how to repair and upgrade. Many pilots start with a small FPV kit, then build their own quad once they understand what they like.
Which Is Better For A First Build, Analog Or Digital FPV?
Analog FPV gear usually costs less and works with many budget goggles, while digital FPV offers clearer video. Both systems can work well on a first FPV drone, so choose based on your budget and the goggles you want.
Do I Need Betaflight To Build An FPV Drone?
You do not have to use Betaflight, but most FPV quadcopter build guides rely on it because it is flexible and well-documented. Sticking with common firmware makes it easier to follow community tutorials and troubleshoot issues.
Summary
- You learned the core parts that every FPV drone needs and how they work together.
- You saw how to pick a compatible FPV drone parts list and gather the tools required for the build.
- You assembled the frame, wired the motors, and installed the flight controller, ESC, receiver, and VTX.
- You configured firmware, set up your radio link, and tested the FPV system before a safe first hover.
- You picked up troubleshooting steps and tips that keep your new FPV quad flying longer and easier to repair.
Conclusion
Learning how to build FPVDrone gives you more than a fast quadcopter. It teaches you how to diagnose issues, replace damaged parts, and tune the feel of your FPV drone to match your flying style. With a solid parts list, careful soldering, and simple Betaflight presets, you can build a reliable 5 inch FPV drone that handles everyday crashes and grows with your skills.
Start with safe hover tests, fly in open spaces, and respect local rules as you gain confidence. As your skills improve, you can swap motors, experiment with new frames, and explore more advanced FPV gear while keeping the same core knowledge from this first build.


Discussion (0)
Be the first to comment.