Knowing how to use alarms in Windows 10 or Windows 11 can come in handy. Whether you want a backup alarm to ensure you make that super-important early morning meeting, or need help organizing your daily schedule, the built-in alarm clock in Windows 10 or Windows 11 can boost your productivity. You should use alarms if you spend a lot of time on your computer, especially while your time management skills are still a work in progress. 🙂 Read this guide to find out how to add, use, and remove an alarm for Windows 10 or Windows 11 computers:
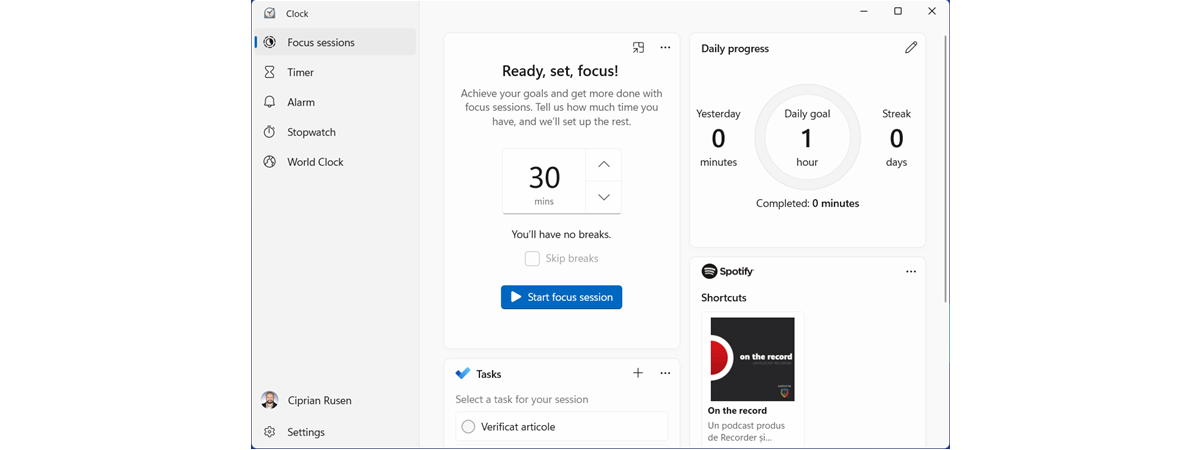
NOTE: The Windows 11 and Windows 10 alarm clock is built into the Clock app. Since this app is identical on both operating systems, this guide features mostly screenshots from Windows 11.
Access the Windows 11 or Windows 10 Alarm
The first step to gain access to the Windows alarm clock is to open the Clock app. Type clock inside the Search bar found on Windows 10’s taskbar or inside the top field of the Search window in Windows 11 (use the magnifying glass on the taskbar to open it). Then, click or tap on the Clock app search result.
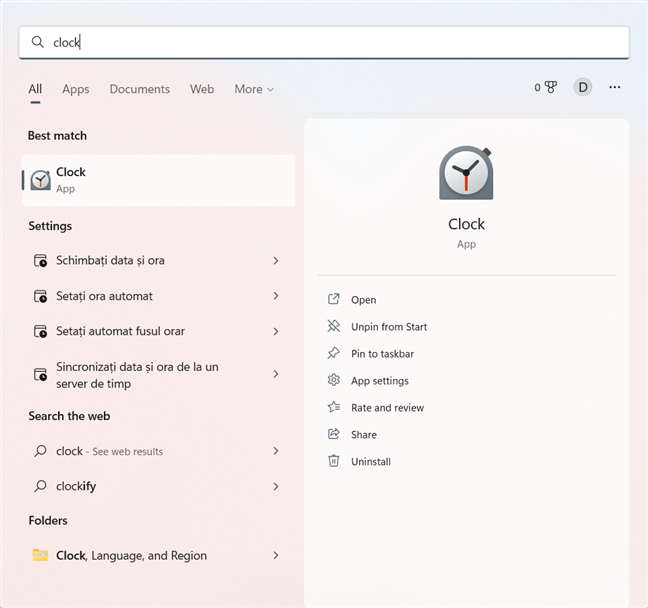
Access the Windows Clock app
Another way of accessing the app is to open the Start Menu and click or tap on the Clock shortcut found in the All Apps list.
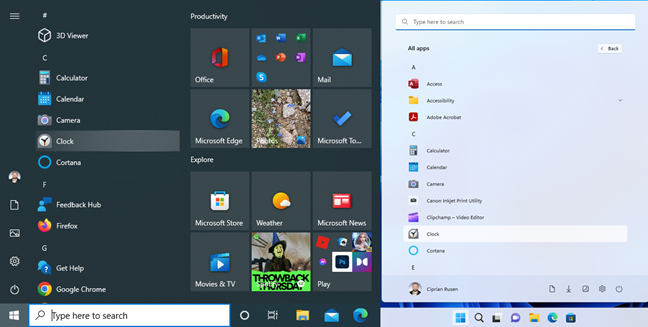
Open the Clock app in Windows 10 (left) or Windows 11 (right)
In the Windows Clock app, access the Alarm tab from the left panel.
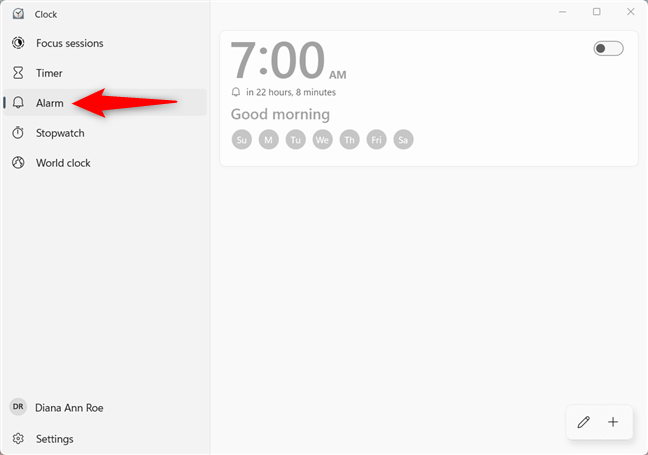
Access the Windows 11 or Windows 10 Alarm
TIP: You can also use the World clock tab in the Windows Clock app to keep an eye on the times in different countries.
How to set an alarm on Windows 10 and Windows 11
By default, the Windows 11 and Windows 10 Alarm has only one preset, Good morning, set to repeat every morning, at 7 AM sharp. This alarm is Off, but you can easily enable it by clicking or tapping on the switch in the upper-right corner.
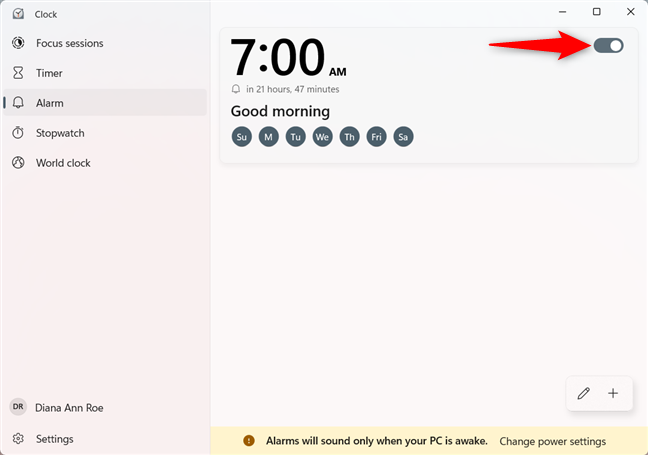
How to set an alarm on Windows 10 or Windows 11 by turning on an existing alarm
If 7 AM is a little too early for you (I know it is for me *yawn*), you can set this default alarm for another time by clicking or tapping on its entry. You can also use the Edit alarms button in the bottom-right corner of the window, and then click or tap on the alarm you want to set for another time. However, this only adds an extra step to the editing process; we’ll cover the best use for this edit button in the next chapter.
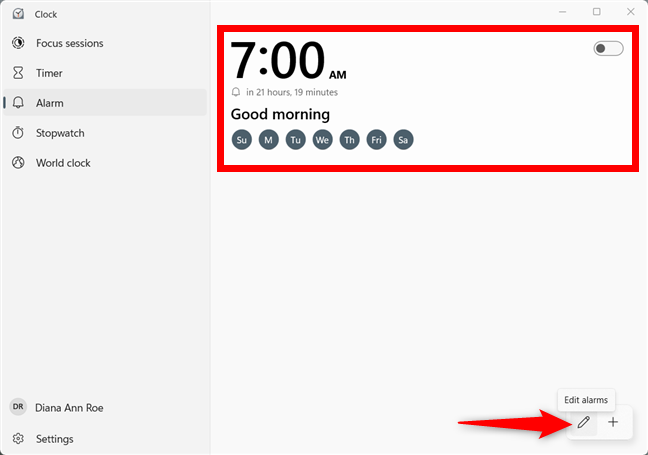
Press Edit alarms first or click/tap directly on an entry to edit it
Furthermore, you can also create another entirely different alarm to use on the days when you don’t have to get up early. Since the Edit alarm and the Add new alarm windows offer similar settings, we’ll only cover how to create a new alarm. First, click or tap on the Add an alarm (+) button in the lower-right corner of the app window.
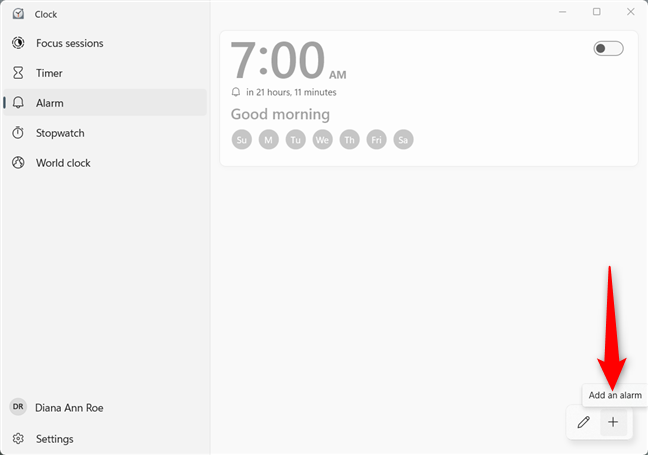
Add an alarm in Windows 10 and Windows 11
In the “Add new alarm” window, set the exact time for your alarm by changing the values for the hours, minutes, and period of the day. You can do this by inserting each value from the keyboard (use the mouse or press the Tab key to switch from one field to the next), by scrolling while you hover on top of each value, or using the arrow buttons displayed.
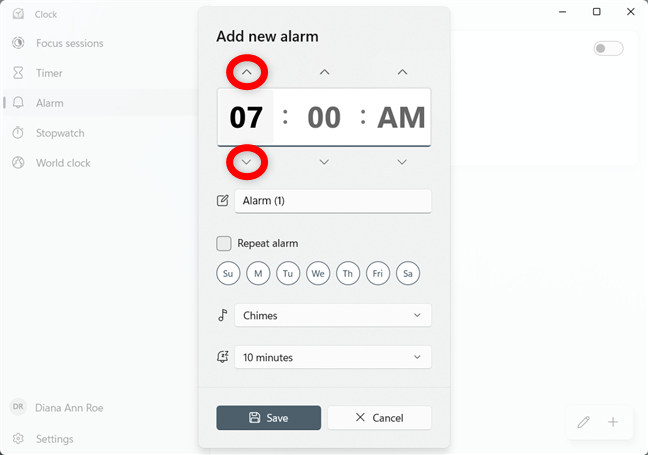
You can use the arrows next to each value to set an alarm for Windows
Click or tap on the Alarm Name field to enter a new name, instead of the default Alarm (1). If you don’t feel like naming your alarms, Windows helps you tell them apart by adding a new number after the generic Alarm. I created an alarm called Digital Citizen to remind me of the weekly meeting with our editorial staff.
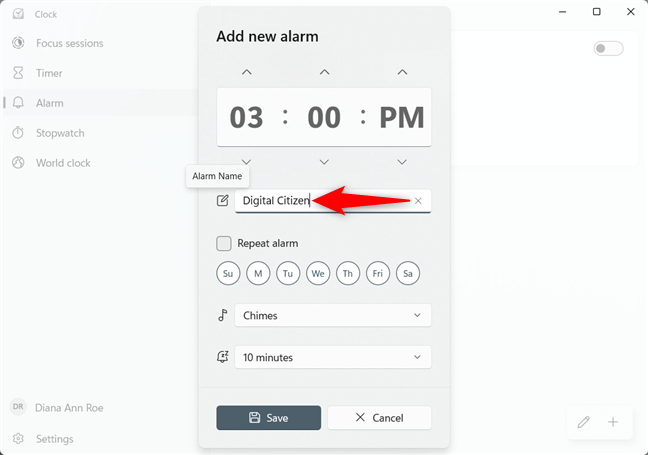
Type in a name for your alarm
Next, decide if you want to Repeat alarm. Check the Repeat alarm box and then click or tap on the weekday(s) when you want your alarm to alert you from now on; you can also just go ahead and select the days, which automatically selects the Repeat alarm box. I had the alarm repeat every Friday at 3 PM, as seen below.
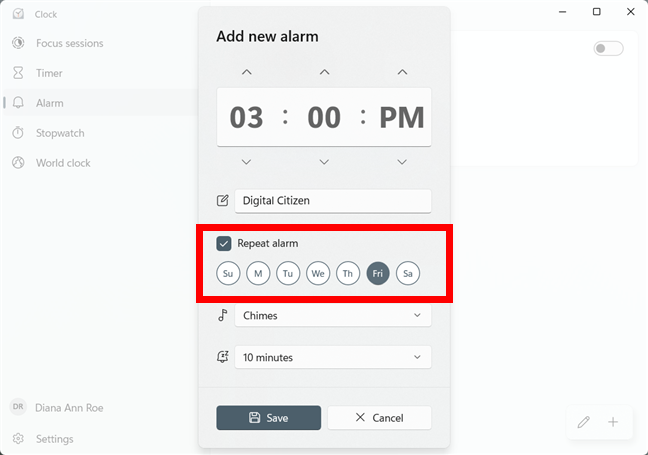
You can have your alarm repeat on any day(s) of the week
Clicking or tapping on the next field (Alarm Chime - showing the Chimes default choice) opens a dropdown menu where you can decide how your alarm sounds. Click or tap on the Play button next to each entry to listen to it. Once you've made up your mind, click or tap on the tune you want to use for your alarm to select it.
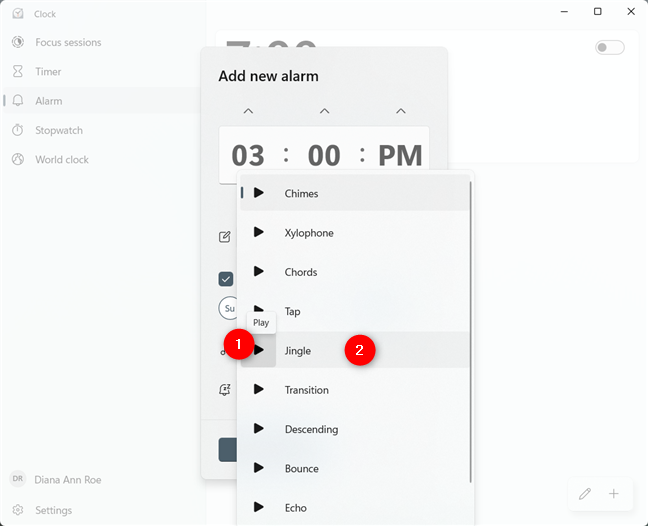
Set a tune for your alarm in Windows 10 and Windows 11
NOTE: Did you know that the Echo tune is the same one used by timers in Windows 10 and Windows 11? You can find out more from our guide on using the Windows Timer.
You can also set the Snooze Time by selecting a time frame for it. Click or tap on the default 10 minutes to open a drop-down menu.
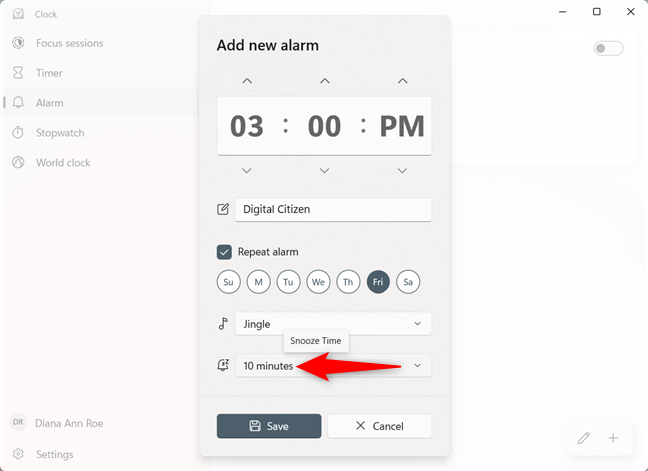
Open the Snooze Time dropdown menu
Disable the snooze function or select one of the values displayed. Click or tap on your choice to select it.
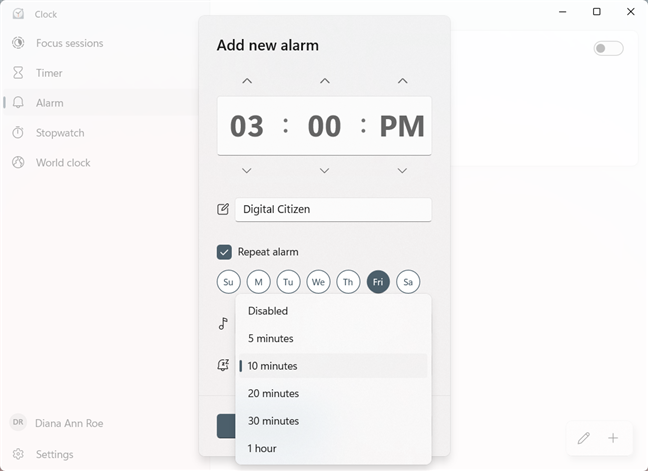
Choose a Snooze Time for your alarm or disable snooze
When you are done setting up your alarm, click or tap the Save button at the bottom of the Add new alarm window.
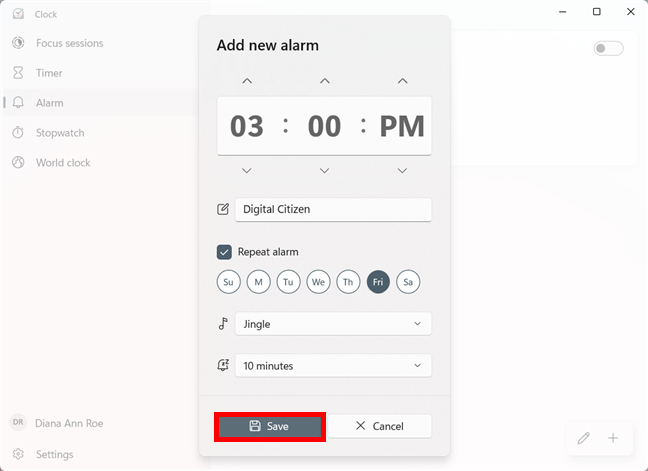
Click or tap Save to create the alarm for Windows
Your alarm is now set, and you can see it displayed in the Clock app’s Alarm tab.
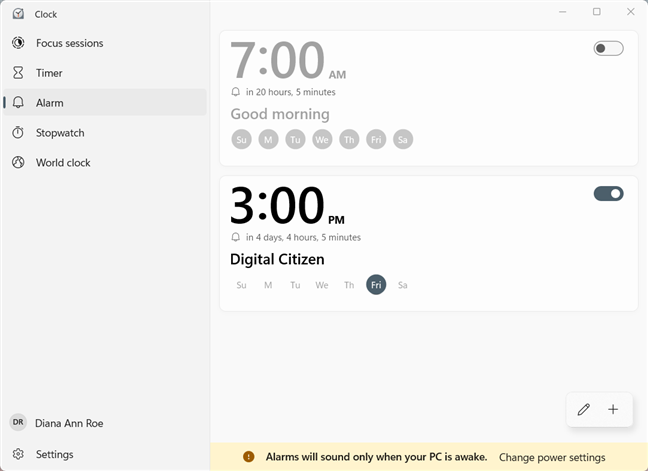
Your new alarm is saved and enabled
You can have over thirty alarms active at the same time. We could have been even more specific, but we figured thirty is more than enough for the average user (and we also got bored 🙂 ). Your alarm goes off at the time you decide, as long as your PC or device is awake, even if it’s locked.
How to use alarms in Windows 10 and Windows 11
Now that you know how to set an alarm on Windows 10 and Windows 11, let’s see how to make the most of them. As previously explained, you can enable or disable an alarm at any time by clicking or tapping the On/Off switch located to its right. Disabled alarms are grayed out, making the active ones stand out.
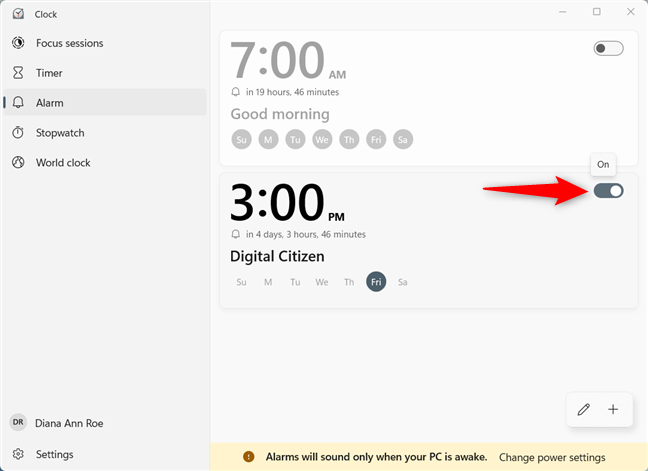
The switch for enabling or disabling alarms
As soon as you activate an alarm, you get a notification at the bottom of the Clock window letting you know that “Alarms will sound only when your PC is awake.” When an alarm goes off, its default behavior is to alert you by playing its sound and displaying a banner in the bottom-right corner of your screen. The volume of other sounds playing from your Windows computer or device is lowered to ensure you don’t miss the alarm.
If you still need a bit more time, you can Snooze your alarm. Windows considers that your needs might have changed from the alarm’s creation and lets you modify how long to Snooze for. Click or tap on the preset value to open a drop-down menu.
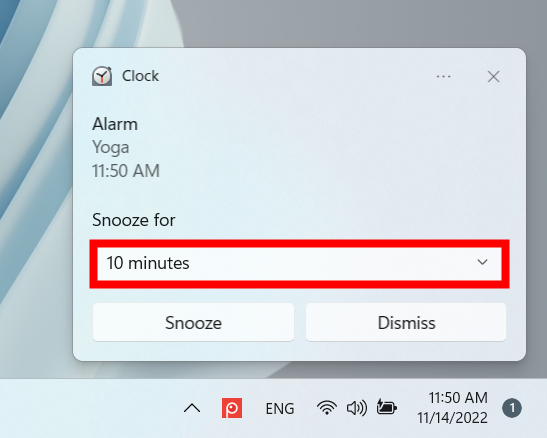
Change the Snooze Time for your alarm
Select for how long you want to postpone your alarm.
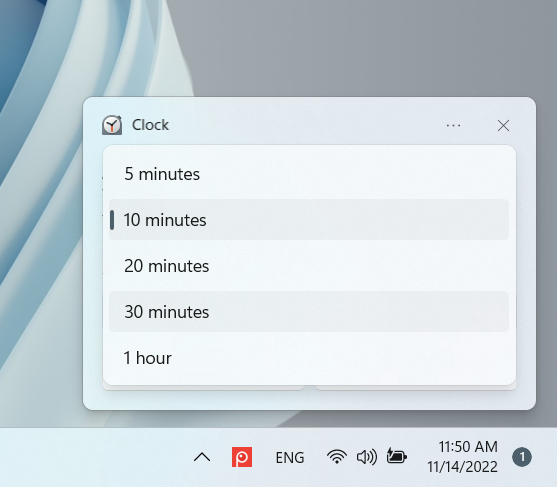
Choose another Snooze Time for your alarm
Whether you modified the Snooze Time or not, click or tap on the Snooze button to postpone the alarm for the displayed duration. Your alarm goes off again when the snooze duration has gone by, and you can continue postponing it by following the same steps. If you’re right on schedule, click or tap on Dismiss to stop the alarm entirely and hide the banner.
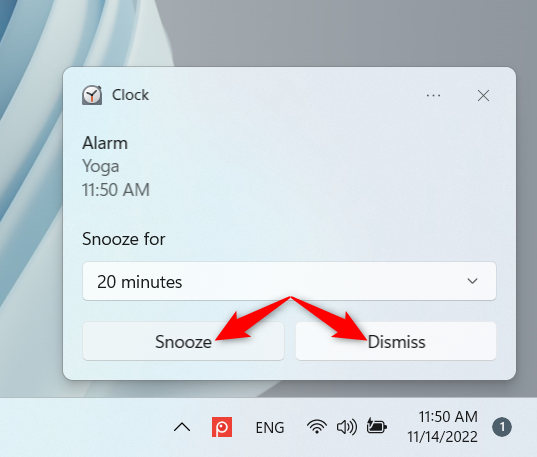
Snooze or Dismiss an alarm in Windows 10 or Windows 11
Clicking or tapping on the banner in the area displaying the alarm’s details also stops the alert, while also opening the Alarm tab of the Clock app. Even if your alarm isn’t set to repeat, you can still find it in the Alarm tab when it’s done. Right-clicking or pressing-and-holding on an alarm entry opens a contextual menu with the options to Edit or Delete the alarm. Clicking or tapping Delete immediately removes an alarm from the list, while Edit lets you modify it.
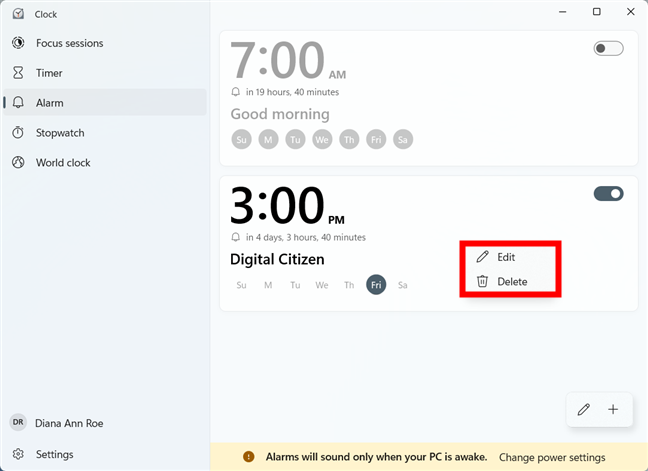
Every alarm has a right-click menu with two options
We already went over the settings in the Edit alarm/Add new alarm window in the previous chapter, if you’re interested in changing how an existing alarm works. However, the Edit alarm window has one extra option: a Delete button in the upper-right corner - click or tap on it to remove the selected alarm.
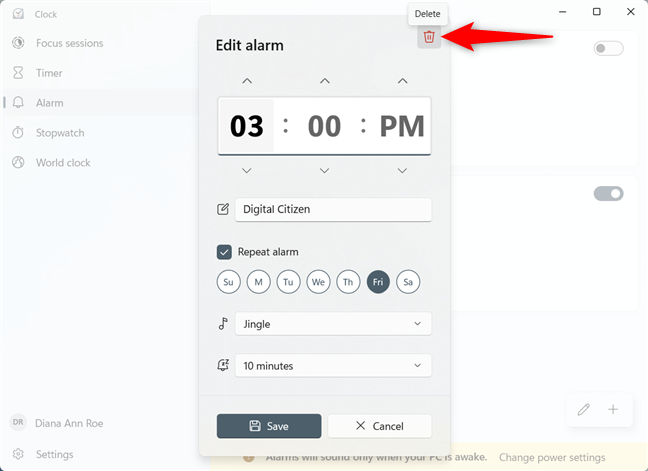
Delete a Windows 11 or Windows 10 alarm
If you created a lot of alarms you no longer need, and you want to get rid of them as fast as possible, use the Edit alarms button in the bottom-right corner of the window.
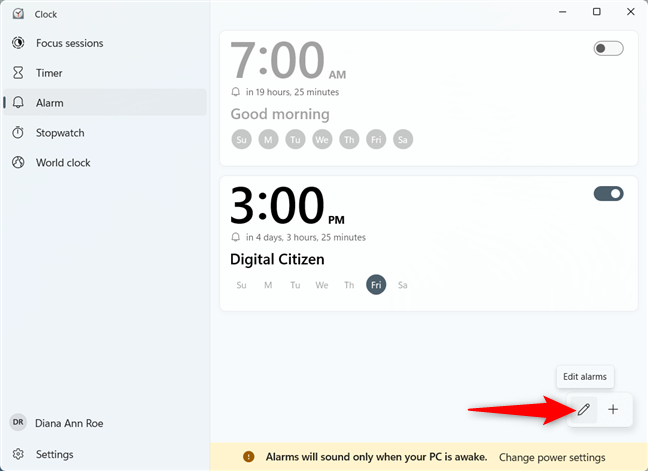
Click or tap on Edit alarms
You now get a Delete button for each existing alarm, in the top-right corner of its entry. Click or tap on Delete next to each alarm you want to remove. Then, press on Done - the check mark that replaces the pen icon for the Edit alarms button.
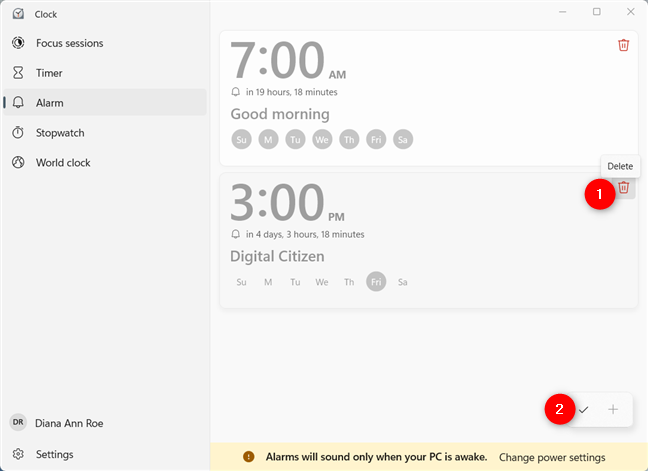
Use the Edit alarms button to Delete more alarms at once
Why did you need an alarm for Windows?
Nowadays, we rely more on the alarms on our smartphones than the ones on our PCs. However, if you’re a heavy sleeper or when it comes to work tasks, the Clock app lets you set as many alarms as you want in Windows 10 or Windows 11. Before you close this guide, let us know about the alarms you’re using on your PC. Did you enable more than one? Leave a comment below with your answer.


 14.11.2022
