If you landed on this web page, you probably already know how to work with Task Scheduler to create scheduled tasks. Now it may be that you are asking yourself and the internet search engines about a way to rename a task that is already created and scheduled in Task Scheduler. While it may seem a trivial action to some, things are not as simple as they appear to be. Let's see why, and how we can change that:
Why there is no "rename task" option in the Task Scheduler?
One would expect that renaming a Windows task is a simple thing to do. It might seem obvious that you should open the Task Scheduler, find the task you want to rename and search for an option to rename it. Well, when you do that, you find that there is no such option.
There is no rename task option available in Task Scheduler because that would make the operating system vulnerable to threats. To get a better idea, imagine that a virus starts renaming all your scheduled tasks. Every task you have set and enabled could be changed. This is why there is no obvious way to rename scheduled tasks in Windows.
How to rename a task in Task Scheduler
We know that there is no obvious way to change the name of a task already created in Task Scheduler. However, is there no way at all? The answer is that there is a way. However, it is not as smooth and straightforward as a "right click & rename" action. To put it briefly, you have to export and then import the same task to be able to change its name.
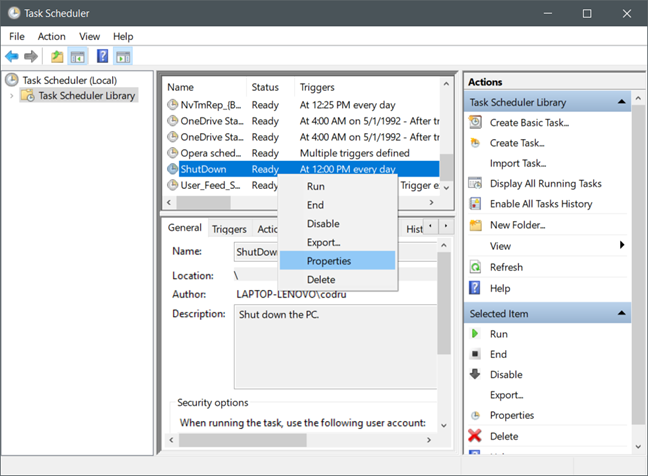
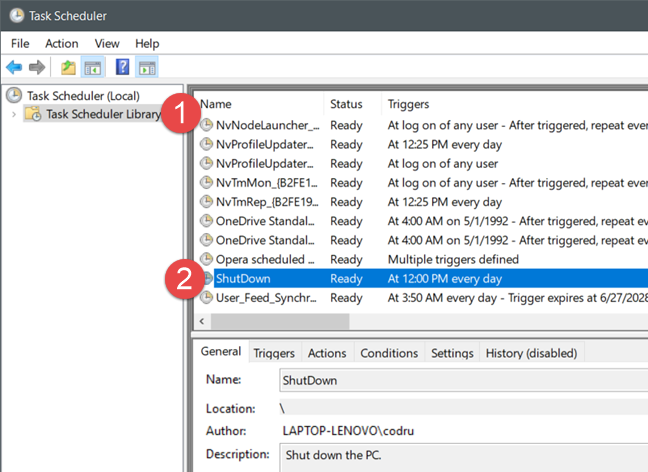
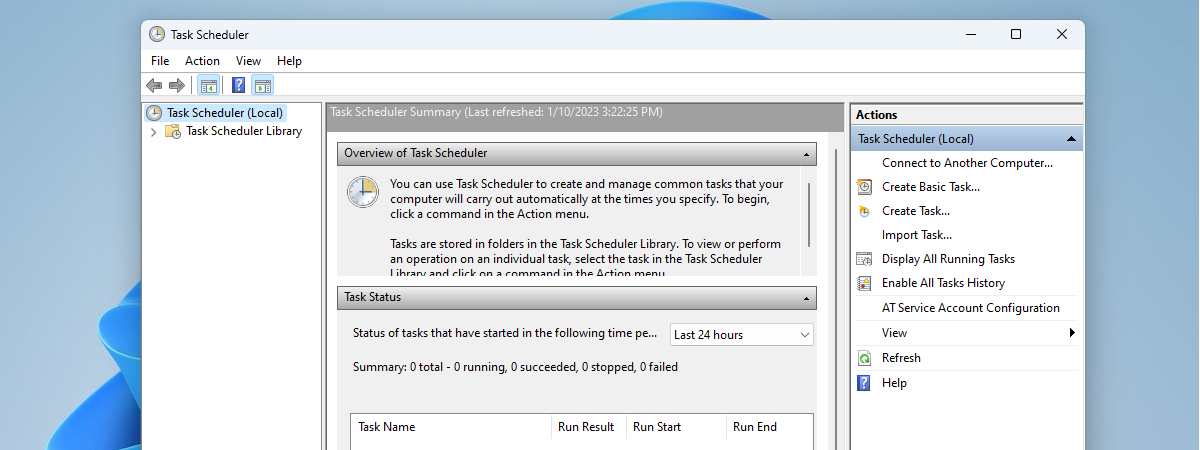
First, open the Task Scheduler and look for the task you want to rename in the Task Scheduler Library. Then, click or tap on it to select it.
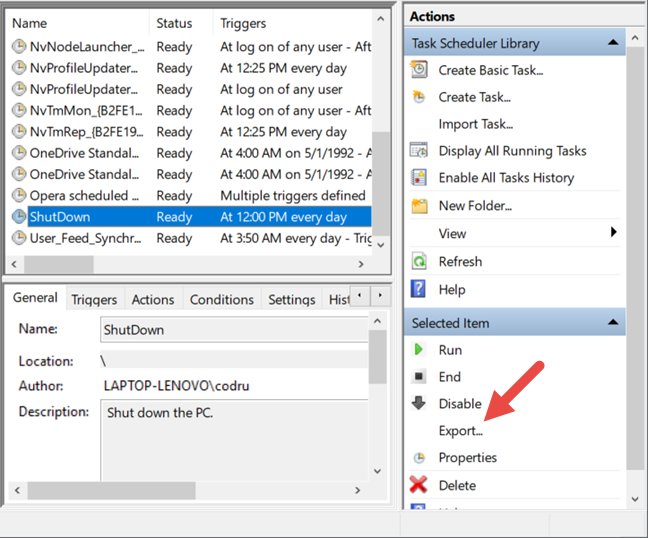
On the right side of the Task Scheduler window, in the Actions sidebar, click or tap on the Export option.
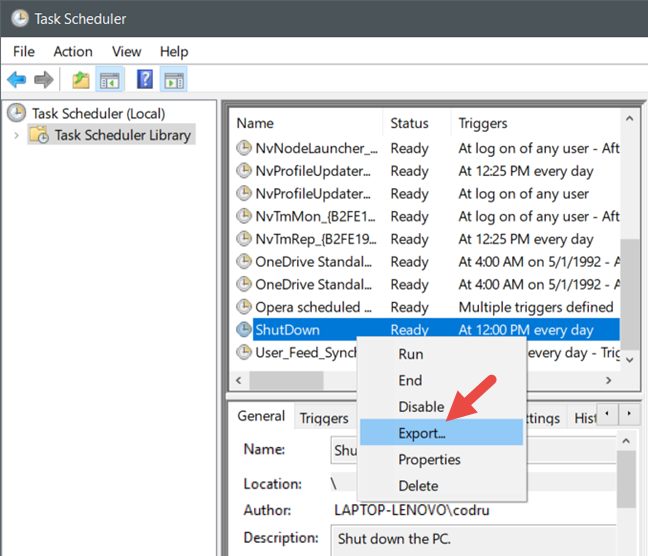
Alternatively, you can also right-click or tap and hold on the task's name and select Export.
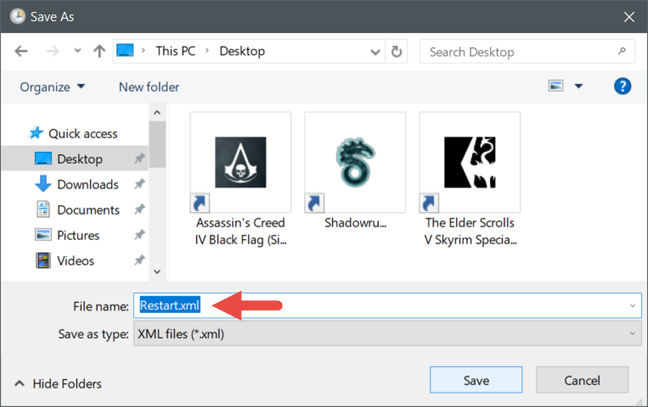
In the Save As window, type the name you want to use for your task and save it somewhere on your computer. The task you export is saved as a ".xml" file. Just remember where you saved it.
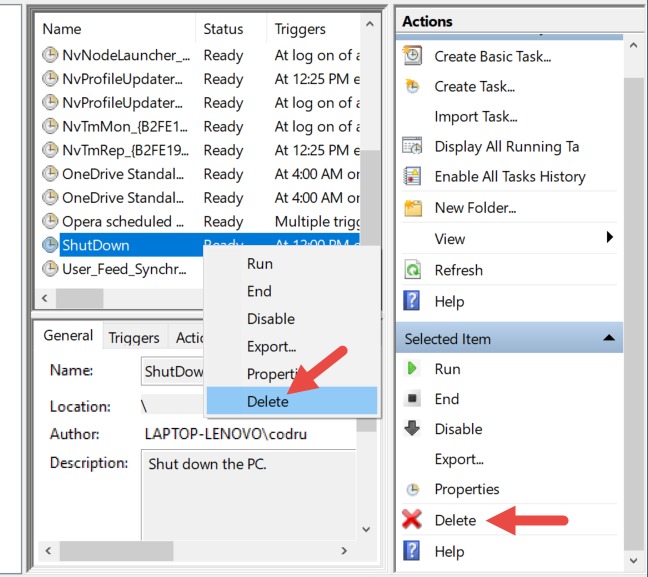
After you save the task, you are brought back to the main window of the Task Scheduler. Select the task you just exported and delete it.
You can do that either from the Actions sidebar or its right-click menu.
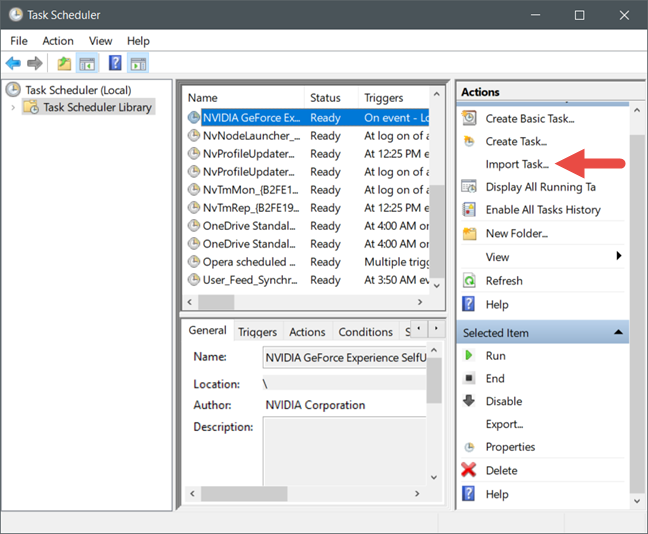
The original scheduled task is now gone. To get it back, but this time with a new name, recheck the Actions sidebar and click or tap on "Import Task."
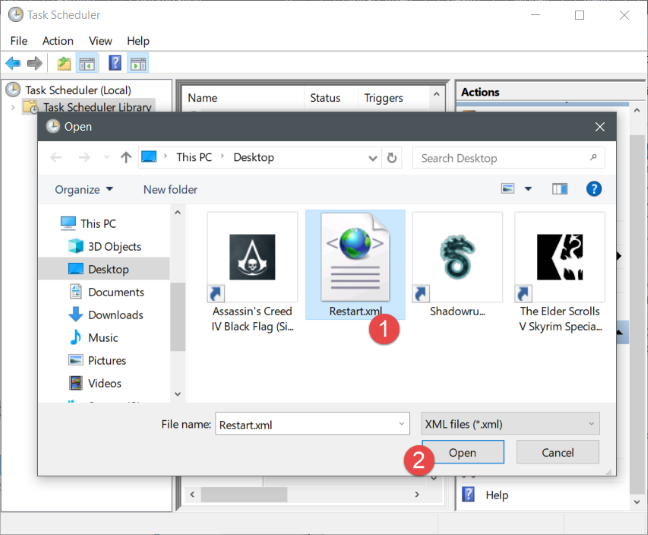
Navigate to the location where you saved the exported task earlier, select it and click or tap Open.
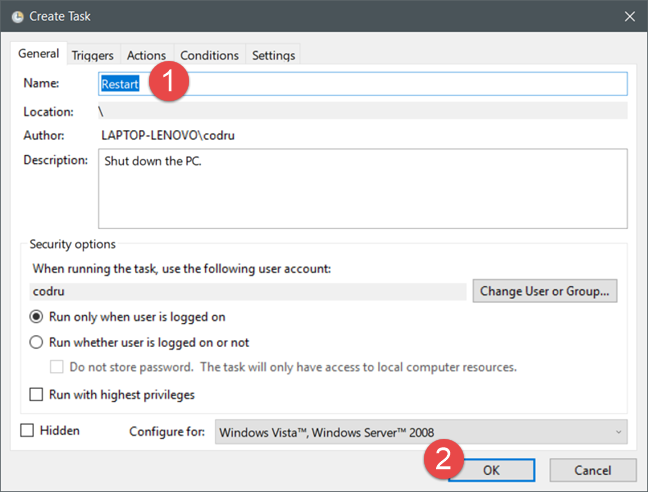
The Task Scheduler now opens a dialog named "Create Task." In the General tab, the first available field is the Name of the new task. You can keep the name you already set for the exported file when you saved it, or you can fill the Name field with a new one. All the other settings of the original task are kept, so unless you want to change something else, press OK.
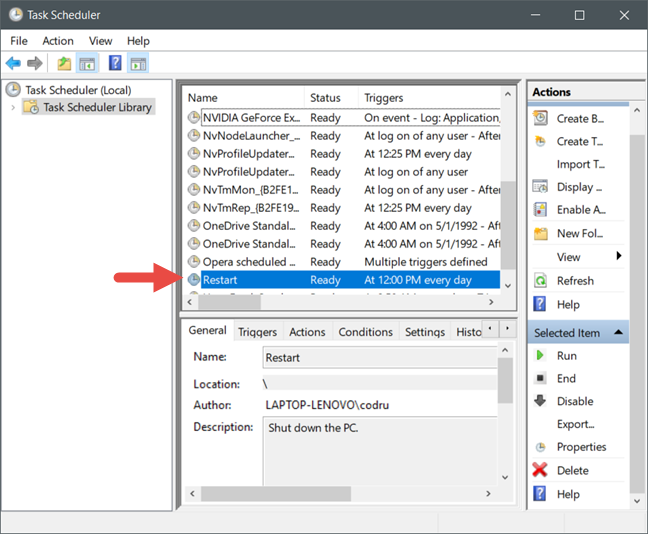
In the Task Scheduler, you can now see that the original scheduled task bears the new name you chose for it.
Do you know other workarounds for renaming tasks in Task Scheduler?
Renaming a task set with Task Scheduler is not an action as straightforward as you might be tempted to think. As you know now, this happens for security reasons. However, that does not mean that it is impossible to rename a task. You can use our workaround for this job. If you know of other ways to rename tasks created with Task Scheduler, do not hesitate to let us and the other readers know. You can use the comments section below for that, or for discussing this subject.


 28.06.2018