Picture this: you come home after a day's work, and you want to read a book while listening to your favorite music. You power up your computer, launch your favorite media player, load your music playlist and throw yourself in bed, book in hand. You start reading, but only a few seconds in, you realize the music is too loud, and you need to turn down the volume. The only problem is that you're too lazy to get up and do it yourself. How cool would it be if you could pick up your Android smartphone and remote control the computer with it, to lower the volume, skip the current track or turn off the computer altogether? Well, you're in luck, because the Play Store is full of apps that can help you with this matter. In this article, we present you one of the most popular apps for remote control:
How to remote control your Windows PC from an Android device
You need to install a piece of software on your computer (usually called a "server") in addition to the correspondent app on your smartphone or tablet (usually called a "client"). This method turns your smartphone into an old-fashioned remote control, like your regular TV remote control, allowing it to send commands to the device it is controlling. In this case, the communication is done one way: you send a command from your smartphone that tells your computer what to do (change the volume, skip a music track, power off, or move the mouse cursor). This method is usually faster in a localized environment, like a Local Area Network, but both devices need to connect to the same network, which means it doesn't work via the internet. After testing a few solutions using this method, we found one that we liked. It is called Unified Remote: here's the app and the website.
The app is a commercial software solution that offers a free version with a limited set of features. For this tutorial, we used the free version, which serves well for a good start.
Install the Unified Remote server on your Windows PC
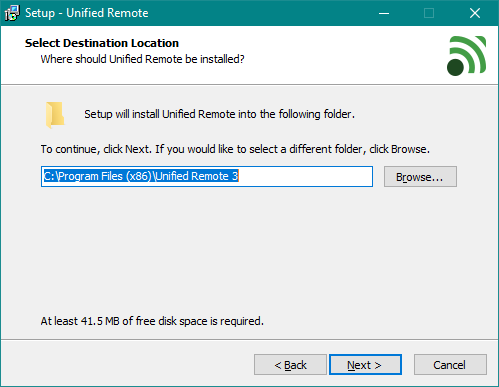
The first step you have to take is to install both the client app on your Android smartphone or tablet and the server software on your Windows PC. To install the "server," visit the Unified Remote website and navigate to download the latest version of the server software (or click here to download the latest version). Run the setup package (the installation procedure is pretty straightforward).
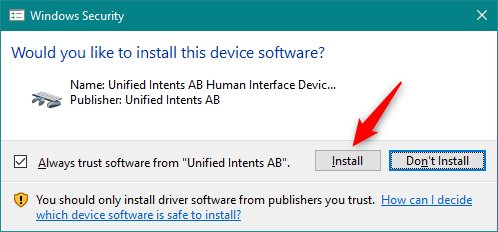
Sometime during the installation procedure, you have to accept the setup of the HID driver, needed by the software to send commands to the remotely controlled system. For identification purposes, it is called Unified Intents AB Human Interface Device. Click on Install to accept its installation.
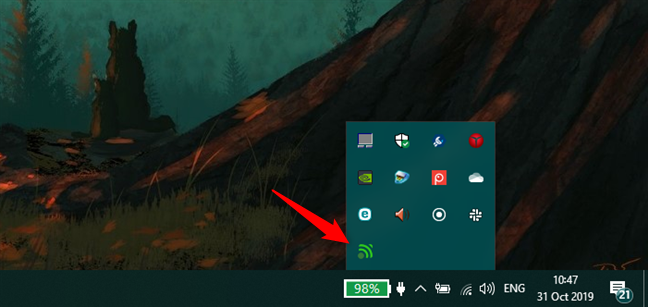
Wait for it to finish installing, and once it does, find its icon in the system tray, next to the clock, to make sure it is running. You don't need to configure anything at this point; it just works out of the box.
Install the Unified Remote client on your Android smartphone or tablet
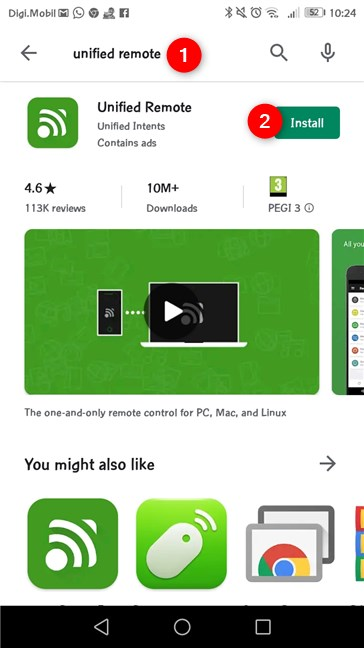
Next, open the Play Store app on your Android device and search for Unified Remote, find the app in the search results, and install it. You can also go here on your smartphone.
After it finishes installing, open the App drawer and launch it from there.
How to use Unified Remote for Android to remote control your Windows computer
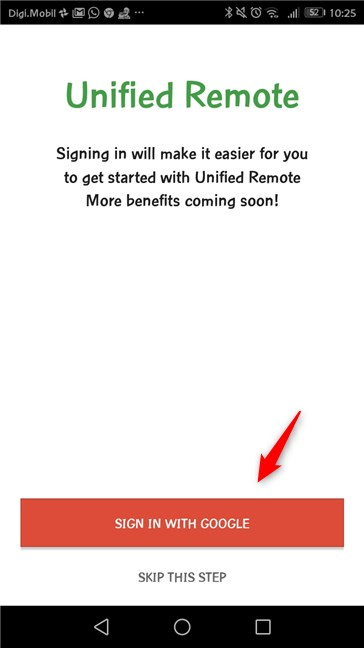
On the first screen of the app, you can choose to "Sign in with Google" or "Skip this step" and not use an account with the app. If you choose to sign in with your Google account, the app backs up your configuration and remote settings across devices, so it's a useful step to take.
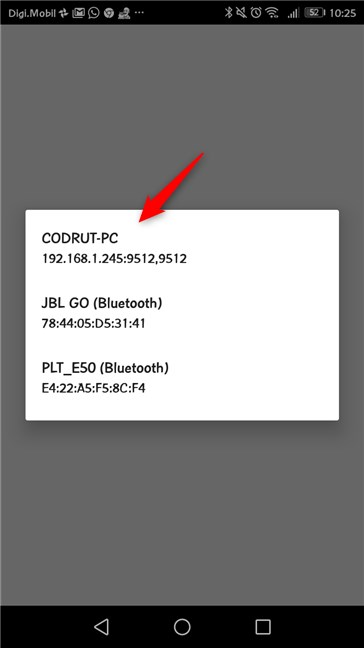
On the next screen, the app shows a list of devices to which you can connect. If you've previously completed the server setup without complications, the app automatically detects the computers connected to the LAN on which the server is running.
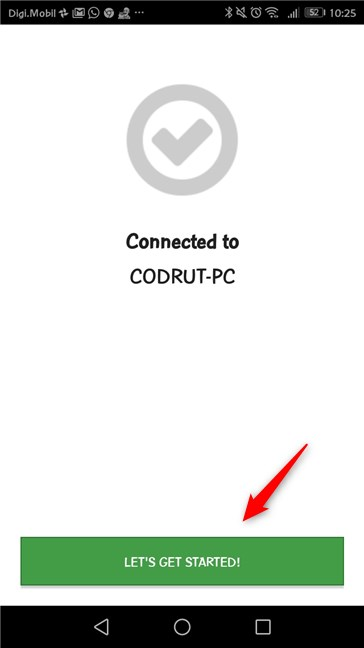
Tap on the name of your PC, and you should get a notification telling you that your device connected to it.
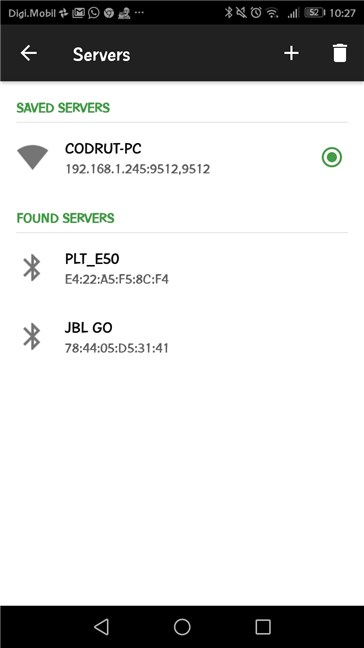
Unified Remote can connect to Windows PCs via Bluetooth or WiFi. The app also offers access to a "servers" screen, where you can find the computers that currently run the server and are available for a connection. You can also change their settings on that screen.
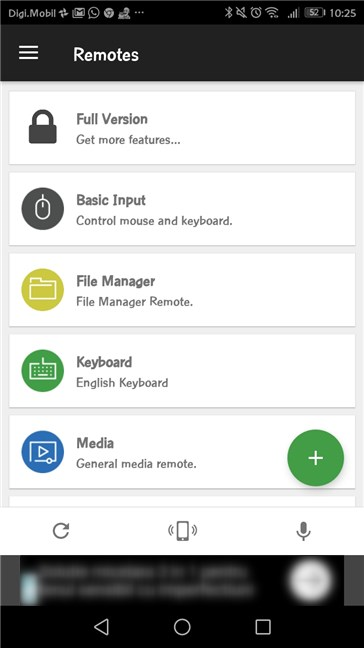
For now, tap on "Let's get started!" to get to the list of options, which you can see below:
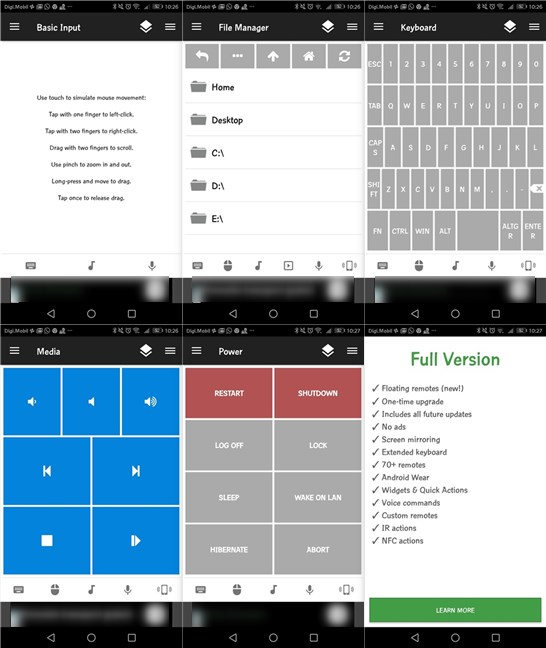
These are the default installed remotes you can use as soon as you install the app. Here's what each of them does:
- Basic Input is your basic virtual mouse; move your finger on your smartphone's screen to move the cursor on your computer desktop, tap with one finger for a left click, tap with two fingers for a right-click or swipe with two fingers to scroll the current window;
- File Manager opens up a window of the computer's hard drives, giving you access to the files and allowing you to open or launch them on the computer;
- Keyboard is a regular QWERTY virtual keyboard, complete with function keys;
- Media Remote is a remote containing the media keys, such as the volume keys, previous and next track or play/pause;
- Power is a remote containing the power options, such as Shut Down, Log Off or Restart.
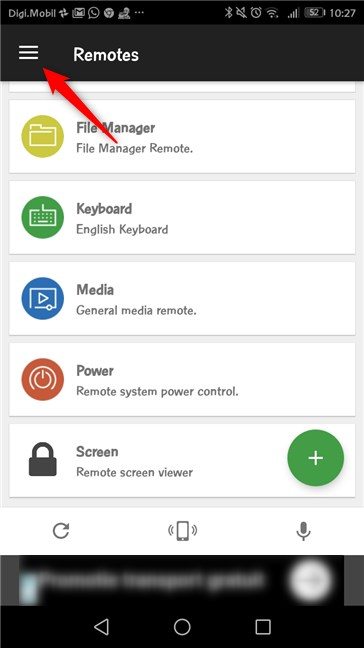
By tapping on the bottom-right green PLUS button, you can add other remotes, like different input methods, various media remotes specialized for a particular media player, or even a remote Task Manager. Some of them are available in the free version of the app, but for the more advanced ones, you must purchase the Premium version, which also offers the possibility of screen mirroring, IR actions, custom remotes, and NFC tag triggers. In the Remotes screen, you can see a three lines menu button (burger menu) in the top-left corner.
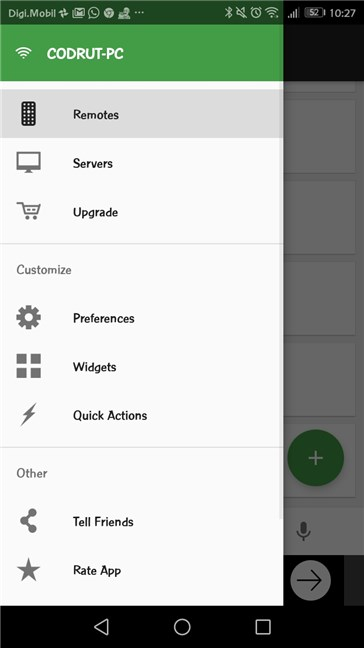
You can tap on this button to get to the menu of the app.
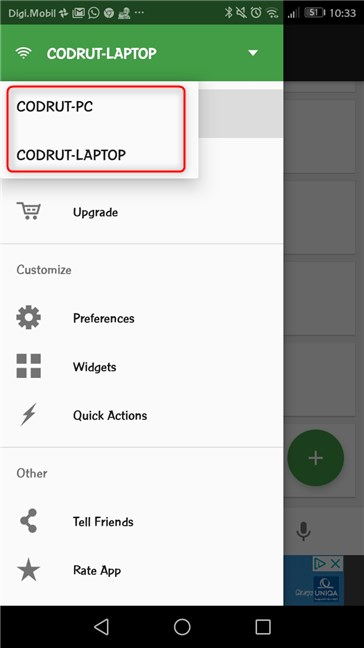
At the top of the menu, you can tap on the computer name to select the computer that you want to control remotely (in case you have several computers configured in the app).
Tap on the next entry in the menu, the Servers tab, to go to the server's configuration screen. Here, you see a list of all the configured computers ready for remote control and also, the computers which have not yet been configured for remote control, but have been detected by the app and are eligible for configuration. You can also tap on the "+" button on the top toolbar to manually add a server, if the app has not detected it, or tap on the "Recycle Bin" button to remove one of the computers from the list.
One of the advantages of this method is that it is faster, because the communication is only one-way (the only exception being the screen mirroring feature). Depending on the context, it may also be a more stable solution. And most definitely, it is the more secure solution, because it is limited to the LAN it is working in, without sending data over the internet.
But this also counts as a disadvantage, in our opinion, if you're looking for a method of remote controlling a Windows PC over the internet. Another low point is that you are limited by the "remotes" (as the app calls them) that the developers offer or the ones that you design yourself.
Do you like Unified Remote?
You've learned how to control your desktop computer from your Android smartphone or tablet, using the Unified Remote app. If you want to send commands to your Windows computer, Unified Remote can fulfill this role, but if what you need is more complex work, like sending files by email or editing photos, then other apps like TeamViewer are what you're looking for. Before closing this tutorial, tells us what you think about the Unified Remote app and whether you like using it.


 01.11.2019