If you used Skype before, you might have noticed that you can link your Skype and Microsoft accounts. Microsoft recommends linking the two account primarily because you will only need to remember one user account and password that can be used across multiple devices and Microsoft services. Secondly, linking your accounts allows the integration of Skype with Outlook and the merging of all your contacts from the two services. This tutorial continues the series about Skype for desktop and it will help you understand how to link your Skype account with your Microsoft account both in Windows 8.1 and Windows 10.
Important Information About Linking Accounts In The Skype For Desktop App
Linking accounts in Skype for desktop is an action which involves a series of requirements that you should know about beforehand. First, it is only possible to link a single Skype account with a Microsoft account.
Also, the linking process will only work if the Microsoft account was never used to sign into Skype before, on any type of Windows powered device. If you have used your Microsoft account to sign in directly to Skype, then you would have created a so called technical Skype account. This doesn't make the app work in a different way and the only difference is related to the fact that you will not have a Skype name.
However, if you have linked the wrong accounts or if don't want the technical Skype account, you can unlink them and then link the Skype and Microsoft account you want.
If you have ever used a Microsoft service or device such as Hotmail, Outlook, an Xbox or a Windows Phone, you have surely created a Microsoft account. For that matter, if you want, you can also create one directly from the Skype for desktop app. For more information about Microsoft accounts, we recommend you read this guide: Simple Questions: What is a Windows Live ID or a Microsoft account?.
If you need more help on how to download the Skype for desktop app and how to use it, read this tutorial: How To Use The Skype For Windows Desktop App.
How To Link A Skype Account To A Microsoft Account Using The Skype For Windows Desktop App
If you are using Windows 8.1, we assume that you already have a Microsoft account. If not, this step by step guide should help you solve this problem: How to upgrade a Local Account to a Microsoft Account in Windows 8.1. For those of you who use Windows 10, no need to worry as many of you already use a Microsoft account to log in to the operating system.
All of the explanations from this section will not work unless you have created both types of accounts. Also, the screenshots we will use in this tutorial are taken in Windows 10, but rest assured that they also apply for Windows 8.1.
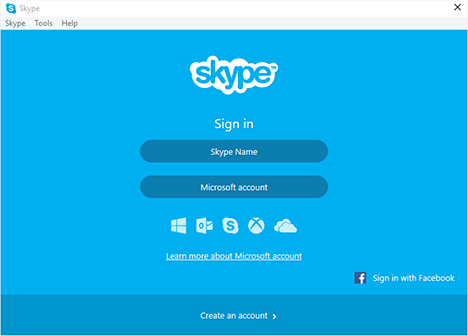
First of all, you have to start Skype for desktop. If you have just downloaded and installed this application, you will be asked about how you would like to sign in. Of course, if you have already used this application and you are logged in with your Skype account, you need to sign out before taking any other step forward.
You should see a window similar to the one below.
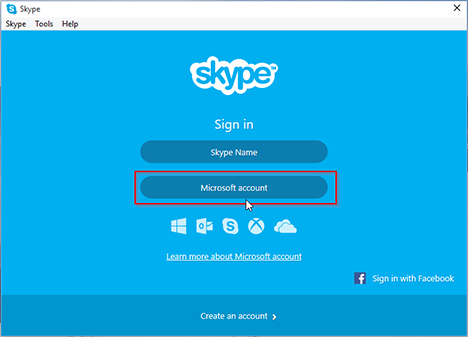
Click or tap on the option labeled Microsoft account.
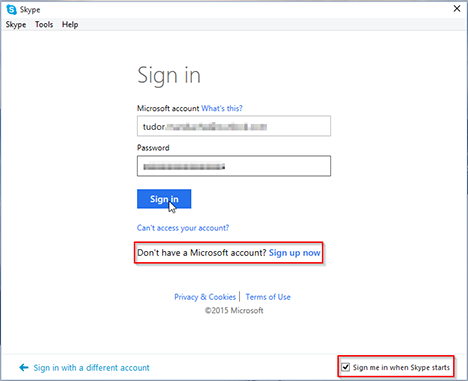
At this point you will be required to enter your Microsoft account and, of course, your password. Also, this window allows you to create a Microsoft account if you don't have one already. After you have entered your login information, you can set Skype for desktop to sign in automatically with your Microsoft account every time this app starts, by checking the small Sign me in when Skype starts box from the lower right corner of the window. After that, click or tap on the Sign in button.
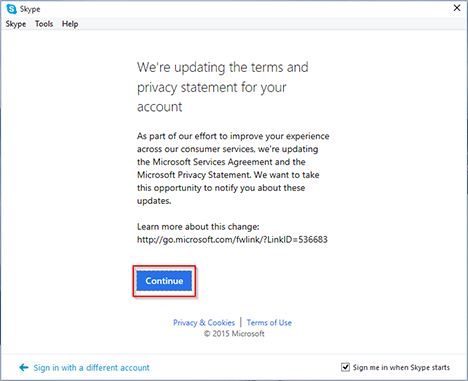
Recently, with the forthcoming arrival of Windows 10, Microsoft has decided to update the services agreement and privacy statement for their products. It is supposed to be a more transparent and simplified approach to customer privacy that will be easier to understand and commit to. So you will be prompted to accept this new situation and if you are OK with these changes, click or tap on the button labelled Continue.
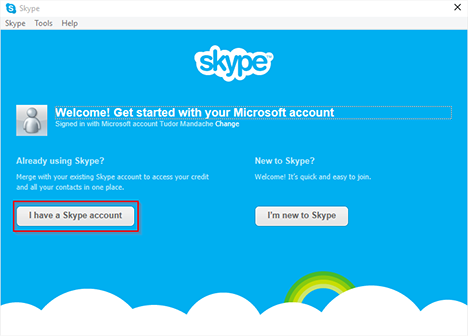
The next window will start the linking process between the two accounts. Now, you should click or tap on the I have a Skype account button.
You will need to enter your account login information for the Skype account you want to merge. It's possible for you to have multiple Skype accounts (for example one for home and one for work), but, as we have already stated, you can only merge one Skype account to a Microsoft account. Once you have entered your Skype username and password, click or tap on Sign in.
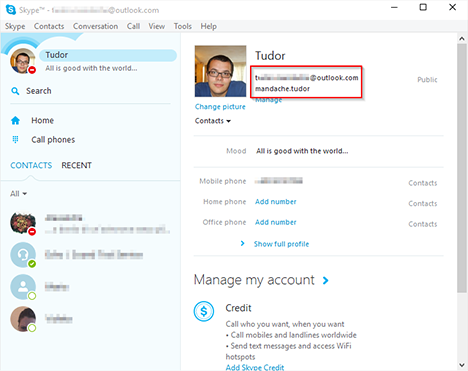
The Skype for desktop app will automatically create a link between your Skype account and your Microsoft account. Your accounts will merge and from this point forward you can sign in to Skype by using your Microsoft account.
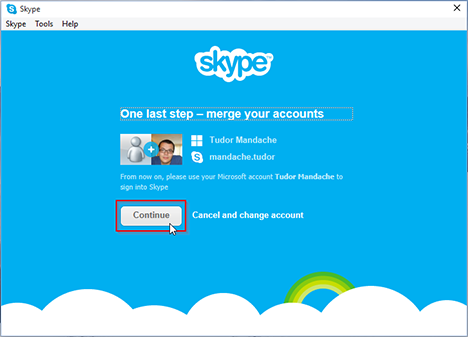
Finally, you will see a window that features both your Microsoft and Skype accounts side by side. Review if everything is OK and then click or tap on Continue.
And that's it! The link between your Skype account and your Microsoft account will be made when Skype for desktop starts. The next time you sign in to Skype, simply use your Microsoft account ID and password.
NOTE: You can only link a Skype account to a Microsoft account if you use the Skype for desktop app. You can't link your accounts even if you go to the Skype website. You can manage your Skype account and subscriptions from this website, but you cannot merge your accounts from there. We hope that Microsoft will add this option in the future.
Conclusion
As you can see from this tutorial, it is quite easy to link your Skype and Microsoft accounts. This is a useful feature as it can help you connect to multiple Microsoft services with the use of only one ID and password. Have you merged your Skype account with a Microsoft account? How did the procedure go? Are you happy with this migration?


 09.07.2015