Not too long ago, we wrote a tutorial on how to add or remove keyboard input languages in Windows 8. To continue with the topic of working with languages, I would like to show how to install and enable additional display languages. I'm sure many of our readers would like to switch between at least two languages in their daily work. And, luckily, Windows 8 makes it easier than ever to find, install and switch between multiple languages.
IMPORTANT NOTE: The first and most important step when installing a new display language in Windows 8 is to open the Language panel, found in Control Panel. There are several ways to do this, and we described them all in a previous article. We warmly recommend that you first read: How to Add or Remove Keyboard Input Languages in Windows 8. The sections found in this tutorial assume that you did just that and you know how to open the Language panel and add a new input language. Also, in order to install a new display language, you must be logged in with an administrator account.
How to Find and Install a New Display Language
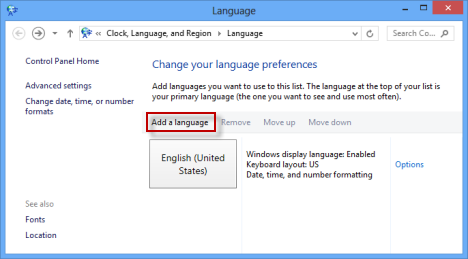
You must first add the input language that you want to use. That's because Windows 8 assumes that, when you add a new display language, you want that language to also be your keyboard input language. Open the Language panel, and then click or tap Add a language.
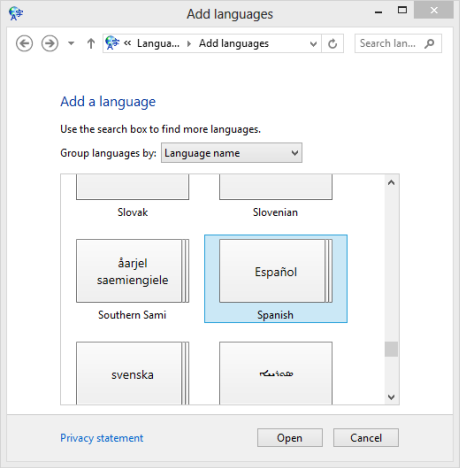
Choose the desired language either by scrolling or by using the search box on the upper right side of the window.
If Microsoft packed regional variants for the selected language, then you have the opportunity to choose the one you wish by selecting it from the next panel.
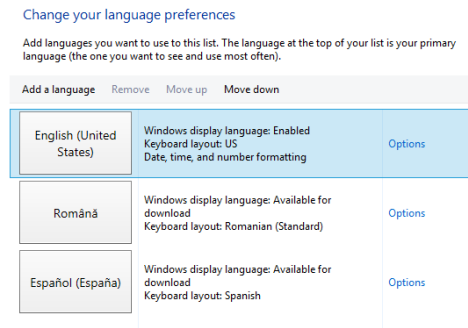
Then, click or tap Add. You are back to the Language panel, and you see that the new language has been added to the list of available input languages.
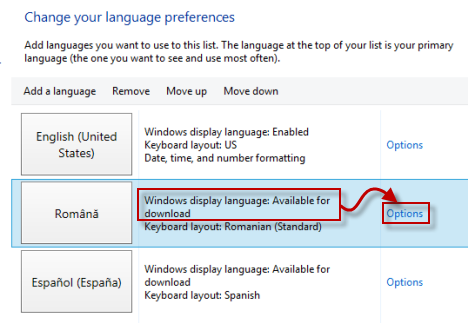
If Microsoft released a display language pack for the selected keyboard input language, you see a message stating: "Windows display language: Available for download".
If this is displayed you are in luck. You will be able to install that display language. The next step is to click or tap the Options link, available on the right.
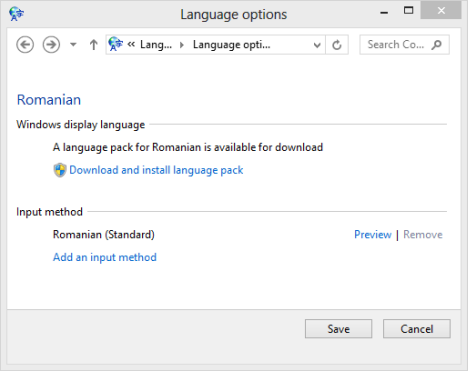
This opens the Language options panel. Here you find two sections: Windows display language (the one that interests us) and Input method, which gives access to various input methods for your keyboard.
In the Windows display language section, click or tap on the link that says "Download and install language pack".
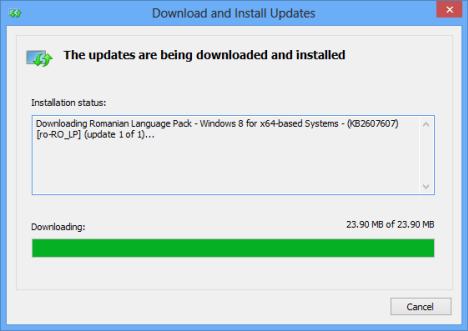
You are prompted to give your permission and go ahead with the process. Once you confirm, a new window is displayed, with information on the installation status. Wait for the display language to be downloaded and installed.
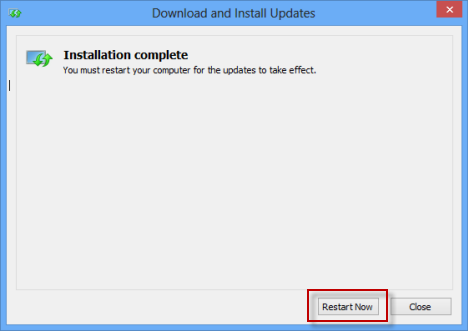
When done, you are asked to restart your computer. If you have other programs running, first save your work, close them and click or tap Restart Now.
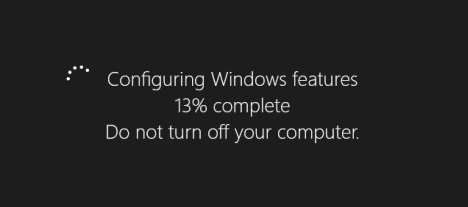
Windows will restart and configure itself.
How to Enable the Newly Installed Display Language
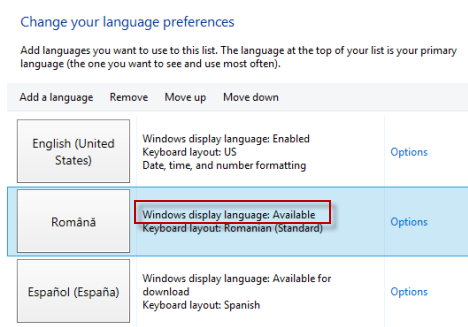
The new display language is installed but not enabled. Let's see how easy it is to enable it. Open the Language panel. Then, look for the language you just installed. If all went well, you should see the mention "Available" being displayed instead of "Available for download".
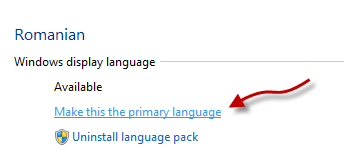
Click or tap the Options link. This opens the Language options panel. The first section now contains two options, different from those available before we installed the new display language. The first one says "Make this the primary language". Click or tap on it.
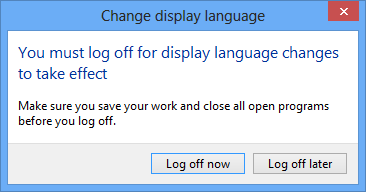
You are now prompted to log off, so that the new language can be applied.
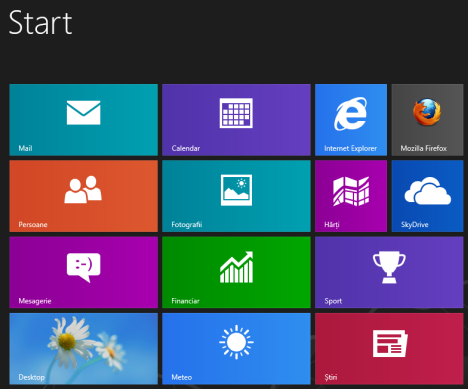
Log off, log on again and enjoy Windows 8 in the new display language.
Conclusion
It's great to see Microsoft learning from past mistakes. In Windows 7 you had to hack the operating system in order to install different display languages, if you were not using Windows 7 Ultimate. In Windows 8 this is easy to do and you are no longer restricted by the version of Windows 8 you are using. For more information on working with languages in Windows 8, don't hesitate to read the articles recommended below.


 07.11.2012