Once you have some text in a document you really want it to make it look as good as possible. This means that you will need to use some text formatting tools, to change the look of the text in order to have it match the type of document you are creating. Microsoft Word on Android offers quite a lot of features to change the appearance of the text: the options range from various fonts, text styling and different style presets. Let's see how they work!
NOTE: Before going any further, we will first need some text to work on: you can either create a new document or open an existing one.
How To Change Text Formatting In A Document In Microsoft Word For Android
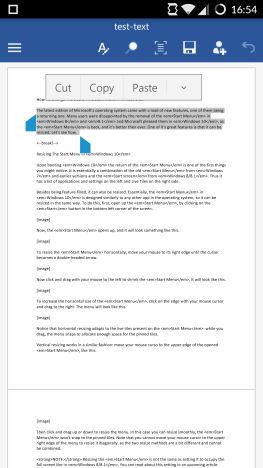
Start by selecting the text you want to format.
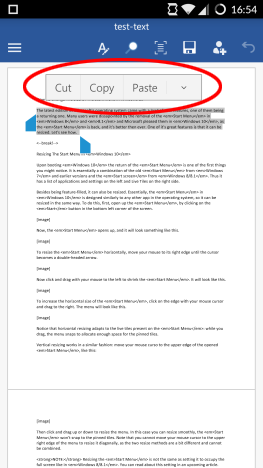
You can access basic editing operations in the popup bar: tap Cut or Copy to place the text in the clipboard, or tap Paste to insert text from the clipboard.
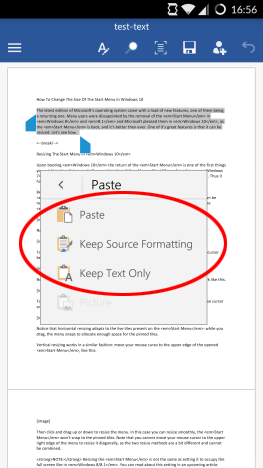
Tapping Paste opens up a menu with additional options: you can paste the text from the clipboard as is, keep its source formatting or keep only the text, without formatting.
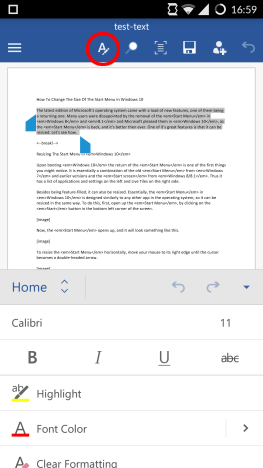
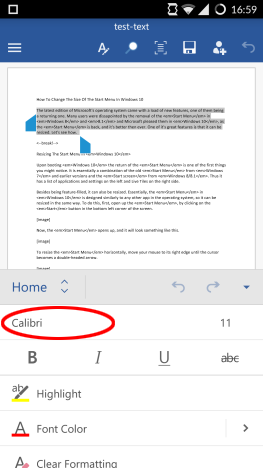
Text formatting options are available from the Home menu. To open it, tap the icon that looks like the letter A.
To change the text font, tap on the font name. For instance, tap on Calibri.
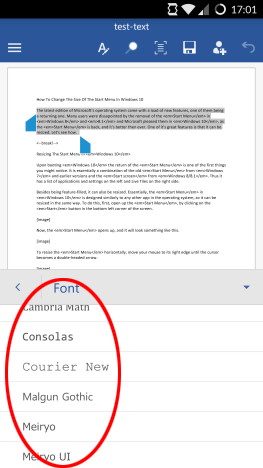
Choose a new font from the list and tap on it to apply it.
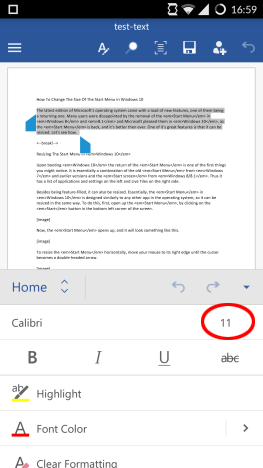
To change text size, tap on the current size indicator, on the right side of the font name.
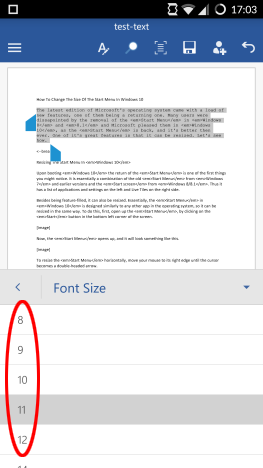
Choose a new size and tap on it to apply it.
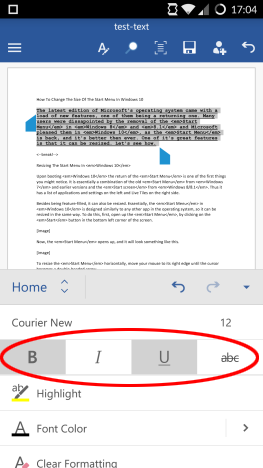
To make the text bold, italic, underlined or strikethrough, tap one or more of the corresponding icons in the next row. Here, we wanted the text to be bold and underlined.
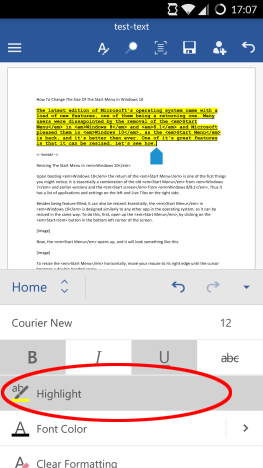
To highlight the text, tap the Highlight button, which applies a yellow background to the text.
The highlight color cannot be changed, only toggled by repeatedly tapping the button.
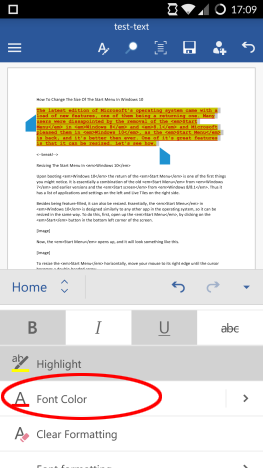
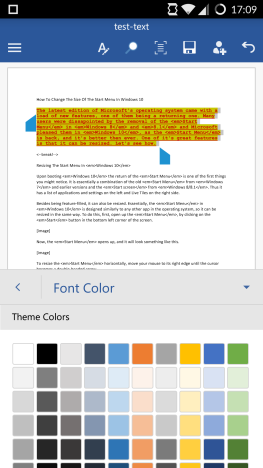
Tapping Font Color applies the currently selected color to the text.
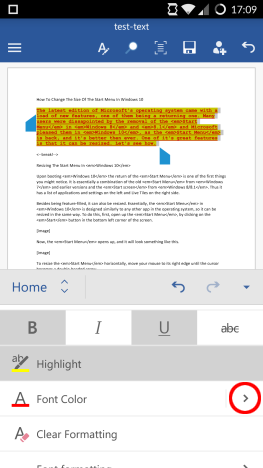
To choose a different color, tap the arrow next to Font Color.
This opens up a list of colors, from where you can choose the color you prefer.
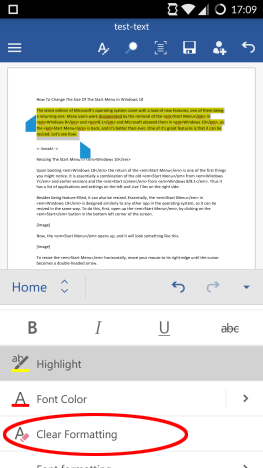
The next button, Clear Formatting removes all text formatting, except highlighting.
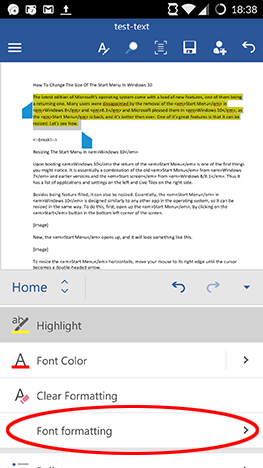
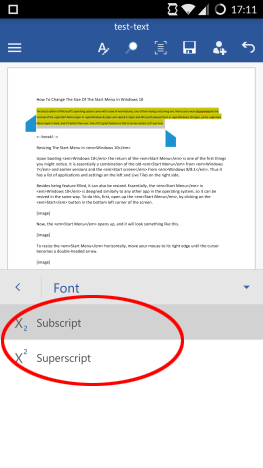
Tap Font formatting to make the text subscript or superscript.
From the newly opened submenu, select the format you want for your text: Superscript or Subscript.
How To Change Text Styles In A Document In Microsoft Word For Android
The last feature of the Home menu in Word for Android is text styling. Note that we'll also discuss lists and paragraph formats, but we'll do that in separate tutorials, which we promise to publish soon.
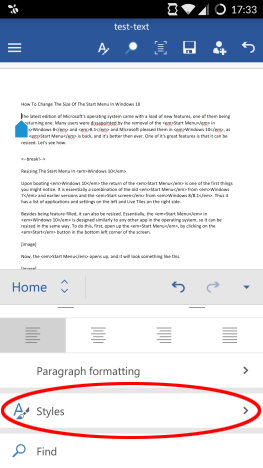
Tap Styles to see the list of available text styles.
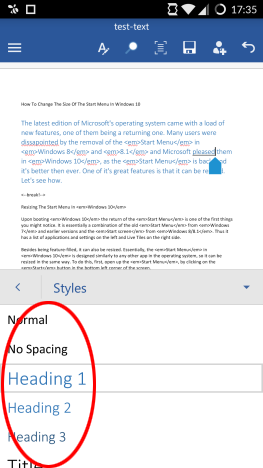
Choose a style from the list and tap it to have it applied to the text.
Styles can be applied to portions of text or to entire paragraphs. You should keep in mind that some styles can look different depending on the text sections you applied them to. For instance, a Quote style applied to an inline portion of text will be quite different from a Quote style applied to an entire paragraph.
Conclusion
As you can see, Microsoft Word for Android offers a wide variety of options to change the way how your text looks. All these features are available from the easily accessible Home menu, where you can set quite a number of formatting options.
Of course, Word has a lot more to offer: we'll cover list management, paragraph settings and many more in upcoming tutorials. Stay tuned and share your opinion about Microsoft Office for Android in the comments!


 18.09.2015