If you use a laptop or a desktop PC, there is a high chance that you rely on your mouse or on your touchpad to use it. Working with Windows 10 implies the use of one of these devices. You can also connect a Bluetooth mouse to your tablet if that makes it easier for you to work on it. Therefore, if you want to be more productive, it is essential to configure your mouse just the way you like it. Whether you want to change what its buttons do, or change your mouse sensitivity to be higher or lower, read this tutorial and find out how to do it in Windows 10:
NOTE: The settings illustrated in this article cover most accessories, but some more advanced mice and touchpads have specialized drivers with additional options. To configure those settings, you have to refer to the user manual of your specific pointing device.
How to access the basic mouse settings in Windows 10
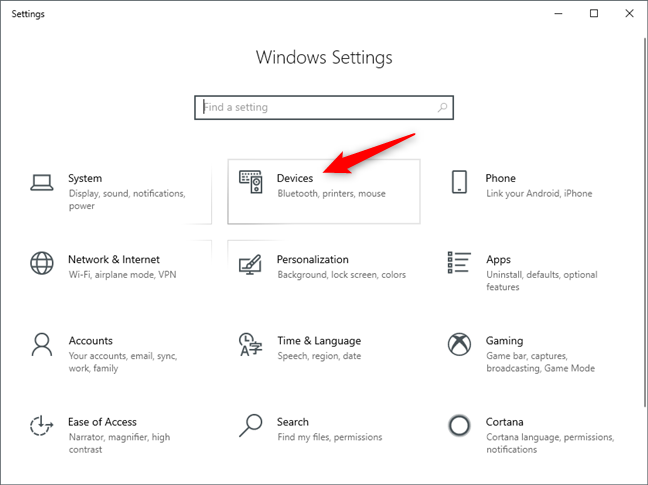
To configure the essential features of your mouse or your touchpad, you have to open the Settings app. To do so, click or tap on its button from the Start Menu or press Windows + I on your keyboard. Then, in the Settings app, access Devices.
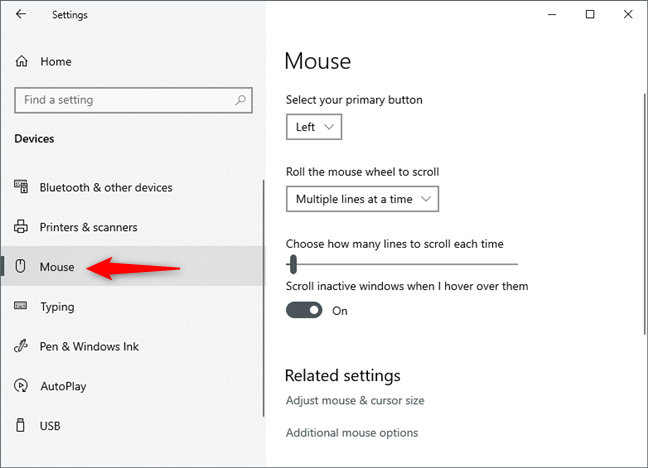
On the left side of the window, select "Mouse" to access the mouse configuration settings.
How to reassign mouse buttons and set the left-click button
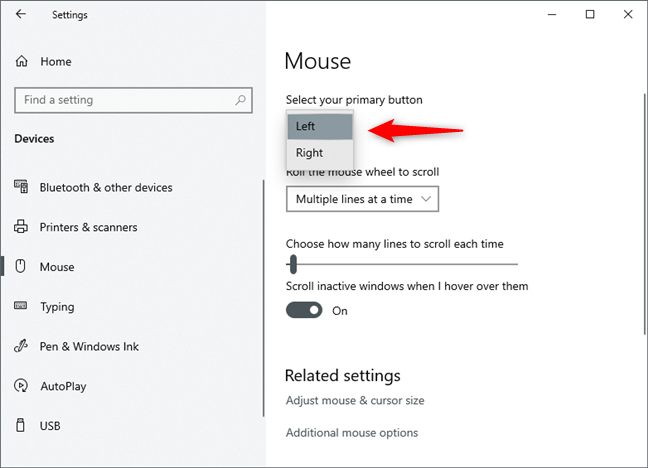
The first setting, "Select your primary button," sets the button allocation. Click or tap to open the list of options and choose between having your left or right mouse button set as primary. The default setting is left, but you might want to change it to the right if you are left-handed.
Yes, reassigning mouse buttons is as simple as that. 🙂
How to change the mouse wheel scrolling options
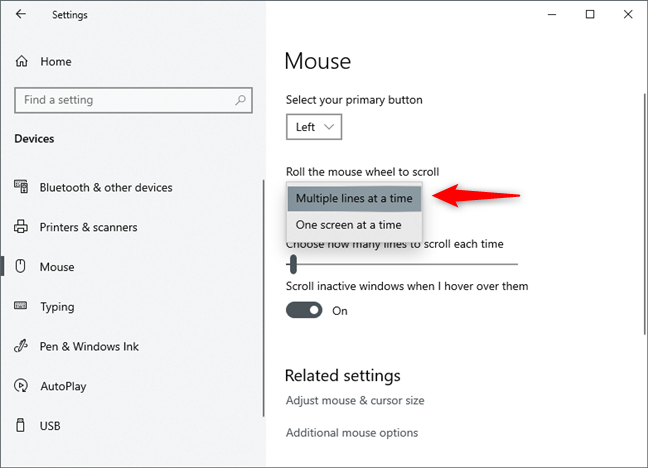
The second option configures how scrolling with the mouse wheel works. Click to choose one of the available options: scroll "Multiple lines at a time" or scroll "One screen at a time." The first is the default setting, which makes scrolling smoother and slower while selecting the second one makes the mouse wheel scroll a whole screen of content at a time. The easiest way to see how these scrolling options work is to open a website, like Digital Citizen, and check which scrolling method you prefer.
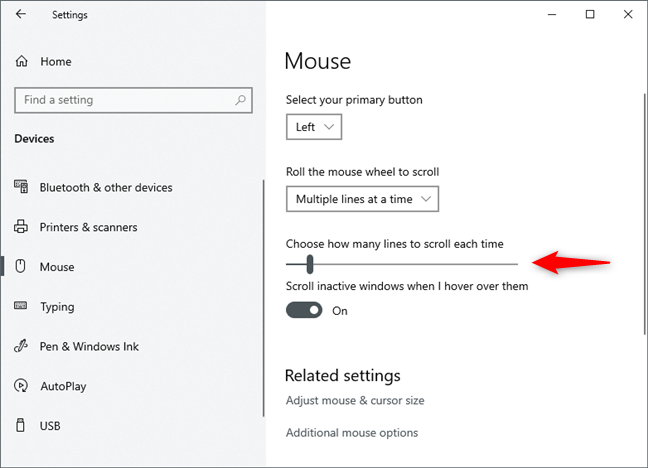
If you choose to scroll "Multiple lines at a time," you can use the scrollbar below the setting to set how many lines to scroll at a time. Click or tap and drag the cursor to the left or to the right to decrease or increase the number of lines. The default setting is 3.
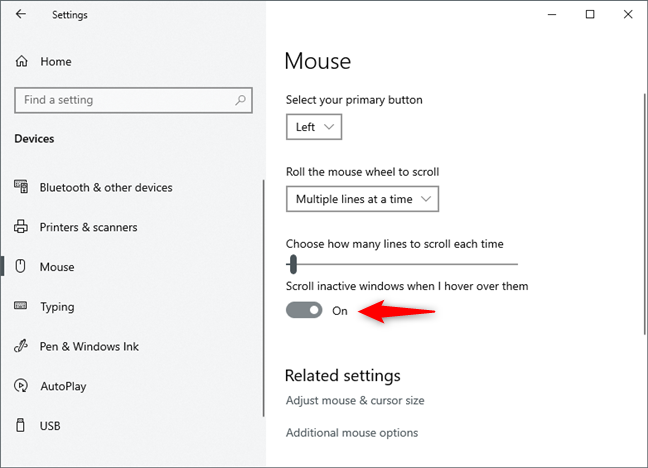
Next, you can set the scroll behavior regarding inactive windows, or windows in the background. If "Scroll inactive windows when I hover over them" is set to On, when you move the mouse cursor over an inactive window, you can scroll it without having to focus on it. If it is turned off, you first have to click on inactive windows before scrolling their contents. The default setting is On.
How to change the mouse pointer size and color in Windows 10
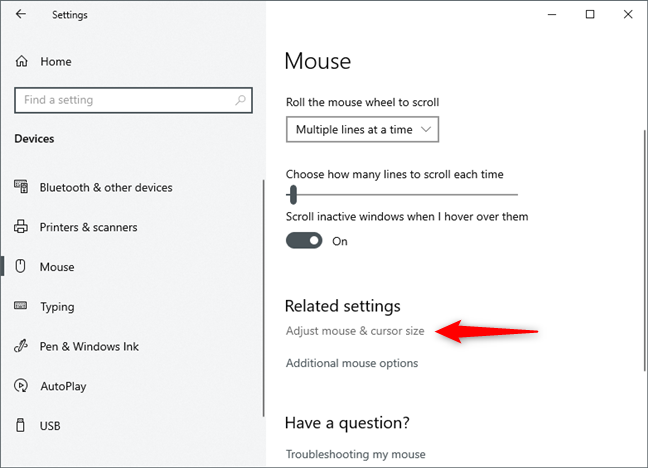
In the Related settings area, you get two links: "Adjust mouse & cursor size" and "Additional mouse options." The first one opens a new page in the Settings app, that's filled with various mouse-related settings and options. There, you can change the mouse pointer size, as well as the mouse cursor colors. This feature deserves a separate tutorial, which we already published and which you can read if you follow this link: How to change the mouse pointer size and color in Windows 10.
How to change the more advanced mouse properties
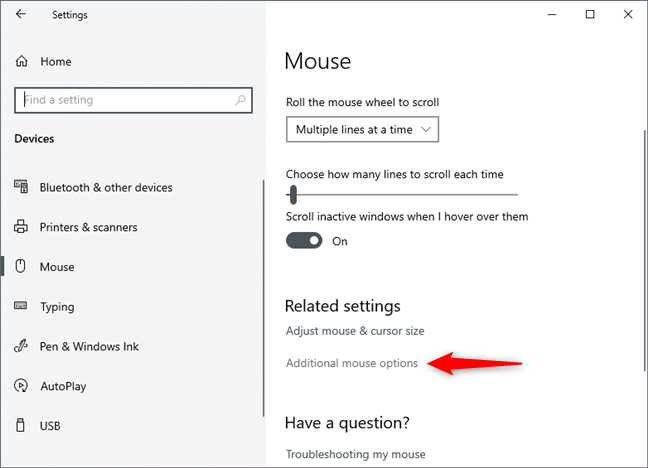
If you want to explore additional mouse settings, click or tap the "Additional mouse options" link in the Mouse settings window, under the Related settings section.
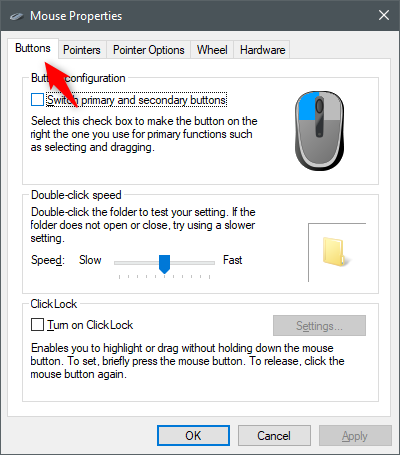
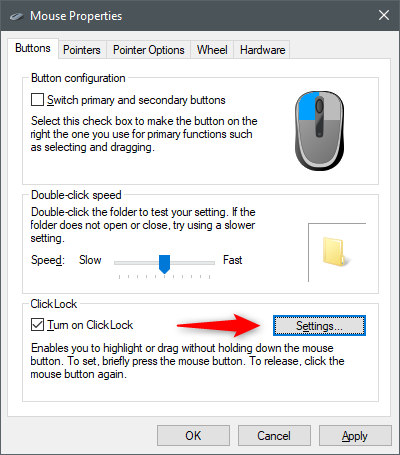
The Mouse Properties window opens up with its first tab, Buttons, active.
How to reassign mouse buttons, from the "Mouse Properties" window
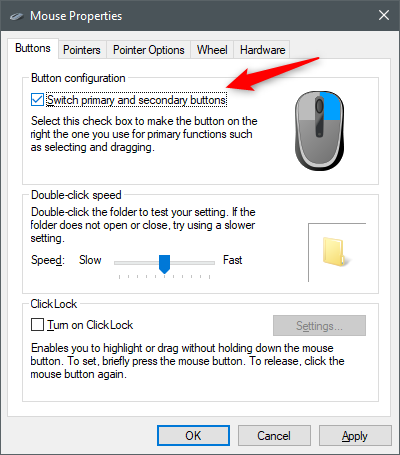
The first thing you can do is change the primary mouse button, the same setting you had in the Mouse settings window. Here, you do not choose the primary button, but switch them by ticking the "Switch primary and secondary buttons" box.
The picture of a mouse on the right shows which button is currently the primary (colored in blue).
Although this is a roundabout way to reassign mouse buttons, you might prefer it if you are accustomed to older Windows operating systems.
How to set the mouse double-click speed
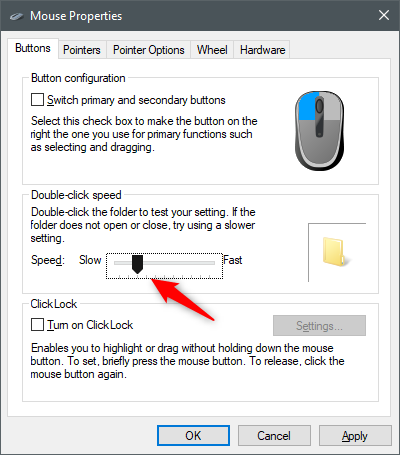
You can also set the "Double-click speed": this sets how fast you have to press the primary mouse button two times to have it considered a double-click. Slower mouse users might want to lower this speed. You can test the selected option on the folder icon on the right.
What is ClickLock and how to turn it on
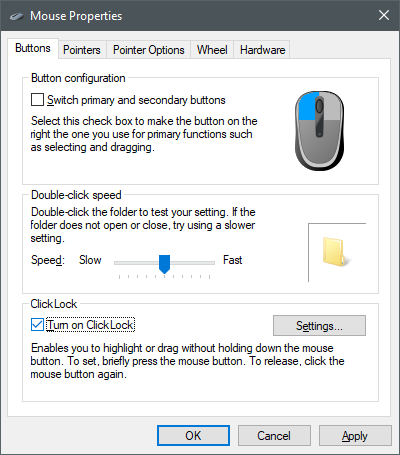
ClickLock is the last setting on the Buttons tab. You can turn it on by ticking the "Turn on ClickLock" box.
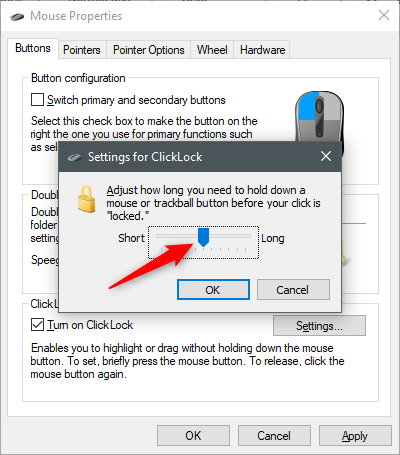
When ClickLock is on, it can replace clicking and dragging: click and hold your primary mouse button (usually the left button for right-handed people) briefly, then release it. This "locks" the click, and your mouse button is considered pressed until you click it again. Press the Settings button to configure ClickLock length.
Here you can set how long you need to hold down the mouse button before the click is "locked." Drag the bar left or right to decrease or increase the required time. Apply the setting with a click or tap on OK.
How to change the mouse cursor appearance
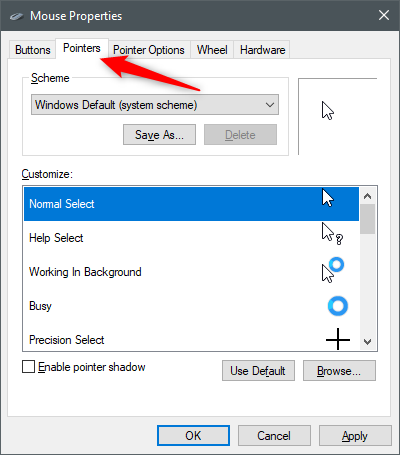
To access pointer options, click or tap the Pointers tab on the top of the Mouse Properties window.
We have discussed the customization options for mouse pointers in an earlier article: How to customize mouse cursors or pointers in Windows.
How to change the mouse sensitivity
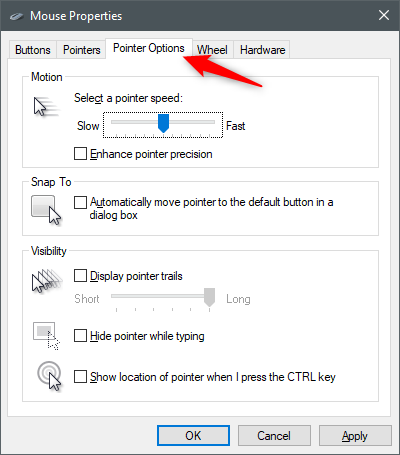
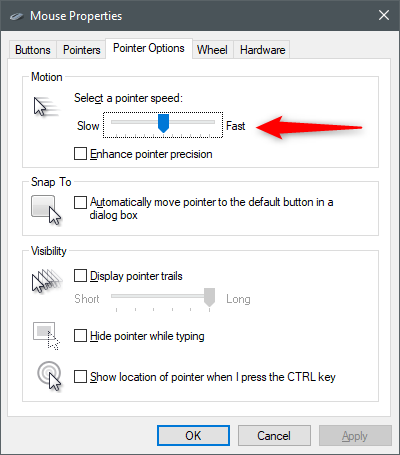
To be able to make changes to the mouse sensitivity in Windows 10, you have to go to the "Pointer Options" tab from the Mouse Properties window.
Here you can set the mouse sensitivity or, in simpler words, set how fast your mouse pointer moves on the screen by clicking or tapping and dragging the "Select a pointer speed" bar. Move it to the left or right to decrease or increase pointer speed.
NOTE: This is the only standard way to do any mouse calibration in Windows 10. However, some mice come with specialized software from their manufacturers, which allows you to do more advanced mouse calibration.
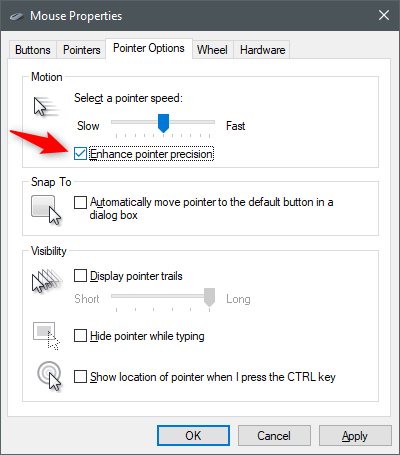
Ticking the "Enhance pointer precision" option makes mouse clicks more precise, so you should probably leave this box checked, especially if your mouse is not that great.
How to change other pointer options (such as snap it to the default button in dialog boxes or display pointer trails)
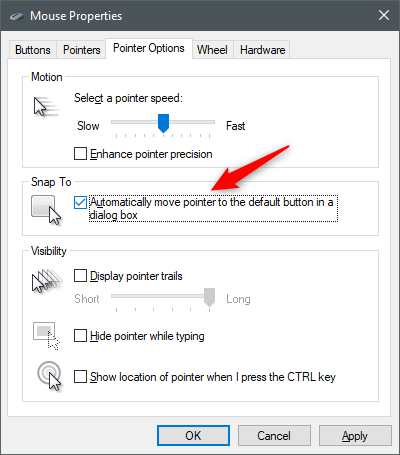
If you enable the "Snap To" setting, you can make your mouse pointer automatically move to the default button (like OK, Yes, Save, etc.) in dialog boxes.
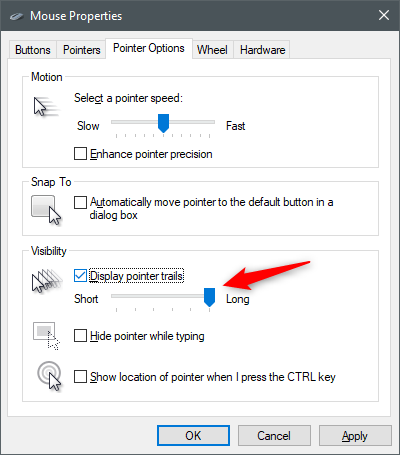
If you check the "Display pointer trails" box, the mouse pointer is going to be followed by a trail of additional pointers. The cursor trails can make it more comfortable to follow the mouse on low-light screens. Move the bar to the left or right to decrease or increase the trail's length.
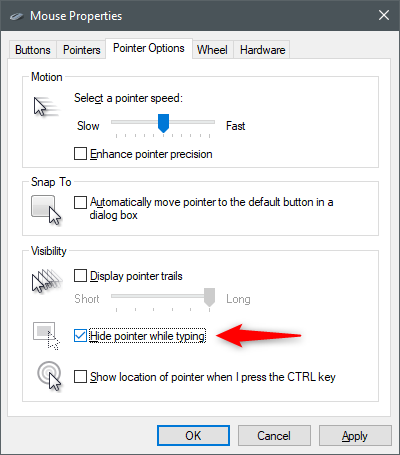
Check the "Hide pointer while typing" if you want the mouse cursor to disappear when you type long texts in a word processor or email software. Theoretically, that makes the text you type more comfortable to read.
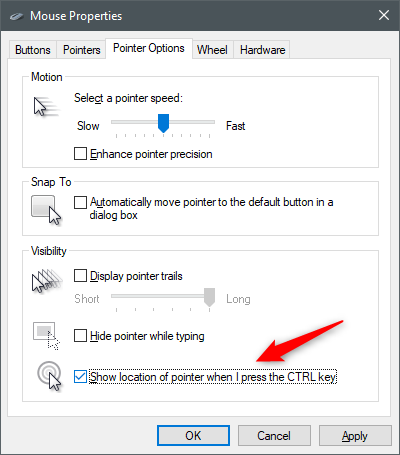
The "Show location of pointer when I press the CTRL key" option can be useful when using low-light monitors. It makes the CTRL key mark the mouse pointer's location with animated, radar-like circles.
How to change the mouse wheel vertical and horizontal scrolling options
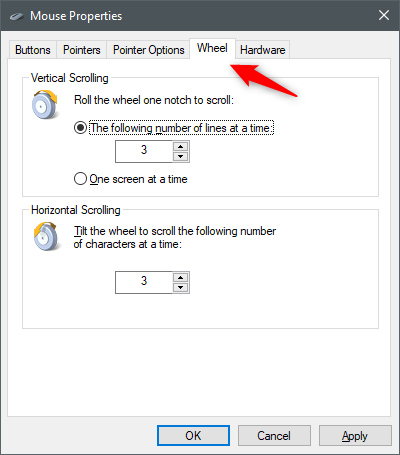
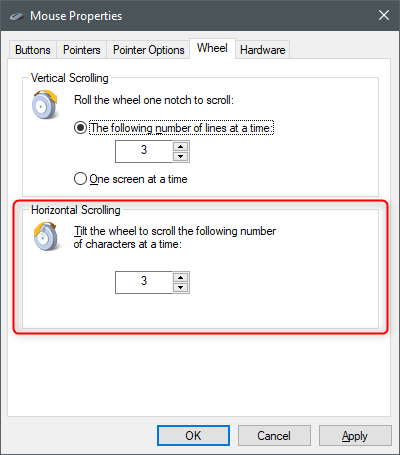
To customize mouse wheel options, click or tap the Wheel tab of the Mouse Properties window.
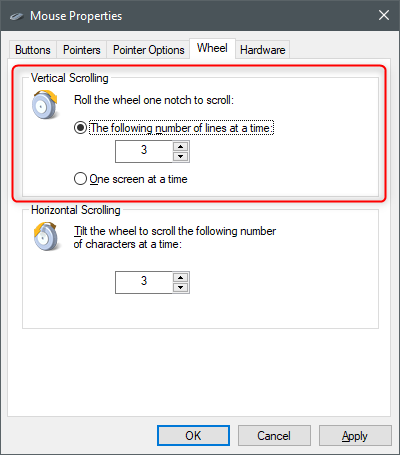
The "Vertical Scrolling" options are the same as the ones in the Mouse settings page from the Settings app. You can choose how much content you scroll at a time, and set the number of lines if you select the first option.
Under Horizontal Scrolling, you can set how many characters to scroll horizontally when you tilt the mouse wheel. Note that this does not work on every kind of mouse: you need one that supports horizontal scrolling.
How to view mouse hardware information
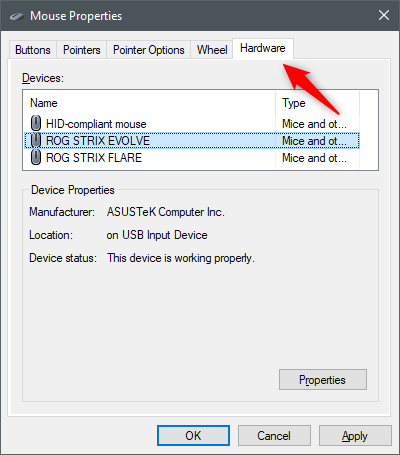
To see your mouse hardware options, click or tap the Hardware tab of the Mouse Properties window.
Here you can see all the mice and touchpads connected to your computer, their manufacturer, what port they are plugged in, and if the devices are working correctly. Usually, there is no need to access this page, and the hardware properties are meant to be used only by advanced users.
How to configure a mouse that has more than two buttons
One of our readers asked how to configure a mouse that has more than two buttons. Unfortunately, the answer to this question is that you cannot set the additional buttons found on your mouse, using solely Windows 10. If you have such a mouse, you can configure what the extra buttons do only by using a software application offered by your mouse's manufacturer. You usually get the right software for your mouse together with its drivers, on the CD/DVD that came with it, or from the mouse's manufacturer website. Here is a list of the software used by some of the most popular mice:
- Microsoft mice buttons can usually be configured with Microsoft Mouse and Keyboard Center
- Logitech mice can be configured with Logitech Options or Logitech SetPoint
- Razer gaming mice buttons can be set with Razer Synapse
- ASUS gaming mice can be controlled with ASUS Armoury Crate or ASUS ROG Armoury
- SteelSeries gaming mice can be configured with the help of the SteelSeries Engine software
- Corsair gaming mice use the Corsair Utility Engine software to map their extra buttons
Did you manage to configure and calibrate your mouse as you wanted?
In Windows 10, you can configure almost every detail of how your mouse works, with the notable exception of what the extra buttons on a mouse do, when you have a mouse with more than two buttons on it. However, compared to previous Windows versions, Windows 10 offers simplified access to the Settings app, where you can modify basic mouse settings. At the same time, you can access the more detailed Mouse Properties window, with more options and an interface familiar to users of previous Windows versions. If you have any questions regarding mouse settings, please let us know in the comments below.


 28.11.2019