Did you know that you can customize the Windows 10 Start Menu to look however you want? The Windows Start Menu went through many changes during the more than twenty-five years it’s been around for. However, unlike previous versions, the Start Menu in Windows 10 is versatile, and you get to decide everything about it, from its size to the way it’s organized and the items displayed. Whether you want it full-screen or prefer a Windows 10 classic Start Menu, like the one in Windows 7, this guide provides all the answers you need. Continue reading to find out all the different ways you can organize and change the Windows 10 Start Menu to suit your needs and preferences:
1. Pin and unpin tiles and shortcuts to the Start Menu
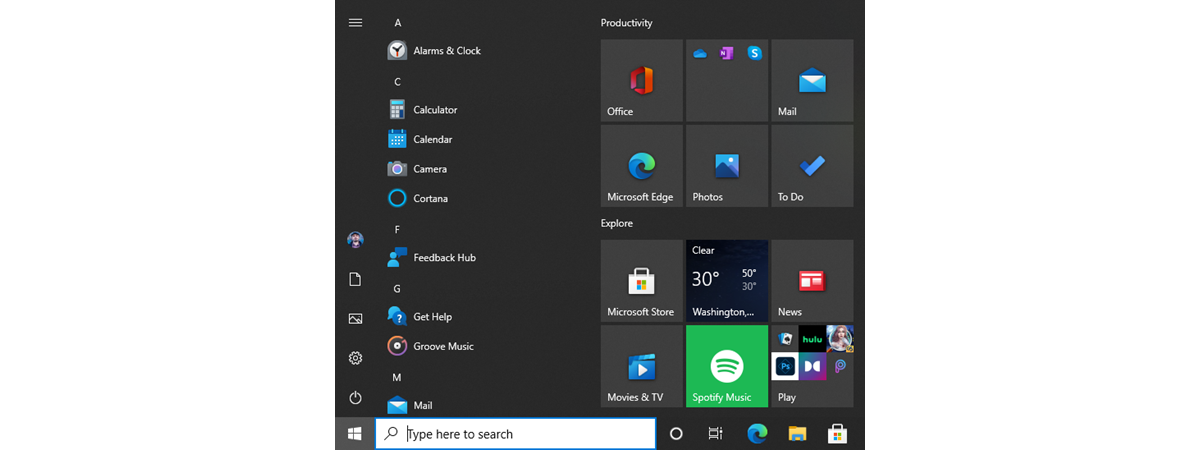
In Windows 10, the default Start Menu layout has a whole section for tiles and shortcuts. Displayed on the right side of the Start Menu, these icons help you quickly access all your favorite items.
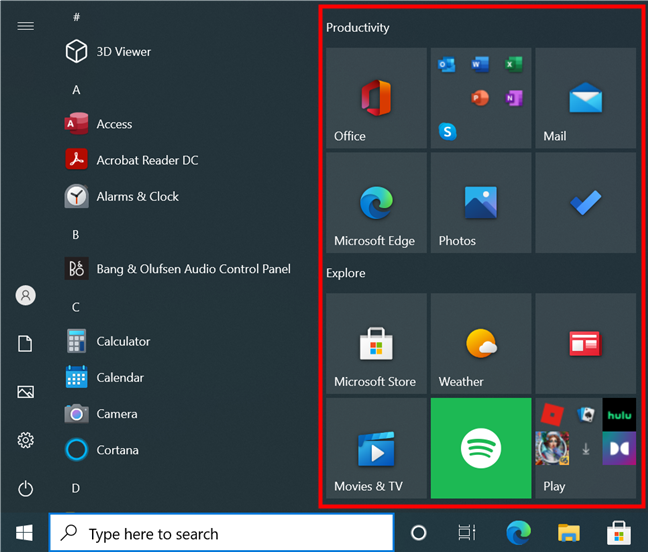
The Windows 10 default Start Menu displays tiles and shortcuts on the right
If you’re wondering how to add programs to Start Menu in Windows 10, right-clicking or pressing-and-holding on an app’s shortcut opens a menu with the “Pin to Start” option. This also works for most Windows 10 items, but there are some exceptions. To learn how to pin something to the Windows 10 Start Menu, read our complete guide to pinning items to Start.
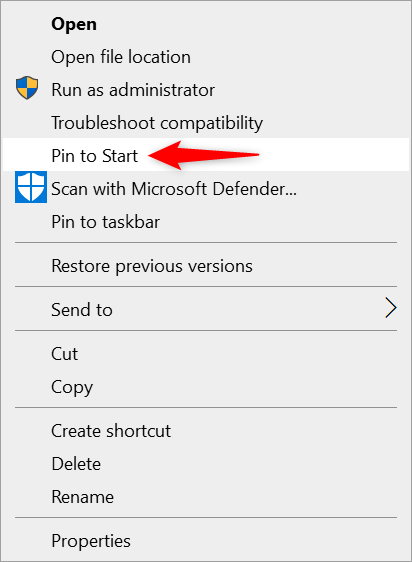
Press Pin to Start to add a Start Menu shortcut in Windows 10
If you get carried away when you pin different items or add programs to the Start Menu in Windows 10, it might get a bit cluttered. Luckily, unpinning icons works the same for everything. Open the Start Menu and right-click or press-and-hold on the tile or shortcut you want to remove. Then, click or tap on “Unpin from Start.”
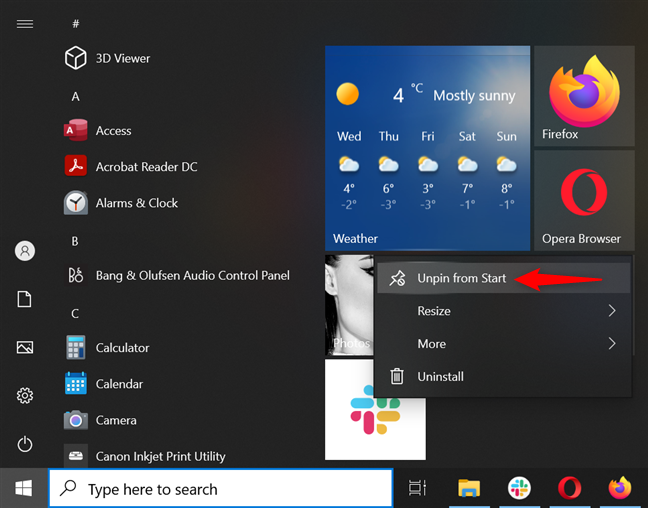
Remove apps from Start Menu in Windows 10 by unpinning them
However, if your Start Menu gets too crowded, but you need the icons pinned to it, there are other solutions. Keep reading to find the ones that work for you.
2. Recreate the classic Start Menu in Windows 10
Some users are nostalgic about the simpler versions of the Windows Start Menu. Others don’t use tiles because they prefer desktop shortcuts or pinning items to the taskbar. In either case, it would be preferable to use a classic Start Menu in Windows 10, eliminating any unnecessary icons.
If you’re wondering how to make the Windows 10 Start Menu like Windows 7, there are third-party apps you can use to get a perfect replica. However, you can also unpin everything to change the Windows 10 Start Menu to classic. Just follow the steps to unpin items illustrated in the previous chapter, and then close the Start Menu. Reopen it, and it’s automatically resized, resulting in a pretty close version of the Windows 7 Start Menu for Windows 10.
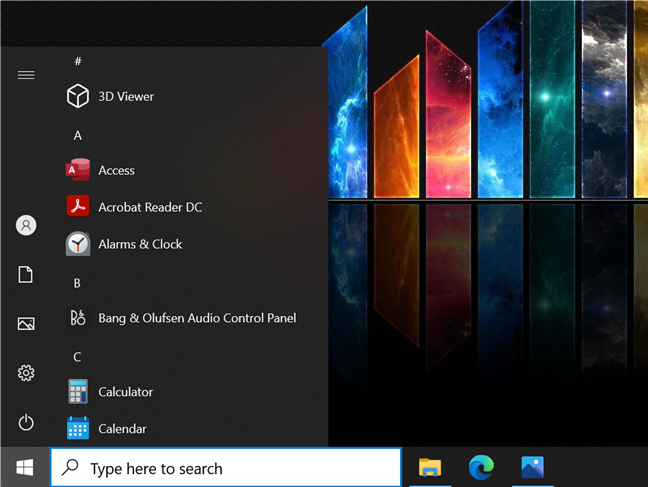
Create a Windows 10 classic Start Menu
If you change your mind at any point, it’s easy to enlarge your Start Menu, as you can see in the next chapter.
3. Resize the Windows 10 Start Menu
You can enlarge or make the Start Menu smaller in Windows 10 using your mouse, keyboard, or touchscreen. One great thing about the Start Menu for Windows 10 is that it can get much bigger than previous ones, allowing you to add all your favorite items to it. Whether you need more room or want to keep things small, our guide illustrates how to resize the Windows 10 Start Menu using 3 different methods.
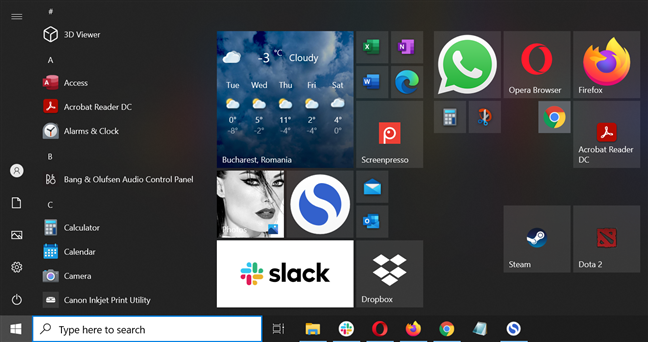
In Windows 10, make the Start Menu smaller or almost as big as your screen
You can change the Start Menu in Windows 10 to be almost as big as your screen. However, if it’s all you want to see on your display, check out the next chapter.
4. Use a full-screen Start Menu in Windows 10
You can activate tablet mode to have the Windows 10 Start Menu on the desktop regardless of the device you’re using. However, that is not the only way to get a full-screen Start Menu in Windows 10.
In an attempt to please all users, Microsoft allows changing the Windows 10 Start Menu into a Start screen, just like the one in Windows 8. If that’s something you want, you can learn the necessary steps from our guide on setting the Windows 10 Start Menu to take up the whole screen.
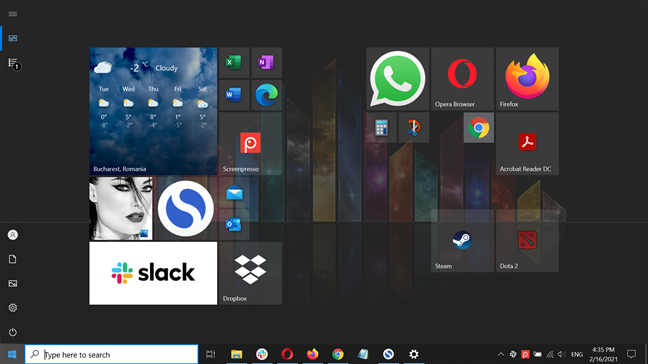
Use a full-screen Start Menu in Windows 10
5. Resize the Windows 10 Start Menu tiles
If you want to fit more icons in your Windows 10 Start Menu, one option is to resize the tiles displayed in it. There are four possible dimensions you can select: Small, Medium, Wide, and Large. To learn more about the available sizes and how to use them, read our guide on how to resize the Windows 10 Start Menu tiles.
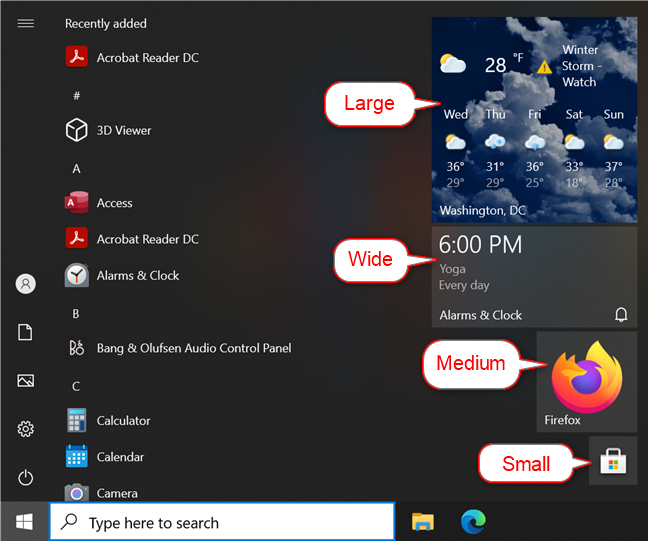
There are four options available when resizing your tiles in Windows 10
6. Change the Windows 10 Start Menu by having it show more tiles
The Windows 10 default Start Menu layout shows three rows of medium tiles in every column. However, you can change the Start Menu in Windows 10 by expanding each column with a fourth row of tiles. It may sound complicated at first, but you can learn all about it in our guide about showing more tiles on the Start Menu.
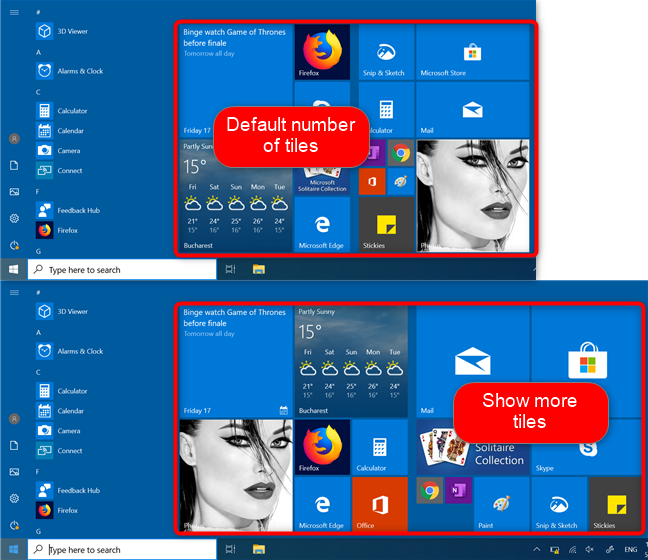
Show more Windows 10 Start Menu tiles
7. Organize the Windows 10 Start Menu tiles into groups and live folders
Even an extra-wide Start Menu can feel cluttered if you add too many tiles to it, and that is when live folders and groups come in handy. The Windows 10 default Start Menu comes with two groups, Productivity and Explore, which contain all the active tiles. However, you can create more Windows 10 Start Menu groups, add related tiles and shortcuts to them, and customize everything according to your needs. Our guide on managing the Windows 10 Start Menu groups of tiles and shortcuts provides more details on the subject.
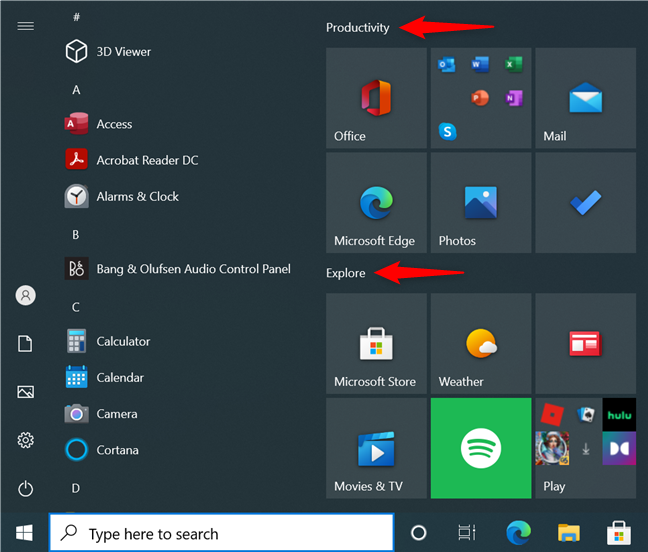
How to organize the Windows 10 Start Menu using groups
Furthermore, you can easily organize the Windows 10 Start Menu into live folders. These are especially useful if you need to optimize your space and arrange everything in a way that makes sense to you. For instance, you can have different Windows 10 Start Menu folders for work, games, school, etc. Learn everything about them from our guide on creating and using live folders in Windows 10.
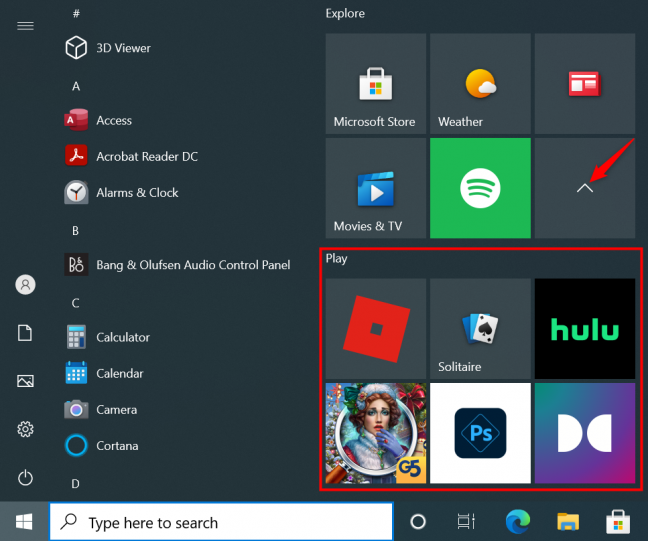
The Windows 10 Start Menu folders can be expanded with one click or tap
While the default Play live folder seen above is a great example, we are not so crazy about its contents. Luckily, you can get rid of the suggested apps Windows 10 keeps pinning to your Start Menu by following the steps shown in the next chapter.
8. Remove and disable apps promoted in the Start Menu for Windows 10
Unlike previous versions, Windows 10 includes a lot of bloatware, and the Start Menu is no exception. Nowadays, if you click or tap on the tiles included in the default Play live folder, Windows 10 starts downloading that app or program automatically. You don’t even get an alert about it, let alone a prompt asking for permission to fill your Windows 10 PC with unwanted software. If you’re not thrilled about this behavior, you can stop Windows 10 from promoting apps on the Start Menu.
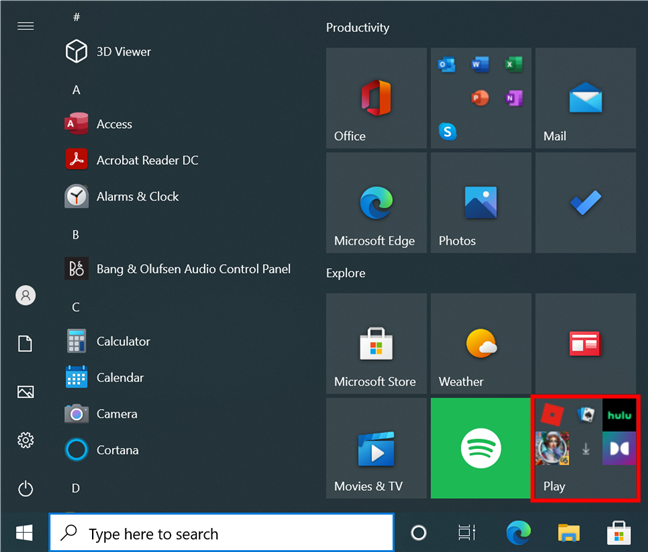
Remove suggested apps from the Start Menu in Windows 10
9. Customize the Windows 10 Start Menu All apps list
If you’re using the tiles in Windows 10, it might seem like the alphabetical All apps list takes up precious space on the left side of your Start Menu. While it can be useful to pin a tile or to quickly access your Recently added apps, scrolling through All apps to find what you need is time-consuming and inconvenient.
Luckily, you can hide the All Apps list from the Windows Start Menu and only bring it up when you need it. Better yet, Windows 10 lets you customize it further by disabling the Recently added section at the top of the All apps list.
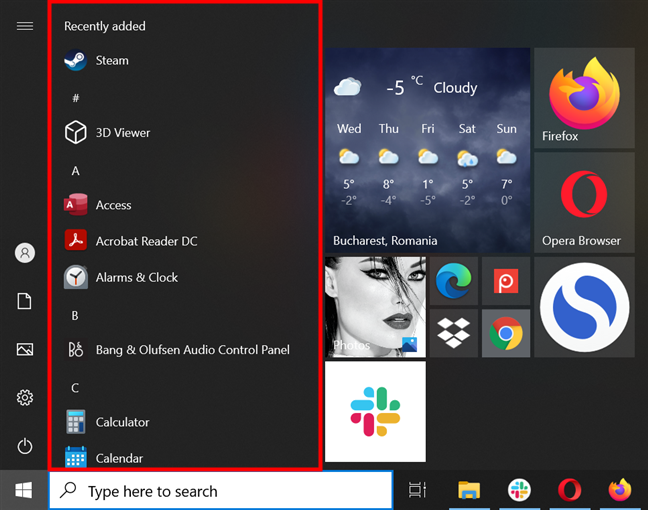
Change the Start Menu in Windows 10 by customizing All apps
10. Decide which folders appear on Start
The Windows 10 default Start Menu layout includes three folders (or, better said, shortcuts) on its left edge, directly above the Power button: Documents, Pictures, and Settings. However, there are six more Windows 10 Start Menu folders you can add and use to get fast access to popular locations on your computer or device. You choose what stays and what goes. All we can do is provide details on how to add or remove Windows 10 Start Menu folders to help you make an informed decision.
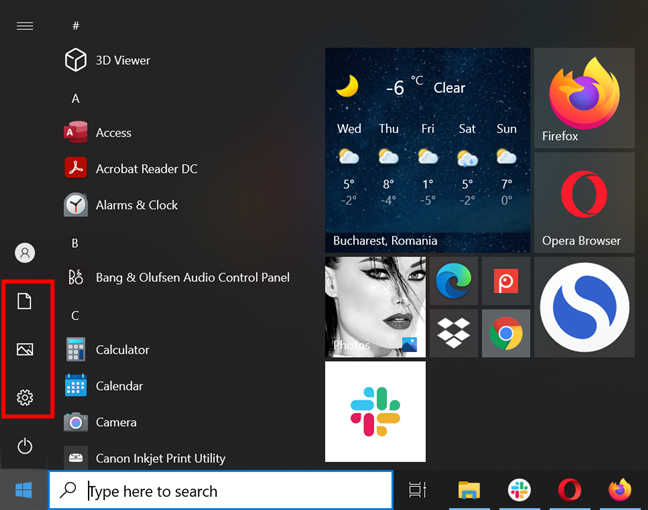
Change the Windows 10 Start Menu to include the folders you want
How did you change the Windows 10 Start Menu?
It doesn’t matter if you prefer a Windows 10 classic Start Menu or you’d rather use a Start screen. You can now customize everything about it to create the perfect starting point in Windows 10. Before you close this guide, we’re curious to know what your Start Menu looks like. Is there anything else you’d like to change about it? Let us know in the comments below.


 19.02.2021