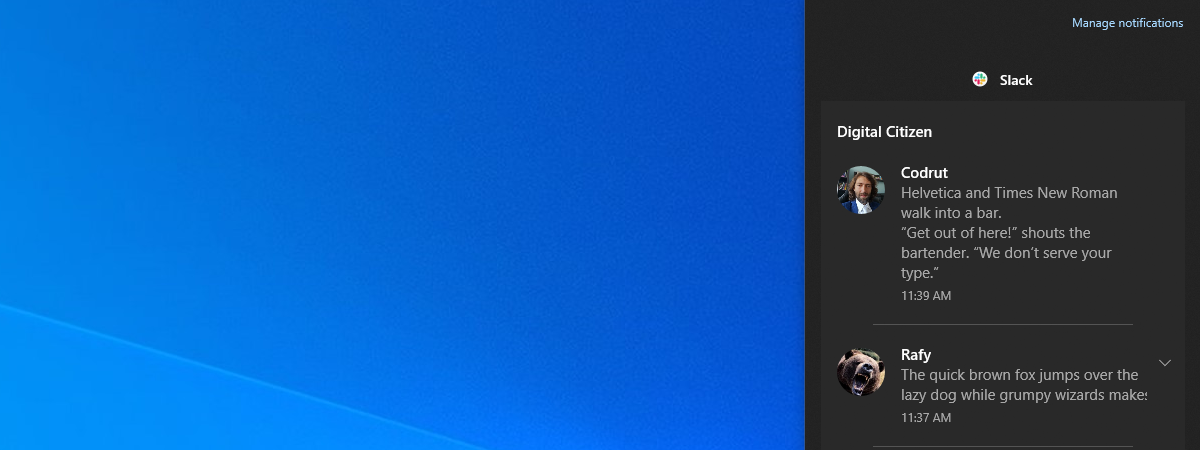
Notifications help you stay up-to-date with the things that take place on your computer or with the events that are coming your way. However, while you might want to receive notifications from some apps, you might prefer not to be interrupted by others. For instance, on your business laptop, you might not want to get notifications from the Facebook app, although you want those sent by Mail, Calendar, Skype, Teams, or Slack. Here is how to configure and turn off app notifications in Windows 10:
NOTE: The screenshots used in this article are from Windows 10 with November 2019 Update. If you have an older version of Windows 10, things could look different on your PC.
How to block all the notifications from a specific app (such as Mail, Calendar, Skype, Facebook, etc.)
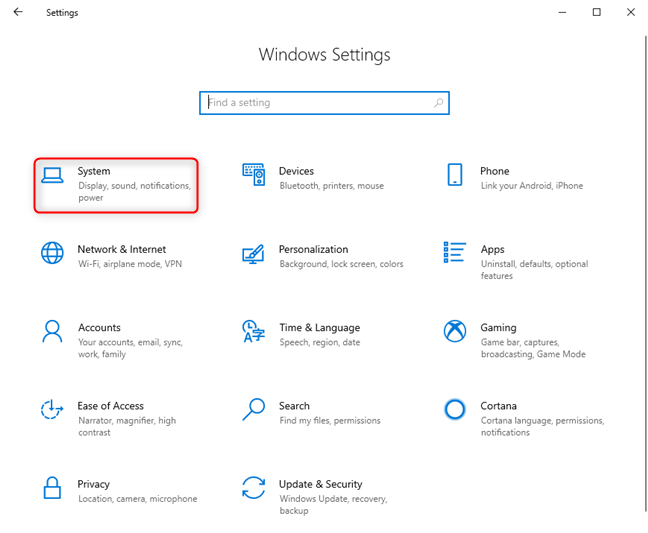
If you want to block the notifications you get from a specific app, start by opening Settings. A fast way to open it is to click or tap on its shortcut from the Start Menu or to press Windows + I on your keyboard. In the Settings app, go to the System category.
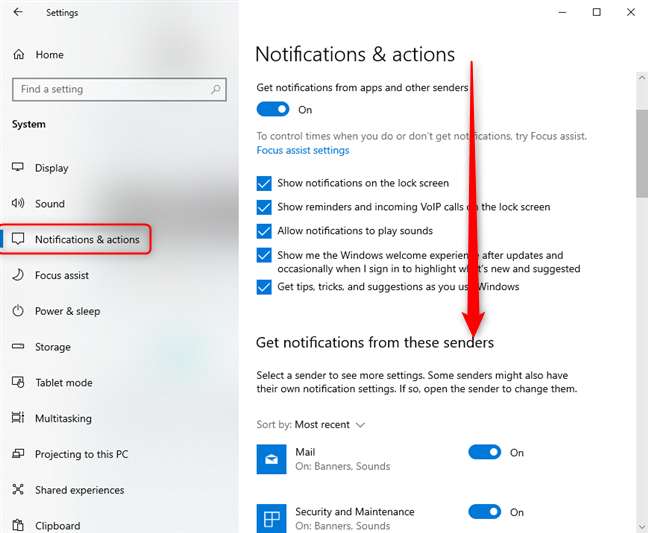
On the left side of the Settings window, click or tap the Notifications & actions entry. Then, on the right, scroll down until you get to a settings section called "Get notifications from these senders."
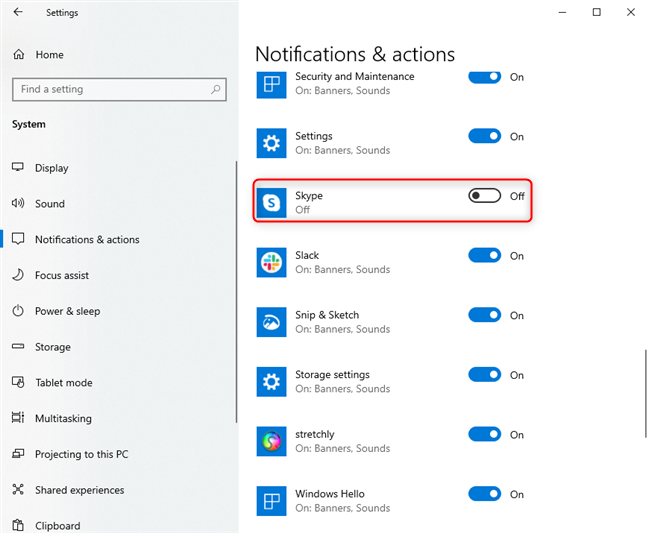
In the "Get notifications from these senders" section, locate the app that you want to block from sending notifications, and then turn Off its switch. For instance, let's say that you want to disable all the notifications sent by Skype. To do that, you would have to click or tap on the switch found on its right side and set it to Off.
Now you can repeat the action above for all the Windows 10 apps that you want to block from displaying notifications.
How to access the advanced settings for the notifications that are sent by a specific app (Mail, Calendar, Skype, Facebook, etc)
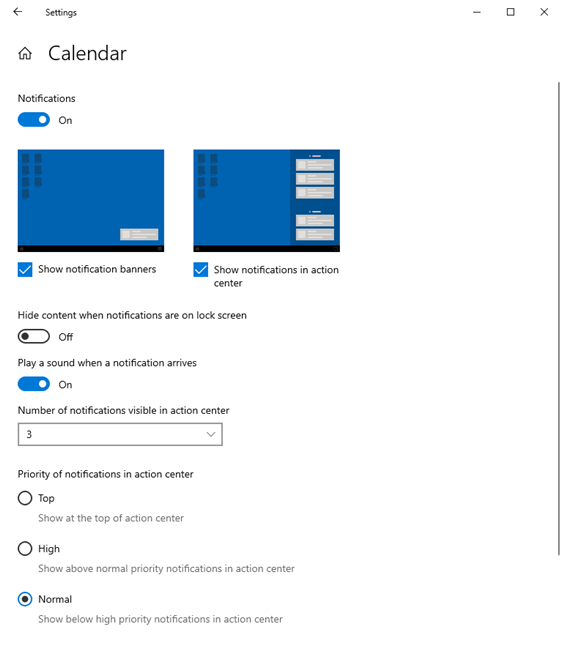
You may not want to see the notification banners displayed by a particular app, or hear the sounds when a notification arrives. In such cases, you have to configure the advanced notifications settings for that app. To do that, in the "Get notifications from these senders" section, click or tap on the app's name.
Windows 10 loads the advanced settings for the notifications that you get from that app. They should look like this:
Read on to see what each setting does.
How to show or hide notification banners sent by a specific app to your desktop
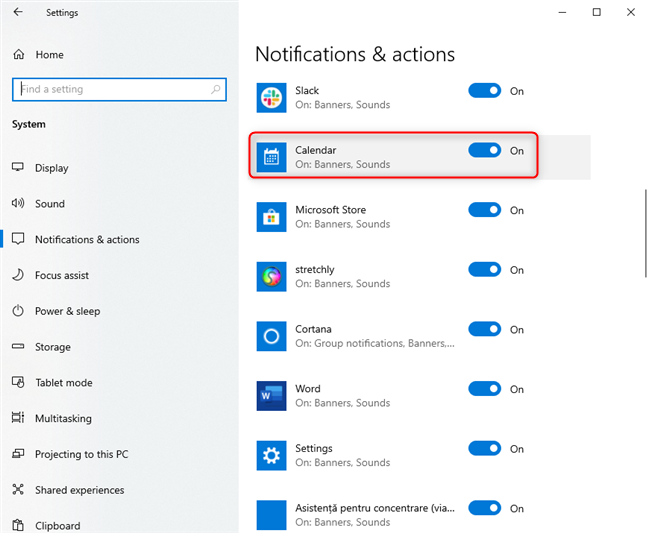
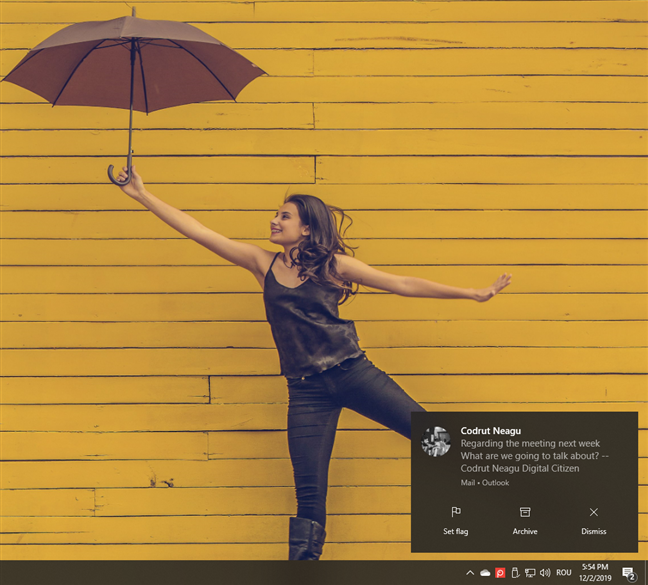
When you get a notification from a Windows 10 app, it displays a banner for a short while on your desktop. Depending on the app's integration with Windows 10, it can show you banners that contain only written information, and also some control options (like the Calendar app). The notification banners shown by apps on the desktop always slide into view from the bottom right part of the screen.
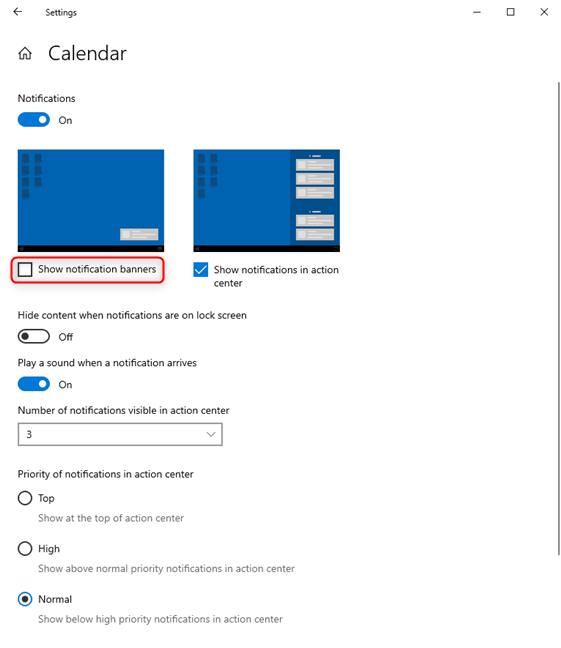
If you want to disable the notification banners shown by a specific app, uncheck the "Show notification banners" option from that app's advanced notifications settings.
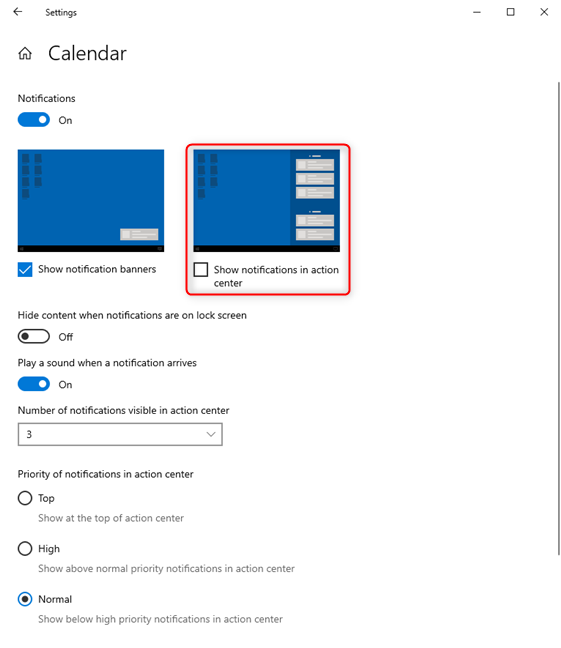
How to stop a specific app from showing notifications in your Action Center
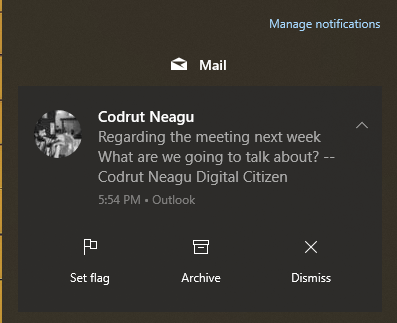
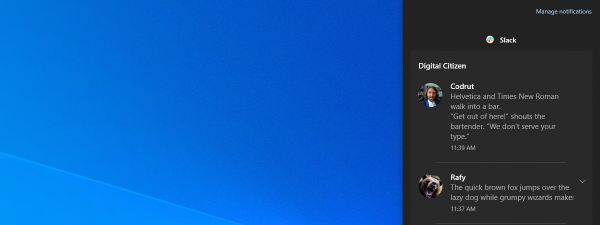
Here is an example of how a notification looks in the Action Center:
If you want to block a Windows 10 app from showing notifications in the Action Center, go to the advanced notification settings of that app. Then, uncheck the "Show notifications in action center" setting.
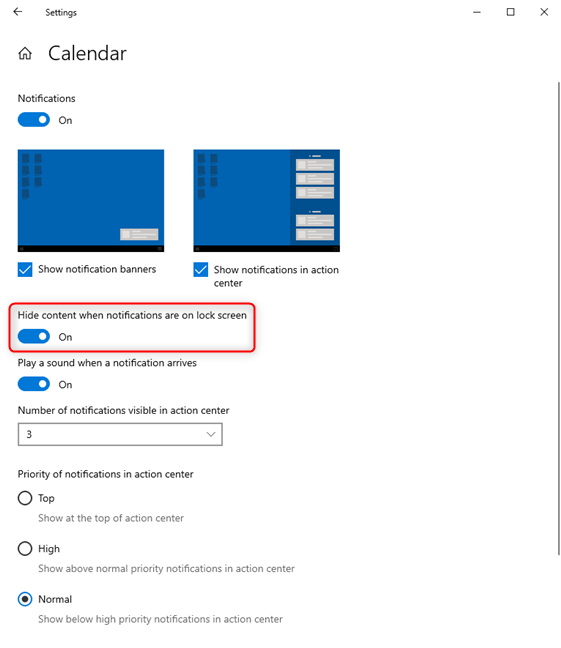
How to stop a Windows 10 app from showing notifications on the lock screen
The next switch from the advanced notification settings of an app is related to how notifications are handled when your Windows 10 PC is locked.
If you do not want notifications from an app displayed on the lock screen, turn On the switch called "Keep notifications private on the lock screen."
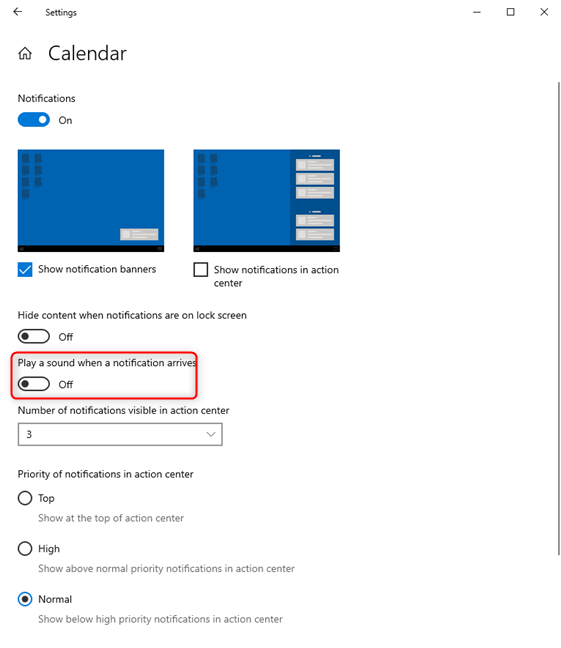
How to mute the notification sounds you get from a Windows 10 app
Some people want to get notifications, but only in their visual form. Most apps in Windows 10 send you notifications that are also accompanied by sounds. If you do not want to hear sound notifications from an app, go to its advanced notifications settings and disable the option named "Play a sound when a notification arrives."
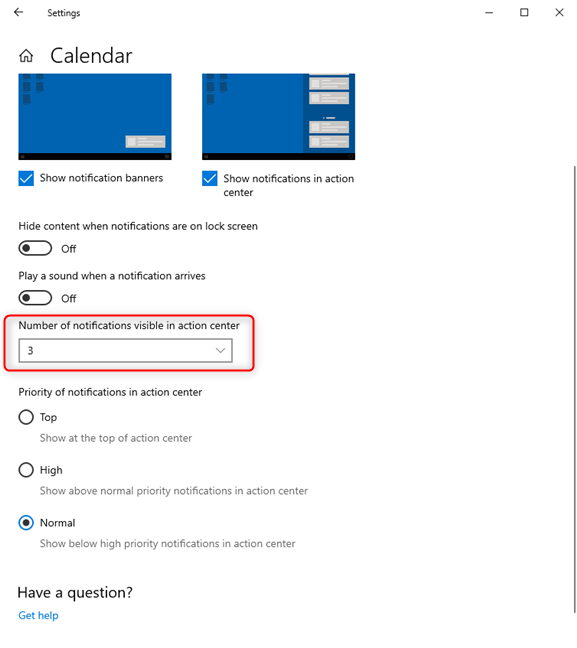
How to set the number of notifications an app can show in the Action Center
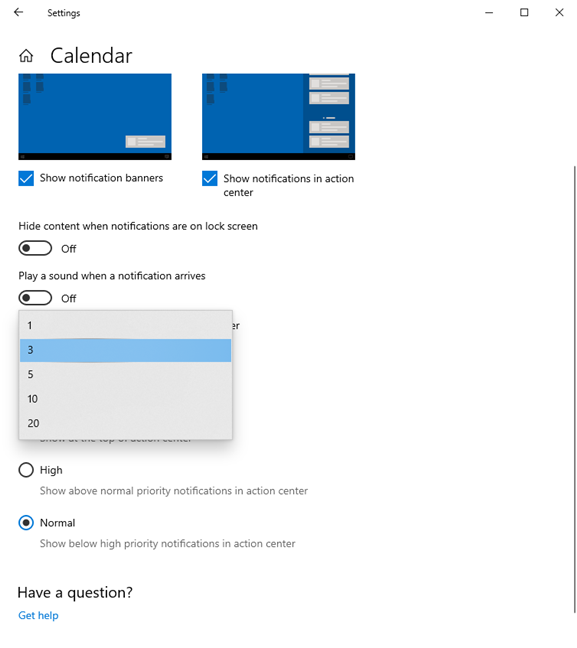
The Action Center can show many notifications, from lots of apps. However, you might not want to fill the whole thing with the notifications you get from apps like Mail, Calendar, or Skype. The good news is that Windows 10 lets you set the number of notifications an app can display in the Action Center. To change this number, click or tap on the drop-down list for "Number of notifications visible in action center".
You can choose to let that app show a maximum of 1, 3, 5, 10, or 20 notifications in the Action Center.
How to prioritize the notifications that are displayed by an app in the Action Center
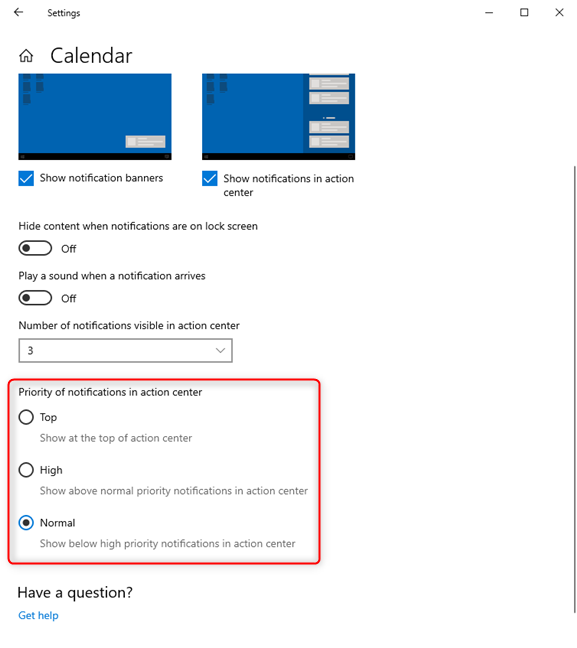
You can also choose how important an app's notifications are. In the advanced notifications settings of the app, you can set the "Priority of notifications in action center:"
- to be shown at the Top of the list;
- to be regarded as notifications with a High priority, which means that they are shown above standard priority notifications in the Action Center;
- as Normal priority notifications that are shown as they come, one after the other.
Which Windows 10 apps did you block from displaying notifications?
The way Windows 10 works when it comes to the notification system is pretty neat. There are lots of customizations you can make, from general to particular settings, like the ones shown in this tutorial. We like the level of control you get for displaying and configuring Windows 10 notifications. Before closing this guide, tell us which notifications you turned off and why. Comment below and let's discuss.


 03.12.2019