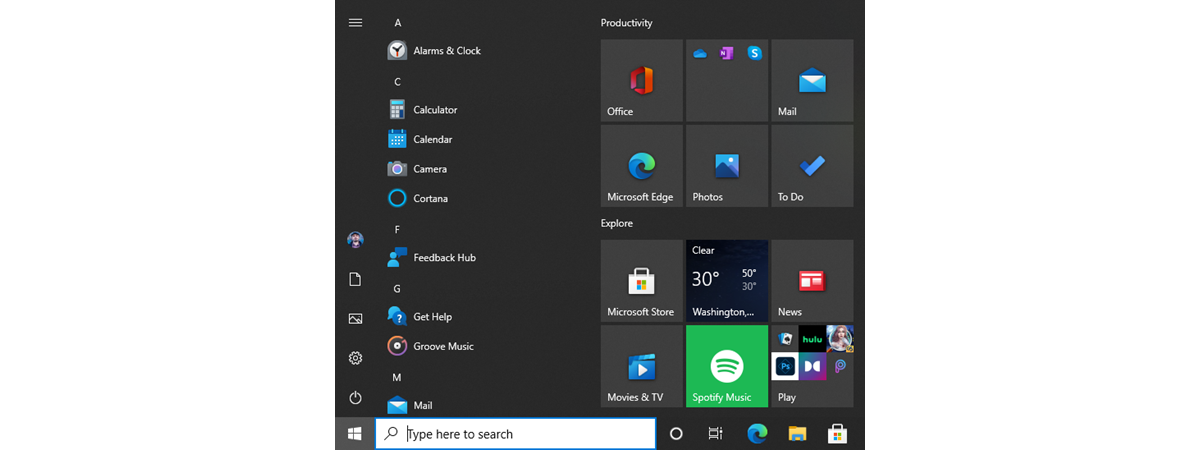
By default, Windows 10 displays a couple of folders on the Start Menu’s left side column, for easy access. Few people know that this list of folders is editable, and you can easily add or remove folders to or from the Start Menu. The procedure is not complicated at all, and all you need are a couple of clicks or taps. Without further ado, here’s how to add or remove folders on your Windows 10 Start Menu:
The Windows 10 Start Menu folders: how many can you add or remove?
When you install Windows 10, the Start Menu is populated by three folders: Documents, Pictures, and Settings. They are shown on its left margin, between the picture of your user account and the Power button.
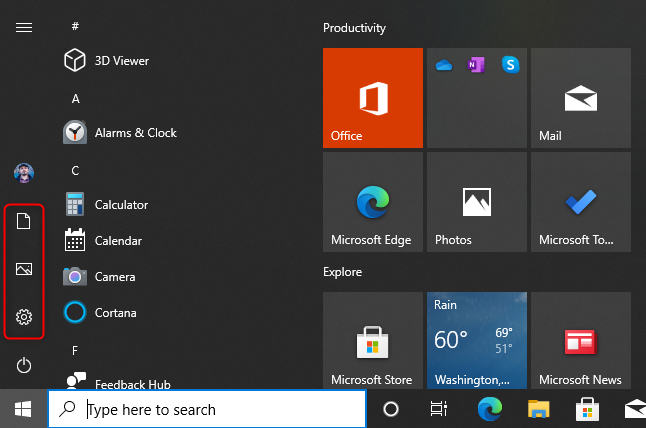
The default folders on the Windows 10 Start Menu
You can add up to six folders to the Start Menu, alongside the default ones. Windows 10 is going to display as many folders as you want, from a list of predefined options that can be added or removed: File Explorer, Settings, Documents, Downloads, Music, Pictures, Videos, Network, and Personal folder. The list of folders shown on the Start Menu extends, as illustrated in the comparison below.
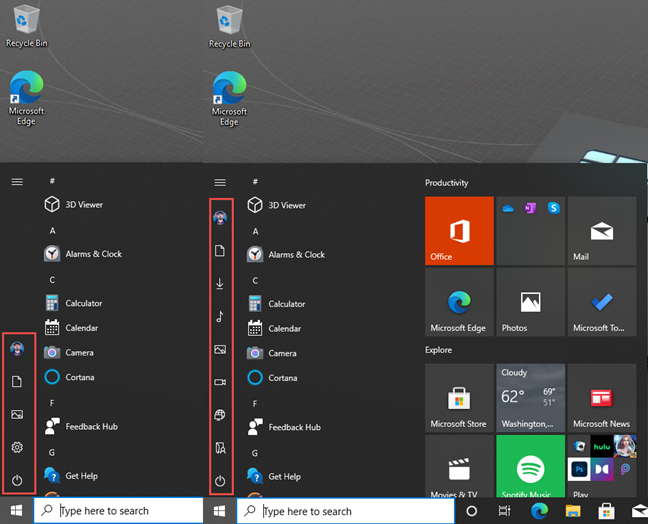
The Windows 10 Start Menu with many folders added vs the default
When you enable all Start Menu folders, Windows 10 displays as many as they fit, depending on its height. If you added a folder and don’t see it displayed, resize the Start Menu to make it taller. This guide is going to help: How to resize the Start Menu in Windows 10 (3 methods).
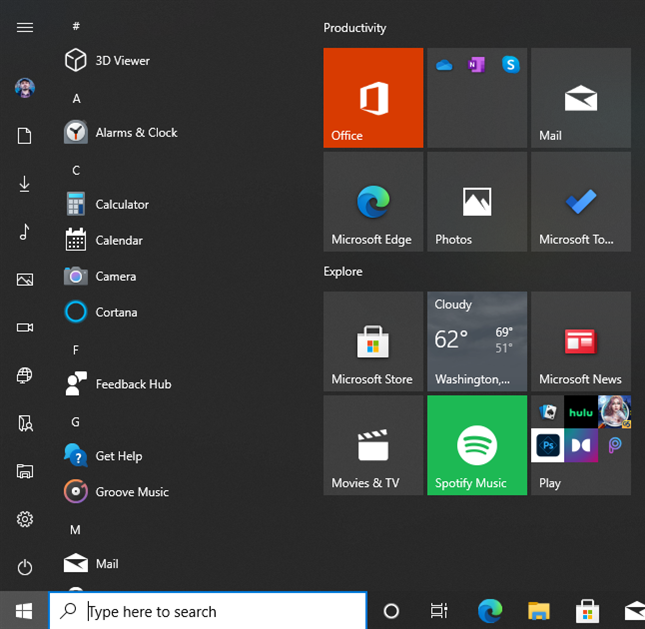
To see all folders, resize the Start Menu
How to add or remove folders from the Windows 10 Start Menu
To add, edit, or remove folders from the Start Menu, first open Settings. A quick way to do that is to click the Settings shortcut from the Start Menu or press Windows + I on your keyboard. In the Settings app, go to the Personalization section.
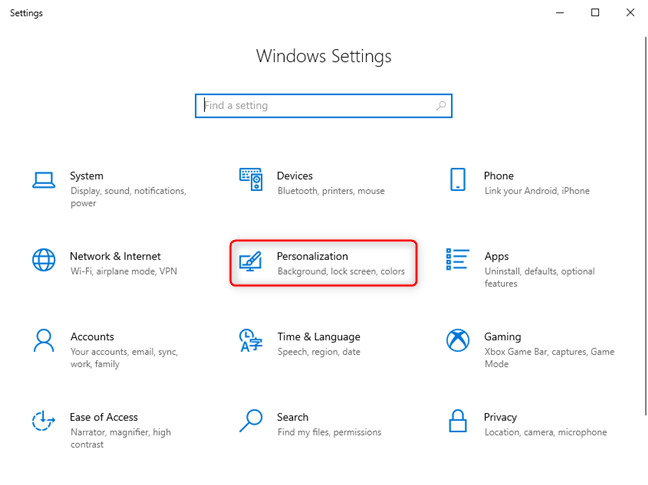
In the Windows 10 Settings, access Personalization
In the column on the left, choose Start, and then click or tap the link that says: “Choose which folders appear on Start.” It is found on the bottom-right side of the window.
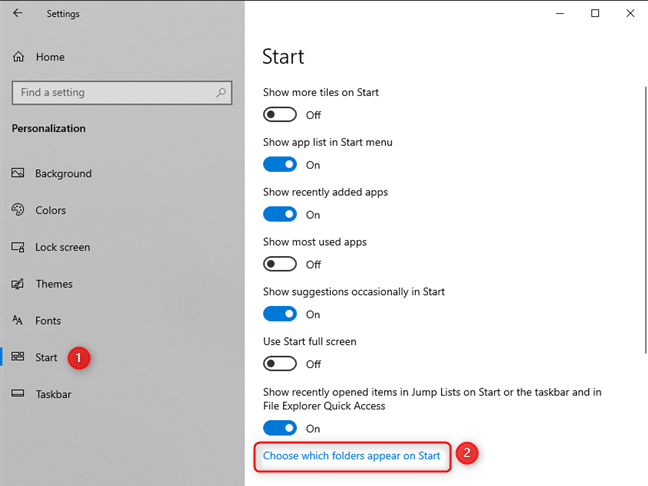
Go to Start and then to Choose which folders appear on Start
You see a list where you can decide which folders appear on the Start Menu. For each folder, there is a switch that can be turned On or Off.
When you turn on a switch, that folder is added to the Start Menu. When you turn off a switch, that folder is removed from the Start Menu. Set things as you wish, to add and remove the folders that interest you.
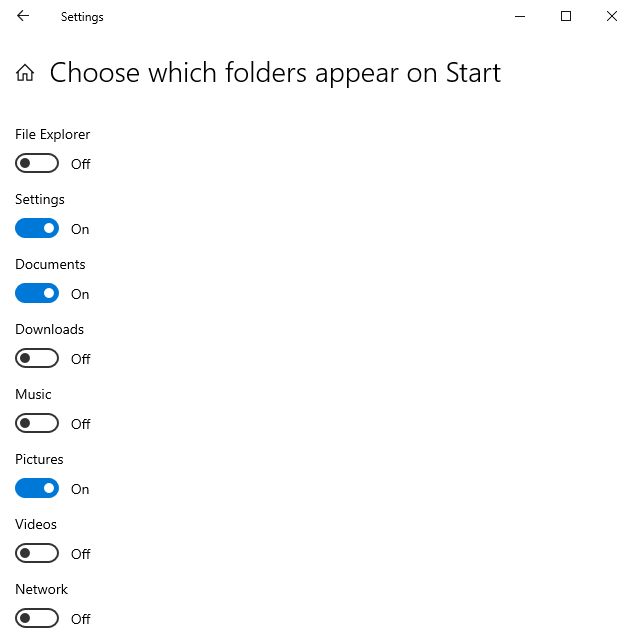
Choose which folders appear on the Start Menu
When done, close Settings and the Windows 10 Start Menu immediately reflects your changes.
The Windows 10 Start Menu has the folders you want
The next time you click ortap Start or press the Windows key on your keyboard, the Start Menu displays the folders that you have chosen on its left-side column. Each folder has its unique icon to help you identify it. If you want to see the name, hover the mouse cursor over any folder, or click or tap the burger button on the top-left of the Start Menu. It looks like three horizontal lines.
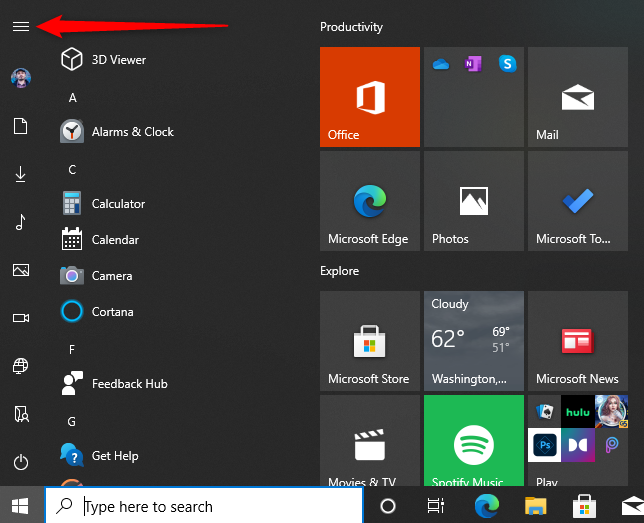
Extend the Windows 10 Start Menu to see the folder names
The Start Menu then extends and displays the name of each folder. Click or tap on its name to access it.
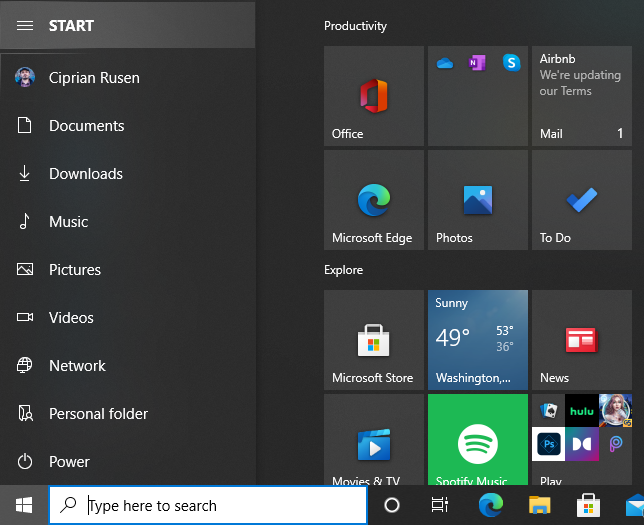
The Start Menu displays the names of all folders
Which Windows 10 Start Menu folders did you add?
Now you know how to add or remove folders to and from the Start Menu. Before closing this tutorial, share with us which folders you added. We are curious to know. Also, if you want more useful tutorials about the Start Menu and other features of Windows 10, read the articles recommended below.


 19.11.2020