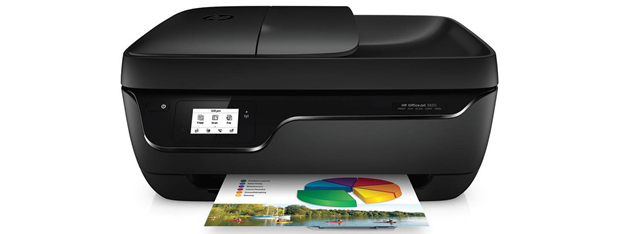
Have you heard about the Print Management console in Windows 7 and Windows 8? I did but I ignored it blissfully for years. Until recently when, by chance, it stirred up my attention. I began to use it and I loved it. Therefore I decided to share what I have learned with our readers and show a better way to manage your installed printers and drivers.
Where to Find the Print Management Console
Both in Windows 7 and Windows 8, the Print Management console is part of Administrative Tools. However, it is not available in all editions of Windows. Only users of Windows 7 Professional, Ultimate and Enterprise will be able to use it. In Windows 8 it is available in Windows 8 Pro and Enterprise.
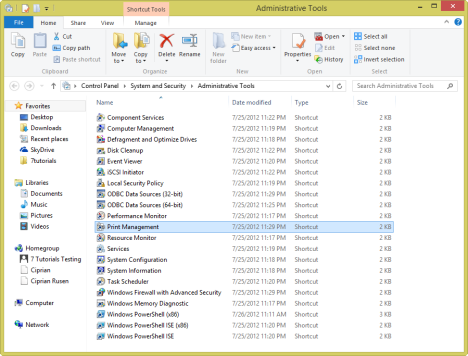
While a search for the term Print Management in Windows 7's Start Menu will return the appropriate result, doing the same in Windows 8's Start screen will not. That's why, to make sure you find it, it is best to open the Control Panel and go to System and Security -> Administrative Tools.
This will work both in Windows 7 and Windows 8.
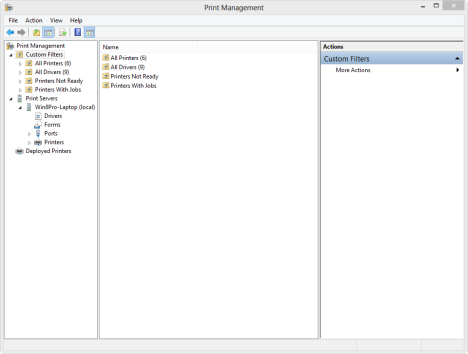
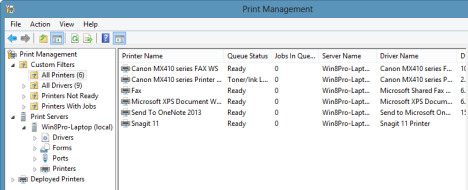
When you first launch Print Management, its window will look similar to the screenshot below.
How to Work with the Print Servers Section
Even though Print Servers is the second section on the left, I would like to showcase it first, as it is the most interesting part of the Print Management console.
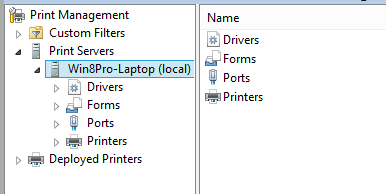
Under Print Servers you find your computer. If you are part of a network domain and you have administrative permissions over it, you will see also other computers from that domain. For each computer listed, there is information about drivers installed, printing forms, ports used and the printers installed.
The Drivers section displays all the print drivers installed on the selected computer, including drivers installed by software that emulates the presence of a printer.
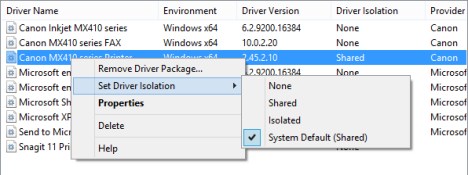
With a right click on a driver, you can manage different aspects of it, such as its isolation from other drivers or its properties. You can also delete the selected driver.
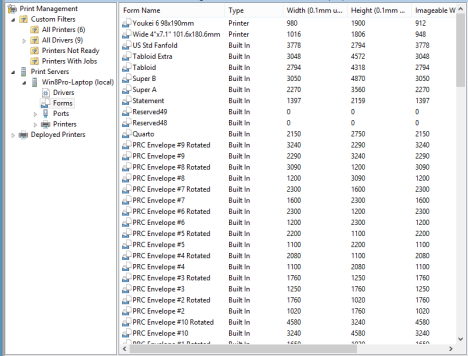
Next is Forms. There you see the list of all forms that can be used for printing by all your printers. For each, there is useful information shown such as its width, height or type.
If you don't remember the size of an A3 page, look for it here and you can see its size in millimeters. Useful, isn't it?
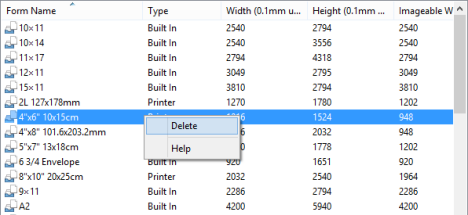
An important column in this list is named Type. The most common values for it are Built In and Printer. The Built In forms come with Windows and cannot be removed or changed. The Printer forms are installed by one of your printers and supported by it. These forms can be deleted, with a right click and then a press on Delete. You should delete them only if you do not plan to use them.
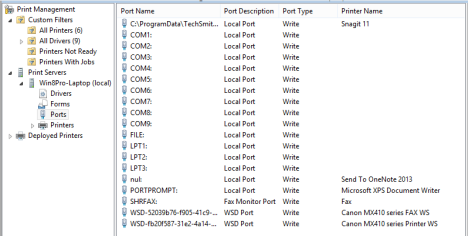
The third list is Ports. All the printing ports installed and used on your computer are shown. Some are standard ports that come with your computer and might never be used. However, they will be listed as available.
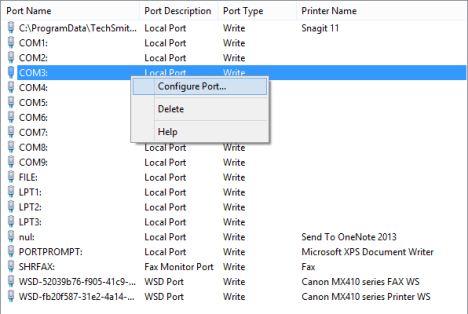
With a port you can right click and delete it or configure it. Deleting a port means it won't be used. If a real printer is attached to your computer, you won't be able to use it anymore and you will have to reinstall it.
Another option is to configure a port. However, few ports can be really configured.
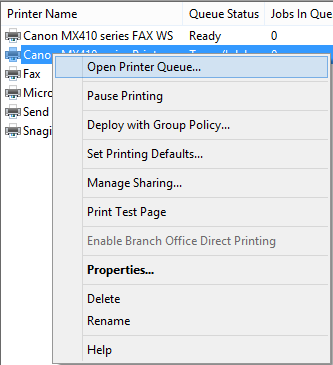
The most interesting list is named Printers. It shows all the printers installed, including software ones. A right click on a printer reveals many configuration options. You can: open the printer queue, pause printing, deploy the printer with Group Policy over a network domain, set printing defaults, manage sharing, print a test page, edit its properties, delete or rename the printer and access Help.
All this just from the right click menu.
How to Work with Custom Filters
The first section - Custom Filters - displays the same information as Print Servers with the use of filters that can be configured to show only what interests you.
Some of the most interesting filters are Printers With Jobs and Printers Not Ready.
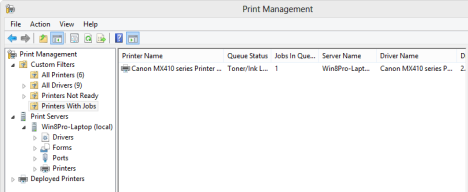
For example, the Printers With Jobs filter displays the printers that are printing something at the moment and how many jobs they have in queue.
Don't Forget to Use the Actions Menu or the Right Click on Categories
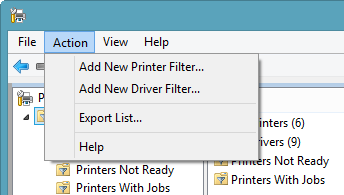
A very useful menu in the Print Management console is the Action menu. It displays the same options as a right click on a category would.
For example, when in the Custom Filters category, it lets you create custom printer or driver filters.
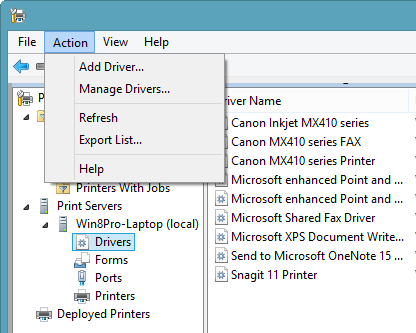
In the Print Servers -> Drivers section, it allows you to add new drivers or manage existing ones.
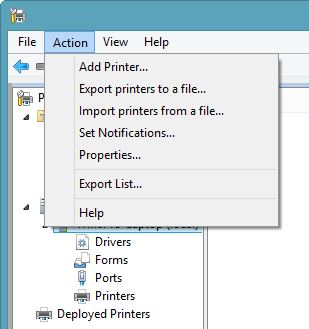
In the Print Servers -> Printers section, it offers the possibility to export all your printers to a file or import printers from a file.
Very useful options if you ask me, so don't hesitate to experiment and learn this tool and all its contextual options.
Conclusion
As you can see from this tutorial, the Print Management console is a very useful tool. After getting to know it better, I preferred it to the Devices and Printers Panel, when managing my printers. For more interesting tips and tricks about Windows, don't hesitate to read our recommendations below.


 21.09.2012