When you connect to a wireless network, Windows saves its credentials (network name password, encryption type) for easy access the next time it’s in range. If you have issues connecting to a Wi-Fi network you’ve connected to in the past, deleting the data for that network can help troubleshoot the issue. Forgetting Wi-Fi networks also helps when you have several Wi-Fi networks available, but your device connects automatically to the wrong one. To help you out, here are four ways to forget Wi-Fi networks in Windows 11:
1. How to forget a Wi-Fi network from the network list in the system tray
The first method of forgetting a Wi-Fi network is the easiest, but it requires you to be in range of the network you want Windows 11 to forget. So make sure your Wi-Fi adapter is turned on and you are in range of the network you want to forget, then press Win + A on your keyboard to open Quick Settings. Alternatively, click or tap on any of the Wi-Fi, volume, or battery icons in the lower right corner of the screen. Next, press the arrow next to the Wi-Fi symbol (“Manage Wi-Fi connections”).
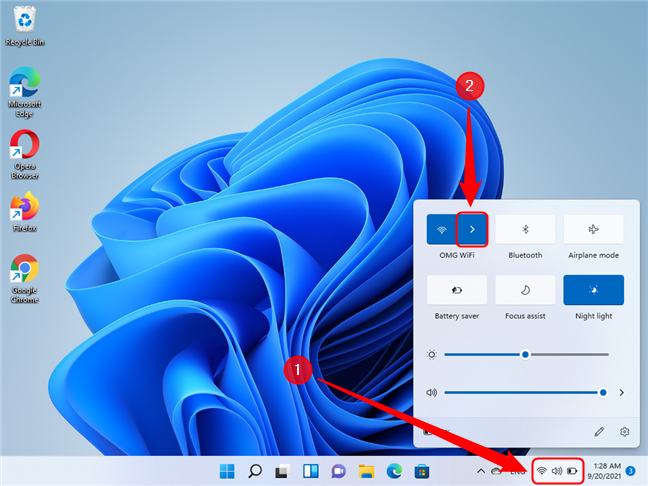
Open Quick Settings in Windows 11
Search for the Wi-Fi network you want to forget in the list. Then, right-click or press and hold on it. This opens an action menu where you should choose Forget.
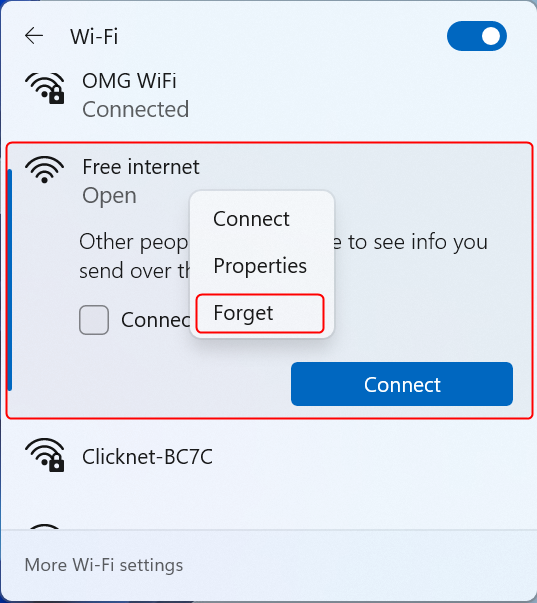
Right click the Wi-Fi network and select Forget
That’s it! The next time you try to connect to that network, assuming it has a password, you will be prompted to enter it again. For more details, here’s our guide on how to connect to Wi-Fi in Windows 11.
2. How to delete a Wi-Fi network from the Settings app
Whether or not the network you are trying to delete is in range, you can delete it from the Settings app. First, open Settings. One way to do it is by opening the Start Menu and choosing Settings.
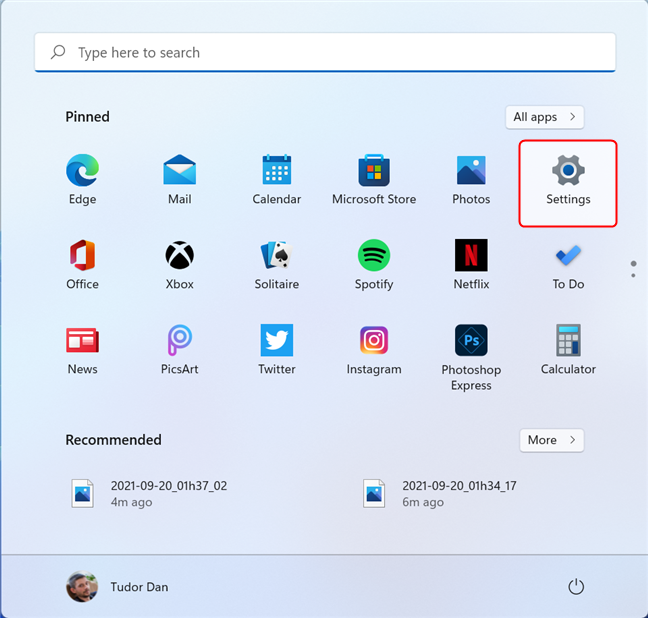
Open the Settings app in Windows 11
Select Network & internet in the left pane, then click or tap on Wi-Fi in the right pane. Make sure you don’t click on the switch.
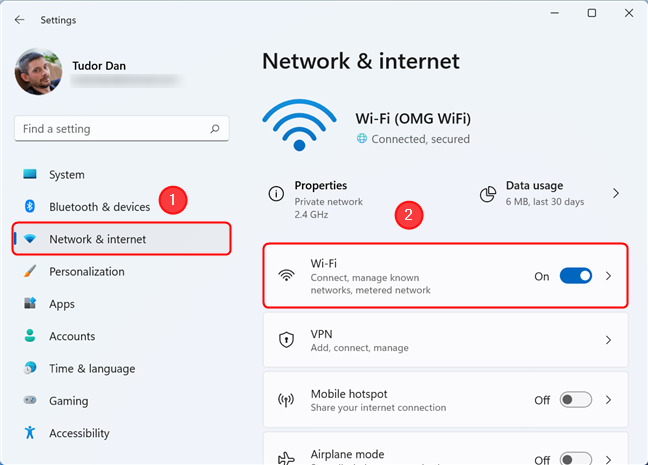
Click on Wi-Fi in the Network & internet section
Now, click or tap on “Manage known networks”. This lists all the networks you've ever connected to since you installed the operating system (or since the last time you deleted items from the list).
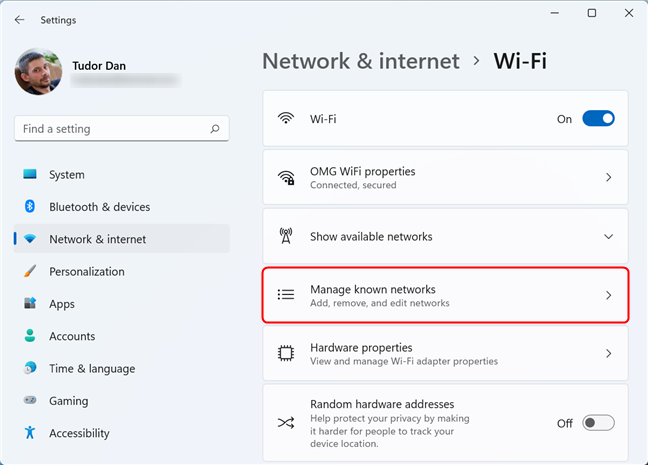
Select Manage known networks to see the list of saved networks
Search for the network you want to forget, either by scrolling or by entering part of its name in the search field. You can change the sorting criteria by clicking or tapping on Sort by in the upper right corner. There are also several filters available that should make your search even easier. Simply press on Filter by in the upper right corner to access available filters.
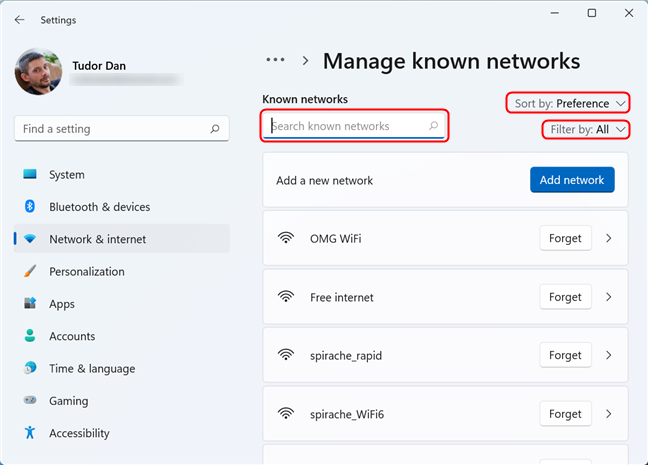
Search, sort or filter the Wi-Fi networks
After finding the network, click or tap on the Forget button. This deletes it from the list of known networks (but it will still be available in the Wi-Fi network list once you are in range).
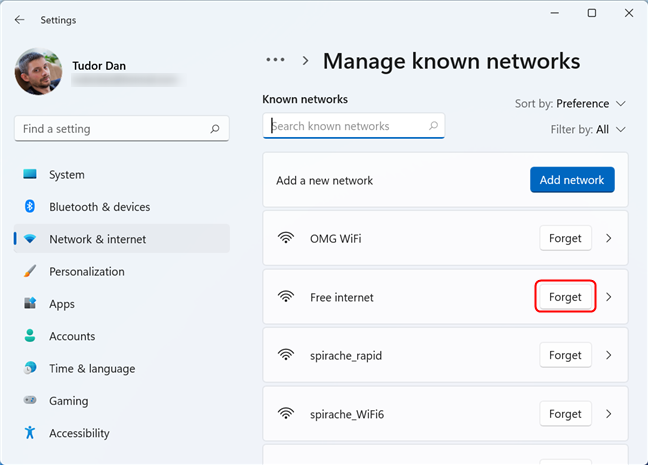
Deleting a saved Wi-Fi network in Windows 11
3. Forgetting a Wi-Fi network using CMD or PowerShell
This method applies to all Wi-Fi networks as well, whether or not the network you are trying to delete is in range. The first thing you should do is run either Command Prompt or Windows PowerShell as administrator. One way to run them is by opening the Search window and then typing either “cmd” (for Command Prompt) or “powershell” (for PowerShell) in the search field. Then, click on “Run as administrator” in the right pane.
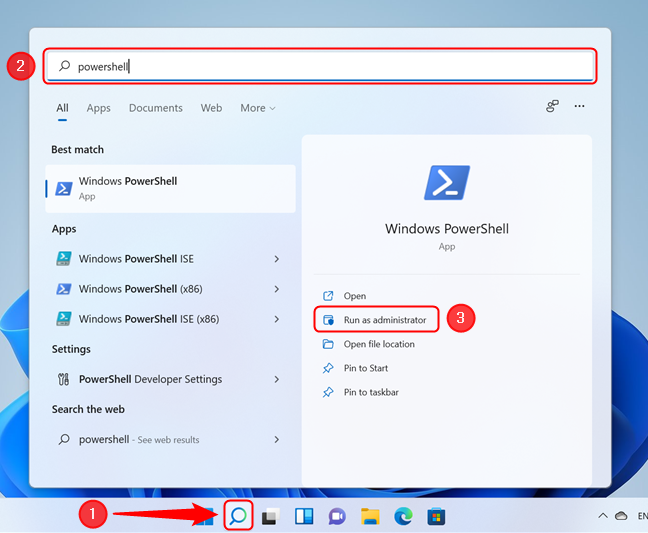
Run PowerShell as administrator in Windows 11
Next, type the following command (or copy and paste it into the interface): netsh wlan show profiles. Press Enter on your keyboard. This command lists all the networks you've ever connected to since you installed the operating system (or since the last time you deleted a Wi-Fi network).
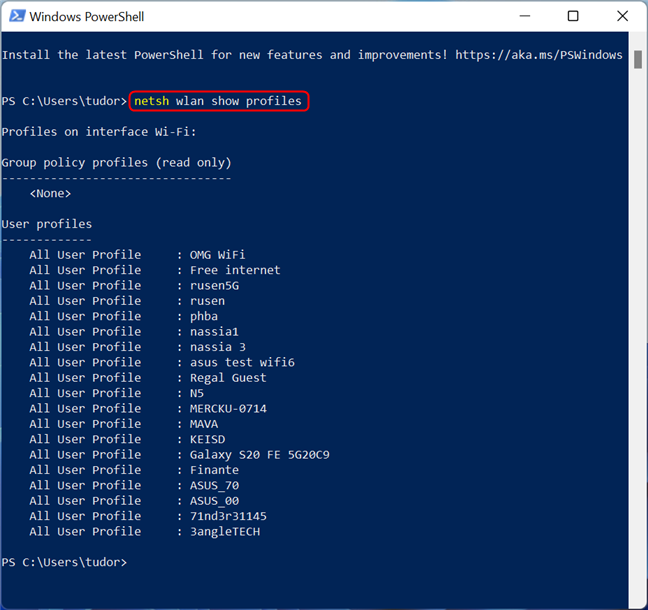
List the saved Wi-Fi networks using the netsh command
Once you identify the Wi-Fi network that you want to forget, type in the following command, replacing PROFILE NAME with the actual name of the network: netsh wlan delete profile name="PROFILE NAME". After typing the command, press Enter on your keyboard. A confirmation message appears after the command is executed.
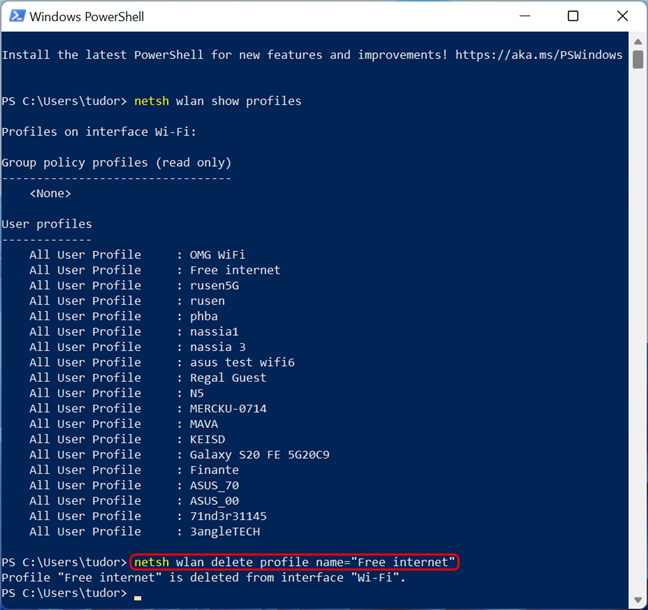
Delete saved Wi-Fi network using the netsh command
You can now close the CMD or PowerShell window.
4. How to forget all Wi-Fi networks in Windows 11 using CMD or PowerShell
If, for privacy or security reasons, you want to delete all the saved Wi-Fi profiles, you can do so in bulk, without going through every entry in the list. However, keep in mind that this method deletes saved passwords for all Wi-Fi networks and disconnects you from the WiFi network you’re currently connected to, so make sure you have the login details at hand.
Open your preferred shell (Command Prompt or PowerShell) as described above, then type the following command: netsh wlan delete profile name=* i=*. Then, press Enter on your keyboard.
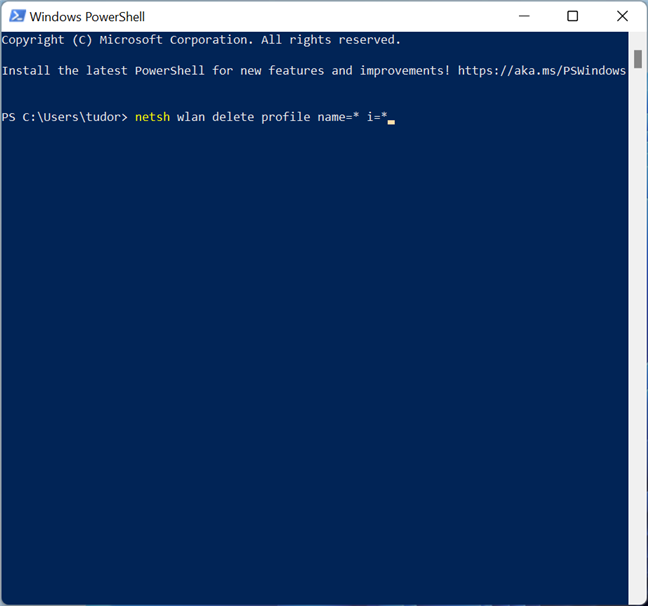
Forget all Wi-Fi networks using the netsh command
After the command is executed, the program lists all deleted items, and you are disconnected from the Wi-Fi network.
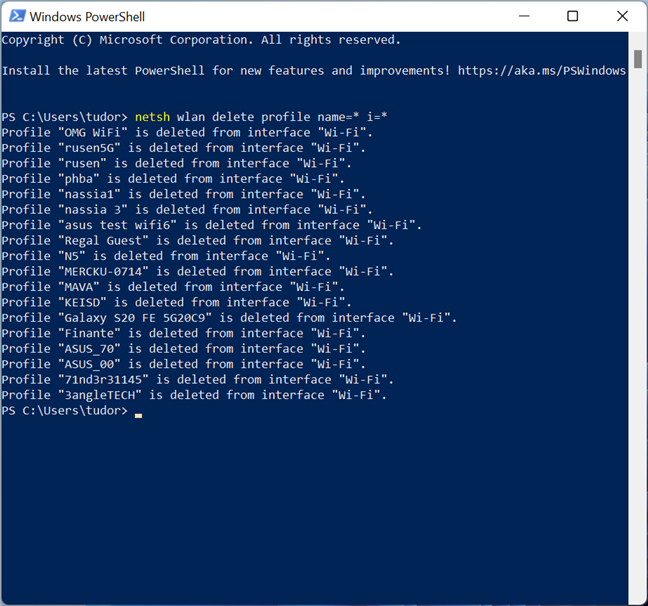
The program shows a confirmation message for each deleted Wi-Fi network
Which method do you use for forgetting Wi-Fi networks?
You now know four methods that make Windows 11 forget Wi-Fi networks. Which one do you use? Did you prefer Quick Settings or maybe PowerShell or CMD? Also, did it help with the issues you had with your Wi-Fi? Let us know in the comments below.


 29.09.2021
