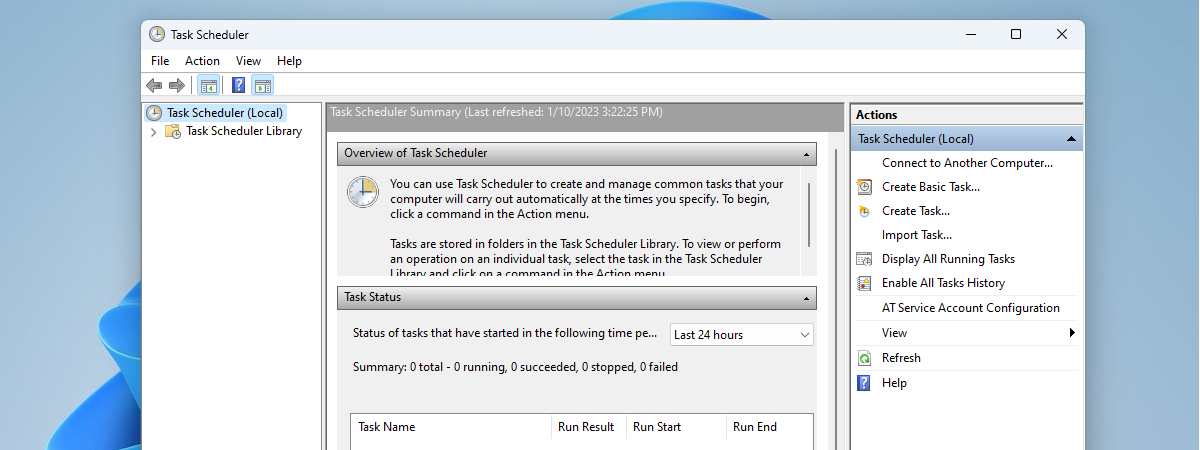
The Task Scheduler is a Windows tool that’s been around for over 20 years. Its main job is to plan when certain tasks should happen on your computer, like running programs or scripts at specific times or in response to certain events. In this guide, I’ll show you how to view the scheduled tasks set up on your computer in order to understand what they do and when they happen. Moreover, I’ll also include instructions on how to get scheduled tasks using commands in PowerShell and Command Prompt, not just with Task Scheduler. So, without further ado, here’s how to see the scheduled tasks created by your apps, Windows itself, or other users on your computer:
NOTE: The instructions in this guide apply to both Windows 10 and Windows 11. To keep things simple, I mainly use screenshots taken in Windows 10, as the interface and functionality are the same in both operating systems.
Method 1. How to view scheduled tasks with Task Scheduler
The easiest way to navigate and see scheduled tasks in Windows is by using the Task Scheduler. Not only that, but the Task Scheduler also helps automate tasks on your computer, making it simple for Windows and installed apps to respond to changes. It also lets you create and manage tasks so your computer does what you want exactly when you want. Although its interface might look a bit old, it’s still very effective at its job. The Task Scheduler lets you see tasks created by you, the operating system, and your apps, all in one place. You can get many details about each task, which helps you manage them better.

The Task Scheduler in Windows
To better understand how the Task Scheduler works, it’s important to understand two terms: triggers and actions. A trigger is what starts a task, like when the computer starts up or when you log in. An action is what the task does when it's triggered, like running a program or sending an email. You can create your own triggers and actions, so the options are endless. Having said that, let’s move on to see…
How to open the Task Scheduler
To open the Task Scheduler, simply search for it in Windows. Type task scheduler in the search box and click or tap Task Scheduler in the results. This is what it looks like in Windows 10:
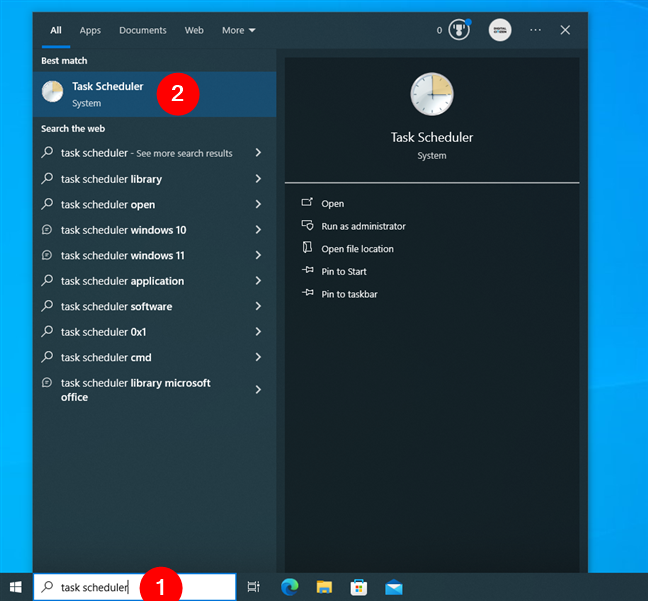
Search for task scheduler in Windows 10
And this is how you can search and open Task Scheduler in Windows 11:
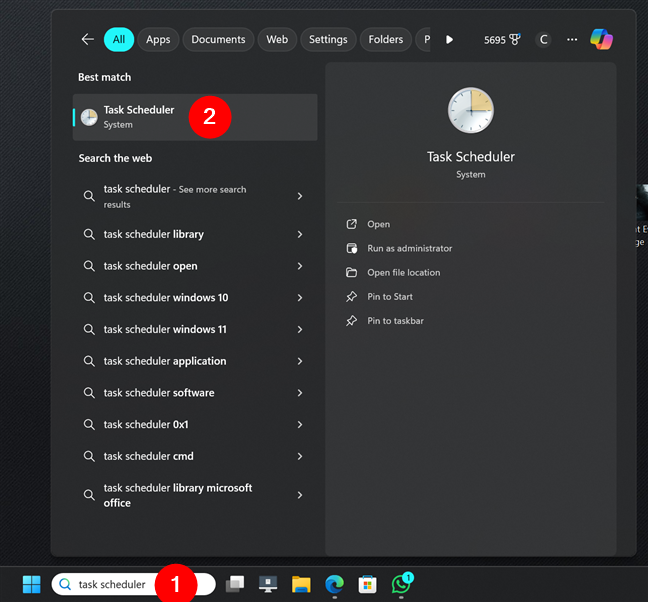
Search for task scheduler in Windows 11
TIP: If you want more options, there are 11 ways to open Task Scheduler in Windows.
How to navigate the Task Scheduler interface
When you open the Task Scheduler, you’ll see three main sections:
- Task Scheduler Library: Helps you navigate all the tasks.
- Task Scheduler Summary: Shows information about recently executed tasks.
- Actions: Lets you create, import, and delete tasks, as well as perform other actions on specific tasks.
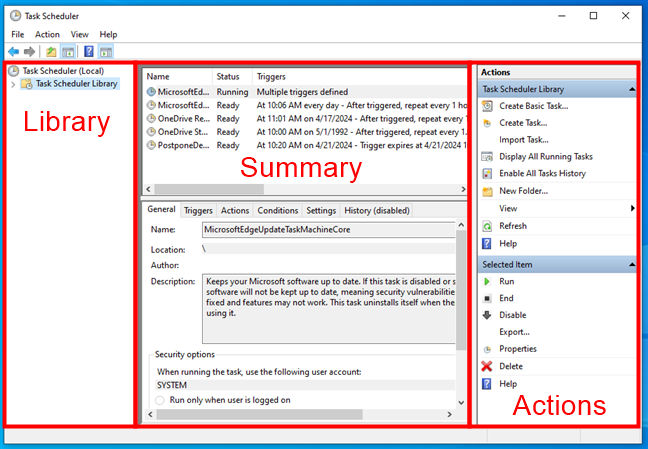
Task Scheduler initial panels in Windows
Let’s focus on the Task Scheduler Library and Task Scheduler Summary, as they’re the ones that allow you to view your scheduled tasks in Windows:
How to use the Task Scheduler Summary
When you select Task Scheduler (Local) in the left sidebar, the middle panel is split into three sections: Overview of Task Scheduler, Task Status, and Active Tasks.
Overview of Task Scheduler provides information on what you can do with the Task Scheduler.
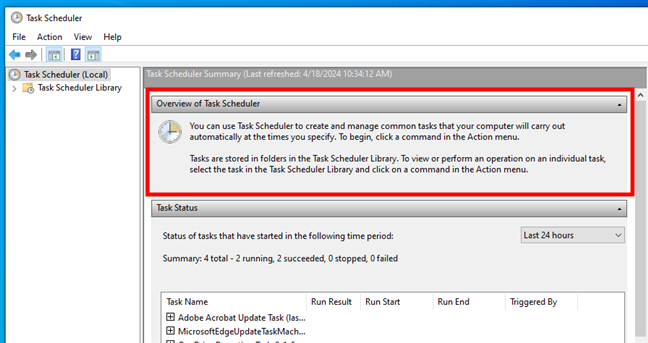
Overview of Task Scheduler
Task Status lists tasks that have started recently, along with their status. You can choose different time periods to view: Last hour, Last 24 hours, Last 7 days, or Last 30 days.
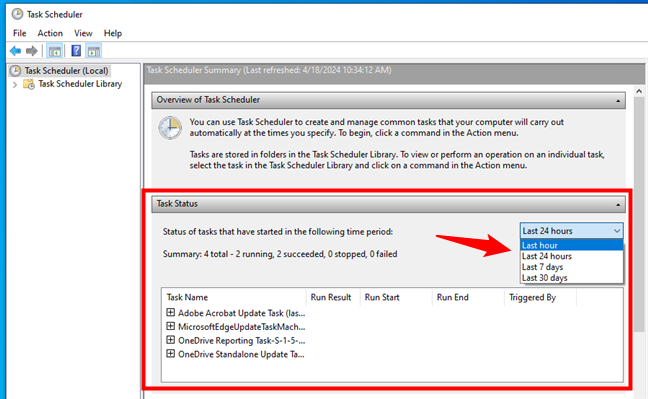
Task Status in Task Scheduler
If any tasks are listed, click or tap the + (plus sign) next to a task’s name to see details such as each task’s run result, when it started, when it ended, and what triggered it.
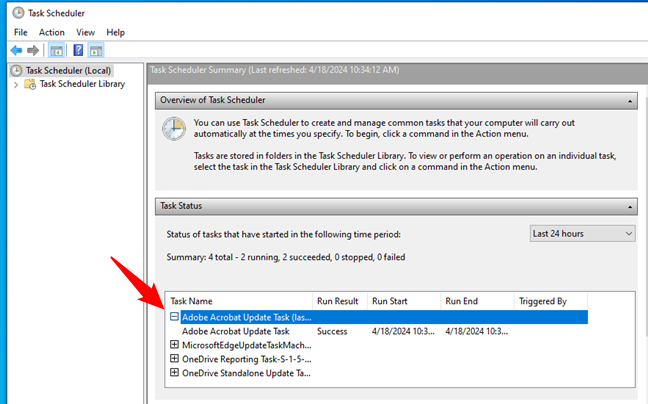
Display the details for a task in the Task Status section of the Task Scheduler
TIP: If there’s no information in the Task Status pane, that’s because the task history is disabled by default. To get this information, click or tap Enable All Tasks History in the Actions sidebar on the right of Task Scheduler.
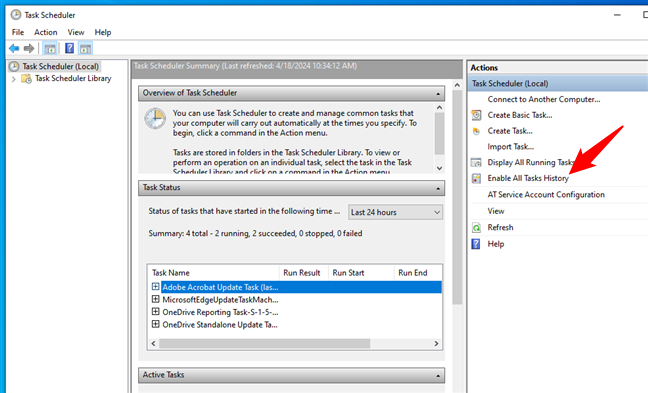
Enable All Tasks History in Task Scheduler
In the last pane on the bottom, Active Tasks, you can see a list of currently enabled tasks that have not yet expired. For each task, you can see its name, the Next Run Time specified by date and time, the Triggers, and the Location.
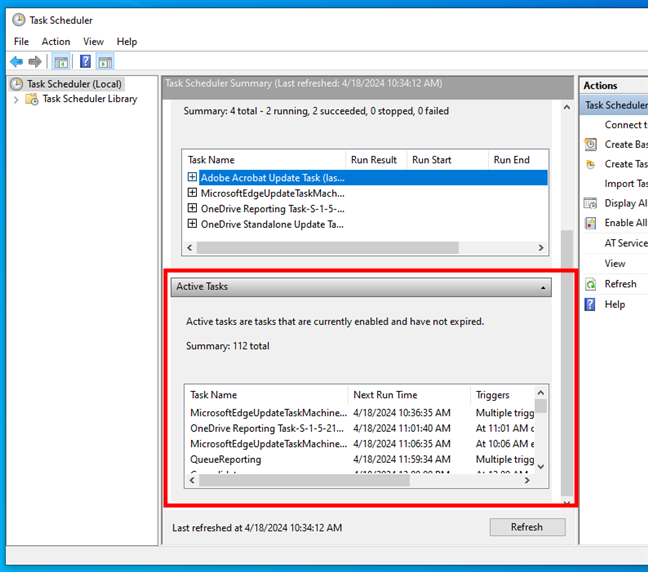
Active Tasks panel in the Task Scheduler Summary
If you want to update the information in the Task Scheduler Summary panels, click or tap the Refresh button.
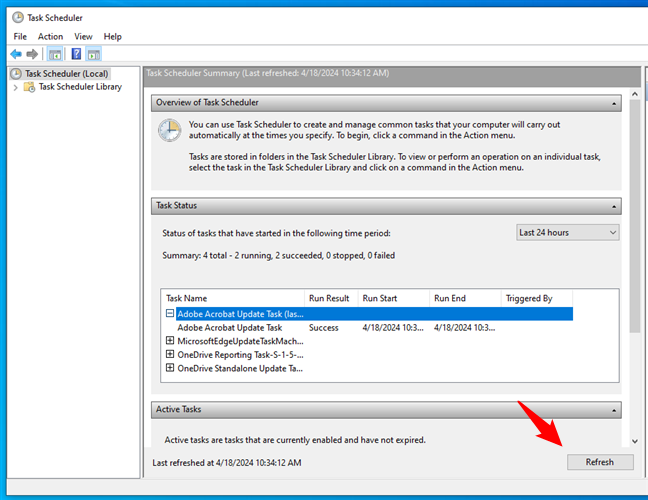
Refresh the information in Task Scheduler
TIP: For a guide on creating your own tasks, check out our article: How to create basic tasks with Task Scheduler in 5 steps.
How to view scheduled tasks in the Task Scheduler Library
On the left side of the Task Scheduler window, there’s also an entry called Task Scheduler Library. This is where all the scheduled tasks are listed. Click or tap the arrow to its left or double-click to see its contents. Then, click on a folder’s name to see the tasks inside.
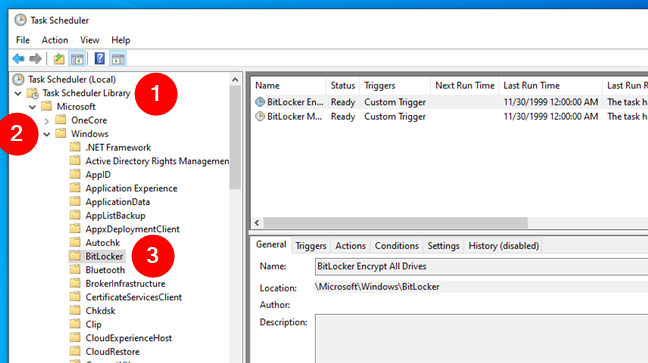
Open folders in Task Scheduler
You’ll then get details for each task, such as its name, status, triggers, and when it last ran. Click or tap on a task to see more information in the panels below.
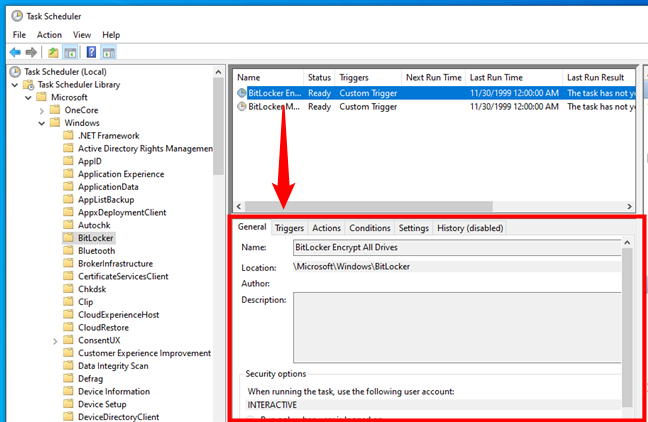
Display the details of a task in Task Scheduler
The information about each task is split into different tabs, showing details like triggers, actions, conditions, and settings. The first tab, General, displays information such as the selected task’s name, location, author, description, and security options.
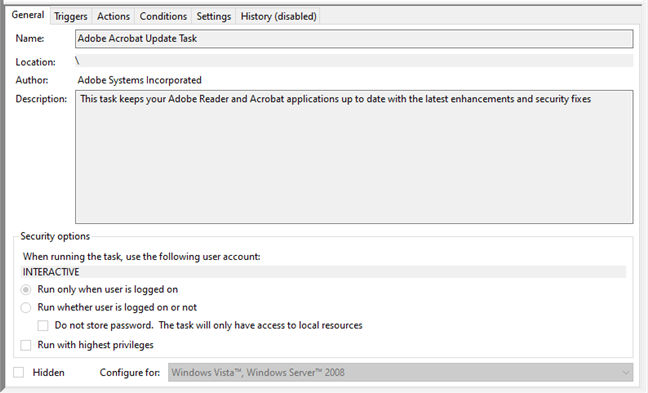
The General tab for a task in Task Scheduler
The second tab, Triggers, shows the list of conditions that trigger the task, along with some details and the status of each trigger.
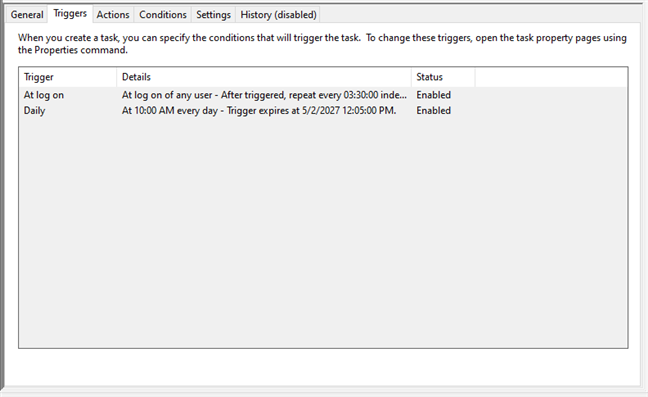
The Triggers tab for a task in Task Scheduler
The third tab, Actions, tells you the action that will occur when the task starts and shows some details about it. For example, if the action is to Start a program, you will see the path of the application that will be executed.

The Actions tab for a task in Task Scheduler
The fourth tab is Conditions. It shares the conditions that must be true for the task to run. These conditions include whether the computer is idle or whether it is on AC power or battery power.
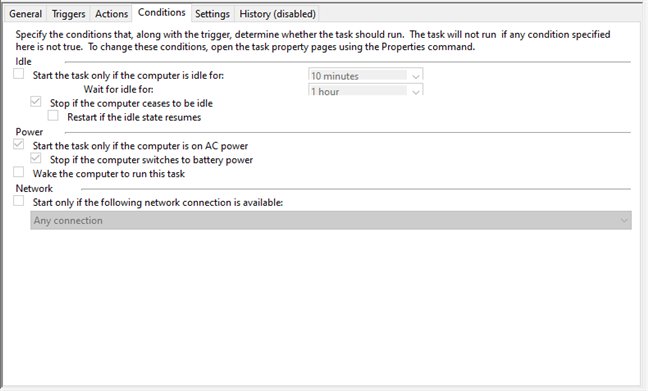
The Conditions tab for a task in Task Scheduler
The fifth tab, Settings, shows additional settings that affect the behavior of the task. It includes things like whether the task can be run on demand or not, what to do if the task fails, or whether to stop if it runs longer than a specified time.
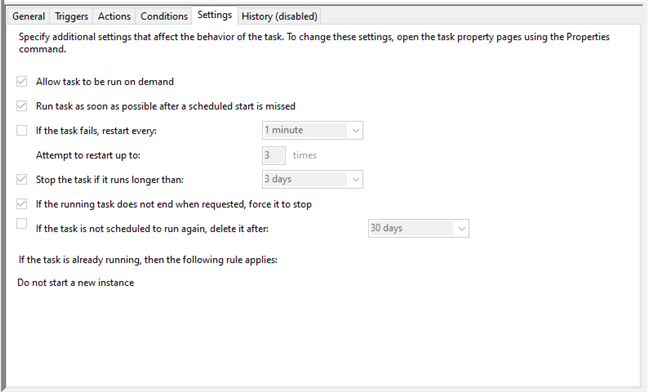
The Settings tab for a task in Task Scheduler
The sixth and last tab is named History and details the scheduled task’s last runs.
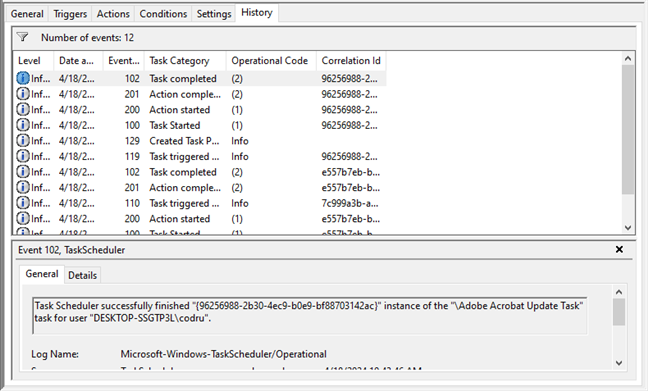
The History tab in Task Scheduler
TIP: If History doesn’t contain any information, click or tap Enable All Tasks History in the Actions sidebar on the right of the Task Scheduler. Note that the information starts to populate only after you enable History.
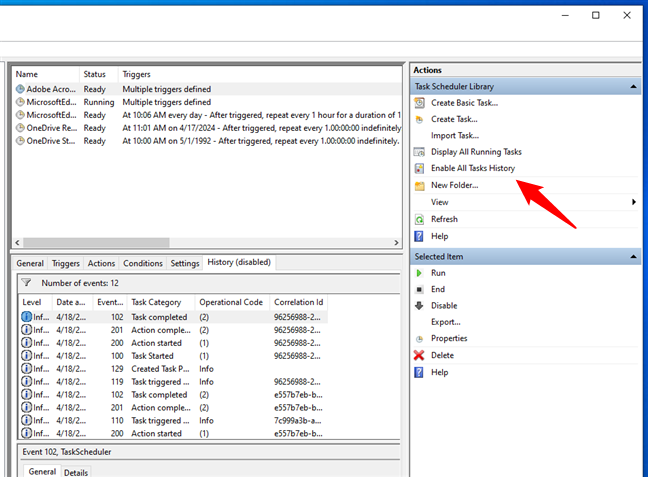
Enable All Tasks History in Task Scheduler
IMPORTANT: Some people have asked me if you can use Task Scheduler to “find by name” scheduled tasks. Unfortunately, that’s impossible, as the Task Scheduler offers no option to search for scheduled tasks! However, you can find them with PowerShell, so keep reading.
Method 2. How to see scheduled tasks using commands
If you fancy using a command-line app more than a graphical interface, you can get a look at the scheduled tasks using Command Prompt or PowerShell, too:
How to view scheduled tasks in Command Prompt
To see scheduled tasks on your Windows computer, you can run this command in Command Prompt:
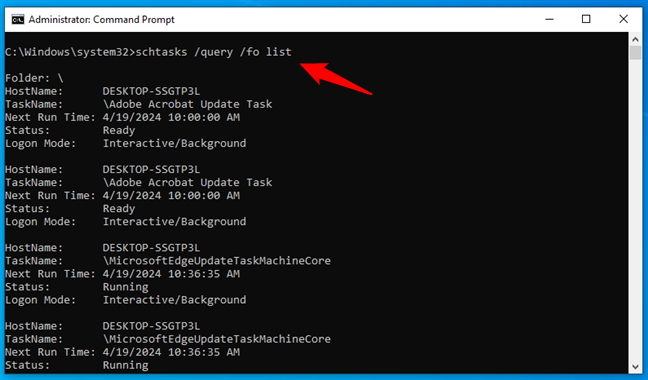
How to see scheduled tasks in CMD
For each task, you see the computer name, the task name, when it is going to run next, its status, and logon mode. That’s it! However, you can get much better and more detailed results with PowerShell. Here’s…
How to view scheduled tasks in PowerShell
To see scheduled tasks on your Windows computer, open PowerShell as an admin and run this command:
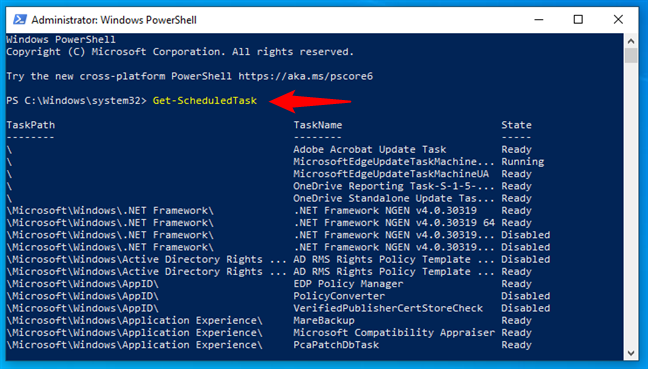
How to see scheduled tasks in PowerShell
To filter the results and only get the running scheduled tasks, you can use the command:
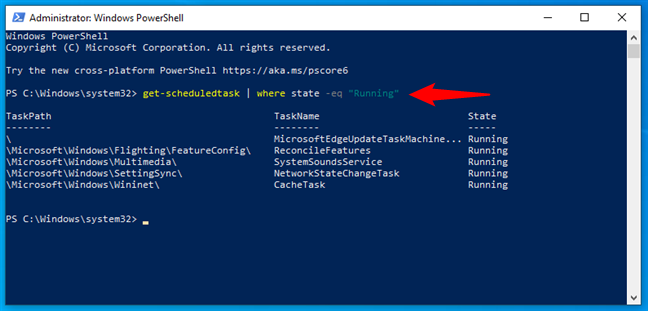
How to get running scheduled tasks in PowerShell
To refine the results and show only the active scheduled tasks, use the command:
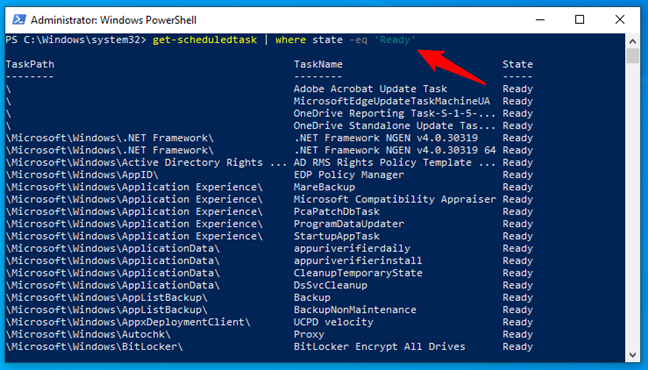
How to see active scheduled tasks in PowerShell
Similarly, to view only the disabled scheduled tasks, you can execute the command:
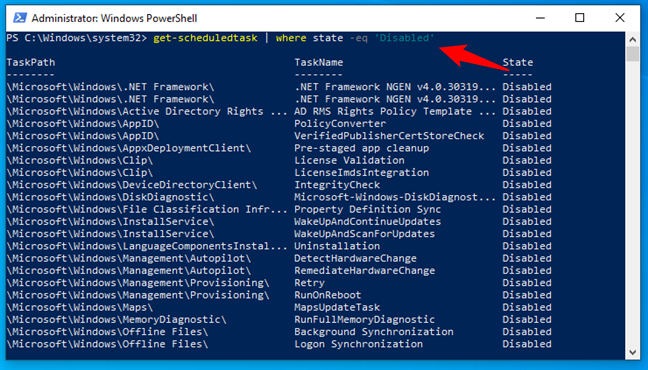
How to see disabled scheduled tasks in PowerShell
And, unlike Task Scheduler, Powershell also allows you to search for a scheduled task by name. To do so, run this command, replacing name with the actual name of the scheduled task:
For instance, if you want to view the Backup scheduled tasks, you need to execute the command like this:
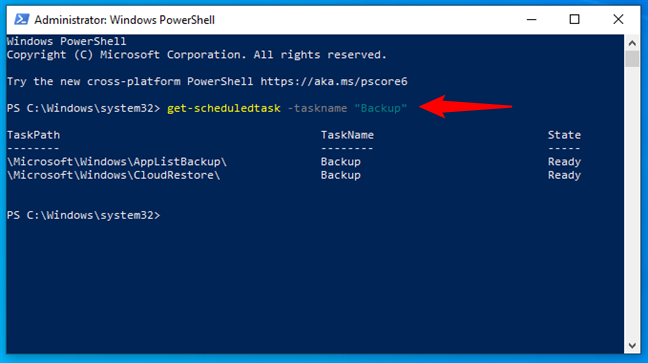
How to find a scheduled task by name in PowerShell
Moreover, the command also accepts wildcards, so you can find all scheduled tasks with a certain text in their name. For example, if you want to find all the scheduled tasks that contain Backup in their name, all you have to do is add an asterisk (*) in the command, like this:
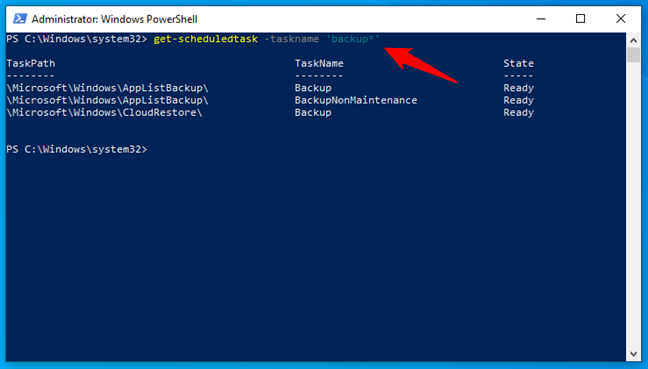
How to find multiple scheduled tasks by name in PowerShell
Addendum: The location of scheduled tasks
You might wonder where scheduled tasks are stored. They are saved in two different locations: the Windows Registry and as files on your computer, in a protected folder called Tasks.
The files are found at this location:
If you prefer using environment variables, they’re found at this location:
However, you need to be signed in with a user account with administrator privileges to access this location.
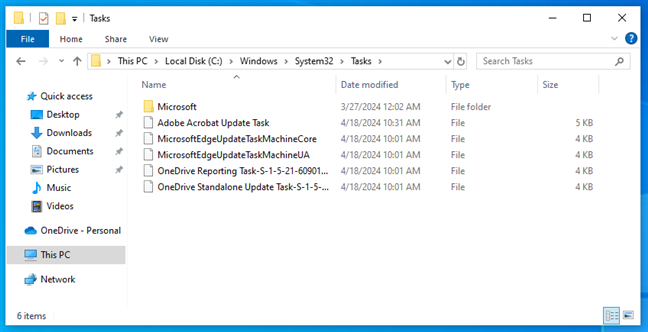
Where scheduled tasks are in Windows' folders
The registry paths where scheduled tasks are stored in Windows 10 and Windows 11 are these:
Computer\HKEY_LOCAL_MACHINE\SOFTWARE\Microsoft\Windows NT\CurrentVersion\Schedule\TaskCache\Tasks
Computer\HKEY_LOCAL_MACHINE\SOFTWARE\Microsoft\Windows NT\CurrentVersion\Schedule\TaskCache\Tree
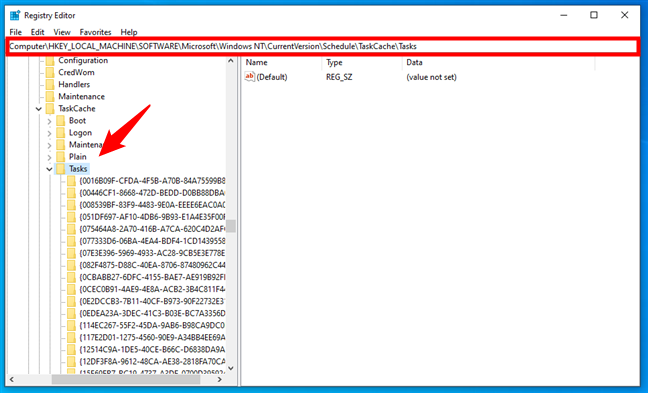
Where scheduled tasks are in the Registry
Do you know better ways to see the scheduled tasks in Windows?
That’s it! Now you know how to navigate the Task Scheduler and how to see scheduled tasks in your favorite command-line environment. Therefore, you can explore and manage the tasks on your Windows computer as you wish. If you want to learn more about using the Task Scheduler, check out our other articles on the topic. Oh, and if you have questions or if you know other methods to see scheduled tasks, feel free to leave a comment below.


 23.04.2024