Biometric authentication is available in Windows 10 if you have a laptop or desktop computer with a fingerprint reader or a webcam that can be used for face recognition. Of the two authentication methods, the fingerprint reader is the fastest, and I like using it because it allows Windows 10 to boot faster than other sign-in methods. If you want to try it out and you have a laptop with a fingerprint sensor, read this guide and learn how to set it up and use it:
How to set up Windows Hello Fingerprint in Windows 10
Open Windows 10’s Settings (Windows + I) and click or tap on Accounts.
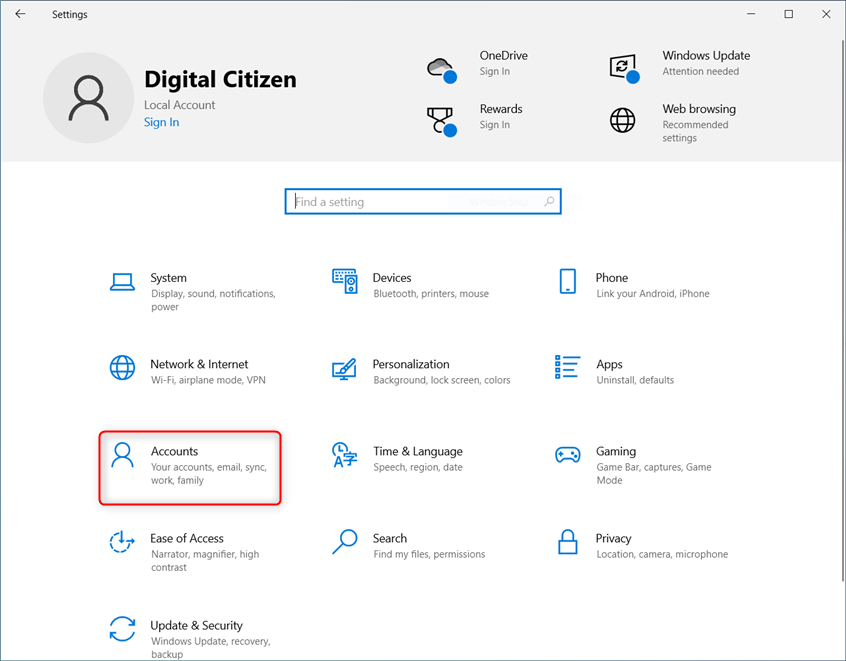
In Windows 10 Settings, go to Accounts
In the left sidebar, choose Sign-in options, and then click or tap Windows Hello Fingerprint.
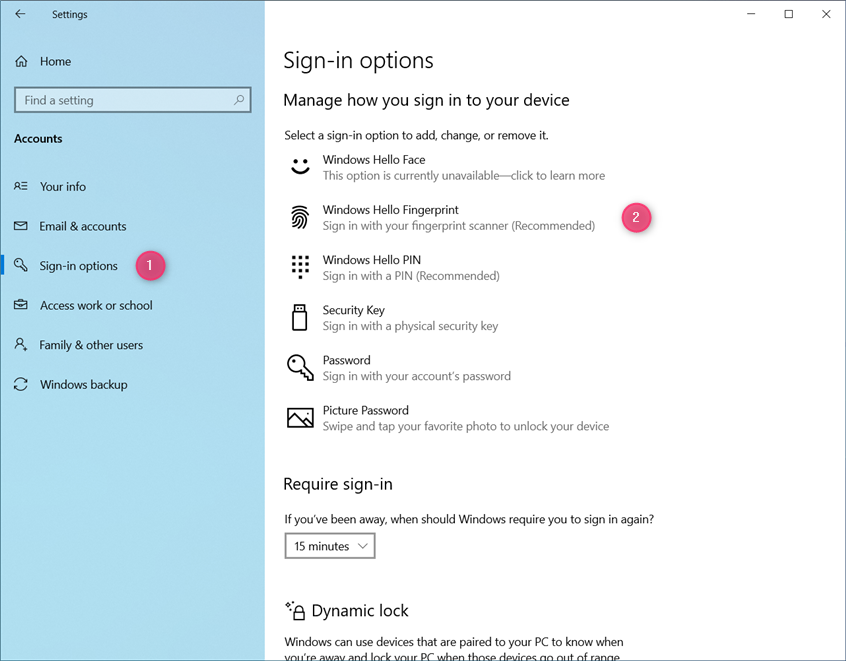
Go to Sign-in options > Windows Hello Fingerprint
This action expands Windows Hello Fingerprint. To enable and set up fingerprint authentication, click or tap the Set up button.
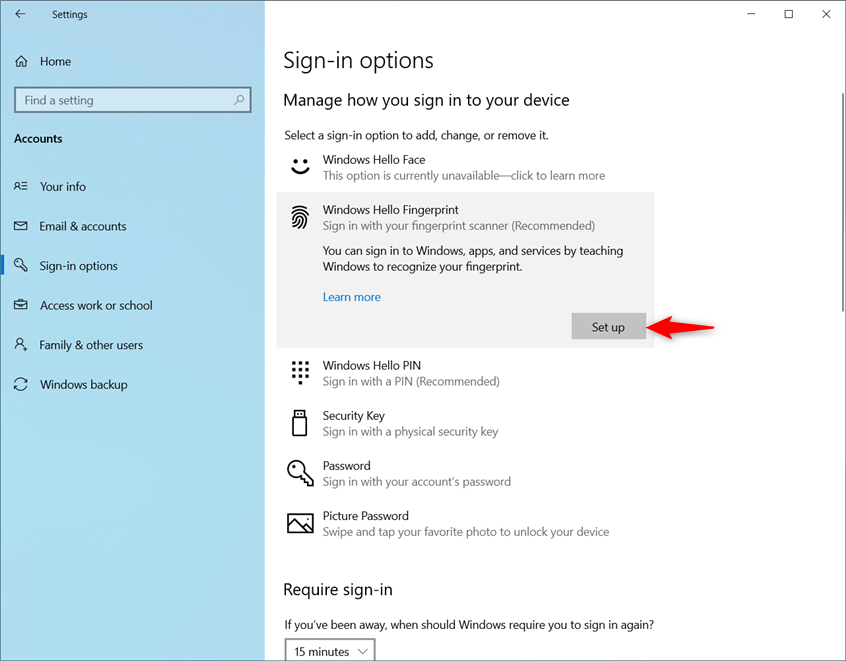
Click or tap Set up
You are welcomed to Windows Hello with a brief message like the one below. Click or tap on Get Started.
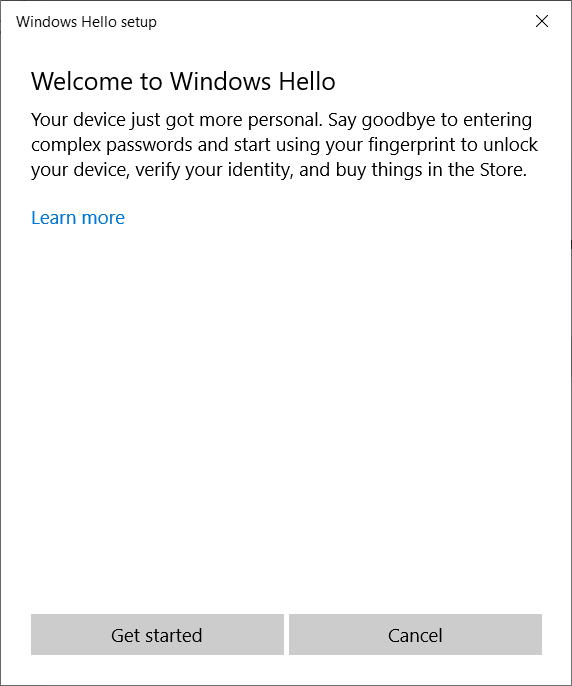
Welcome to Windows Hello
You must then type your PIN or account password to confirm your identity. Type the information requested from you.
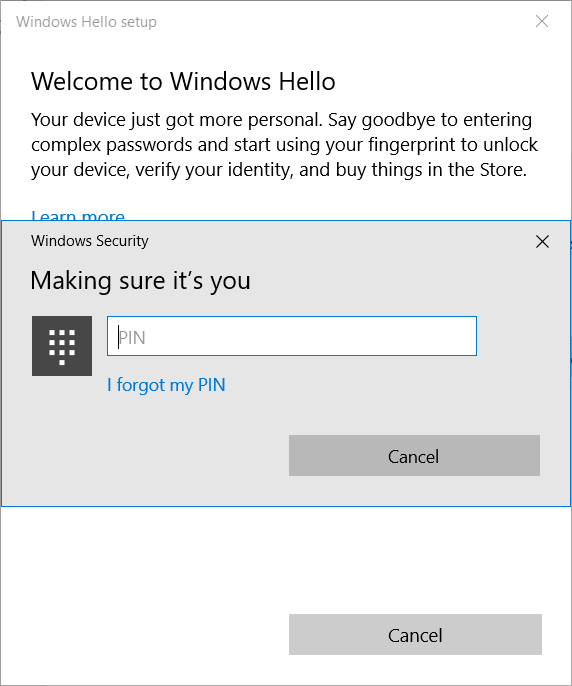
Enter the PIN (or password, if asked for one)
The Windows Hello setup wizard instructs you on how to register your fingerprint correctly. Read the instructions shown and follow them.
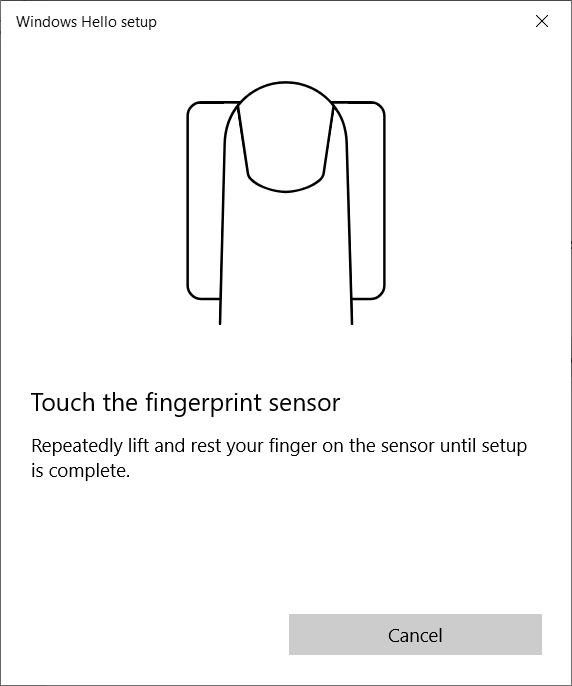
Touch the fingerprint sensor
As soon as you press and lift your finger on and off the fingerprint reader, you see a fingerprint map and further instructions on what to do.
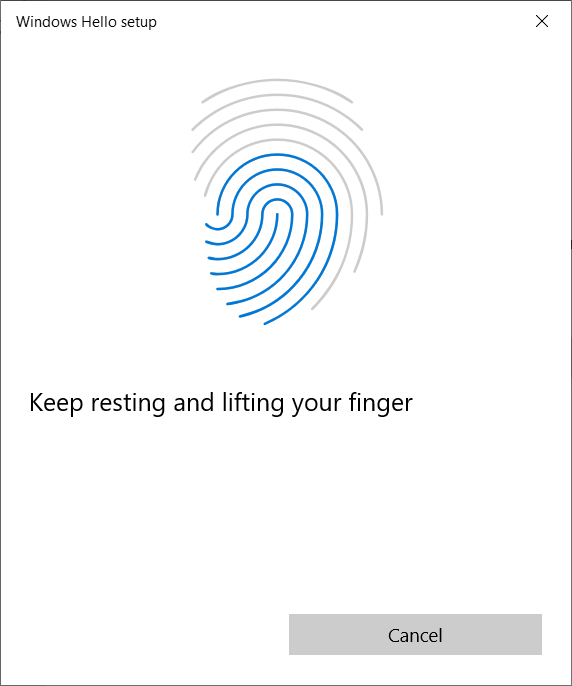
Follow the instructions
When Windows 10 has read your fingerprint, it says that everything is set, and you can start using it the next time you unlock your device. At this point, you can choose to Add another finger and repeat the process or press Close.
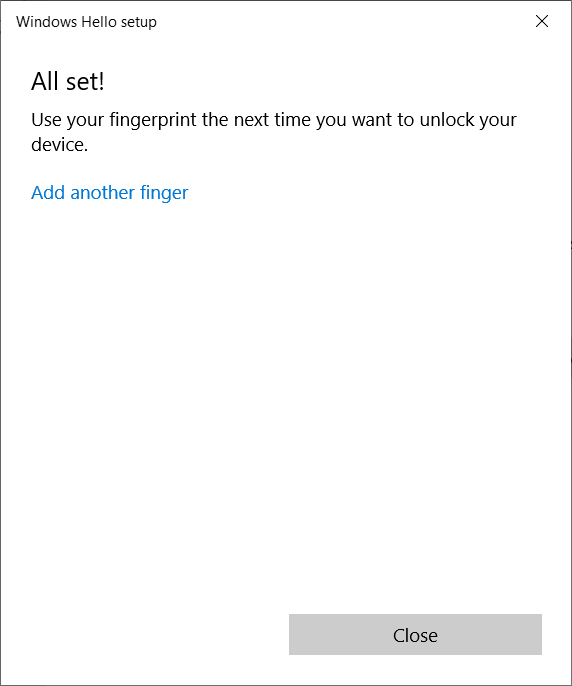
Your fingerprint is now recorded
TIP: If you haven’t set up a PIN for accessing Windows 10, on this last screen, Windows 10 encourages you to create one to use when fingerprint recognition is unavailable.
To test things out, you can sign out from Windows 10 and log in again by pressing on the fingerprint reader with the same finger you’ve just registered.
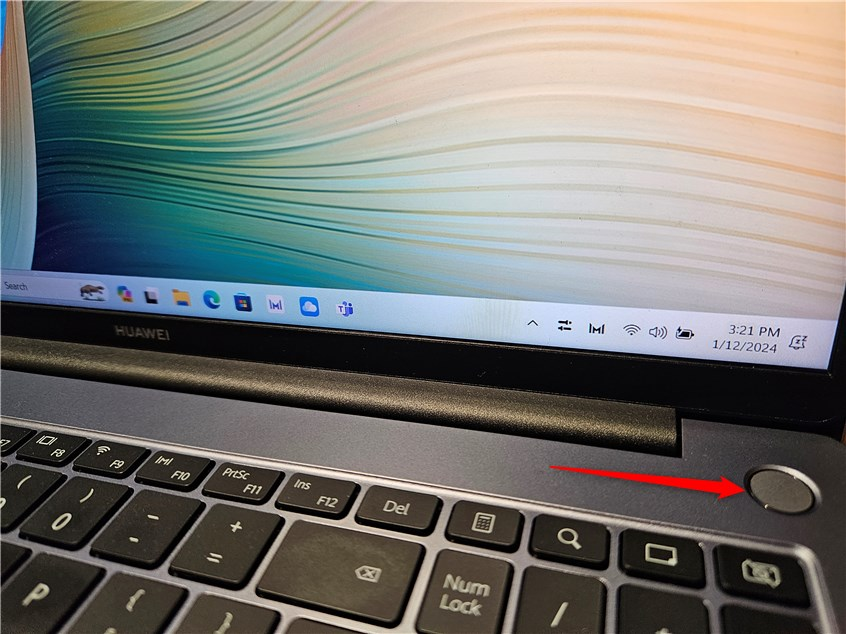
Press the fingerprint reader to authenticate
How do I remove fingerprint authentication from Windows 10?
If you no longer want to use the fingerprint reader on your Windows 10 laptop, you can turn off fingerprint authentication. To do that, open Settings and go to Accounts > Sign-in options. Then, click or tap Windows Hello Fingerprint to expand it and press Remove.
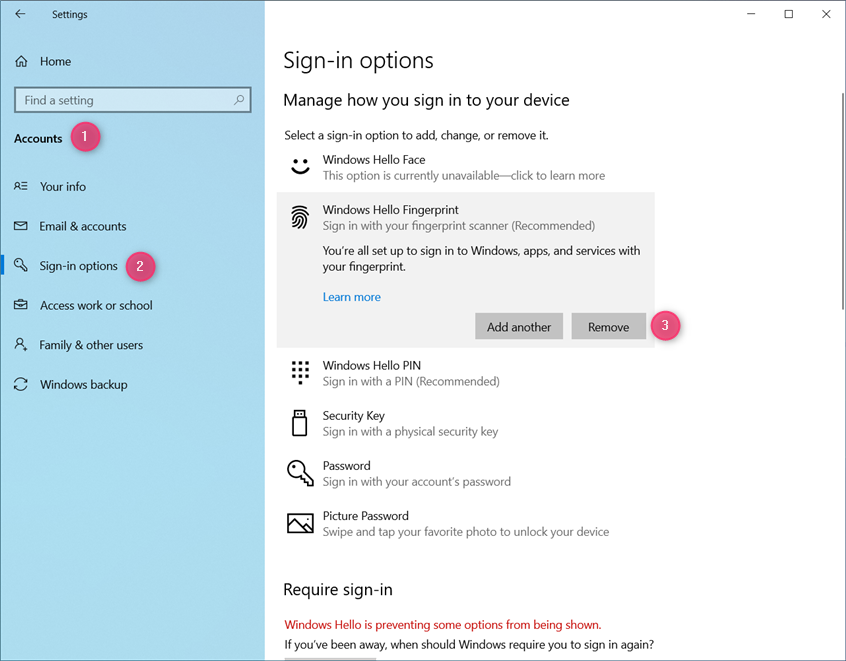
Disabling Windows Hello Fingerprint
The fingerprint lock is removed immediately from your Windows 10 laptop without any confirmation being required. Windows 10 also removes the information stored on your laptop about your fingerprint. Suppose you want to use Windows Hello Fingerprint again. In that case, your fingerprint information is now reset, so you must go through the initial setup process again, just like in the first section of this tutorial.
Is Windows Hello Fingerprint available on your Windows 10 computer?
While I like using fingerprint authentication in Windows 10, unfortunately, this is not available on most laptops and desktop computers. Few computer vendors provide one, and buying a separate fingerprint reader is costly. Therefore, before closing this tutorial, I’m curious whether Windows 10 says that “This option is currently unavailable” when you try to set up Windows Hello Fingerprint or if it works well for you. Comment using the options below, and let me know.


 29.01.2024
