Windows 10 May Update introduces a new feature called the Light Mode. What it does is change the appearance of certain Windows interface elements from black and other colors to white. In other words, the Light Mode whitens your Windows 10. This mode looks surprisingly good, and many users may prefer it instead of the Dark Mode or the default Windows 10 theme. If you want to learn more about what the Light Mode for Windows 10 is, what effects it has on the user interface, and how to turn it on or off, read on:
What is the Light Mode for Windows 10?
The Light Mode is a new feature found in the latest versions of Windows 10, starting with the May 2019 Update. It allows you to modify the appearance of your Windows 10 interface and some of its apps, by changing the primary color to white.
What changes are made when you enable Light Mode?
In Windows 10, when you enable the Light Mode, most of the default apps found in the operating system change their default appearance to white. The most obvious changes are these:
- The background used in apps turns white or gray
- The background color used on menus turns to white
- The default black text displayed in apps turns to gray or black
Which apps support Light Mode in Windows 10?
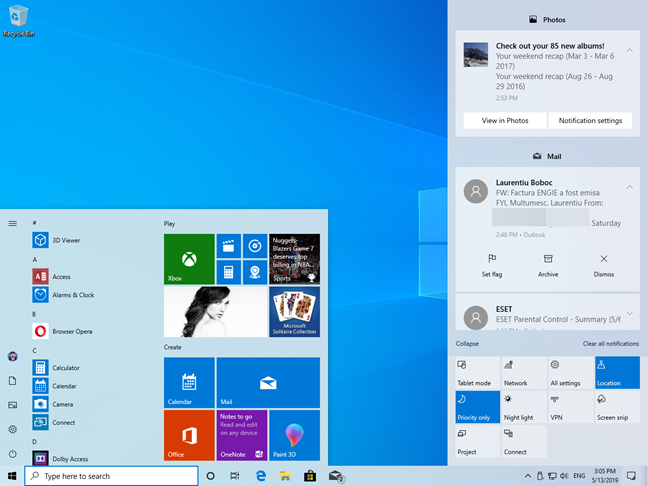
The first user interface elements that look a lot different when using the Light Mode are the taskbar, the Start Menu, and the Action Center from Windows 10. See how they look, in the screenshot below:
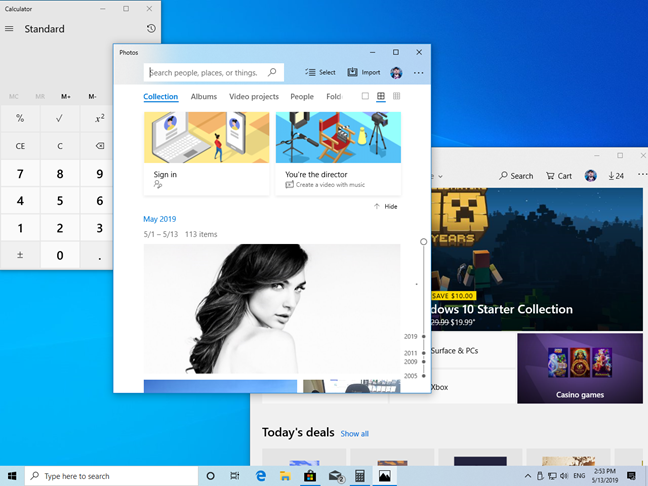
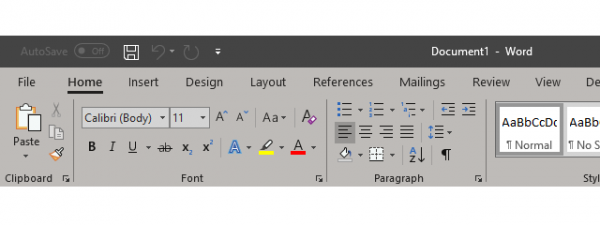
The Light Mode works for many Microsoft apps found in Windows 10, such as Mail and Calendar, Microsoft Store, Photos, Calculator and so on. Here is a quick preview of how such apps look when using the Light theme:
Microsoft Edge does not change, because the default theme used by this web browser is Light Mode. One weird problem is that Cortana keeps using the Dark theme, even when you enable the Light Mode in Windows 10.
How to enable the Light Mode in Windows 10
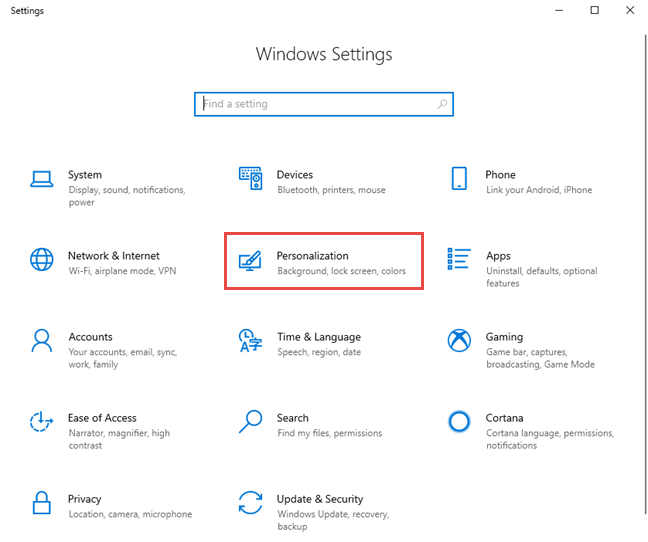
Open the Settings app in Windows 10. The fastest way is to either click/tap on its button from the Start Menu or to press Windows +I on the keyboard. In the Settings app, click or tap Personalization.
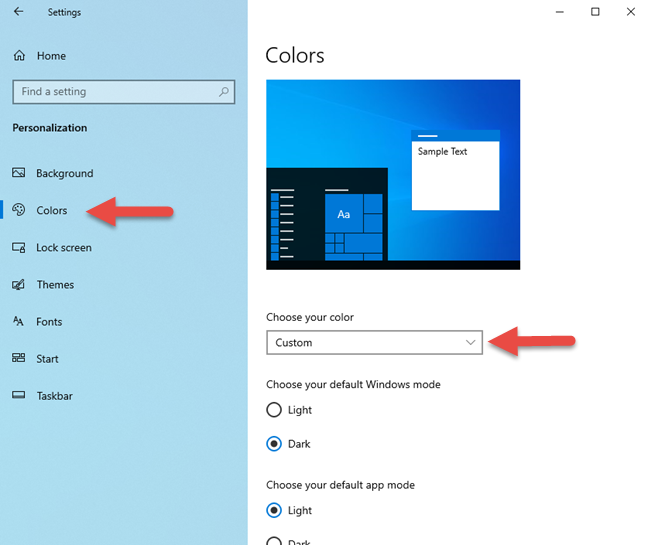
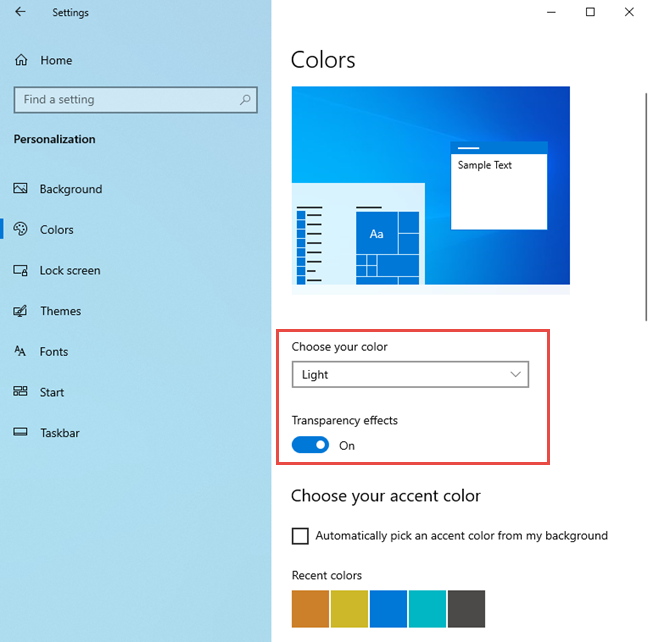
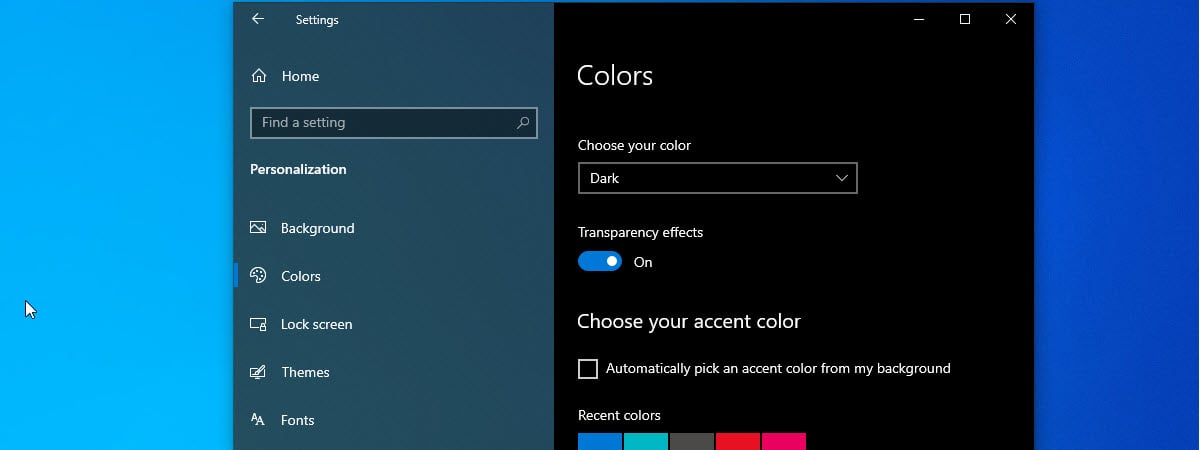
On the left side of the window, select Colors. On the right, find the drop-down list for "Choose your color."
Click or tap on "Choose your color" and then select Light from the list.
You can see that the Light theme is applied because the taskbar instantly changes its appearance from Dark to Light. You can also set whether you want Transparency effects by enabling or disabling the switch under the drop-down list where you selected Light.
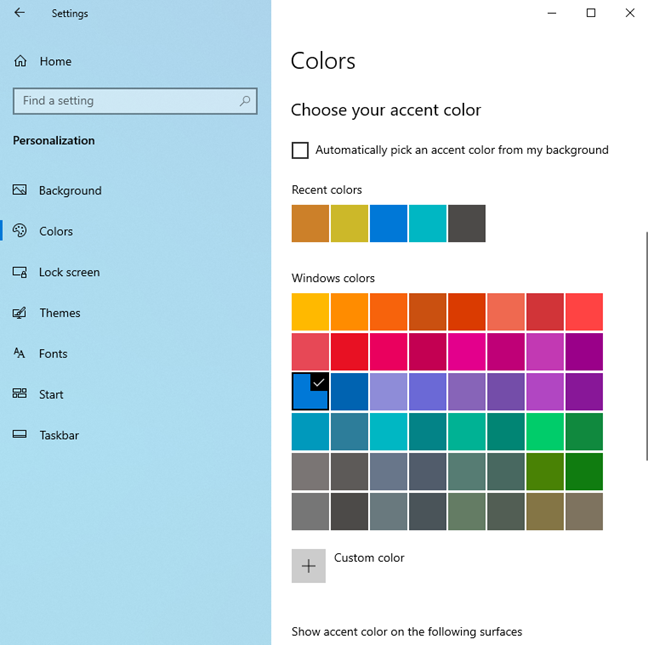
If you scroll down, you find options for choosing the accent color, for user interface elements like buttons, switches, title bars, and window borders. Change the accent color too, if you wish, with something that looks good on white.
You can now close the Settings app. The Light Mode is enabled, and working according to your settings.
How to disable the Light Mode in Windows 10
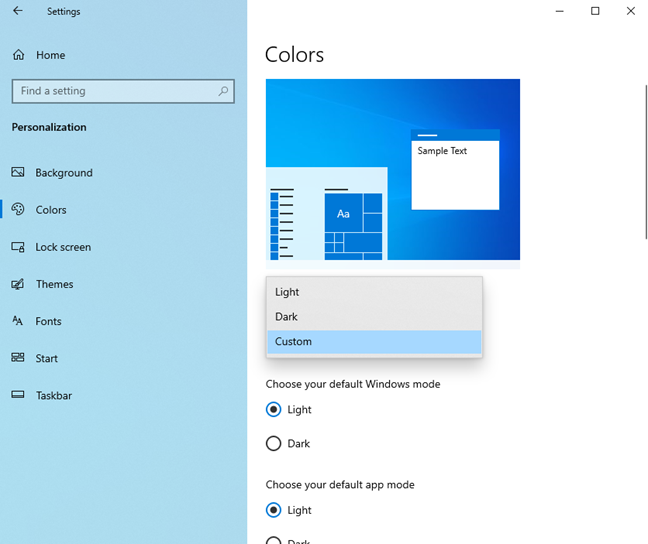
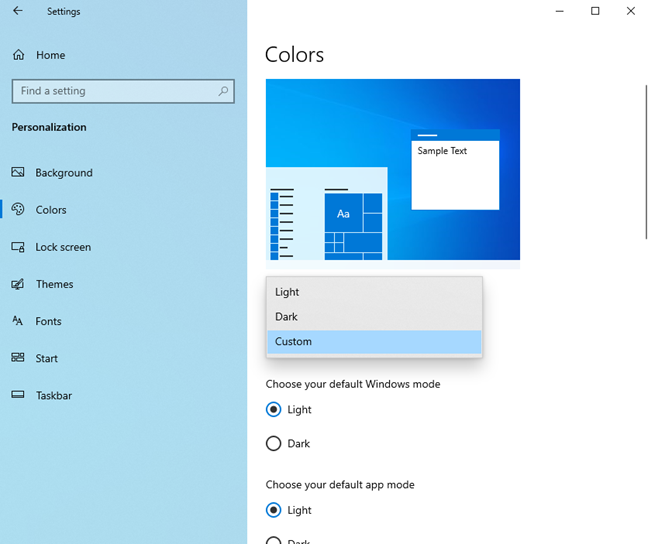
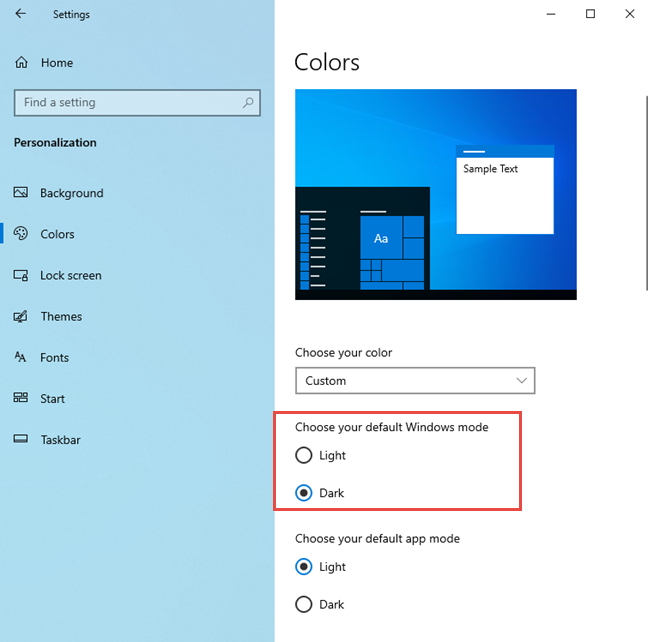
To disable the Light Mode, follow the same steps from the previous section of this tutorial. In the "Choose your color" drop-down list, choose Custom.
Then, select Dark in the section asking you to "Choose your default Windows mode." The default theme for Windows 10 is a mix between Dark Mode for Windows 10, and Light Mode for apps.
Then, set the transparency effects and the accent color based on your preferences. When done, close Settings and the Light Mode is disabled.
Do you prefer to use Windows 10 with the Light Mode on?
The Light Mode can be an excellent way to use Windows 10. Some people might even think it is prettier than the Dark Mode. Try both the Light Mode and the Dark Mode, and then tell us which one you like best, in a comment below.


 15.05.2019