08.01.2024
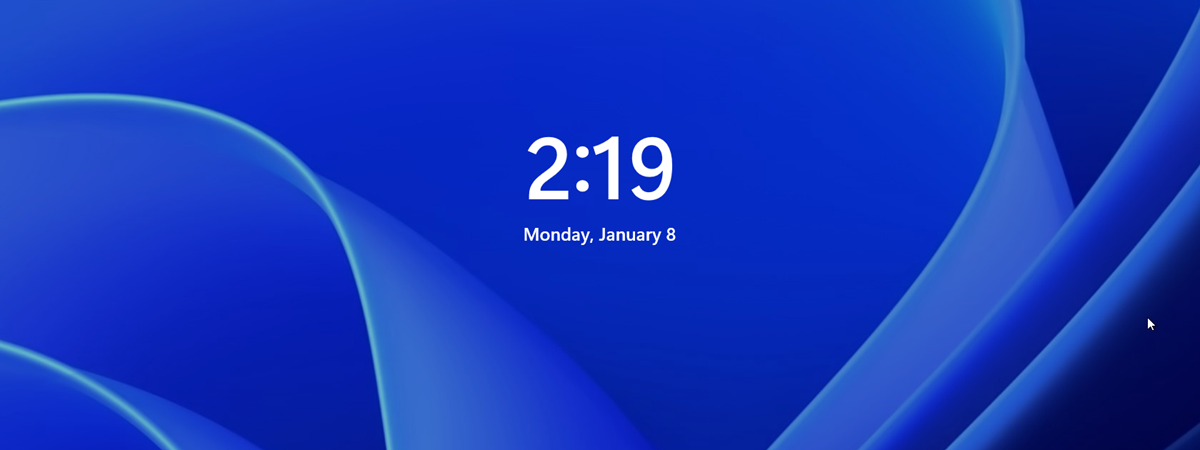
Did you install an English version of Windows on your computer, only to change the default display language to another language afterward? Like maybe Spanish, French, German, or any other language you prefer using? If you did that, you probably found out the hard way that although the display language is the one you want, the language your computer uses on the sign-in/lock screen is still the one that your Windows version uses by default. Read this tutorial if you want to find out how to make Windows 11 and Windows 10 use the same display language everywhere, both on the desktop and on the lock screen or the sign-in screen:
What happens when you change the language for the lock screen in Windows
If you want to enhance your experience with your Windows 11 or Windows 10 computer, you might want to change the language for the Lock Screen. The sign-in or lock screen is the first thing you see when you turn on your PC, and it usually displays a picture with the date and time, but it can also show some notifications like the weather or the number of emails you’ve got in your inbox. However, if you’ve changed the display language of your Windows computer, the lock screen might still be displayed in the original language you had.
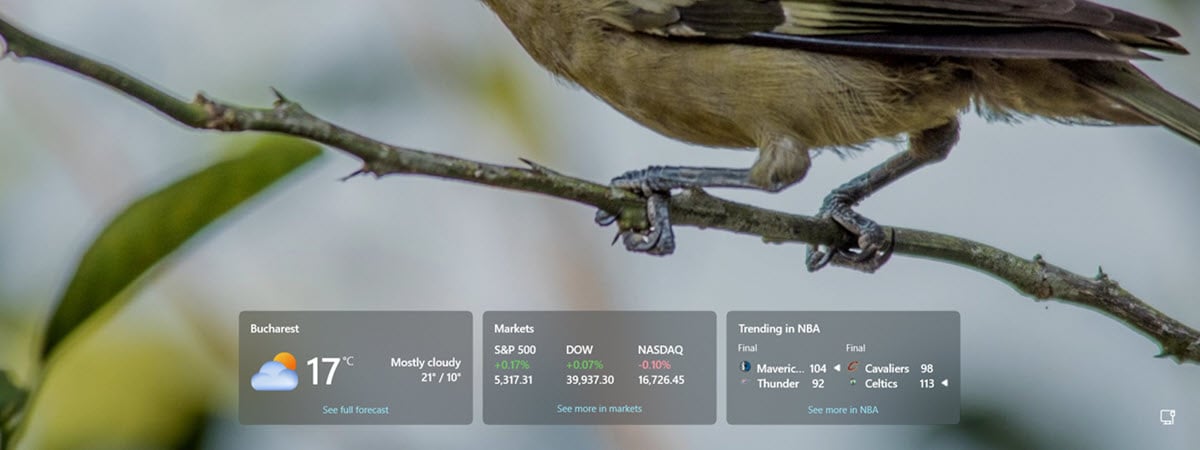
The lock screen in Windows 11 using the default language
For instance, you may have Spanish set as your Windows 11 or Windows 10 display language, but your lock screen might still be showing information in English. And in that case, you’ll probably want to change the language for the lock screen, too, so that you’ll have a more unified experience across the whole operating system on your PC.
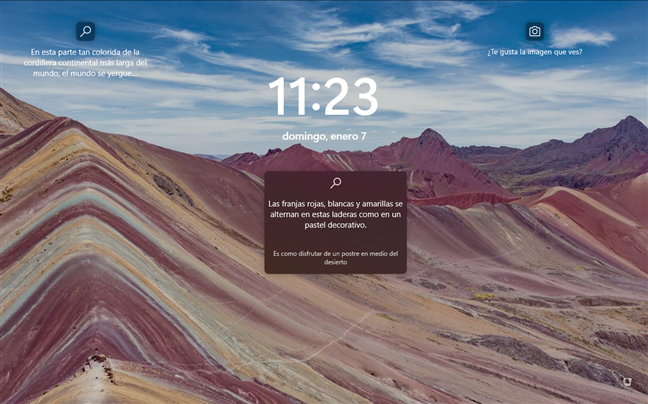
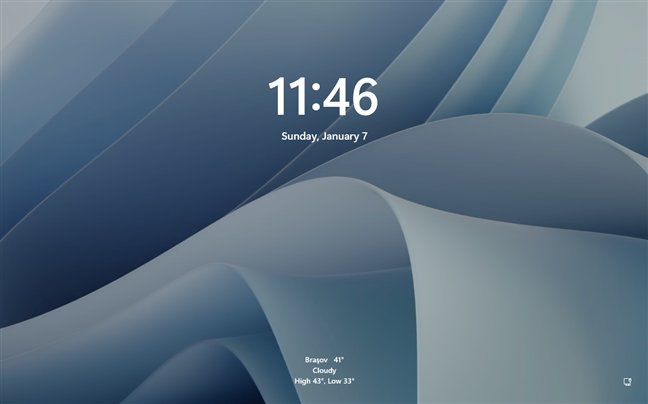
The lock screen in Windows 11 using a different language
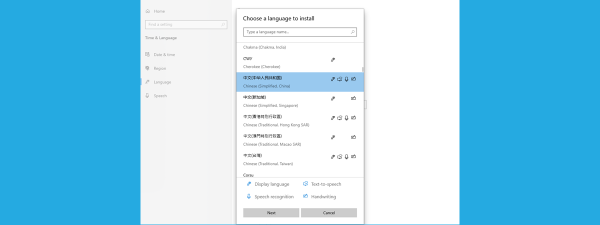
If this is something you’d like, follow the next steps to make your sign-in/lock screen use any language you want:
Step 1. Open the Region Administrative settings in Windows
In order to change the language used by your Windows computer on the sign-in/lock screen, you’ll have to open a panel called Region. Here’s how to do that in both Windows 11 and Windows 10:
1.1. How to open Windows 11’s Region Administrative settings
The fastest way to access the Region settings panel in Windows 11 is to use the search box from the taskbar. Enter the word region in it and then click or tap on the Region (Control panel) search result.

Open Region in Windows 11 using search
If you prefer, there are other ways to get to the Region panel. For example, you can open the Settings app, select Time & language in the left sidebar, access Language & region on the right panel, and click or tap the Administrative language settings in the Related settings section at the bottom of the right area of the window.
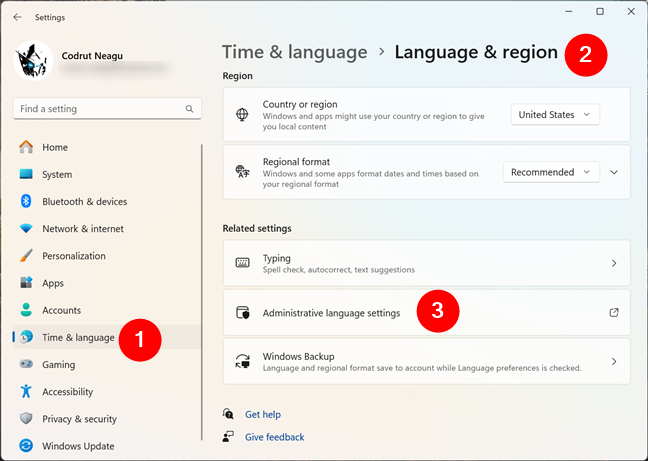
Open Administrative language settings in Windows 11
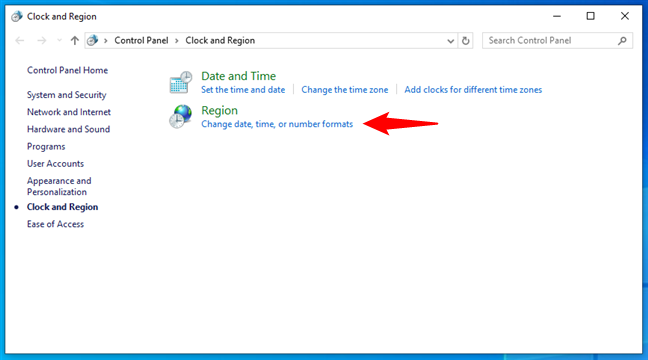
Moreover, you can also open the Region settings by accessing the Control Panel and clicking or tapping the Change date, time, or number formats link under Clock and Region.
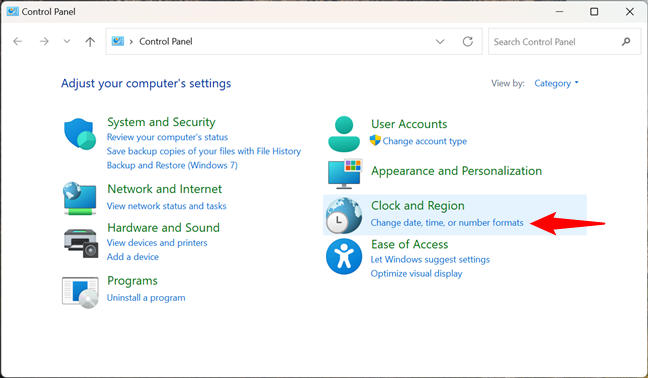
Change date, time, or number formats
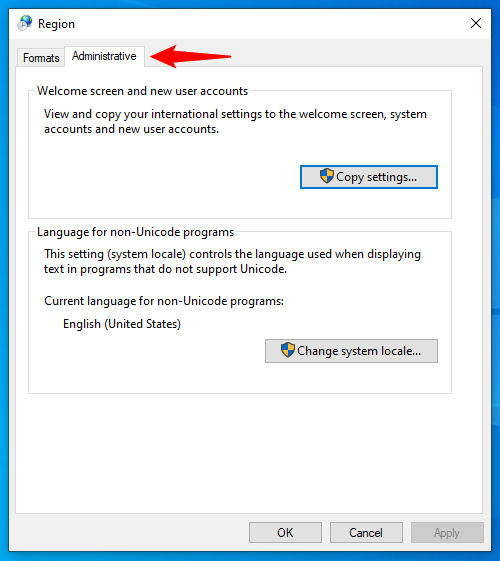
Either way, this opens the panel called Region. In it, select the Administrative tab, like in the screenshot below.
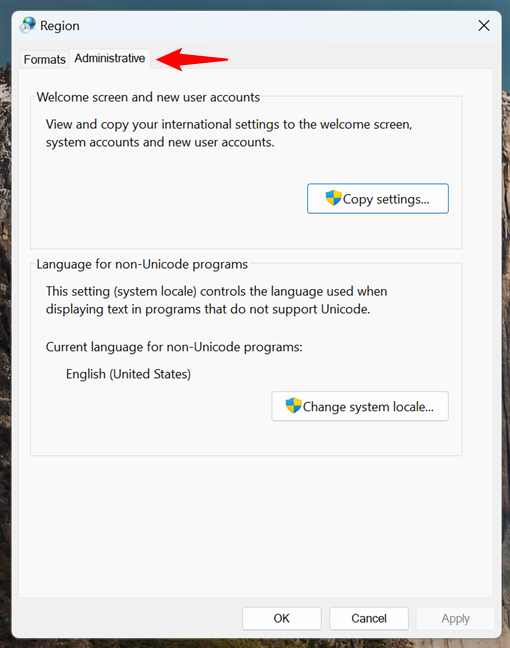
The Administrative Region settings in Windows 11
Now that you’ve found the Region Administrative settings, move on to the second step in this guide.
TIP: You might also be interested in learning how to change the Windows 11 Lock Screen wallpapers.
1.2. How to open Windows 10’s Region Administrative settings
To open the Region settings panel in Windows 10, you can use the taskbar search box. Type region in the search field and click or tap the Region settings result.
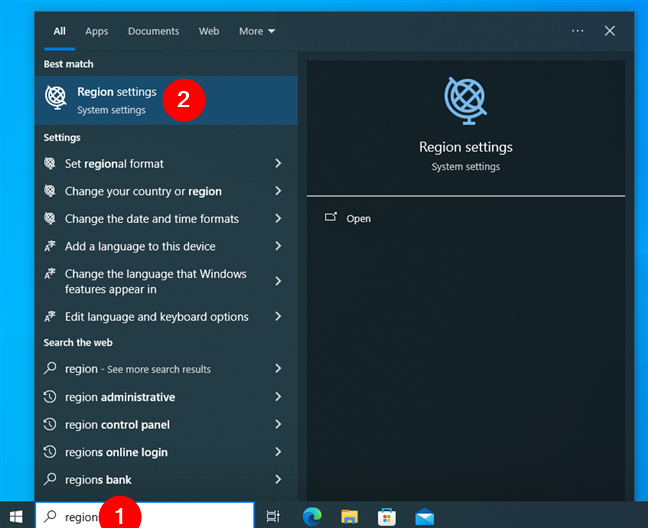
Open Region settings in Windows 10 using search
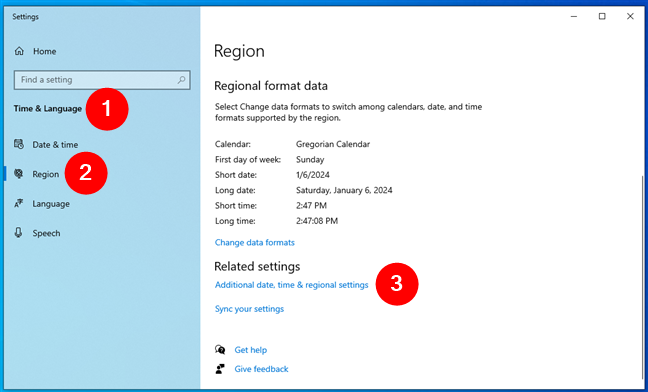
This launches the Settings app and takes you to the Region page in the Time & Language category. Here, click or tap the Additional date, time & regional settings link in the Related settings section on the right-hand panel.
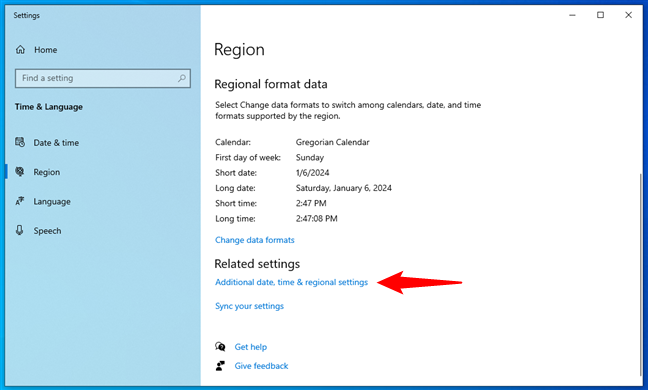
Additional date, time & regional settings
The link opens the Control Panel and automatically takes you to its Clock and Region section. Here, click or tap Change date, time, or number formats under Region.
Change date, time, or number formats in Windows 10
Finally, the Region panel opens: in it, select the Administrative tab at the top.
Administrative Region settings in Windows 10
Note that you can also follow the previous steps manually without using the search in Windows 10. For example, you can choose to go straight to the Control Panel, access Clock and Region, and click or tap the Change date, time, or number formats link.
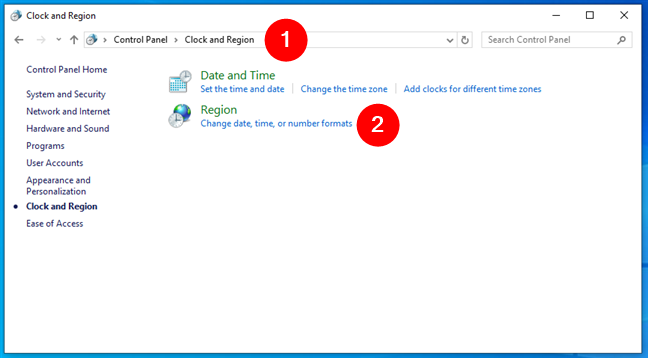
Open Change date, time, or number formats from Windows 10's Control Panel
Or, you could open Settings, navigate to Time & Language > Region, click or tap the Additional date, time & regional settings, and then take the last steps in the Control Panel.
Open Additional date, time & regional settings in Windows 10
Either way, once you have the Administrative tab selected in the Region panel, do the next steps to translate the Windows sign-in/lock screen into your local language:
Step 2. Change the default language used on the Windows sign-in/lock screen
In the Administrative tab of the Region window, the first section of settings is called Welcome screen and new user accounts. It briefly explains that you can use it to “View and copy your international settings to the welcome screen, system account and new user accounts.” Although it’s not exactly precise, the “welcome screen” is just another name for the sign-in screen or the lock screen, which is what you’re looking for.
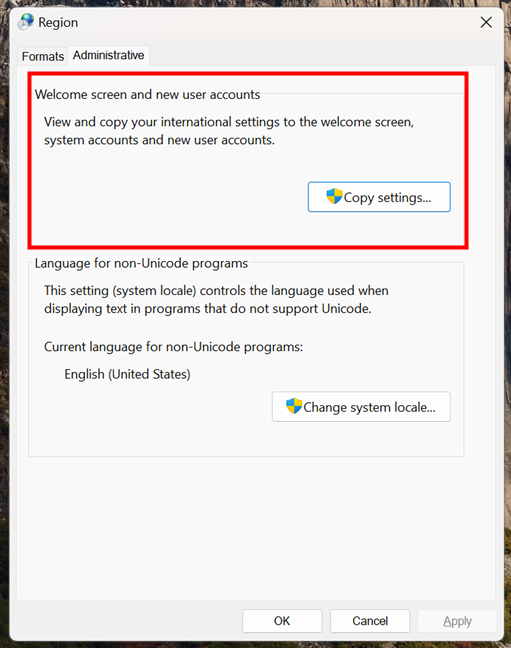
Welcome screen and new user accounts
This section includes a single button named Copy settings. Click or tap on it.
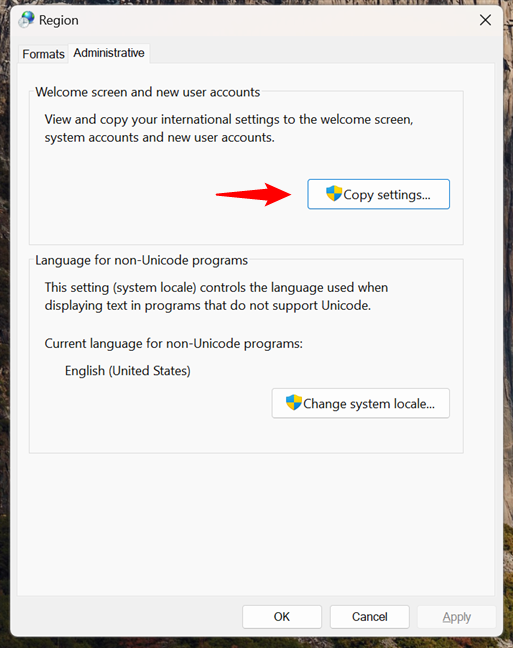
Click Copy settings
A dialog box called “Welcome screen and new user accounts settings” opens. In it, you can see the display language used by your user account, as well as the display language your Windows PC uses for the “Welcome screen”.
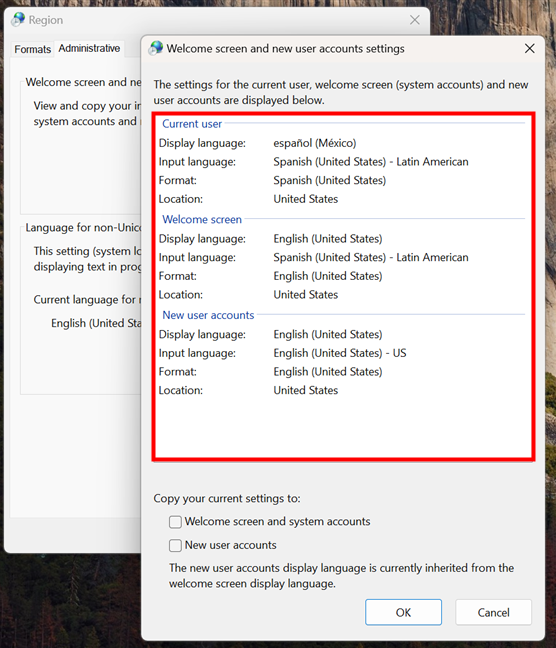
The settings for the current user, welcome screen, and new user accounts
To match the sign-in/lock screen language with that used for your user account, check the “Copy your current settings to: Welcome screen and system accounts” option. You will find it at the bottom of the window.
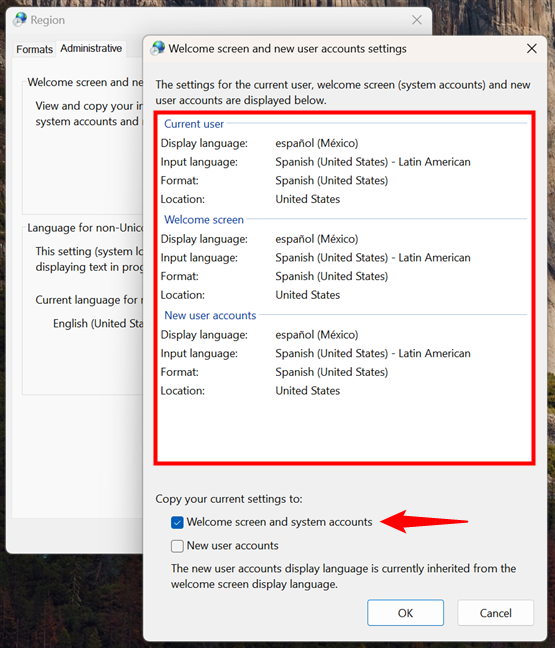
Check the Welcome screen and system accounts option
After you click or tap on the OK button, Windows asks you to reboot your computer or device, so that it can save your new preferences.
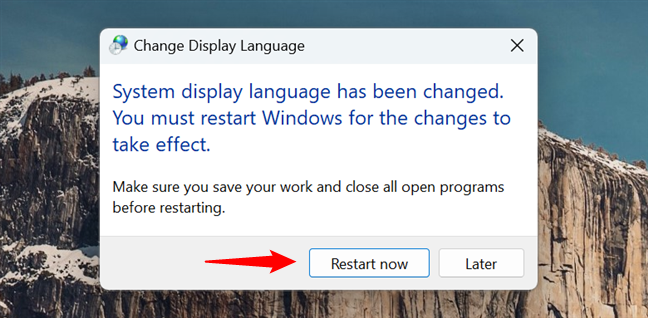
Restart your Windows computer to change the lock screen language
Do that, and when you get to the sign-in screen, you’ll see that it now uses the same language as the one used by Windows on your desktop.
TIP: Do you like the wallpapers shown on your Lock Screen? Here’s how to find the location of Windows 10 wallpapers for the Desktop & Lock Screen.
Did you change your lock screen language?
Matching the display language you use on your desktop to the one shown by Windows on the sign-in/lock screen might not seem like much, but it’s something that helps you customize your PC to use the same display language everywhere. And, at least for some of us, it’s pretty important to see our mother tongue being used everywhere on our Windows computers. I hope that you found this guide useful. If you have any questions or issues, ask using the comments form below.