The Windows Registry is one of the most critical tools in Windows 10. As it can profoundly alter how your operating system works (or doesn’t work, for that matter), letting every user on your PC access it is not a good idea. If you don’t want others to be able to change keys or values using the Registry Editor, you should consider disabling access to the Windows Registry. Here are three different ways to do that:
1. How to disable Windows Registry on Windows 10 using Registry Editor
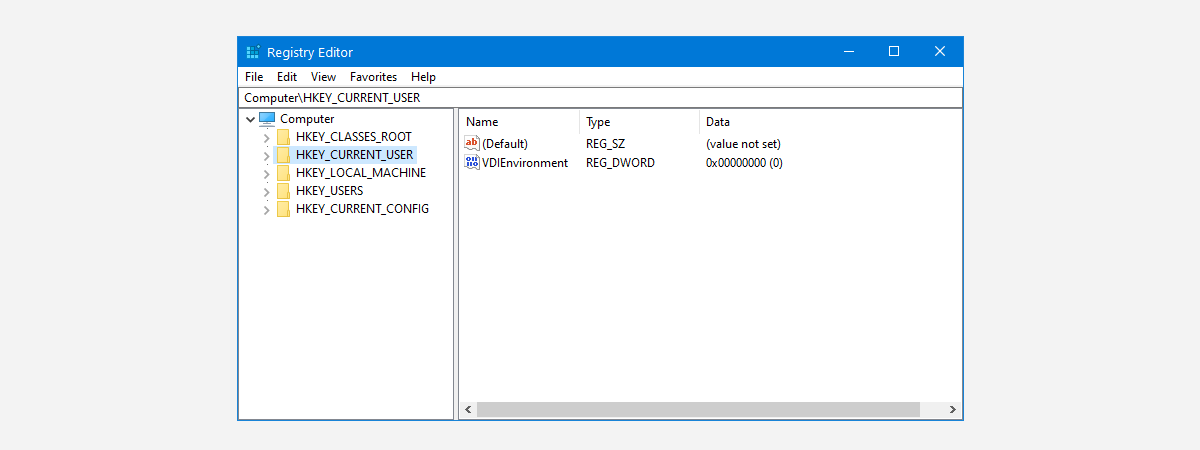
Although it might sound counterintuitive, one of the best ways to disable the Registry Editor in Windows 10 is to use the Registry Editor itself. Open it: a fast way to do that is to use the search field on your taskbar to type regedit, and then click or tap on the Registry Editor result.
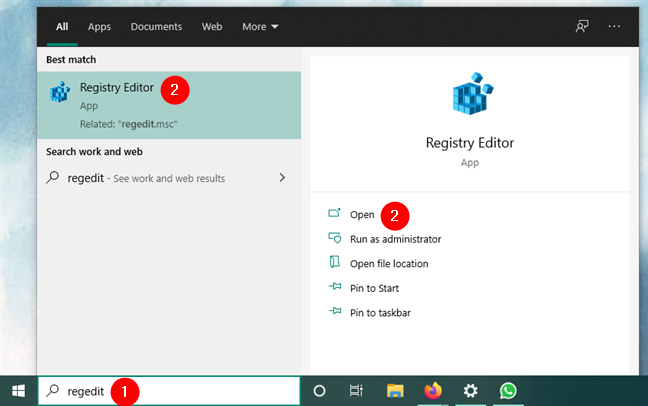
Opening Registry Editor (regedit) using search on Windows 10
In Registry Editor, navigate to the following location: “Computer\HKEY_CURRENT_USER\SOFTWARE\Microsoft\Windows\CurrentVersion\Policies\System.”
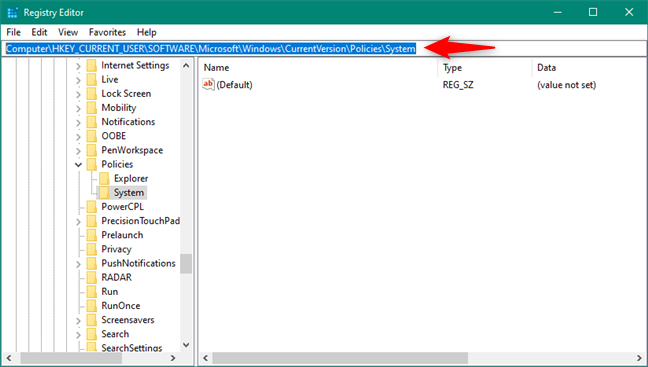
Computer\HKEY_CURRENT_USER\SOFTWARE\Microsoft\Windows\CurrentVersion\Policies\System
If the System key doesn’t exist, create it yourself. Right-click on the Policies key, select New on the contextual menu, and then click or tap on Key.
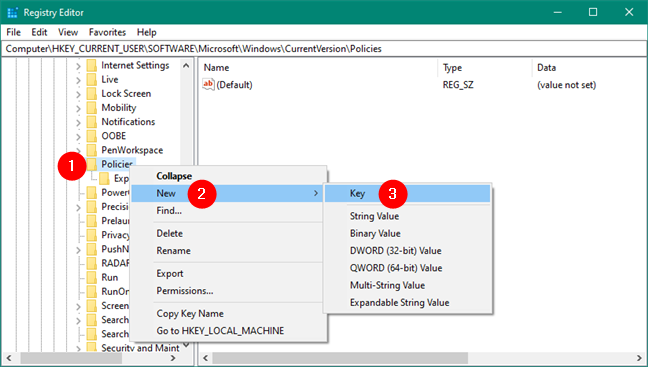
Creating a new key in Windows Registry
Name the new registry key as System.
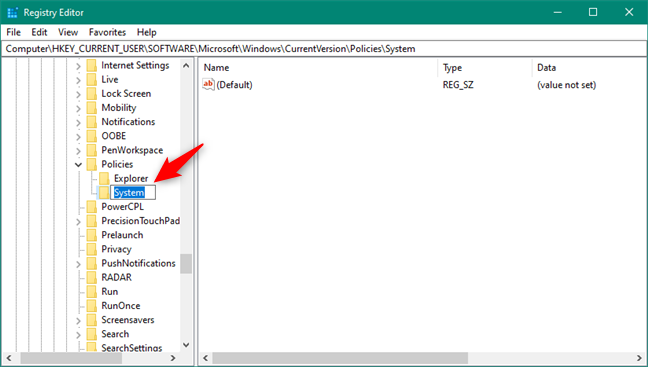
Naming the new key System
Next, on the right panel from the Registry Editor, right-click on an empty space and use the contextual menu to create a New DWORD (32-bit) Value inside the new System folder.
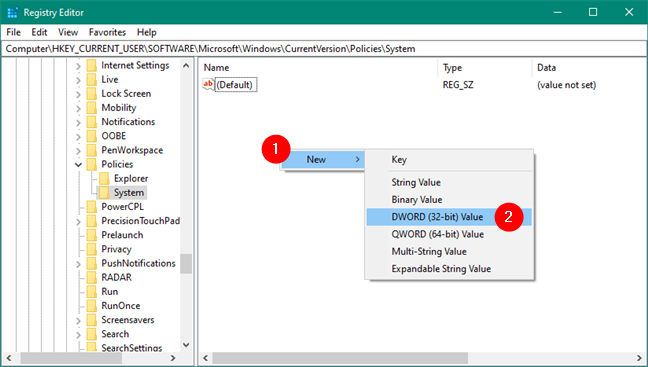
Creating a new DWORD (32-bit) Value in Registry Editor
Name the new value DisableRegistryTools.
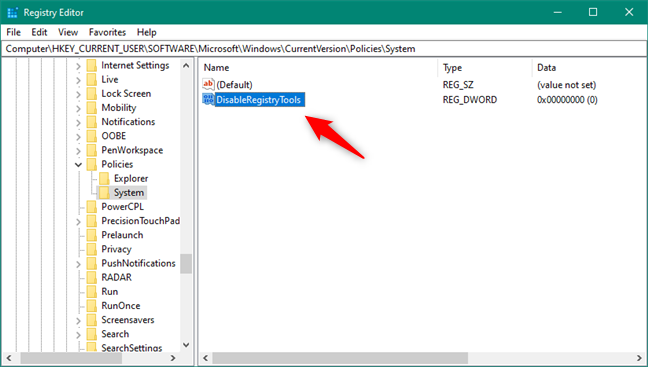
Naming the new value DisableRegistryTools
To disable access to the Registry Editor, double-click on DisableRegistryTools and set its value to 1.
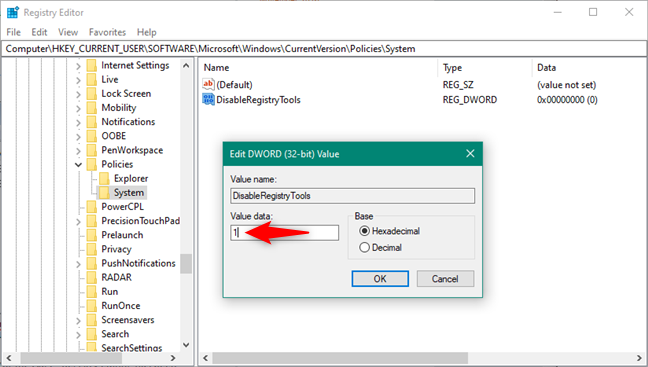
Setting the value DisableRegistryTools to 1
IMPORTANT: This method disables Registry Editor only for the current user account. If you want to enable Registry Editor back for that user, change the DisableRegistryTools value to 0 (zero), or simply delete the value. Keep in mind that if you disabled Windows Registry for an administrator, you have to use another administrator account to re-enable Registry Editor for that admin. If you don’t have two or more administrators configured on your Windows 10 PC, you can enable the Registry Editor using one of the other methods in this guide.
2. How to disable Windows Registry on Windows 10 using group policy
If you want to disable the Registry Editor, you can also do it using the Local Group Policy Editor. However, know that this tool is only available in Windows 10 Pro and Enterprise. If you’re using Windows 10 Home, follow the instructions from any of the other sections of this guide.
Start by opening the Local Group Policy Editor. A quick way to do it is to press Win + R on your keyboard to fire up the Run window, type gpedit.msc, and press OK or the Enter key.
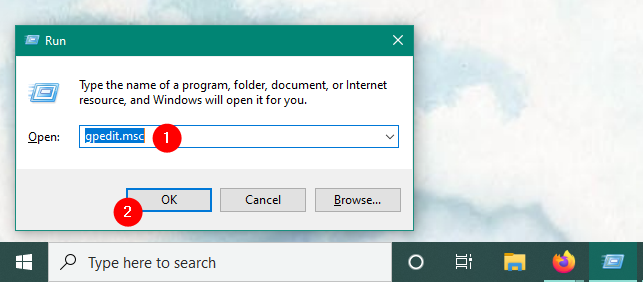
Running gpedit.msc to open Local Group Policy Editor
In the Local Group Policy Editor, use the navigation pane to go to “User Configuration -> Administrative Templates -> System.” Then, double-click or double-tap on the “Prevent access to registry editing tools” setting from the right panel.
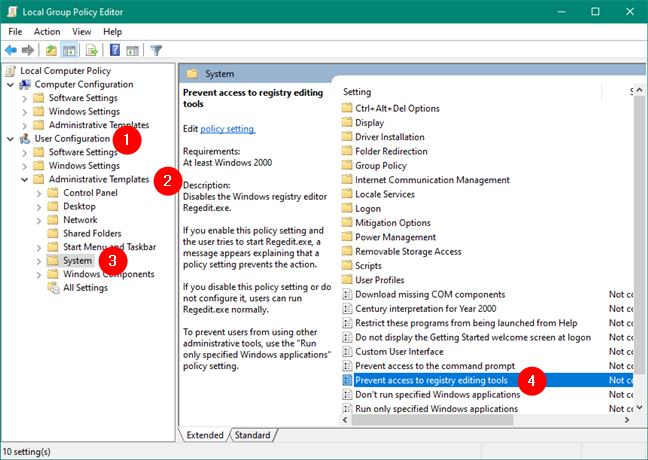
User Configuration -> Administrative Templates -> System
The previous action opens a window also called “Prevent access to registry editing tools.” In it, select the Enabled setting. Then, click or tap on Apply or OK.
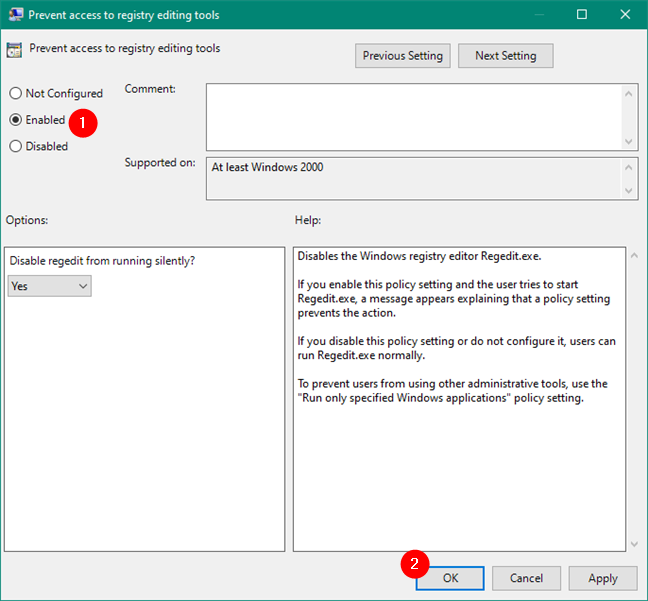
Enable Prevent access to registry editing tools
The Registry Editor is now disabled. If a user tries to open it, the only thing he or she gets is a message that says: “Registry Editor has been disabled by your administrator.”
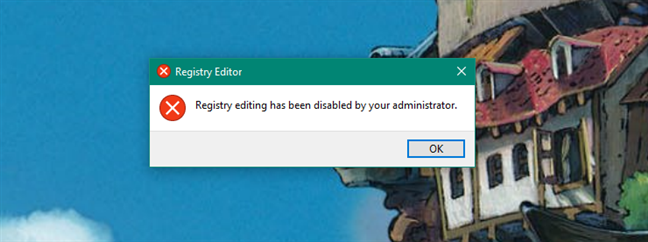
Registry Editor has been disabled by your administrator
NOTE: If you choose to disable the Registry Editor using the Local Group Policy Editor, nobody can access it afterward. That means all standard users and all the administrators configured on your Windows 10 PC. To re-enable the Registry Editor, you have to follow the same steps and set the policy to either Disabled or Not Configured.
3. How to disable Windows Registry on Windows 10 using our DisableRegistryEditor app
Another easy way to disable the Registry Editor in Windows 10 is to use a tool that we created for you, called DisableRegistryEditor.exe. Download it using this link or the one at the end of this section. Save it somewhere on your Windows 10 PC.

The DisableRegistryEditor.exe file made by Digital Citizen
Note that the SmartScreen filter might warn you that it comes from an untrusted publisher. You get this notification because there aren’t that many people downloading and using it. Trust us that it is safe and doesn’t harm your computer. It is only a PowerShell script saved as an executable file with a simple graphical user interface. To use this tool, you have to click or tap on “More info” and then select “Run anyway.”
![Choosing to Run [DisableRegistryEditor.exe] anyway](https://www.digitalcitizen.life/wp-content/uploads/2009/10/disable_registry-12.png)
Choosing to Run [DisableRegistryEditor.exe] anyway
Our tool requires administrative privileges to work, so when Windows 10’s UAC asks you if you want to run it, choose Yes.
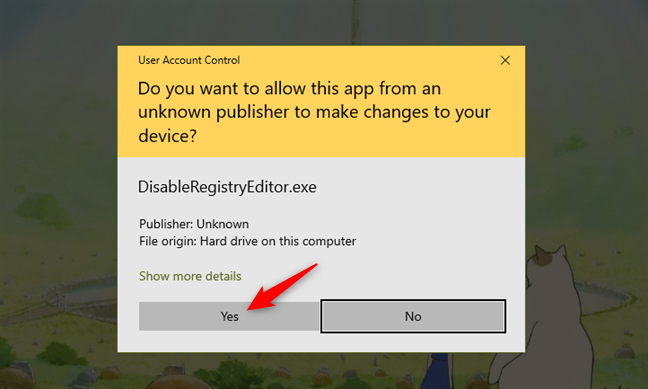
Allow DisableRegistryEditor.exe to run, as admin
When DisableRegistryEditor opens, you should see a small window with two buttons. To block access to the Registry Editor on your Windows 10 PC, click or tap the “Disable Registry Editor” button.
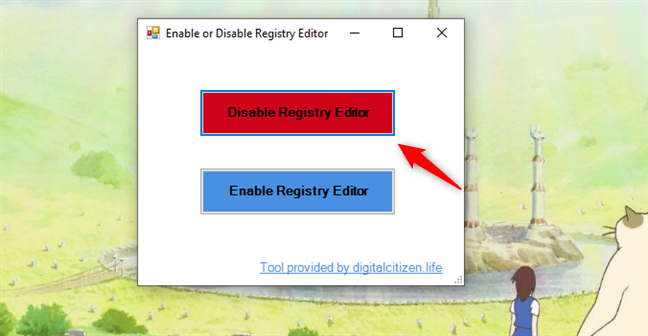
Disable Registry Editor
Once the setting is applied, you get to see a message informing you that “Registry Editor has been disabled.”
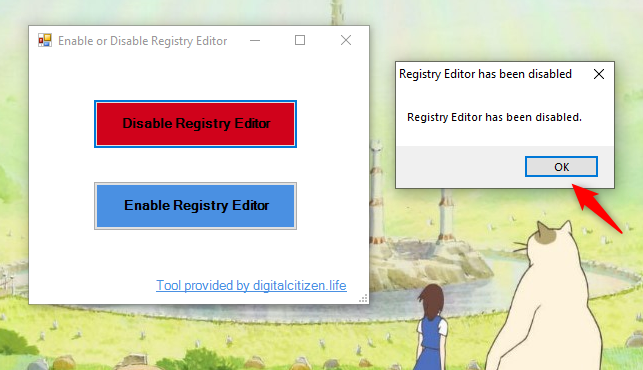
Registry Editor has been disabled
To allow access to the Registry Editor, click or tap the “Enable Registry Editor” button.
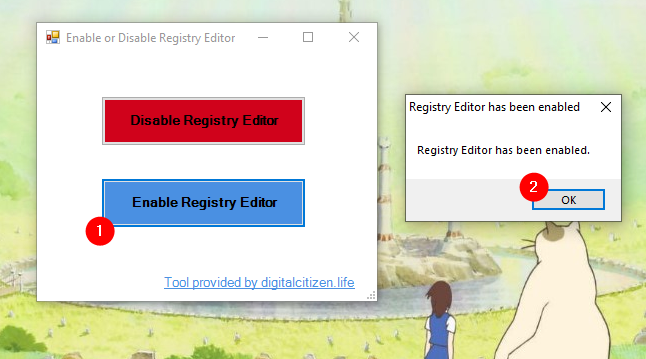
Enable Registry Editor
NOTE: We provide this tool as-is, with no warranties. If you encounter any issues with the app, let us know via the comments section from the bottom of this article.
Download: DisableRegistryEditor
Did you disable Windows Registry on your Windows 10 PC?
Now you know how to disable Registry Editor and deny users access to Windows Registry. Why did you do it? Are you sharing your Windows 10 computer or device with others and want to keep it safe? Do you have other reasons? Let us know in the comments section below.


 03.02.2021