When your Windows 10 machine breaks and refuses to work, System Restore is one of those lifesaving tools that makes you thankful they exist. That's because you can use it to repair your PC if you've created a system restore point before it started to misbehave. Did you create a system restore point? If you didn't, would you like to learn how to create a restore point in Windows 10? Read on and find out:
1. How to create a restore point in Windows 10 from System Properties
The regular pathway for creating a restore point in Windows 10 is via the System Protection tab from the System Properties window. To get there, open System Restore and enable it on your drive(s) by following the steps from this tutorial: 2 ways to enable System Restore in Windows 10.
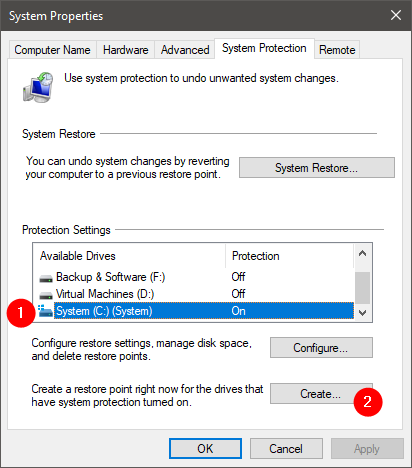
Once you've opened the System Properties window, in the System Protection tab, select your Windows 10 system drive, which usually is called C:. Then, to manually create a system restore point, click or tap the Create button.
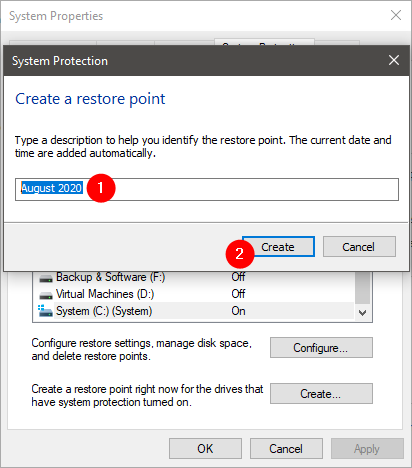
The previous action starts the System Protection wizard, which is designed to help you create a restore point for the selected drive. Type a meaningful description for the restore point, to help you figure out why you created it. Then, click or tap Create.
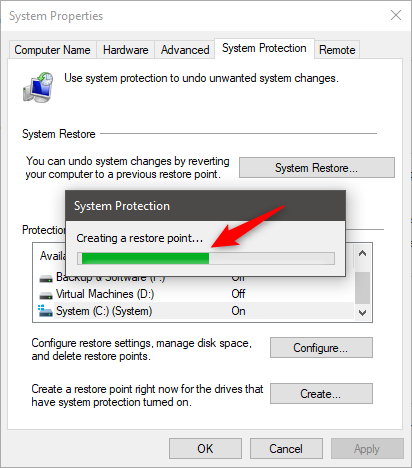
The System Protection wizard can take a while to create the restore point. Still, if you have a reasonably fast computer with a solid-state drive, it shouldn't take more than 20 or 30 seconds to create one.
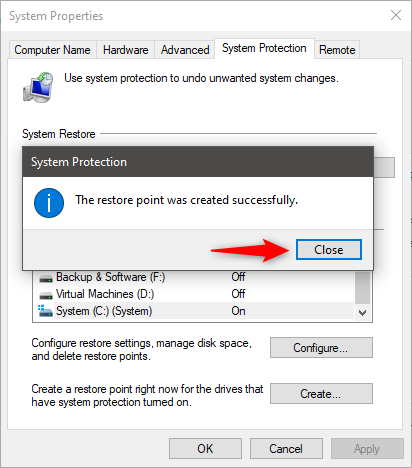
When the process is over, you get a notification that "The restore point was created successfully." Press Close.
Finally, close the System Properties window, and you are done.
2. How to create a restore point in Windows 10 from the Command Prompt
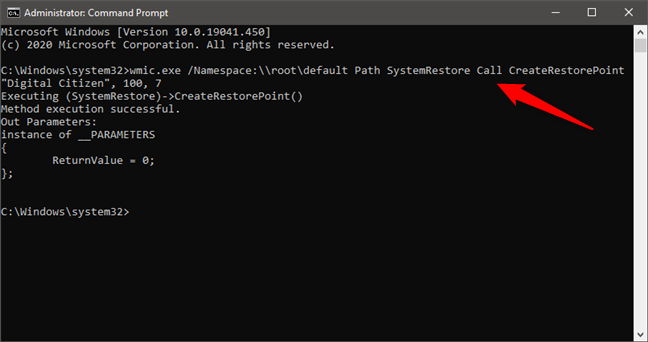
If you're a fan of the command line, know that you can quickly create system restore points from the Command Prompt also. Open a CMD window as an administrator and run this command: wmic.exe /Namespace:\rootdefault Path SystemRestore Call CreateRestorePoint "Restore Point Name", 100, 7
Change the "Restore Point Name" part of the command with any name you want to use for the restore point. If the output you get tells you "Method execution successful" and "ReturnValue = 0", it means that the system restore point was created successfully.
3. How to create a restore point in Windows 10 from PowerShell
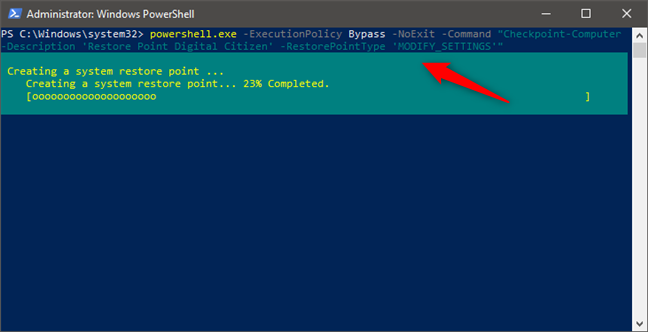
Similarly, you can also use PowerShell to create a restore point in Windows 10. Launch PowerShell as admin and run this command: powershell.exe -ExecutionPolicy Bypass -NoExit -Command "Checkpoint-Computer -Description 'Restore Point Name' -RestorePointType 'MODIFY_SETTINGS'". Note that you can set any name you prefer for your manually created restore point, by replacing the 'Restore Point Name' part of the command.
PowerShell shows a text-based progress bar that keeps you posted on how the restore point creation process goes. When it's done, you can close PowerShell.
What if Windows 10 doesn't let you create a system restore point?
In some situations, Windows 10 might tell you that you cannot create new restore points manually. That's because the operating system allows the creation of only one system restore point every 24 hours by default. However, you can change this setting and allow as many restore points creations as you want by creating a special key in the Windows Registry. Here's how:
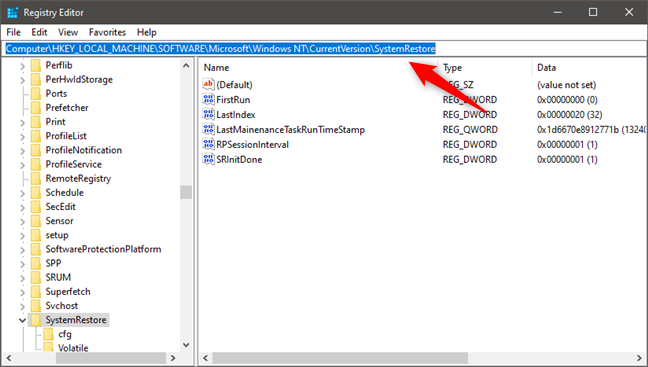
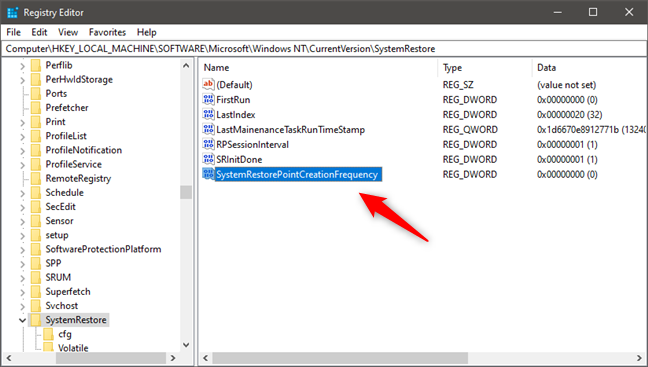
Open Windows Registry and navigate to this location: HKEY_LOCAL_MACHINESOFTWAREMicrosoftWindows NTCurrentVersionSystemRestore.
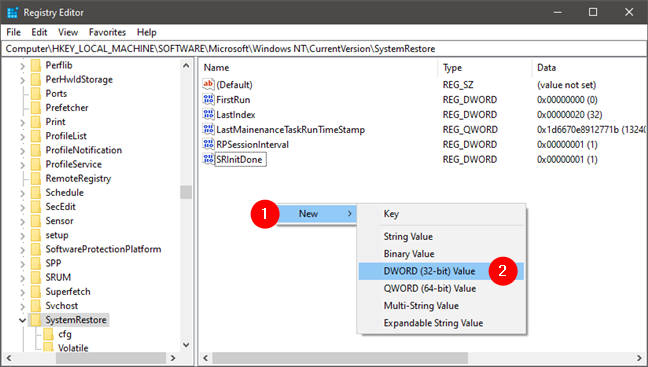
Right-click on an empty space from the right side pane, select New, and choose DWORD (32-bit) Value.
Type SystemRestorePointCreationFrequency as the name of the new DWORD (32-bit) Value and leave its value set to 0 (zero).
Close Windows Registry and try creating a restore point again. It should work now!
When should you create restore points?
A great time to create a restore point is immediately after you have installed Windows 10 on your computer or device. Only then should you go ahead and install your apps, drivers, change your settings, and so on. When you are done, if everything works correctly, you should make another restore point to use it later on, if you encounter problems.
Another good time to create manual restore points is before installing apps from untrusted sources (which you shouldn't be doing anyway), that might cause issues.
What happens when you do a system restore?
System Restore takes snapshots of some of the essential system files and the Windows Registry and saves them as Restore Points. Then, in case your computer breaks, you can use these restore points to take your PC back in time to when it used to work. Basically, when you do a system restore, system settings go back to their previous state, and file associations are returned to their previous settings. However, none of your personal files are deleted or lost.
If you need help to do a system restore, we explained all the steps in detail, here: 3 steps to restoring your Windows PC to a working state, with System Restore. Furthermore, if you can't log into Windows, and you need help to start System Restore and recover your computer, read this guide: Start System Restore when you cannot log into Windows (from Advanced Boot).
Do you manually create restore points in Windows 10?
System Restore is a safe way to backup and restore your computer's settings and applications, so that you can quickly fix problems that may arise in the future. It is highly recommended that you keep it turned on and that you manually create system restore points in critical moments. Are you using System Restore because you've seen its usefulness, or just because you like being prepared for worst-case scenarios?


 25.08.2020