Creating a file is a basic but important task that any computer user should know how to do. Especially as there are several different ways you can create new files in Windows, and most are quite easy and intuitive. Yes, some are visual and involve using only the operating system’s interface or your installed applications. Others rely on using commands that create files from the Terminal, in tools such as Command Prompt or PowerShell. Regardless of what you prefer, in this tutorial, you’ll learn a couple of different ways to create files in both Windows 10 and Windows 11. Without further ado, let’s begin:
1. Create a file on the desktop or using File Explorer
The easiest and most common way to create files in Windows is by using the right-click menu on the desktop or in File Explorer. Here are the steps you need to follow:
Go to the desktop and right-click or press and hold on an empty space. In the context menu displayed, click/tap or hover over New, then select the type of file you’d like to create.
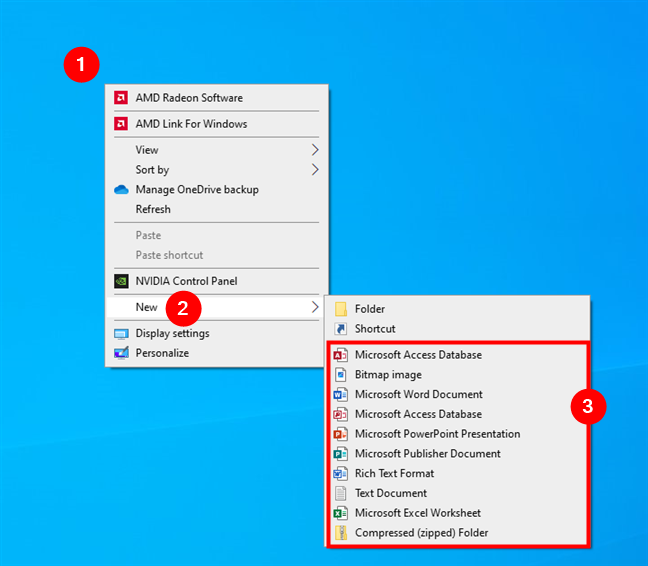
Right-click on the desktop, go to New, and choose the type of file to create
If you don’t want to create a file on the desktop, but rather in a folder on your computer, open File Explorer (Win + E) first. Then, navigate to the location where you want to create your file. For example, go to your user’s Documents folder. Right-click in the folder where you want to create a file, and either click/tap or hover over New. In the list of options displayed, select the type of file you want to create.
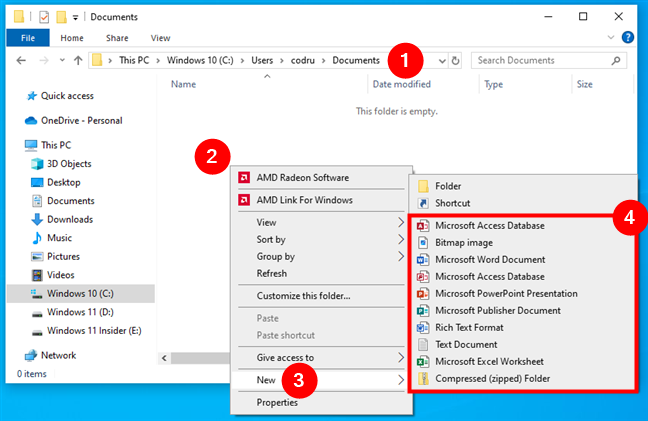
Follow the same steps to create a file in File Explorer
Depending on the software you have installed on your computer, the options you have can differ. However, they’ll usually include: Text Document (.txt), Bitmap image (.bmp), Microsoft Word Document (.docx), Microsoft Excel Spreadsheet (.xlsx), Microsoft PowerPoint Presentation (.pptx).
While in the previous screenshots you can see the options I have on my Windows 10 laptop, here’s what I get on my desktop PC running Windows 11:
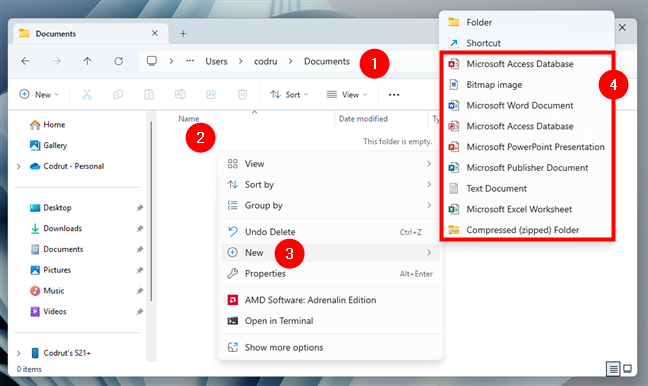
Right-click in an empty space, go to New, and choose the type of file to create
Once you select the file type, a new file or folder will appear with its name highlighted. Type a new name for the file and press Enter on your keyboard. This is what it looks like in the File Explorer of Windows 10:
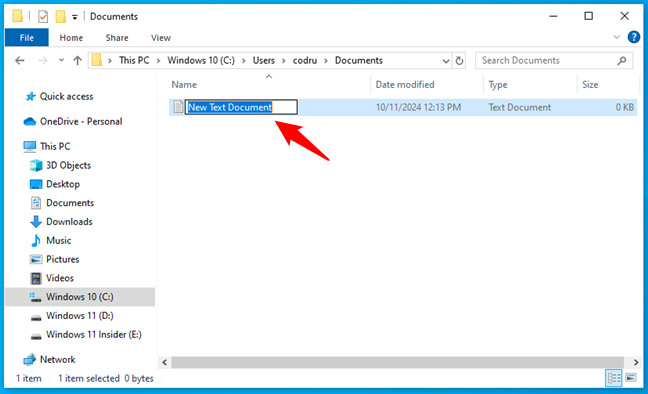
Creating a file in Windows 10
And here’s what to expect in Windows 11:
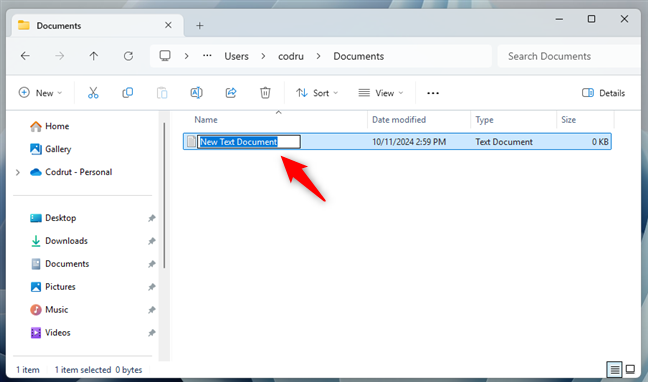
Creating a file in Windows 11
TIP: Besides some usual file types, the right-click menu also includes a few special options: Folder, Shortcut, and Compressed (zipped) Folder. The first one I mentioned - Folder - creates a folder when chosen, while Shortcut lets you make a shortcut, and Compressed (zipped) Folder helps you archive files and folders.
2. Create a file from an application
If you’re working in an application, you can create a file directly from there. Let’s take, for instance, Notepad, which works the same in both Windows 10 and Windows 11:
Open Notepad and start typing text.
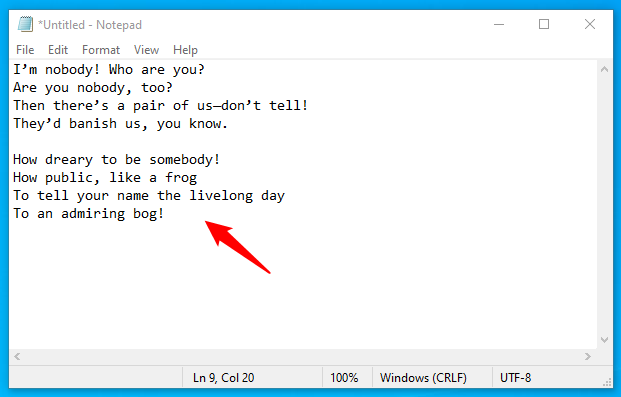
Open Notepad and type some text
When you’re done, open the File menu and choose Save As in the list of options displayed.
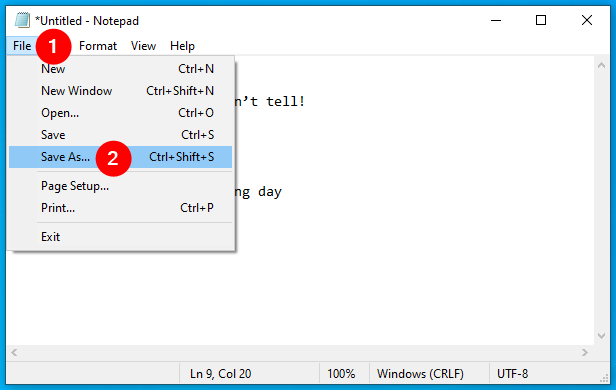
Go to the File menu and choose Save As...
Choose a location where to save the file, name it, and click Save.
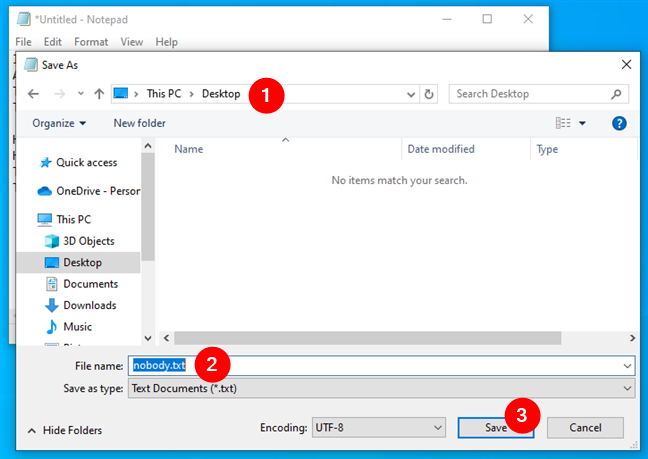
Select a location and choose a name for the file
That’s it! This works in most applications that allow you to create content. They all have options to create new files and save them on your computer. Just check the menus and toolbars in your app to find the way to create a new file.
TIP: Did you know that Windows also lets you create links for files and folders?
3. Create a file from the command line (CMD or PowerShell)
If you’re an advanced user, you may want to create files using Command Prompt or PowerShell. This is especially useful for creating text files or batch files with scripts.
How to create a file with Command Prompt (CMD)
Open Command Prompt either as a standalone app or as a tab in Windows Terminal and navigate to the directory where you want to create the file. You can do that by using the cd command followed by the folder path:
For example, let’s say I want to create a file on my desktop. To get there, I need to execute the cd command like this:
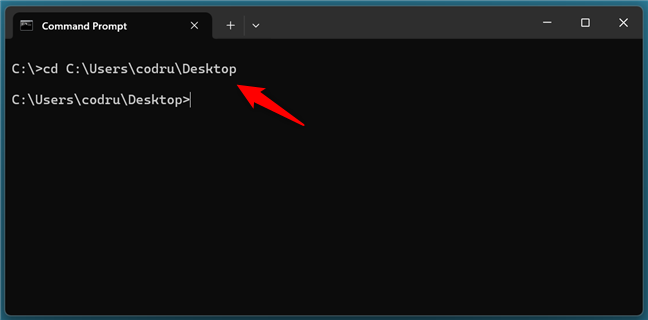
Go to the folder where you want to create a file
To create a text file, use the following command:
…replacing filename with the name and .ext with the extension you want your new file to have.
I chose to create a file called digitalcitizen.docx so I had to run this command:
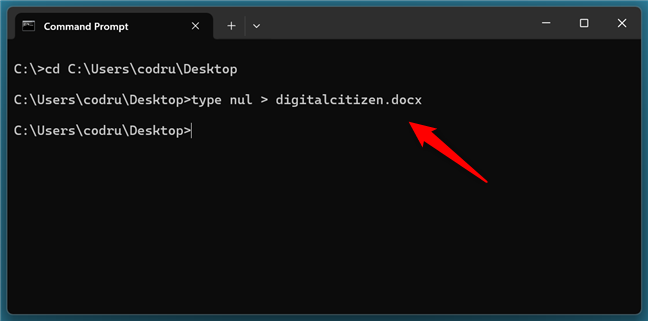
How to create a file from CMD
TIP: Did you know that there are also ways to create files with randomly generated dummy content, of any size you want?
This command immediately created the file on my desktop.
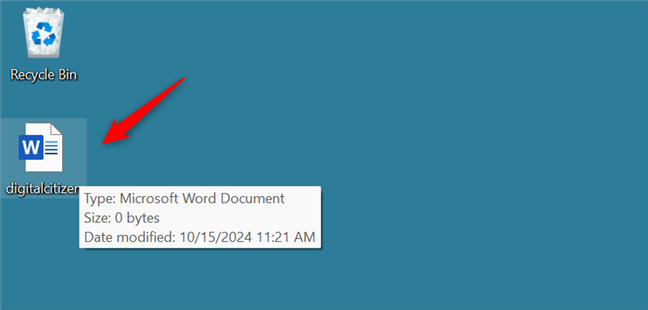
The file created with Command Prompt
IMPORTANT: Although you can use this method to create files with any extension, you can open and edit only the files with text content. In other words, files that use extensions like TXT, DOCX, LOG, or BAT. If you create files with other formats, like XLSX or PNG, for instance, attempting to open them will trigger errors about file format mismatching.
How to create a file with PowerShell
PowerShell also has its own ways of letting you create files. Open PowerShell and use the following command:
…replacing path with the actual path to the folder where you want to create the file and filename.ext with the name and extension you want for it. For example, here’s how I can create a new text file called FreeCitizen on my desktop:
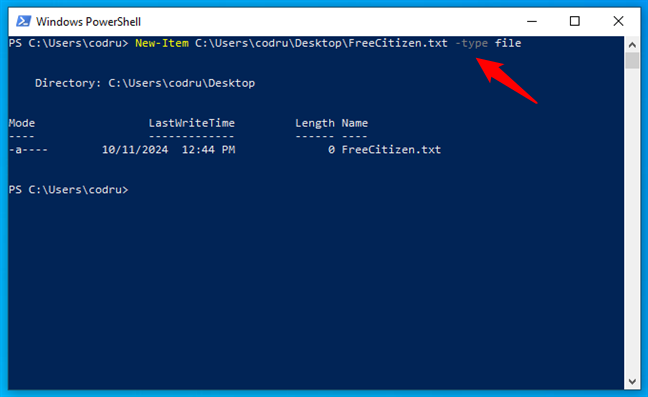
How to create a file in PowerShell
This created a blank file named FreeCitizen.txt on my desktop.
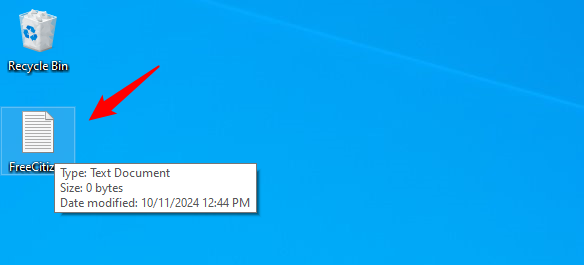
The file created with PowerShell
IMPORTANT: Although you can use this method to create files with any extension, only those with text content are properly formatted. If you create files with formats other than text, like XLSX or JPEG for example, they won’t be formatted correctly. For such files, you’ll need to document yourself on the specific modules and commands to use. Microsoft’s PowerShell Learning website is a great start for that.
Why did you want to learn to create files in Windows?
Now you know how to create files through File Explorer, apps, or using Command Prompt or PowerShell. As you’ve seen, there are plenty of options and methods to try out. Which one are you using most often and why did you look for this information on the internet? I’m curious so please let me know in the comments section below.


 16.10.2024