How to configure Remote Desktop Connection (RDC) in Windows
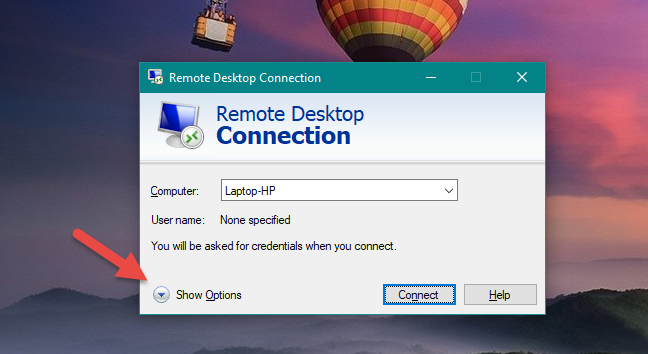
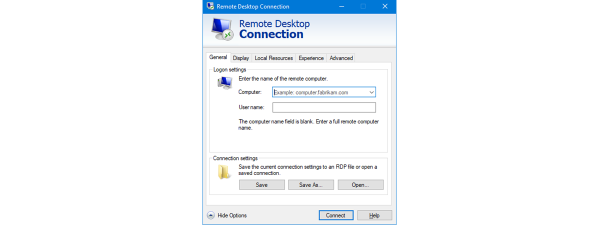
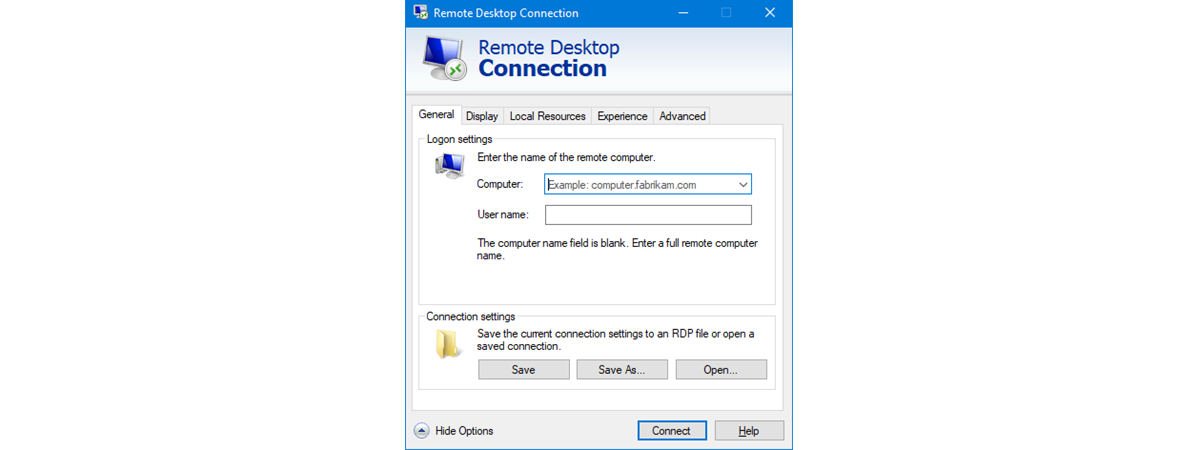
Some people might want to adjust all the detailed settings available in the Remote Desktop Connection program, before establishing any connections. To set the Remote Desktop Connection to work as you like it to, in its main console, expand the preferences by clicking or tapping Show Options.
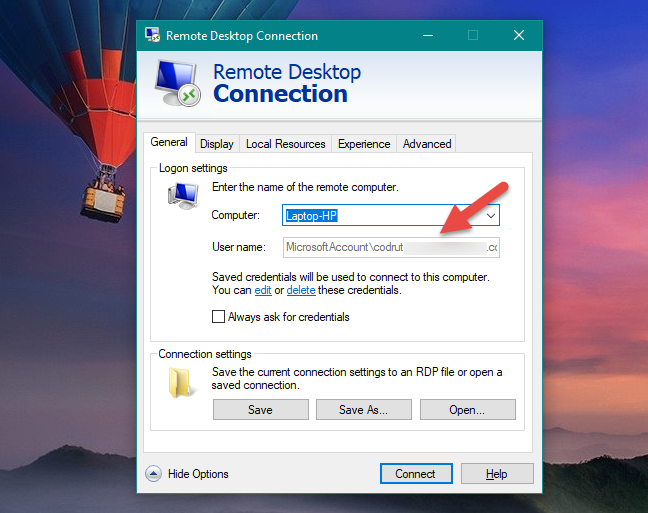
In the General tab, you can enter the name of the remote computer, and also the user account that you want to use by default, for the connection. Enter the username of an administrator account from the remote computer or a standard user account that has been enabled for Remote Desktop connections. In other words, use a user account that you would enter if you were logging in locally to the host machine.
In the following screenshot, you can see the username formatted as MicrosoftAccountUsername or ComputerNameUsername, depending on the user account type on the remote computer or device. You do not have to type it in like this, but when Remote Desktop Connection saves your connection settings, it reformats it so.
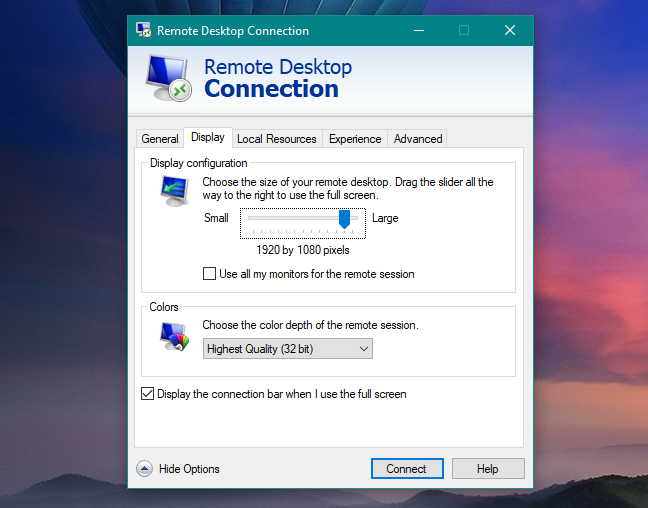
In the Display tab, you can tweak the video settings. By changing the screen size and color depth, you can improve the performance when connected remotely.
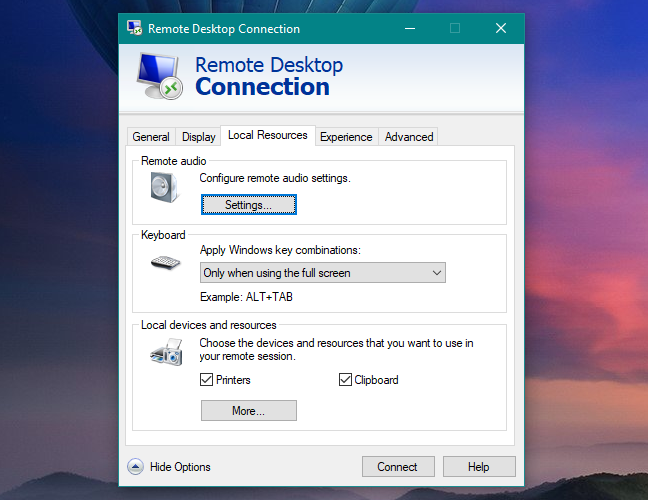
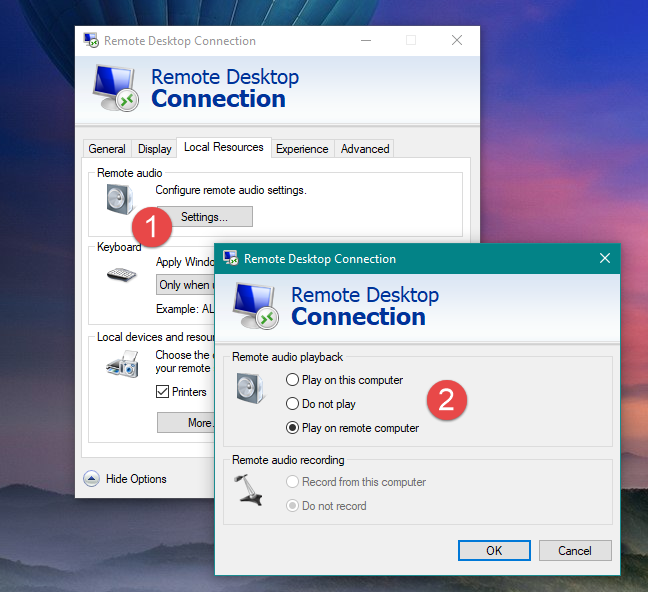
In the Local Resources tab, you can configure your audio, keyboard and devices settings.
If you click/tap Settings under Remote Audio, you can choose whether you want to playback audio on the remote machine, on the client machine or neither. You can also enable recording from the client machine.
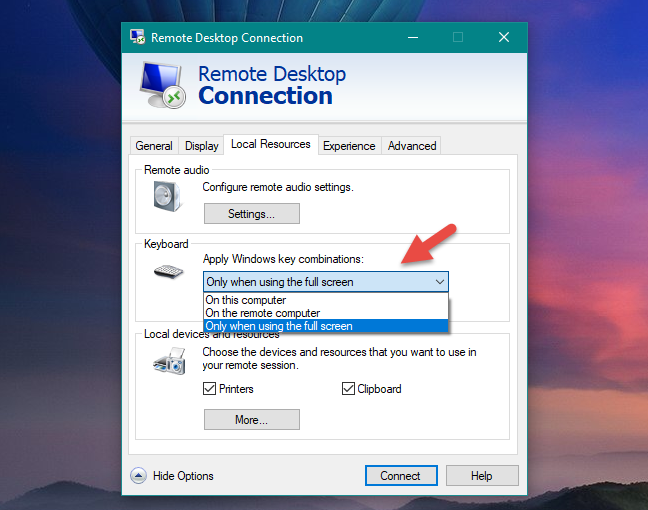
In the Keyboard section, you have three options for handling Windows key combinations (such as Alt + Tab and Ctrl + Alt + Del). By default, these key combinations are registered by the remote computer only when you are in full screen, and if you are in window mode, they are recognized by your computer (the client).
For example, if you are in full screen and you press Alt + Tab, you switch between windows on the remote machine. If you are in windowed mode, Alt + Tab switches between windows on your computer. You can change this so that Windows key combinations are only recognized by the client machine or the host machine.
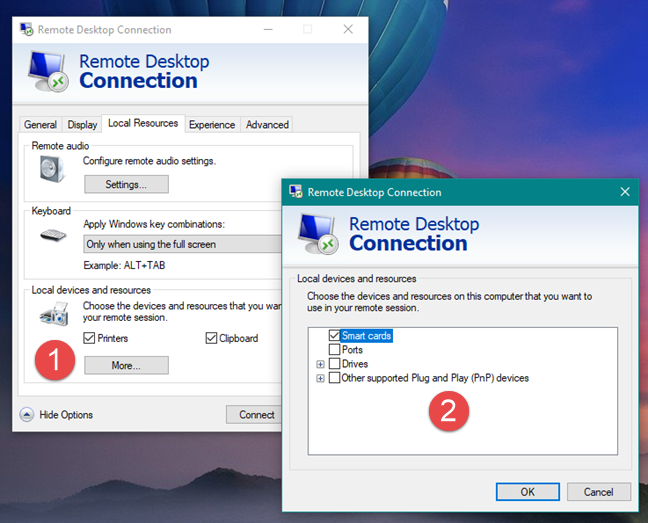
Lastly, you can choose the settings for the Local devices and resources. By default, you can share clipboards between machines (i.e., copy from the host and paste to the client) and print a document from the host machine on a printer connected to the client machine.
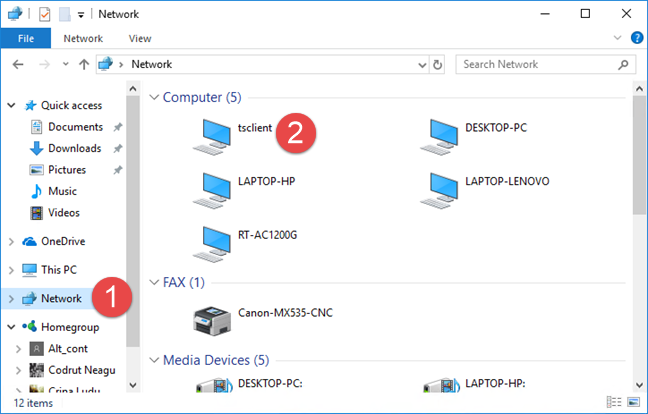
You may also want to share other devices and resources, such as hard drives. Click or tap More to see more options. If you check Drives, you can select which drives and volumes you want to share with the host machine. These show up under tsclient on the host machine, in the Network section of your File Explorer on Windows 10 and Windows 8.1, or in Windows Explorer on Windows 7.
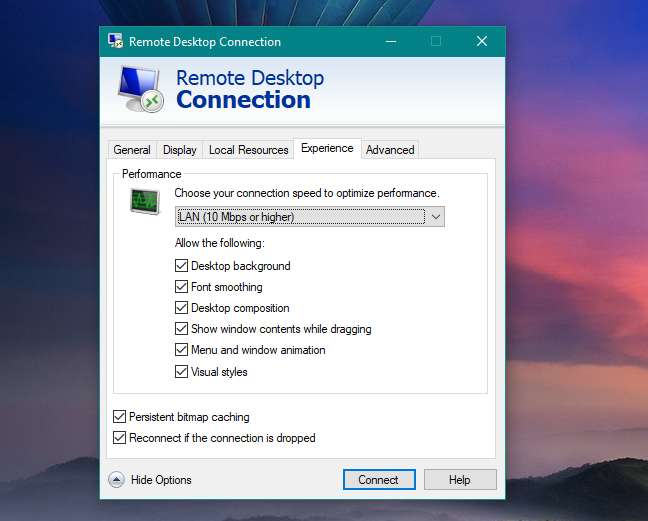
The Experience tab lets you further tweak settings for better performance. For example, it makes sense to disable the desktop background, menu and window animations since these are not essential for most tasks that you are performing remotely. You can also disable font smoothing to make the text a little bit more readable, especially when the screen is resized. Also, you can have Remote Desktop Connection choose the best settings for you based on your connection speed from the drop-down menu.
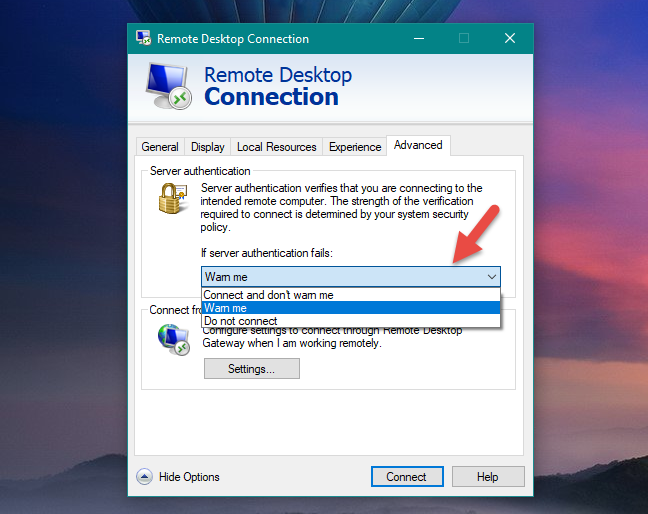
The Advanced tab gives you additional options, which you can use to change how Server authentication behaves. Normally, Remote Desktop Connection checks to make sure that the server name on the certificate matches the computer name you entered to initiate the connection. If they do not match, you are warned about it before connecting.
If you want to skip this message, you can choose to "Connect and don't warn me." This may be useful if you are using the IP address to connect to the remote machine. If that is the case, the authentication will always fail, since the remote computer does not identify itself on the server.
Alternatively, you can choose "Do not connect," if the server authentication fails, which cancels the connection without warning you if the server name does not match.
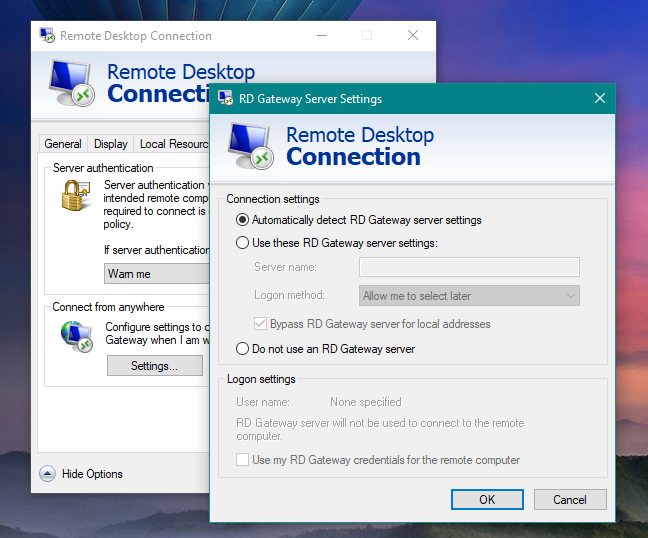
Finally, you can also set up your Remote Desktop Gateway settings by clicking/tapping the Settings button under "Connect from anywhere." Remote Desktop Gateways are used for connecting into corporate networks or Virtual Private Networks (VPNs) from outside those networks. For example, if you were at home and you wanted to connect to your desktop at the office via Remote Desktop Connection, you may need to use a Remote Desktop Gateway. Check with your network administrator to find out how to configure these settings.
What is different in Remote Desktop Connection (RDC) between Windows 10 and earlier versions of Windows
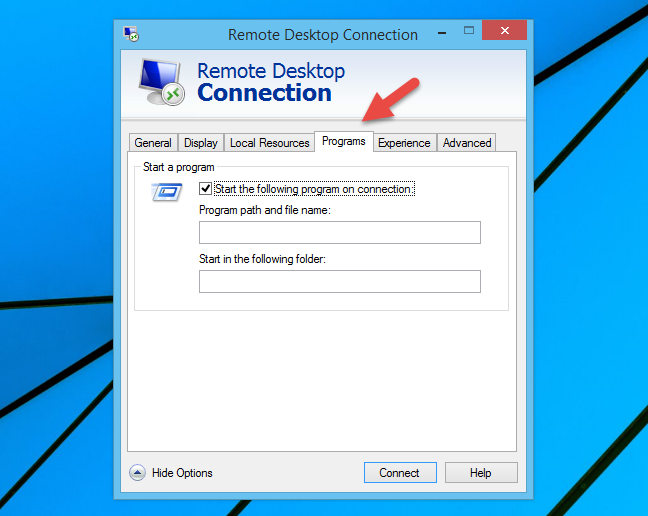
If you are using Windows 7 or Windows 8.1, in the Remote Desktop Connection window, besides the tabs presented in this article, you also have a tab called Programs. The Programs tab allows you to run a specific program when you connect to the remote machine. This allows you to run single programs on the remote computer without having to navigate through Windows Explorer or File Explorer.
To enable this feature, check the "Start the following program on connection" box and enter the program path and filename. If you want to set a working folder, type it in in the second box.
Other than this, the Remote Desktop Connection client looks and works the same in all modern versions of Windows.
Do you use Remote Desktop Connection (RDC)?
As you have seen, with Remote Desktop Connection you can access applications and devices on a remote computer by logging in with an administrator or even with a standard user account. This is useful for technical support teams, systems administrators and those who occasionally work remotely and need access to the files and programs on their office computers. Did you ever use it, and if you did, do you like it? Do you prefer alternatives such as TeamViewer? Let us know in the comments section below.


 24.01.2018