Connecting your Android smartphone or tablet to a Wi-Fi network is an easy two-step process. You must first enable Wi-Fi on your Android device, and then you can connect to the available wireless network you want. Furthermore, using Wi-Fi is free, and you probably get a faster internet connection than you would on your mobile data plan. This guide illustrates how to connect your Android phone to a Wi-Fi network in three different ways, and it includes instructions for Samsung Galaxy devices:
1. How to connect to Wi-Fi from Quick Settings on an Android smartphone or tablet
Quick Settings are the fastest way to enable Wi-Fi on your Android device. Swipe down from the top of your screen to open the Quick Settings menu.
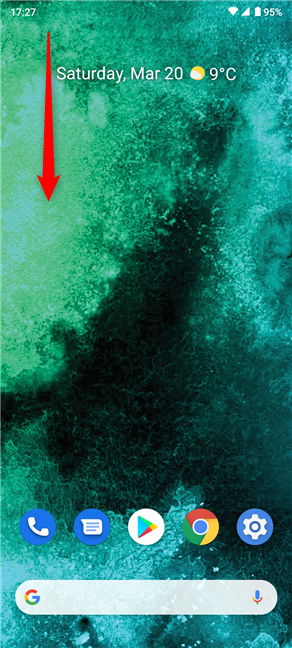
Access the Quick Settings menu
Look for the Wi-Fi icon. If the Wi-Fi is turned off, the icon is greyed out, as seen in the image below.
NOTE: If you can’t find the Wi-Fi icon, you might have to expand the menu or add it to it. Either way, our guide on how to customize the Android Quick Settings menu should help.
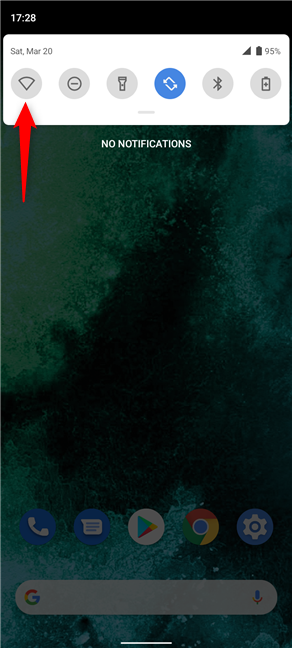
The Android Wi-Fi is disabled
Tapping on the icon enables Wi-Fi on your Android smartphone or tablet, turning the Wi-Fi icon blue. At this point, your device should automatically connect to any available wireless network in range, as long as it was connected to that network before and remembers connection details.
When there are no known networks in range, some Android devices might also display a question mark next to the Wi-Fi icon, as seen below. If you need to connect to a new wireless network, touch-and-hold the icon to access the Android Wi-Fi settings.
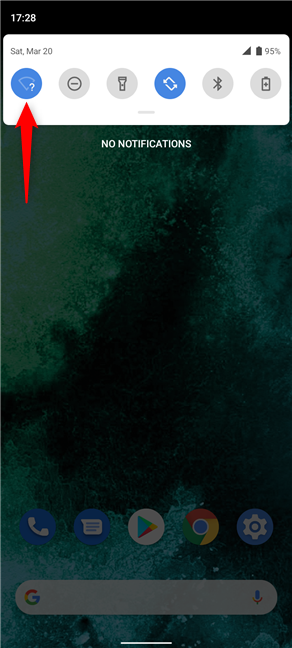
Activating Wi-Fi turns its Quick Settings icon blue
Your Android starts scanning for available Wi-Fi networks, displaying them in a list. A padlock is shown next to the wireless networks that require a password. Tap on the name of the network you want to connect to.
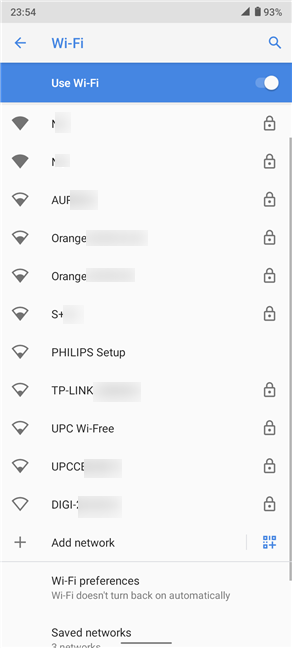
Press on a network's name to connect to it
If the Wi-Fi network you need is not secured with an access password, your Android connects to it at once. However, for secured networks, you are required to type the password in the appropriate field. Then, tap on Connect at the bottom.
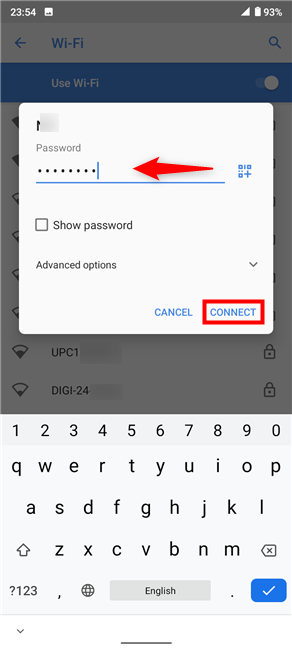
How to connect an Android phone to a Wi-Fi network
The name of the network you chose is moved to the top of the list, and its status changes to Connected. As long as the Wi-Fi chip is on, your Android smartphone or tablet should automatically connect to the wireless network the next time it’s in range.
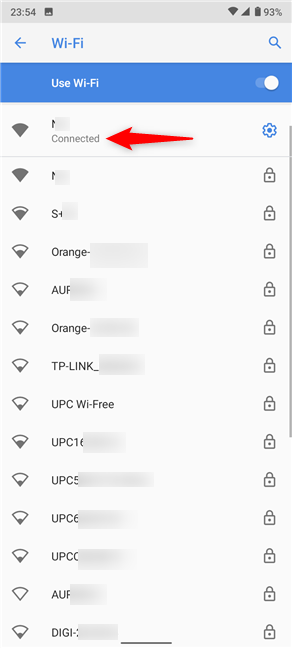
The active network is displayed in the Android Wi-Fi settings
Alternatively, on Samsung Galaxy devices, you can also tap on the word Wi-Fi under the corresponding icon in the extended Quick Settings menu.
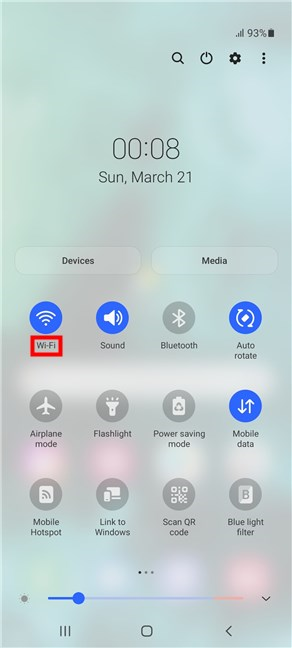
Press on the word Wi-Fi
Next, you can turn the Wi-Fi On from the main switch on top, if you didn’t already. Then, tap on the wireless network you want and follow the same steps illustrated above.
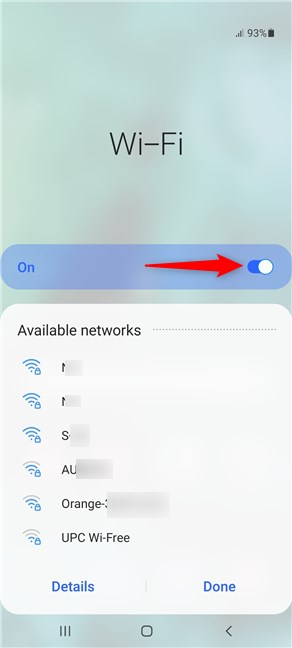
Make sure the Wi-Fi switch is On to display networks
TIP: If you’re concerned about your online privacy, we recommend setting a proxy server for your Android Wi-Fi connection.
2. How to connect an Android phone to a Wi-Fi network from Settings
You can also use Settings to enable Wi-Fi and connect to a wireless network. First, open the Settings app and tap on the first entry, Network & internet.
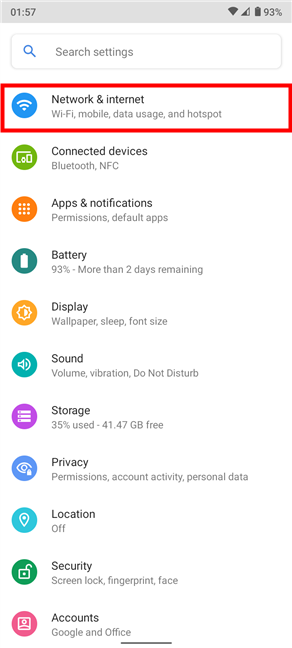
Access Network & internet Settings
IMPORTANT: On Samsung Galaxy devices, the entry is called Connections.
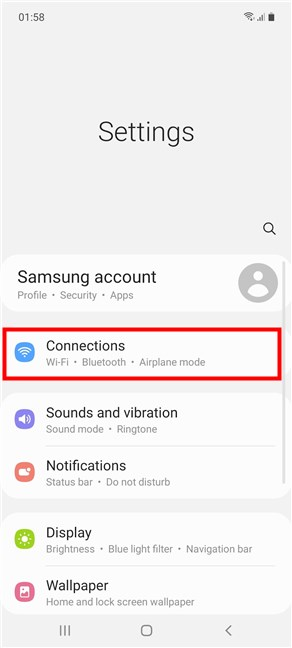
Access Connections Settings on a Samsung Galaxy Android
The Android Wi-Fi setting is at the top of the list. If it’s off, use the switch next to it to enable it. Then, tap on Wi-Fi.
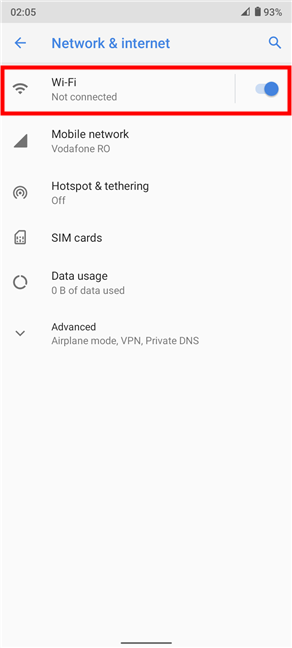
Tap on Wi-Fi to access the Android Wi-Fi Settings
You can also turn on Wi-Fi connectivity from the Use Wi-Fi master switch at the top of the next screen. Tap the network you want, and then follow the same instructions shown in the first chapter to connect your Android smartphone or tablet to it.
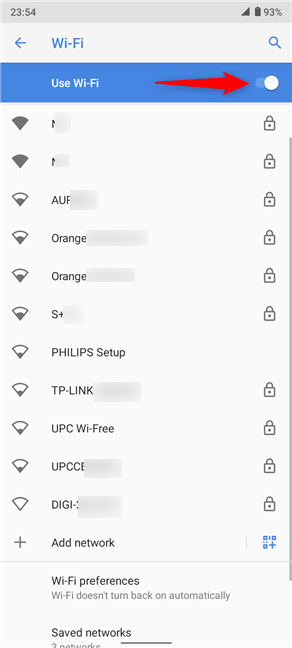
Make sure the Use Wi-Fi switch is on and connect to the desired network
TIP: Connecting to a wireless network has its advantages, like higher speed than 4G data connections, and the option to use Voice over Wi-Fi, that is useful in areas where the mobile signal is weak. For more details, check out our guide on Wi-Fi calling and how to use it on Android.
3. How to connect your Android device to a wireless network using a QR code
Using a QR code can save you a lot of trouble if you’re trying to quickly share your Wi-Fi info with a friend. It also comes in handy if you forget the Wi-Fi password or don’t feel like inserting it, and you already have an Android device connected to the same wireless network. First, follow the instructions in the previous chapter to access the Android Wi-Fi settings on both devices. On the Android device connected to Wi-Fi, tap on the Connected network or the cogwheel icon next to it.
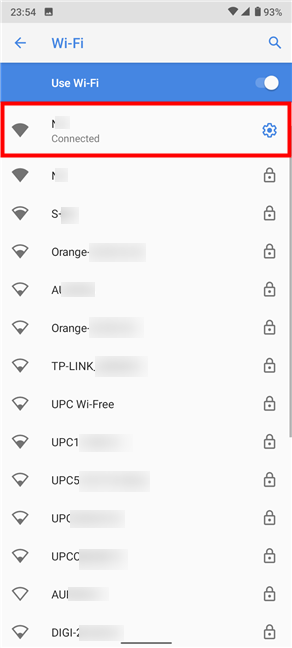
Tap on the cogwheel to access the Network details
Then, tap on the Share button.
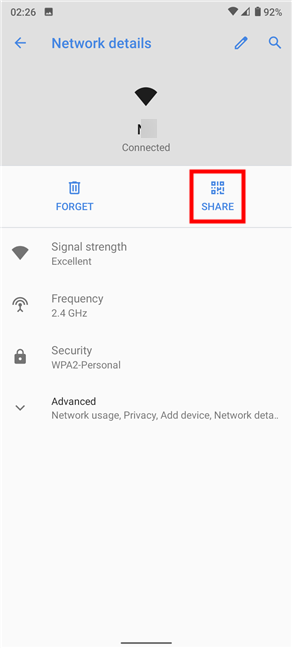
Press Share
NOTE: On Samsung Galaxy devices, tap on QR code at the bottom-left corner of the screen instead.
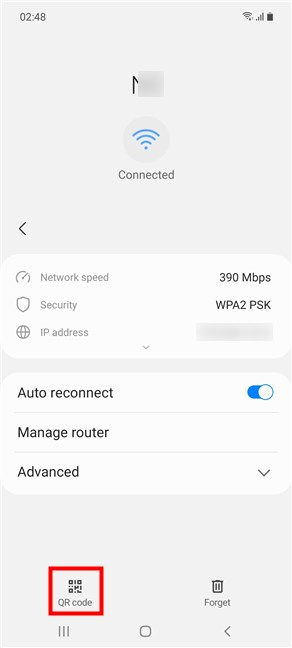
Press QR code on Samsung Galaxy
The next screen displays a QR code, as seen in the screenshot below.
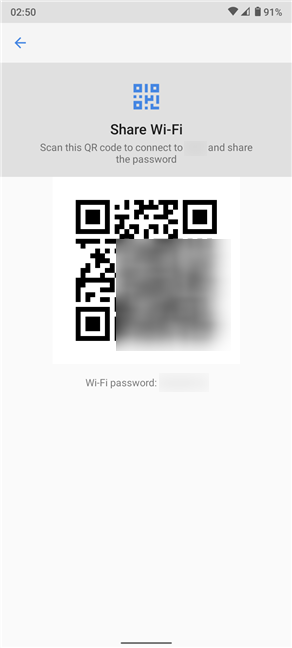
The QR code stores Wi-Fi connection details
Now grab the Android smartphone or tablet that you want to connect to the same wireless network and enable its Wi-Fi. In the Android Wi-Fi settings, you can see the Add network option under the list of available networks. Tap on the QR code icon next to it.
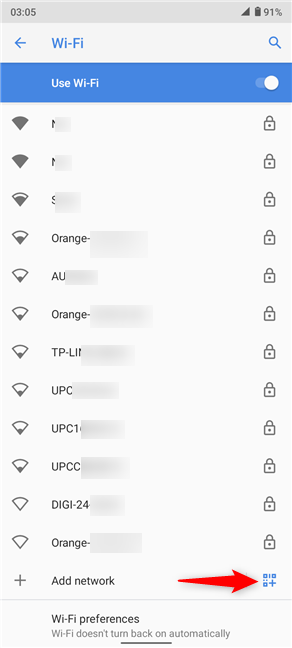
Press the QR code icon at the bottom of the network list
NOTE: On Samsung Galaxy smartphones and tablets, the QR code icon is displayed in the upper-right corner of the Wi-Fi settings screen.
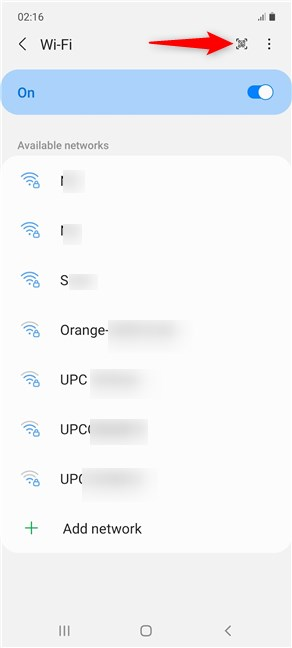
The QR code icon on Samsung Galaxy
Your Android device shows a screen similar to camera mode, with a highlighted rectangular section. Point it at the screen of the first device (the one already connected) and scan the QR code by framing it inside the rectangular section.
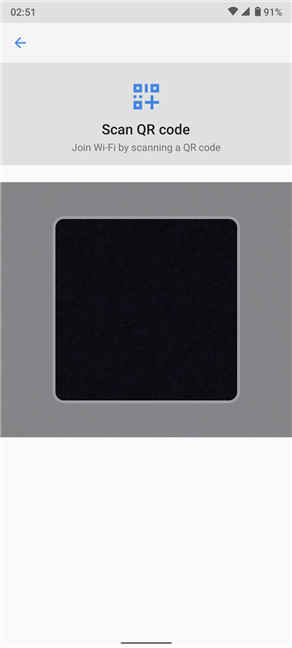
Scan the QR code by framing it in the rectangular section
On some devices, you might have to press one more notification to confirm your choice. Your Android smartphone or tablet immediately connects to the Wi-Fi you shared from the other device.
Which way to connect an Android device to Wi-Fi do you prefer?
We prefer using Quick Settings to quickly connect our Android smartphones and tablets to a wireless network. However, when it comes to complicated passwords, we get lazy and prefer using a QR code instead. What about you? Which way to connect to Wi-Fi do you prefer on your Android smartphone? Let us know in the comments.


 24.03.2021
