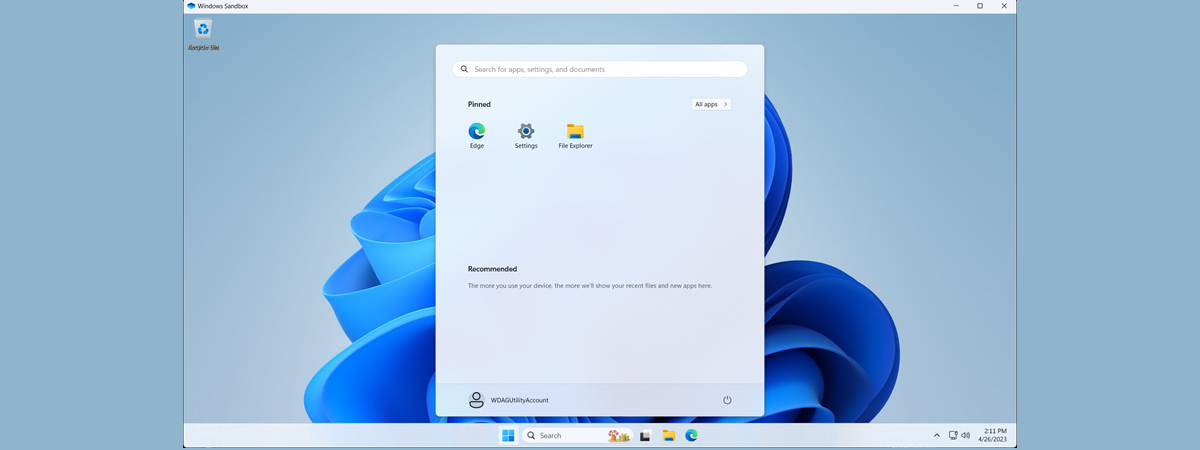
Windows Sandbox is a virtualized environment similar to a virtual machine that’s available in the Pro, Enterprise, and Education editions of Windows 10 and Windows 11. You can use it to test apps you’re not sure are safe, visit untrustworthy websites, and generally do things you fear might compromise your main system. Although personalizing the way Windows Sandbox works is not very friendly, requiring you to create configuration files to change how it works, anyone can do it with a bit of patience. Here’s a step-by-step guide on how to create and use scripts that alter it and allow you to create Windows Sandbox shared folders, automatically run apps, configure the networks, and so on:
NOTE: Before you can customize how Windows Sandbox works on your PC, you must first install it. If you need help with that, read our guide on getting Windows Sandbox. Also, if you’re wondering how Windows Sandbox might be useful to you, here are a few things you can do with Windows Sandbox. Last but not least, you should know that Windows Sandbox works and runs the same in Windows 10 and Windows 11.
How to configure Windows Sandbox
In order to customize Windows Sandbox or automatically run apps and scripts when you launch it, you have to create a configuration file. To do that, you can use Notepad or any other text processor application to write code for Windows Sandbox. Every configuration file you create for Windows Sandbox must start with the line <Configuration> and end with the line </Configuration>. All the other code that you’re going to add must be placed between these lines of code.
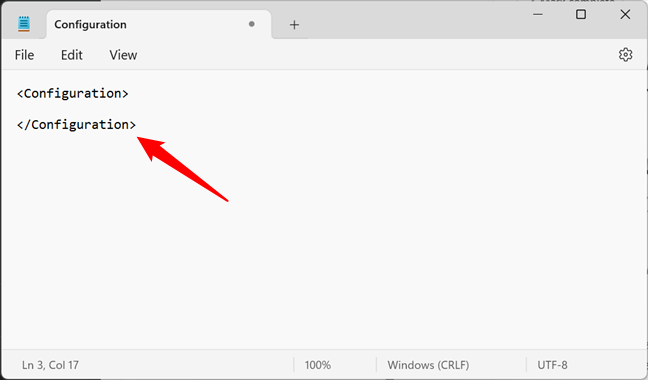
Creating a Windows Sandbox configuration file
TIP: Here’s how to use Notepad in Windows 10 and a separate guide for using Notepad in Windows 11.
Once you’ve created the configuration file and finished adding all the code to it, you have to save it using the file extension .wsb.
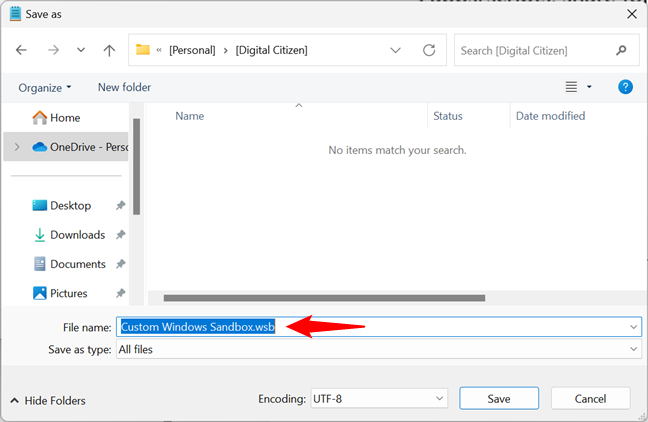
Saving a Windows Sandbox config file (.wsb)
Then, you can double-click or double-tap on the .wsb file to launch your personalized Windows Sandbox.
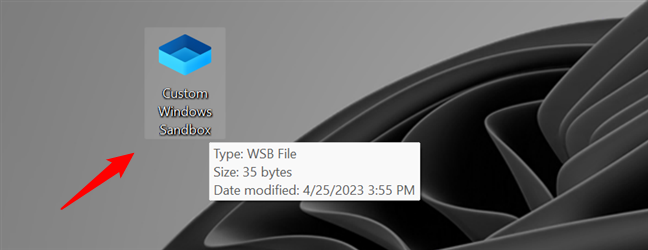
A custom Windows Sandbox config file
Now let’s see what code and scripts you can use for Windows Sandbox:
How to map Windows Sandbox shared folders
Windows Sandbox can map folders from the host. In other words, you can make your Windows Sandbox “see” folders found on your Windows 11 or Windows 10 PC. To do that, in the .wsb file that you created with Notepad, add the following code:
<MappedFolder>
<HostFolder>Folder shared with Windows Sandbox</HostFolder>
<ReadOnly>true or false</ReadOnly>
</MappedFolder>
</MappedFolders>
You can add as many shared folders as you want: just make sure to put their paths between the <HostFolder></HostFolder> tags. Also, for each Windows Sandbox shared folder that you add to the list, you can specify whether you want Windows Sandbox to have read-only access to it. For that, add the code <ReadOnly>true</ReadOnly> after it. If you want Windows Sandbox to have write access to that folder, add the code <ReadOnly>false</ReadOnly> after it. However, remember that this makes the files and folders from the shared folder available to the apps you run in Windows Sandbox. In other words, those apps can change your files, which is something you might not want.
For example, if you want your Windows Sandbox to have access to your Downloads folder, type:
<MappedFolder>
<HostFolder>C:\Users\UserName\Downloads</HostFolder>
<ReadOnly>true</ReadOnly>
</MappedFolder>
</MappedFolders>
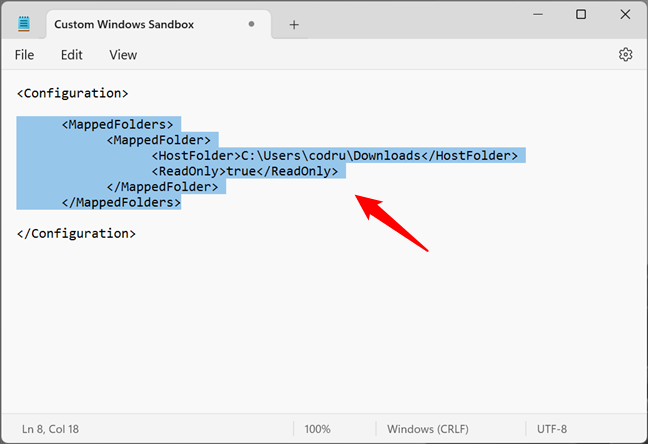
Sharing a folder with Windows Sandbox
Make sure to change UserName with the name of your Windows user account.
Then, when you run the .wsb configuration file, all the Windows Sandbox shared folders are instantly available on the desktop or at this location: C:\Users\WDAGUtilityAccount\Desktop.
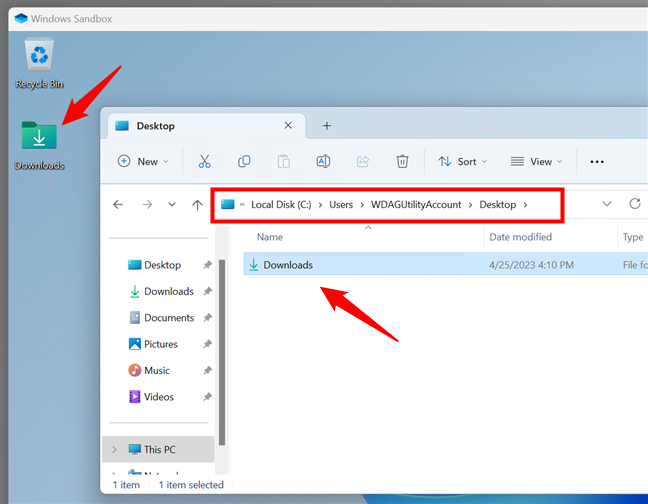
What a shared folder looks like in Windows Sandbox
That’s it: you can now access the Windows Sandbox shared folders from both Windows and Windows Sandbox.
How to run a program or script in Windows Sandbox at launch
Windows Sandbox also lets you run a program (executable file) or a script immediately after launch. To do that, in the .wsb configuration file, you have to add this code:
<Command>Command or app to run at startup</Command>
</LogonCommand>
The command can be the path to any executable file or script that’s available inside the Windows Sandbox. That means that you can, for example, automatically open File Explorer, Notepad, or other system apps. If you want, you can even run an app that’s found in a shared folder (as illustrated in the previous chapter of this guide).
Here’s an example of a Windows Sandbox configuration file that automatically opens File Explorer on launch:
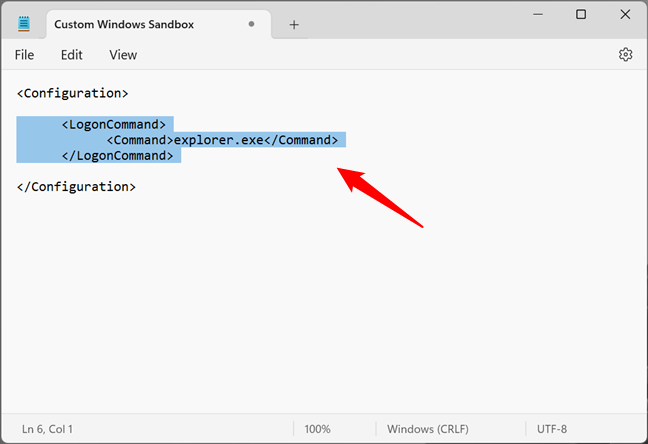
Running a command/script in Windows Sandbox
And here’s an example of a Windows Sandbox configuration file that maps the Downloads host folder and automatically runs an executable file from it:
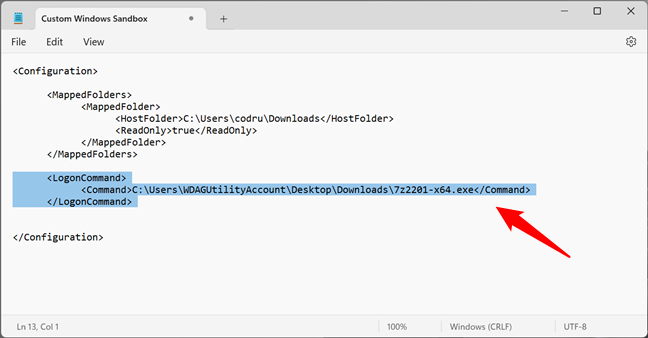
Running an executable file in Windows Sandbox at startup
In the last example, I wanted to run the installer for 7-Zip when launching Windows Sandbox, and that’s exactly what I got:
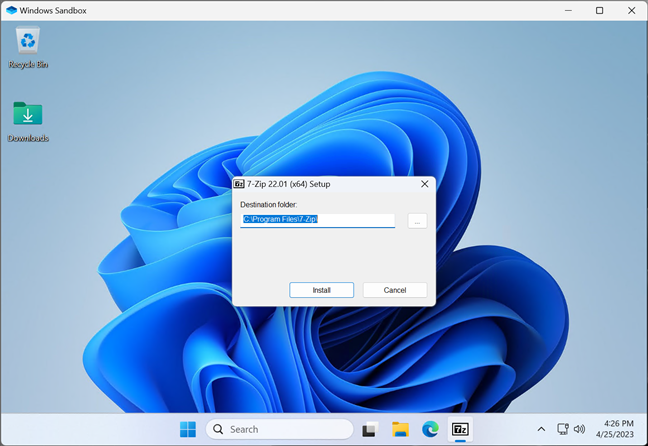
A program that was automatically run when Windows Sandbox launched
NOTE: If you specify a path to a command, executable, or script file that doesn’t exist, Windows Sandbox returns an error and stops when you try to open it.
How to enable or disable the network in Windows Sandbox
If you don’t want Windows Sandbox to be able to access your network and the internet, in the .wsb configuration file, add the following line of code:
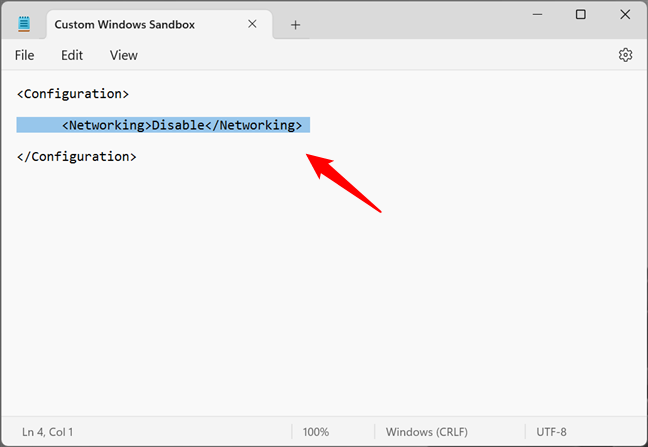
Disable network in Windows Sandbox
This disables the networking services for Windows Sandbox, as you can see in the screenshot below.
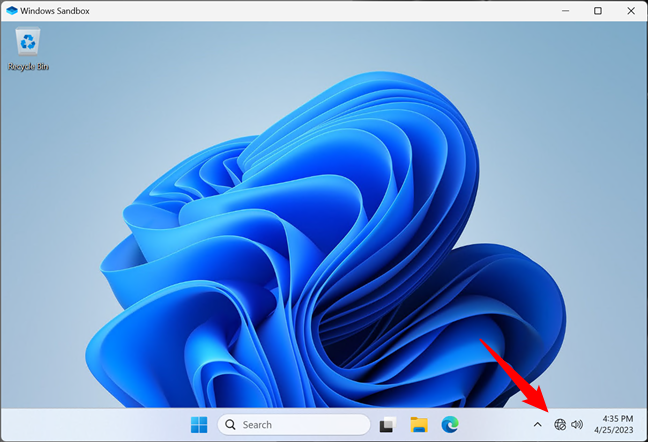
Windows Sandbox launched without networking
In case you want the network to be accessible, either delete the <Networking>Disable</Networking> line from the configuration file or change the Disable value to Default:
How to enable or disable the virtual graphics processing unit in Windows Sandbox
Similarly, Windows Sandbox also lets you disable the virtual graphics hardware rendering engine. In other words, Windows Sandbox shares by default the graphics card on your PC with Windows 10 or Windows 11. However, you can disable this feature and force Windows Sandbox to use software rendering so that you don’t expose your GPU. Although this makes Windows Sandbox run slower, it can be useful in some situations. To disable vGPU support in Windows Sandbox, add this code in the .wsb config file:
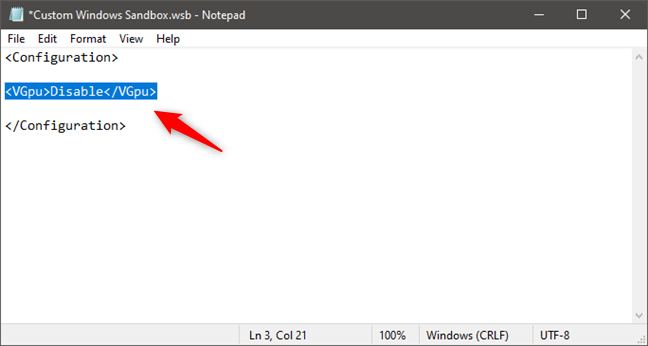
Disable graphics card sharing in Windows Sandbox
TIP: If you don’t know the exact model of your GPU, here’s how to find your exact graphics card model without opening your PC.
To enable the GPU sharing in Windows Sandbox, delete the <VGpu>Disable</VGpu> line from the .wsb configuration file or set its value to Default:
TIP: For more details on scripts and configuration options available for Windows Sandbox, I recommend you to read the official documentation made available by Microsoft here: Windows Sandbox.
What other features would you like to see in Windows Sandbox?
Although configuring how Windows Sandbox works is something you can do now, it still feels like it’s just in an early state. I confess that I’d like it more if Microsoft made it possible to do all the above using a graphical interface. That would make it easier for everyone to configure Windows Sandbox. Do you have other ideas that you’d like implemented for Windows Sandbox? Use the comments section below to let me know what other features you think would be nice to have in Windows Sandbox.


 26.04.2023