The Clipboard in Windows 10 has had an interesting evolution. Initially, it was the same basic clipboard we got used to from the old days of Windows 7. Then, it turned into an app that stores your clipboard’s history, synchronizes items across devices, and enhances your overall productivity like never before in Windows. If you use Windows 10, and you want to be more productive when creating documents, presentations, or simply accessing data you’ve copied to the clipboard some time ago, read this guide:
How to find and access the clipboard in Windows 10
Accessing the clipboard in Windows 10 is very easy: after you log in, press Windows + V on your keyboard. You then see it displayed on the screen, listing all the items you recently copied. Inside the Clipboard window, you’ll find text, images, or links you’ve previously added.

The Windows 10 Clipboard
Only a few people know that the Windows 10 clipboard can also display items you copied on other computers or devices using the same Microsoft account. Therefore, don't be surprised if you just logged into Windows 10 and accessed the clipboard to see something you didn’t copy on the computer or device you’re using now. Instead, read this guide on how to sync the Windows 10 clipboard with other computers and devices.🙂
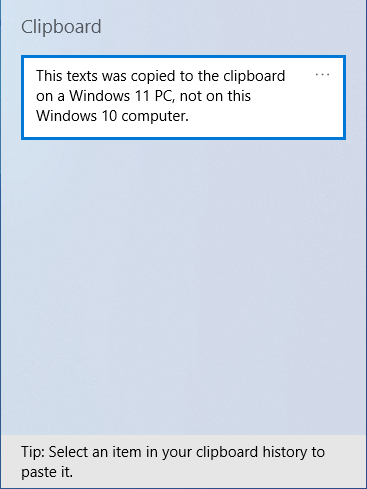
The clipboard can sync items across devices
The items stored inside the Windows 10 clipboard get deleted each time you log out or restart. Therefore, each time you sign into Windows 10, and you don’t copy to the clipboard items on other devices that are synced to it, the clipboard will be empty when you press Windows + V on your keyboard.
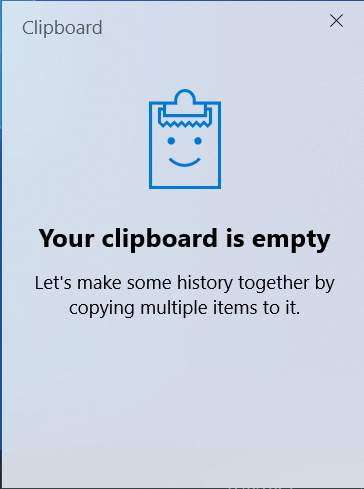
An empty clipboard
If your clipboard is empty, like in the screenshot above, don’t worry. I’ll show you how to start adding items to it, so keep reading this tutorial.
Where are the clipboard files saved in Windows 10?
While the clipboard stores most of its information in your computer’s RAM, it also stores some information on the system drive. If you are a technical user and you want to know where exactly the Windows 10 clipboard stores its data, you’ll find it in this location:
Remember that Your User Account is a folder name that varies from one computer to another based on the user account that is using it. On my computer, this folder is named ciprian, after my actual name. On your computer, it will be something different.
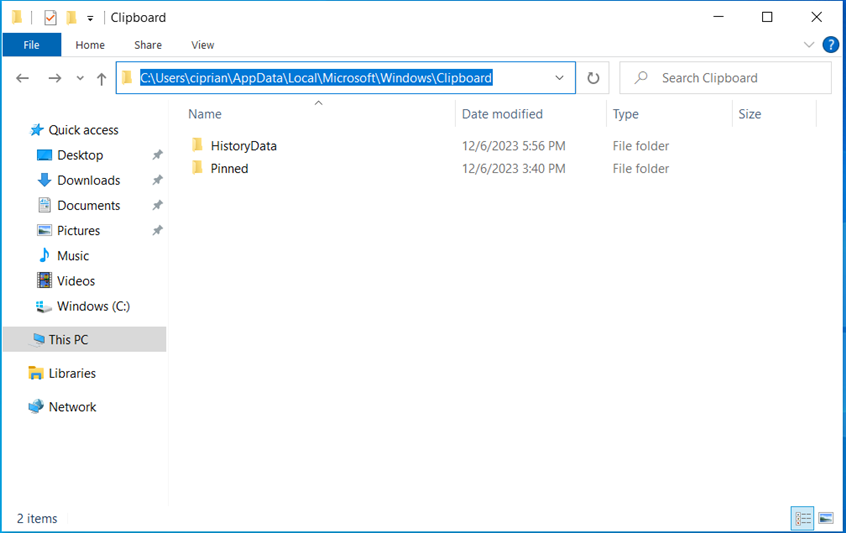
The clipboard's location on disk
To make things simpler, you can use the %LOCALAPPDATA% environment variable to get to this location more easily. Simply copy and paste this location into the address bar of File Explorer or the Run window:
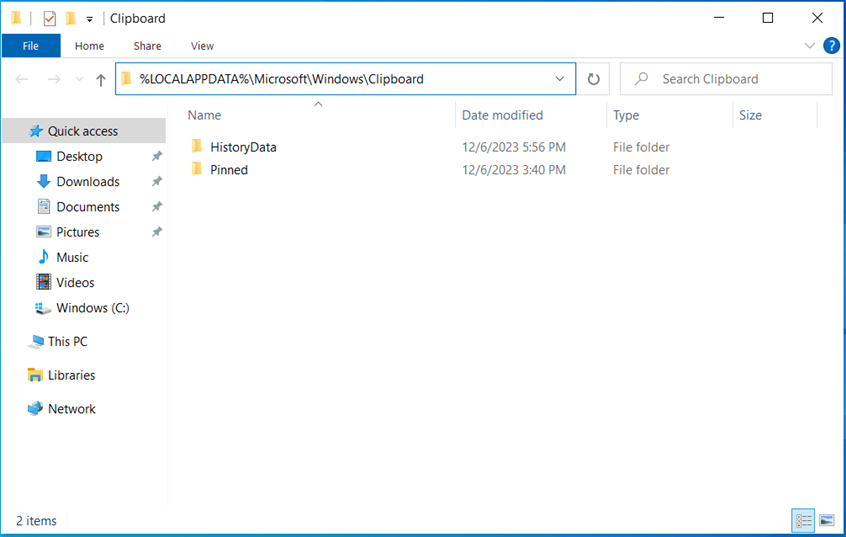
Accessing the clipboard folder using environment variables
TIP: If you like using environment variables and consider them useful, here’s how to create user and system environment variables in Windows.
How to copy items to the Windows 10 clipboard
Adding items to the clipboard is as simple as selecting them and choosing Copy or Cut. While there are many ways to copy or cut items in Windows, let’s quickly show you two of them:
When you write a document in Word and enter some text that you want to paste somewhere else, select it with the mouse and then press the Windows + C keys on your keyboard. This action adds the selected text to the Windows 10 clipboard. Therefore, when you press Windows + V, you see the text added to the top side of the clipboard.
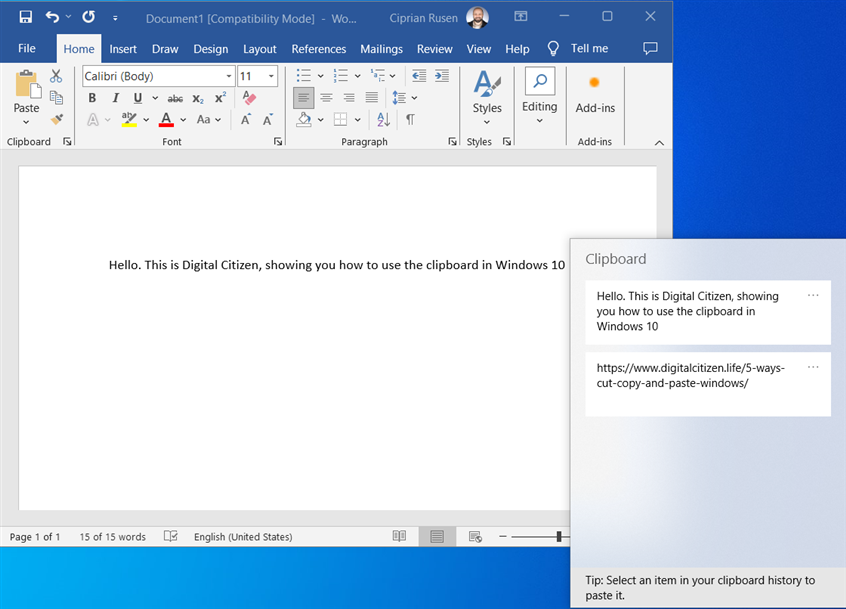
Copying items to the clipboard is easy
Or let’s assume that you’re browsing the web in Microsoft Edge and want to copy a cool image you find online. You right-click on it and choose Copy image.
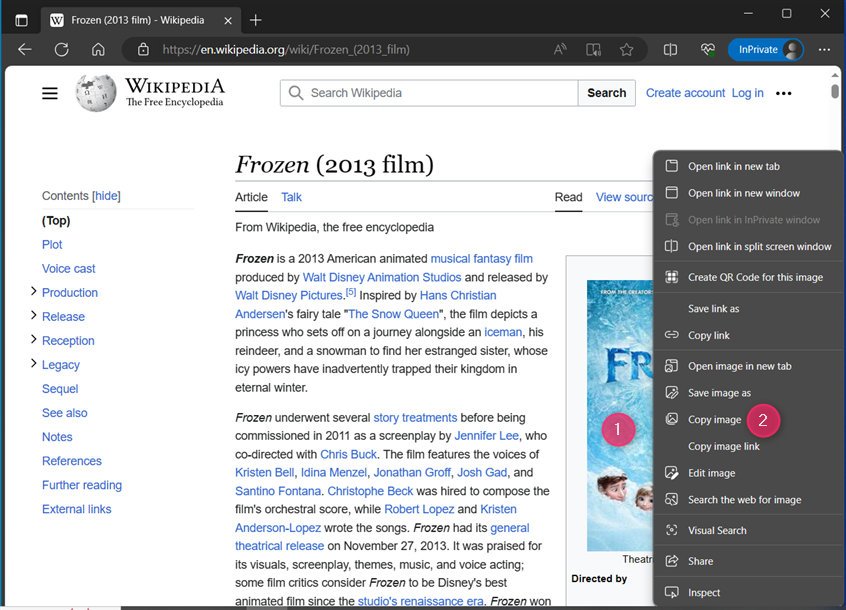
Copying an image from the web to the clipboard
When you press Windows + V, you see the image added to the top side of the clipboard. Also, all the items you recently copied to the clipboard are listed vertically, starting from the most recent one at the top.
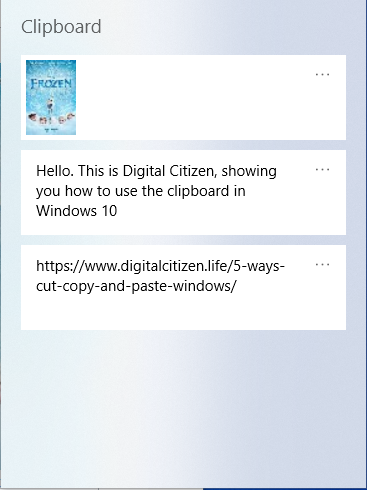
Clipboard items are listed vertically, with the most recent at the top
The Windows 10 clipboard can hold more than just the last item you’ve copied. To make things more useful, there is no maximum size for Windows clipboard data; you can add as many items as you want.
Therefore, if your clipboard has a long list of items, and you want to see the older clipboard items, scroll down in the Clipboard window. You can do this using the mouse and the scroll bar on the right side of the window or using your finger and sliding up and down your device’s touchscreen (if it has one).
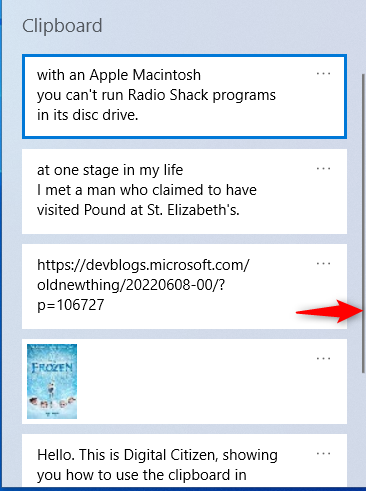
Scroll the clipboard up and down
TIP: If you don’t want the clipboard to keep multiple items, here’s how to turn off the Windows 10 clipboard history and clear your data.
How to paste from the clipboard in Windows 10
If you want to paste the latest item you sent to the clipboard, open the application you want to paste it in and press the Ctrl + V keys on your keyboard.
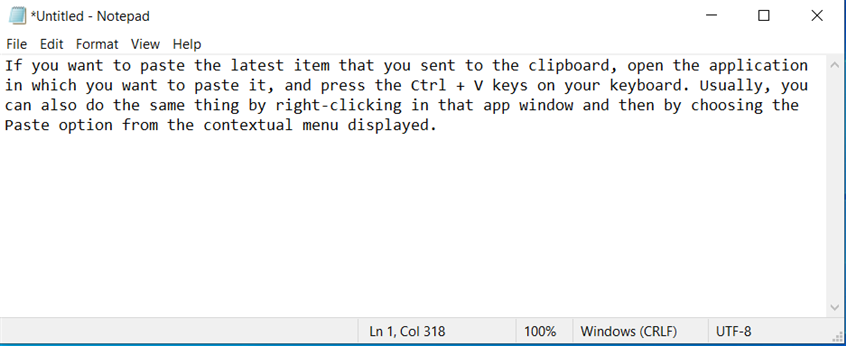
Ctrl + V pastes the most recent item from the clipboard
You can also do the same thing by right-clicking (or pressing and holding) in that app window and then choosing the Paste option from the contextual menu displayed.
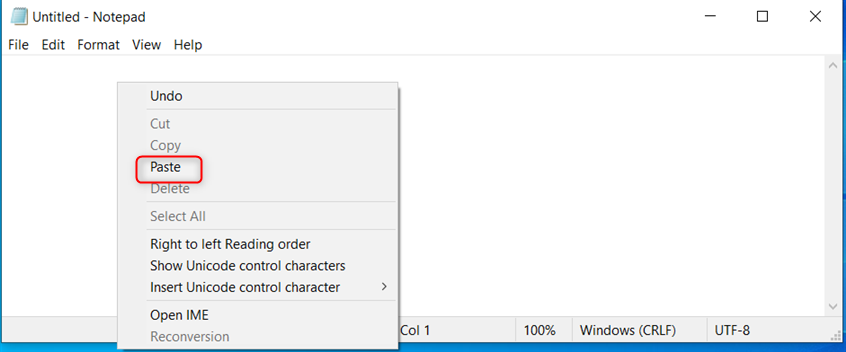
You can also right-click and choose Paste
You can also use the Clipboard window to paste the last item in it. Go to the app window where you want to paste this last item, press the Windows + V keys on your keyboard, then click or tap the first element in the Clipboard window. It automatically appears in the app window, like in the screenshot below.
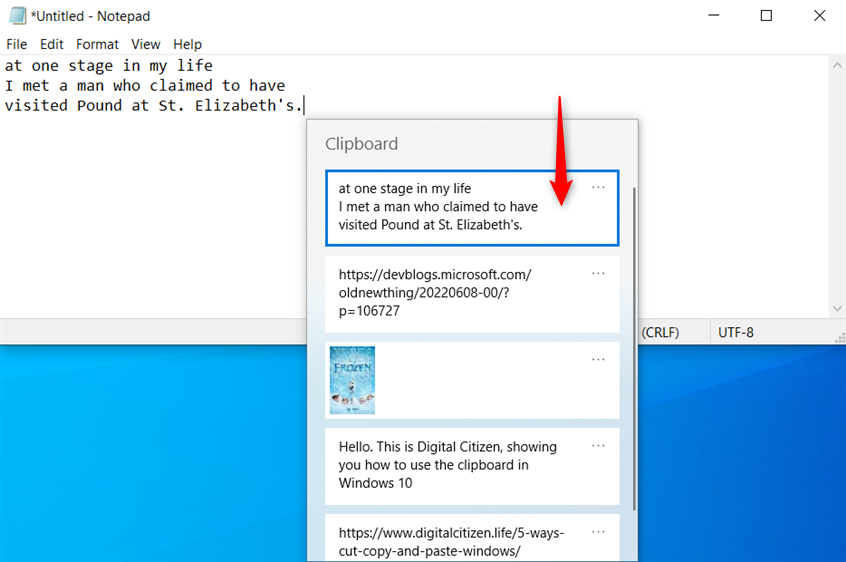
Pasting the latest item from the clipboard
How to paste older items from the clipboard in Windows 10
If you want to paste older items from the clipboard, go to the app window where you want to paste them. Then, press the Windows + V keys on your keyboard to view the Clipboard window, and click or tap the item you want to paste. The item then shows up in the app.
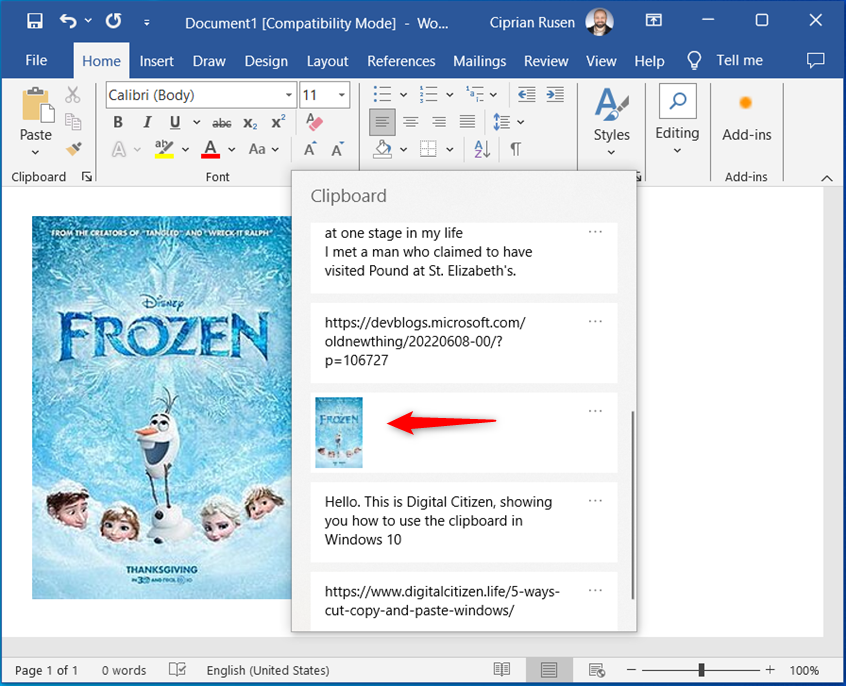
Pasting an older item from the clipboard
How to pin items to the clipboard in Windows 10
As I mentioned, each time you sign out from Windows 10 or reboot your computer, the clipboard is cleared and deletes all stored items. However, you can keep those items between Windows 10 reboots and logouts by pinning them to the clipboard. After you add several items to the clipboard, open it by pressing Windows + V. Then, scroll down the list of items and click or tap the three dots next to the item you want saved for future use. In the menu that pops up, click or tap Pin.
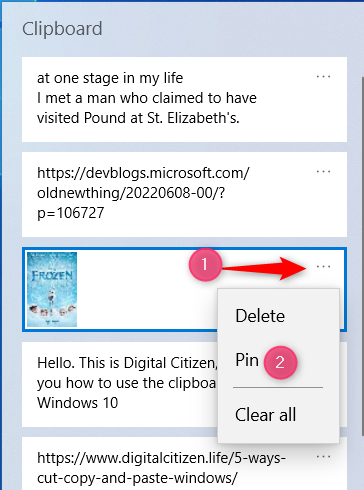
How to pin to the clipboard
Repeat this process until you pin all the items you want to keep for later use. To test if things worked out well, sign out from Windows 10 or clear the clipboard (instructions on how to do this will follow later in this guide), and then access the clipboard again. You will see all the items that you have pinned to it.
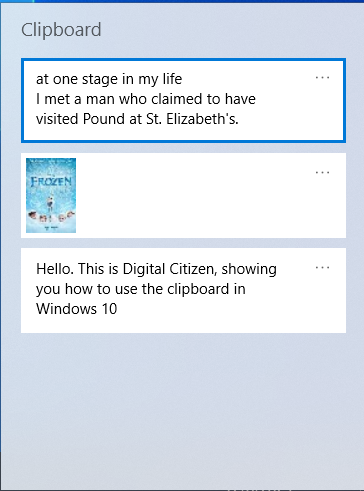
The clipboard stores pinned items
NOTE: Remember that pinned clipboard items are not displayed at the top of the clipboard; they’re just kept inside the clipboard in the order that they were added to it in the first place.
How to unpin an item from the Windows 10 clipboard
If you no longer need an item from the clipboard again, simply unpin it by doing this:
Press Windows + V to access the clipboard, find the item that interests you, and click or tap on the three dots in its top-right corner. Then, in the menu that appears, choose Unpin.
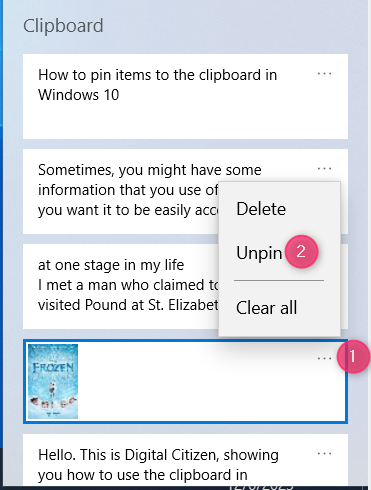
How to unpin an item from the clipboard
The item remains stored inside the clipboard until you delete it, clear the clipboard, sign out of Windows 10, or reboot the computer.
How to delete items from the clipboard in Windows 10
If you want to delete an item from your clipboard, open the Clipboard window (press Windows + V), locate the item you want to remove, and click or tap the three dots next to it. In the menu that appears, choose Delete.
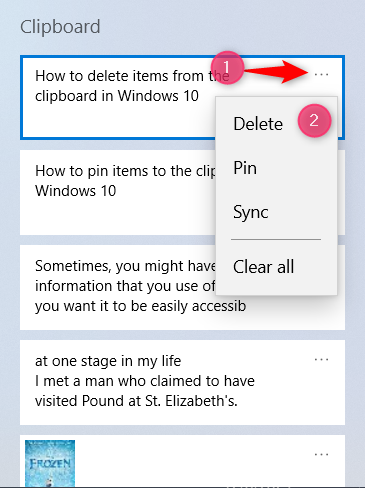
Deleting a clipboard item
The item is removed from the clipboard immediately without any confirmation required.
How to clear the clipboard in Windows 10
Each time you restart Windows 10 or sign out, the clipboard gets cleared automatically. It only keeps the items you manually pinned to it. If you want to clear it immediately, press Windows + V to access the Clipboard window. Then, click or tap the three dots next to any item from the list and choose Clear all.
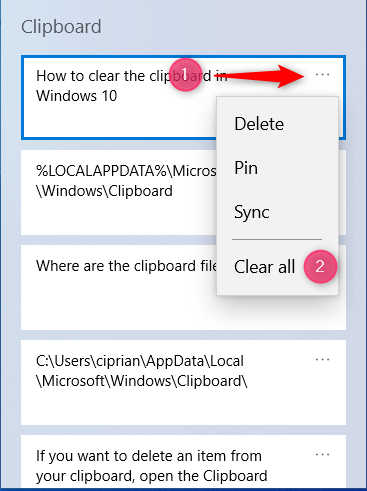
Clearing the items in the clipboard
The Windows 10 clipboard gets cleared immediately, storing only your pinned items. If you want those removed as well, first unpin them using the instructions shared earlier in this guide, and then clear the clipboard again.
Do you like the Windows 10 clipboard?
When Windows 10 was released in 2015, you could not see your clipboard contents unless you used a third-party app designed for this purpose. Also, the clipboard was rather primitive and a lot less useful than it is today. Therefore, I appreciate its evolution and what Microsoft has done with it, helping users become more productive. But this is my opinion, and before closing this tutorial, I’m curious to know yours: do you like the Windows 10 clipboard? Does it work the way you need it? Does it make you more productive? Comment using the options available below, and let’s discuss.


 14.12.2023